


目录
前言
前面我们基于SSM开发了一个简单的登录逻辑,现在我们就继续学习Spring Boot。
学习内容
Spring Boot简介
- 简化初始搭建以及开发过程
- 不再需要定义样板式的配置
- 快速应用开发
Spring、Spring MVC和Spring Boot
- Spring最初利用了IOC和AOP解耦
- 按照这种模式搞了MVC框架
- 写很多样板代码麻烦,就有了Spring Boot
- Spring Cloud是在Spring Boot基础上诞生的
Spring Boot核心特点
- 开箱即用
- 约定优于配置
新建Spring Boot项目
Spring官网新建
- 访问start.spring.io;Spring官网

- 选择如下的选项;

- 点击下载到本地即可;

- IDEA导入刚才的项目;

IDEA集成的Spring Initializr新建
- 选择新建项目,左侧选择Spring Initializr;

- 依次选择如下配置;

- 选择Spring Boot版本并添加web依赖;

- 项目新建完成;

完成第一个接口开发
- 新建测试类;

- 启动Spring Boot;

- 访问http://127.0.0.1:8080/first;

配置URL方式
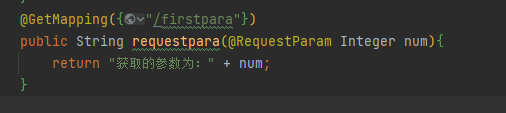
@RequestParam
@RequestParam(required = false, defaultValue = “888”) 表示这个参数不是必须的,可以不传参数,那么默认值就是888.

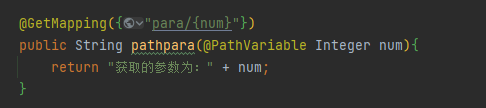
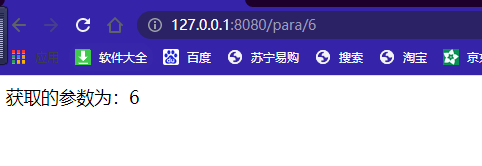
@PathVariable
@RequestMapping
为URL配置统一的前缀!

配置文件的两种写法
web项目三层结构: Controller(对外暴露接口)、Service(对业务逻辑进行抽象)、DAO(增删改查数据库)
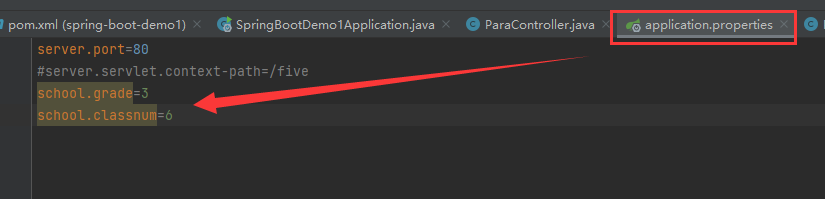
properties配置文件

yml配置文件
分层级,冒号后需要空格!

进行自定义配置
@Value

配置类


Spring Boot查询数据库
-
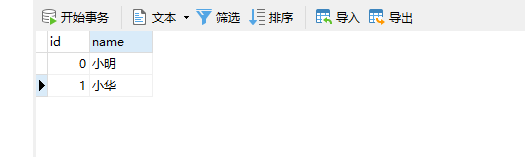
新建数据库和数据表;

-
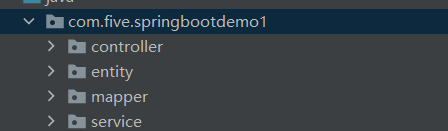
新建如下四个包;
-
在application.properties中添加数据库相关的配置信息;
spring.datasource.driver-class-name=com.mysql.cj.jdbc.Driver
spring.datasource.username=root
spring.datasource.password=123456
spring.datasource.url=jdbc:mysql://localhost:3306/springbootlearn?useSSL=false&useUnicode=true&characterEncoding=UTF-8&serverTimezone=Asia/Shanghai&allowPublicKeyRetrieval=true&allowMultiQueries=true
- 在entity包下新建Student实体类;
package com.five.springbootdemo1.entity;

/**
 * Description:
 *
 * @Author: kk(专业bug开发)
 * DateTime: 2022-02-21 16:44
 */
public class Student {
    Integer id;

    String name;

    public Integer getId() {
        return id;
    }

    public void setId(Integer id) {
        this.id = id;
    }

    public String getName() {
        return name;
    }

    public void setName(String name) {
        this.name = name;
    }

    @Override
    public String toString() {
        return "Student{" +
                "id=" + id +
                ", name='" + name + '\'' +
                '}';
    }
}
- 在mapper包下新建StudentMapper接口和一个方法;
package com.five.springbootdemo1.mapper;

import com.five.springbootdemo1.entity.Student;
import org.apache.ibatis.annotations.Mapper;
import org.apache.ibatis.annotations.Select;
import org.springframework.web.bind.annotation.ResponseBody;

/**
 * Description:
 *
 * @Author: kk(专业bug开发)
 * DateTime: 2022-02-21 16:44
 */
@Mapper
@ResponseBody
public interface StudentMapper {

    @Select("select * from student where id = #{id}")
    Student findById(Integer id);
}
- 在service包下新建StudentService;
package com.five.springbootdemo1.service;

import com.five.springbootdemo1.entity.Student;
import com.five.springbootdemo1.mapper.StudentMapper;
import org.springframework.beans.factory.annotation.Autowired;
import org.springframework.stereotype.Service;

/**
 * Description:
 *
 * @Author: kk(专业bug开发)
 * DateTime: 2022-02-21 16:42
 */
@Service
public class StudentService {
    @Autowired
    StudentMapper studentMapper;

    public Student findStudent(Integer id){
        return studentMapper.findById(id);
    }
}
- 在controller包下新建StudentController;
package com.five.springbootdemo1.controller;

import com.five.springbootdemo1.entity.Student;
import com.five.springbootdemo1.service.StudentService;
import org.springframework.beans.factory.annotation.Autowired;
import org.springframework.web.bind.annotation.GetMapping;
import org.springframework.web.bind.annotation.RequestParam;
import org.springframework.web.bind.annotation.RestController;

/**
 * Description:
 *
 * @Author: kk(专业bug开发)
 * DateTime: 2022-02-21 16:38
 */
@RestController
public class StudentController {
    @Autowired
    StudentService studentService;

    @GetMapping({"/student"})
    public String student(@RequestParam Integer num){
        Student student = studentService.findStudent(num);
        return student.toString();
    }

}
- 启动Spring Boot后打开浏览器访问 http://127.0.0.1/student?num=0;

总结
通过本篇文章的介绍我们基本已经明白了如何使用Spring Boot编写接口,以及一些常用的注解和连接数据库查询,后面我们将会以项目的方式进一步学习Spring Boot。
技术有限,如果您发现文章中存在问题,欢迎交流指正~


 465
465


 被折叠的 条评论
为什么被折叠?
被折叠的 条评论
为什么被折叠?
 到【灌水乐园】发言


