


import org.opensearch.client.opensearch._global.SearchResponse;
import org.opensearch.client.opensearch.indices.*;
import org.opensearch.client.opensearch.indices.put_settings.IndexSettingsBody;
import java.io.IOException;
public class OpenSearchClientExample {
public static void main(String[] args) {
RestClient restClient = null;
try{
System.setProperty(“javax.net.ssl.trustStore”, “/full/path/to/keystore”);
System.setProperty(“javax.net.ssl.trustStorePassword”, “password-to-keystore”);
//Only for demo purposes. Don't specify your credentials in code.
final CredentialsProvider credentialsProvider = new BasicCredentialsProvider();
credentialsProvider.setCredentials(AuthScope.ANY,
  new UsernamePasswordCredentials("admin", "admin"));

//Initialize the client with SSL and TLS enabled
restClient = RestClient.builder(new HttpHost("localhost", 9200, "https")).
  setHttpClientConfigCallback(new RestClientBuilder.HttpClientConfigCallback() {
    @Override
    public HttpAsyncClientBuilder customizeHttpClient(HttpAsyncClientBuilder httpClientBuilder) {
    return httpClientBuilder.setDefaultCredentialsProvider(credentialsProvider);
    }
  }).build();
Transport transport = new RestClientTransport(restClient, new JacksonJsonpMapper());
OpenSearchClient client = new OpenSearchClient(transport);

//Create the index
String index = "sample-index";
CreateRequest createIndexRequest = new CreateRequest.Builder().index(index).build();
client.indices().create(createIndexRequest);

//Add some settings to the index
IndexSettings indexSettings = new IndexSettings.Builder().autoExpandReplicas("0-all").build();
IndexSettingsBody settingsBody = new IndexSettingsBody.Builder().settings(indexSettings).build();
PutSettingsRequest putSettingsRequest = new PutSettingsRequest.Builder().index(index).value(settingsBody).build();
client.indices().putSettings(putSettingsRequest);

//Index some data
IndexData indexData = new IndexData("first_name", "Bruce");
IndexRequest<IndexData> indexRequest = new IndexRequest.Builder<IndexData>().index(index).id("1").document(indexData).build();
client.index(indexRequest);

//Search for the document
SearchResponse<IndexData> searchResponse = client.search(s -> s.index(index), IndexData.class);
for (int i = 0; i< searchResponse.hits().hits().size(); i++) {
  System.out.println(searchResponse.hits().hits().get(i).source());
}

//Delete the document
client.delete(b -> b.index(index).id("1"));

// Delete the index
DeleteRequest deleteRequest = new DeleteRequest.Builder().index(index).build();
DeleteResponse deleteResponse = client.indices().delete(deleteRequest);

} catch (IOException e){
  System.out.println(e.toString());
} finally {
  try {
    if (restClient != null) {
      restClient.close();
    }
  } catch (IOException e) {
    System.out.println(e.toString());
  }
}
}
}
修改localhost为你的opensearch虚拟机ip, 代码中新建了一个index添加了一条数据又将其删掉了 index也删掉了 自己可以注释掉后面的删除代码通过dashboard的dev-tools(下面介绍) 执行dql查看数据是否写入opensearch


这里证书相关的配置会报错 注释掉
// System.setProperty(“javax.net.ssl.trustStore”, “”);
// System.setProperty(“javax.net.ssl.trustStorePassword”, “”);
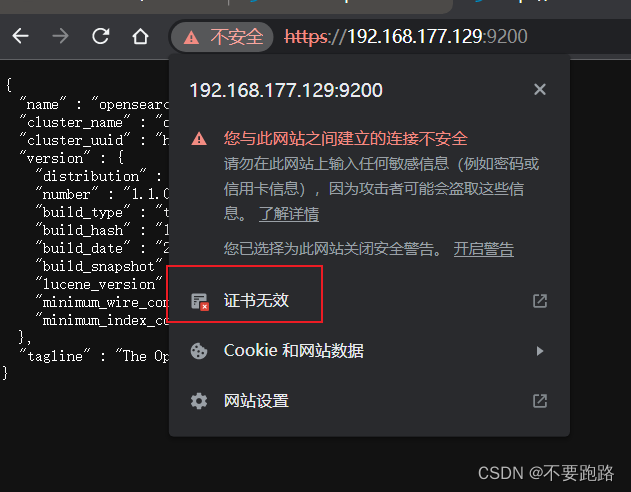
直接访问 虚拟机ip:9200端口 提示不安全点击继续前往 输入上面的admin账户和密码
点击证书无效这个按钮
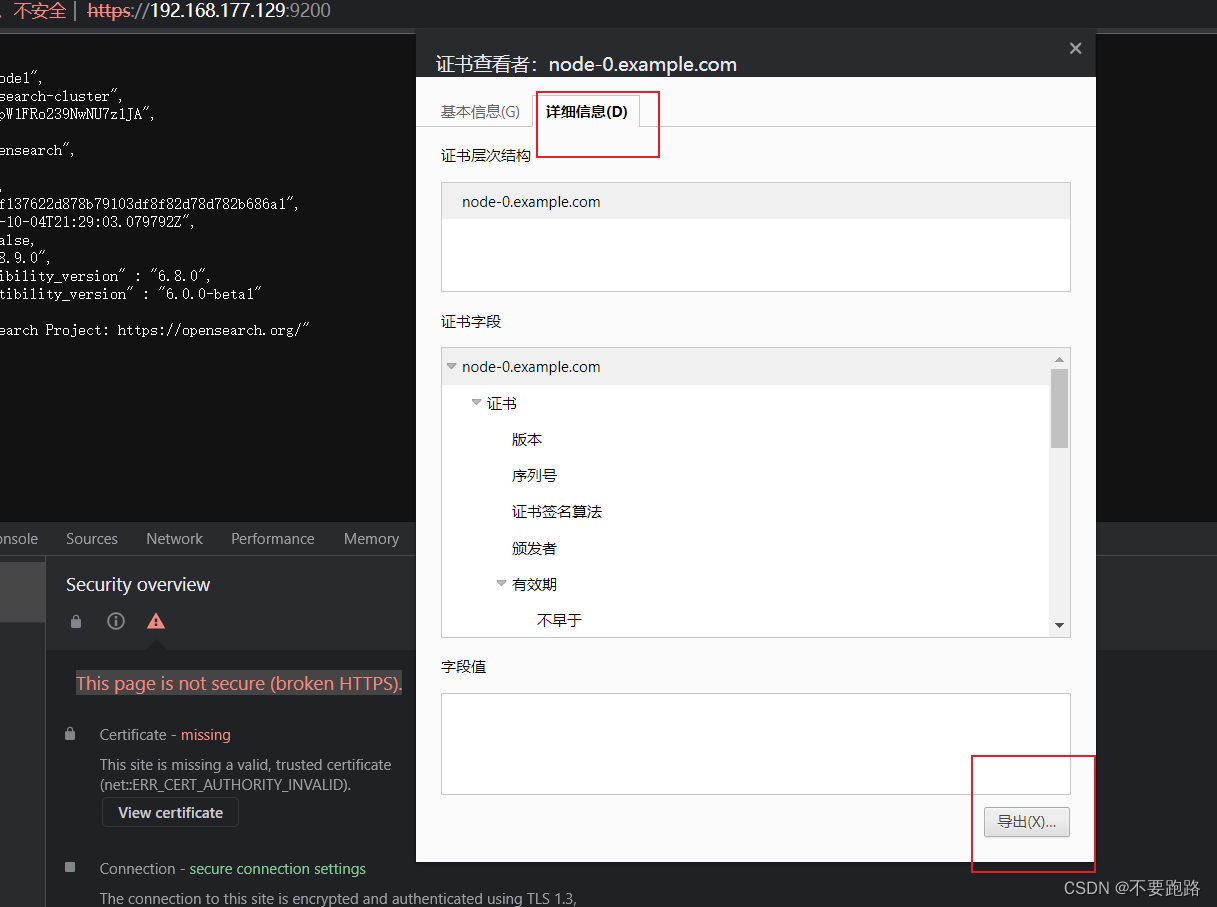
导出到找随便一个路径 起名xxx.cer
管理员身份打开win系统的cmd命令行 找到自己的java环境变量路径 不知道的可以电脑设置里查看高级系统设置
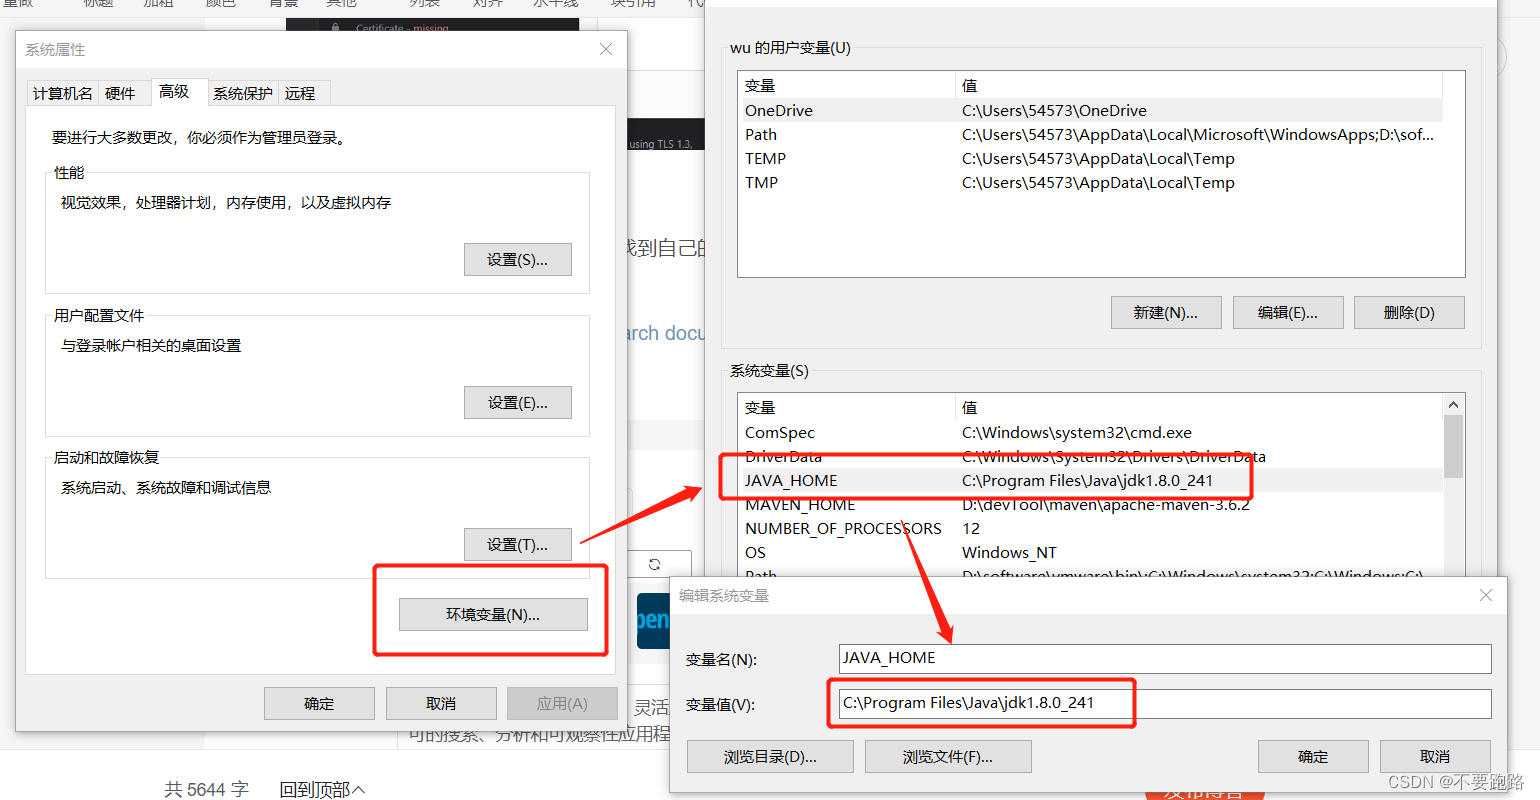
cd到security目录下 我的路径为C:\Program Files\Java\jdk1.8.0\_241\jre\lib\security在这里执行
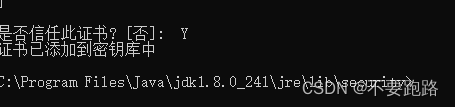
keytool -import -alias abc -keystore cacerts -file D://abc.cer
D://abc.cer就是刚才导出的xxx.cer的路径
显示 是否信任此证书 输入Y 像下面这样就ok
再次运行代码 报错
Caused by: javax.net.ssl.SSLPeerUnverifiedException: Host name '192.168.177.129' does not match the certificate subject provided by the peer (CN=node-0.example.com, OU=node, O=node, L=test, DC=de)
at org.apache.http.nio.conn.ssl.SSLIOSessionStrategy.verifySession(SSLIOSessionStrategy.java:217)
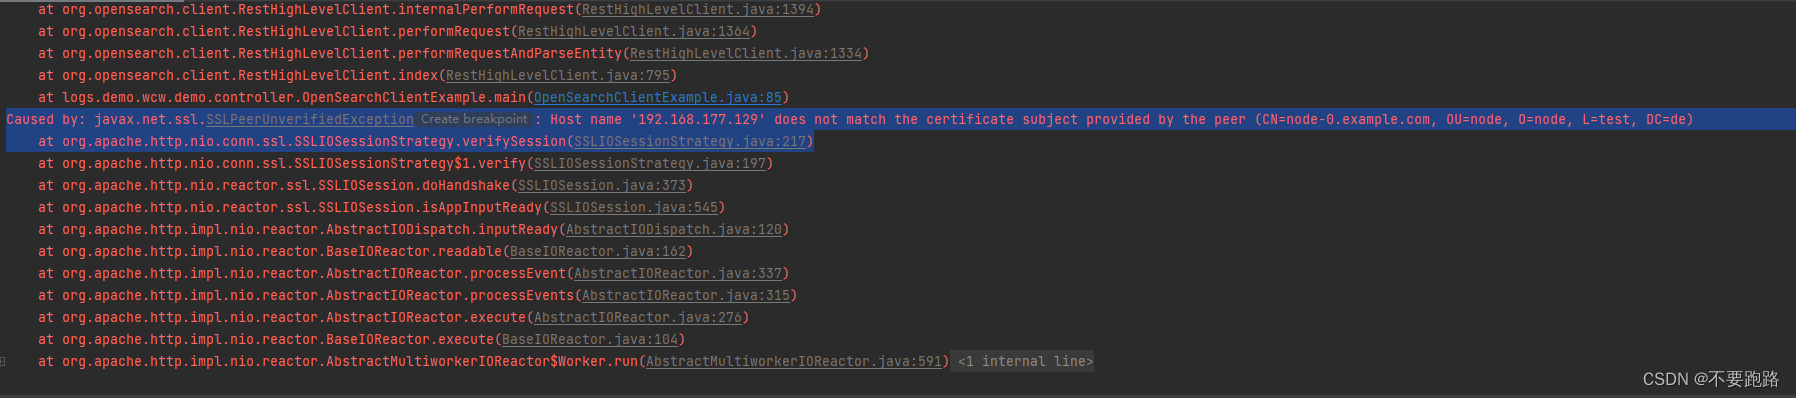
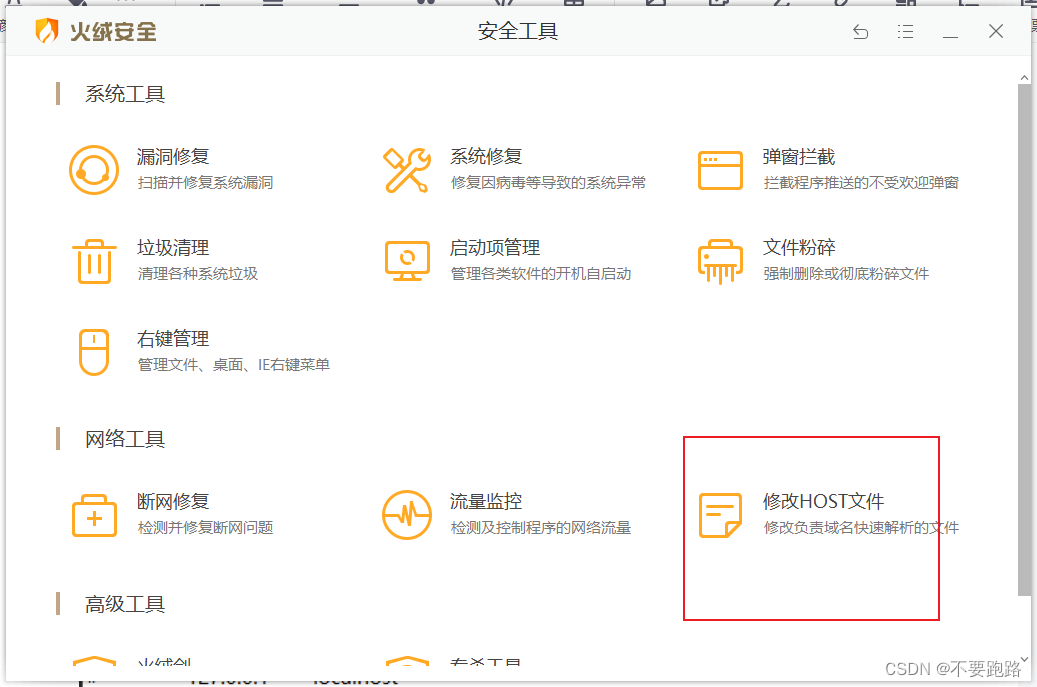
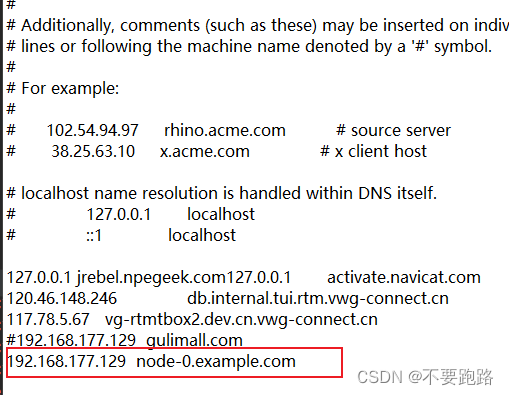
此时修改windows的hosts文件添加
虚拟机ip node-0.example.com 比如下面这样 火绒安全工具就可以修改
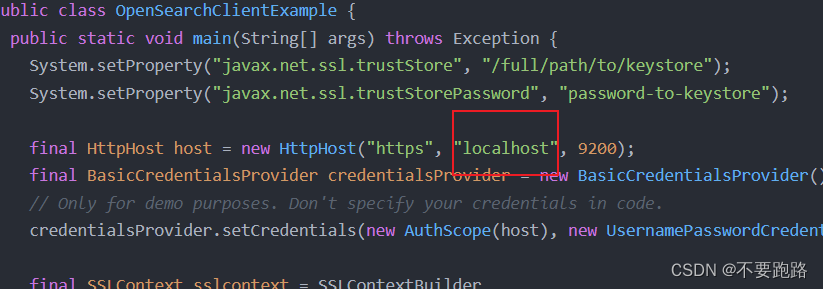
再将代码中框柱的位置改为node-0.example.com 再次运行 没有报错
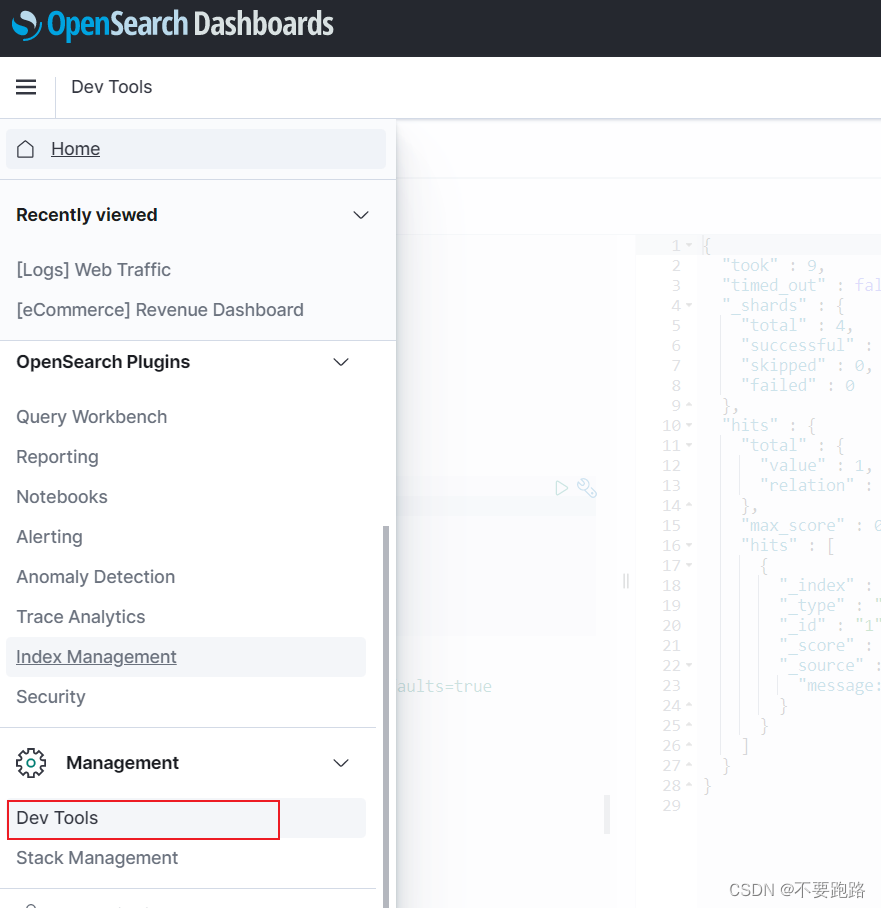
利用Dashboard 侧边栏底下的dev-tools可以查看添加的数据
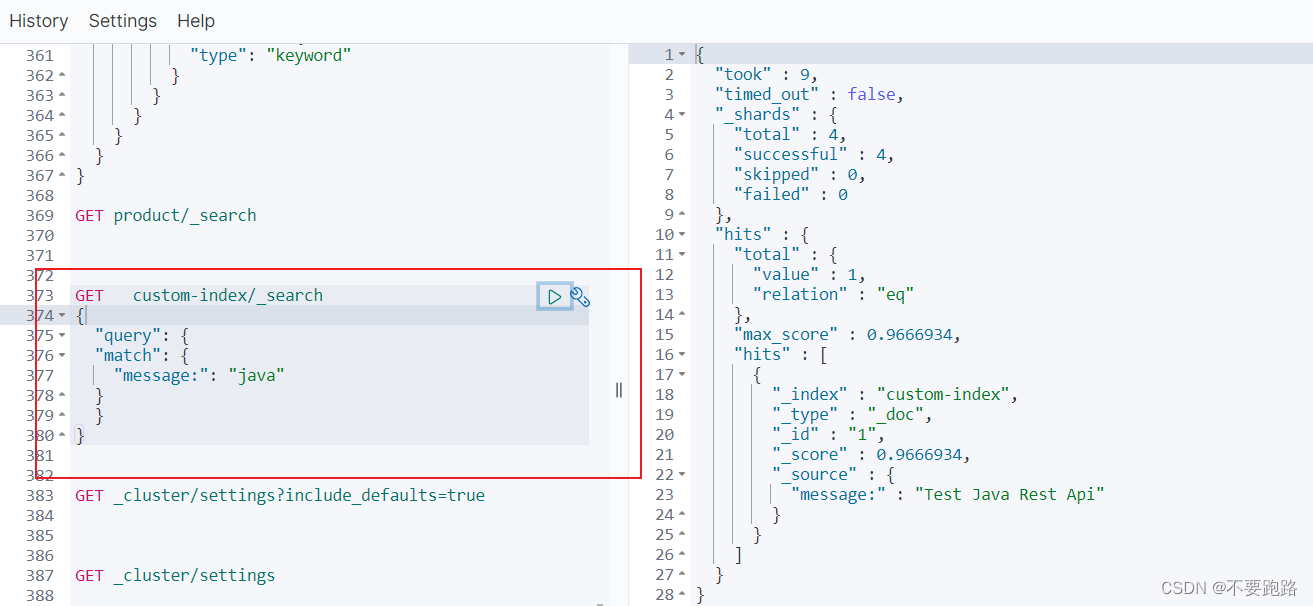
右边就是查出来的数据
## 3 结合代码 增删改查
可以将索引(index)认为是数据库 映射(mapping)认为是字段
创建测试索引 mapping中途不能改变但是可以增加
put test_index
{
“mappings”: {
“properties”: {
“group_create_time”: {
“type”: “date”,
“format”: “yyyy-MM-dd HH:mm:ss”
},
“log_group_name”: {
“type”: “keyword”
},
“log_stream”: {
“type”:“nested”,
“properties”: {
“create_time”: {
“type”: “date”,
“format”: “yyyy-MM-dd HH:mm:ss”
},
“deploy_type”: {
“type”: “keyword”
},
“log_path”: {
“type”: “text”
},
“log_stream_name”: {
“type”: “keyword”
},
“server_ip”: {
“type”: “keyword”
},
“status”:{
“type”:“keyword”
}
}
}
}
}
}
java代码实现
public String testIndex(String indexName,HashMap mapping) {
    CreateIndexRequest request = new CreateIndexRequest(indexName);
    request.settings(Settings.builder()
            .put("index.number_of_shards", 4)
            .put("index.number_of_replicas", 3));
    request.mapping(mapping);
    try {
        CreateIndexResponse createIndexResponse = client.indices().create(request, RequestOptions.DEFAULT); // client 为RestHighLevelClient 提前设置好连接opensearch的参数 直接注入的
        return Boolean.toString(createIndexResponse.isAcknowledged());
    } catch (IOException e) {
        e.printStackTrace();
    }
    return "error happened!";
}
插入测试数据
POST test_index/_doc
{
“log_group_name” : “heihei”,
“group_create_time” : “2022-08-15 16:25:30”,
“log_stream” : [
{
“server_ip” : “192.168.177.128”,
“log_stream_name” : “111”,
“create_time” : “2022-08-15 16:25:30”,
“log_path” : “/path/to/log”,
“deploy_type” : “vm”,
“status” : “stoped”
},
{
“server_ip” : “192.168.177.128”,
“log_stream_name” : “22”,
“create_time” : “2022-08-15 16:25:30”,
“log_path” : “/path/to/log”,
“deploy_type” : “vm”,
“status” : “stoped”
}
]
}
}
查看添加的数据
查看数据 size指定返回条数 默认10条
GET test_index/_search
{
“size”: 20
}
查看映射
GET test_index/_mapping
查看数据得到的结果
{
“took” : 864, // 耗时单位为毫秒
“timed_out” : false, // 是否超时
“_shards” : { // 分片信息的统计。total表示总共参与搜索的分片数
“total” : 1, // 共参与搜索的分片数
“successful” : 1, // 成功搜索的分片数
“skipped” : 0, // 跳过搜索的分片数(比如搜索操作只涉及了一个分片,那么就没有被跳过的分片
“failed” : 0 // 失败的分片数
},
“hits” : { // 关于搜索命中结果的信息
“total” : { // 命中结果信息
“value” : 3, // 命中结果的总数
“relation” : “eq” // 表示比较符号(这里是“eq”表示等于)。
},
“max_score” : 1.0, // 最高得分,得分是评估文档与查询匹配程度的指标
“hits” : [ // 具体命中的文档信息
{
“_index” : “test_index”, // 文档所在的索引
“_type” : “_doc”, // 文档所属的类型
“_id” : “SbhIj4cBfnlzLPVVITje”, // 文档的唯一标识
“_score” : 1.0, // 文档的得分
“_source” : { // 文档的原始内容,即被索引的数据。
“log_group_name” : “88888”,
“group_create_time” : “2022-08-15 16:25:30”,
“log_stream” : [
{
“server_ip” : “192.168.177.128”,
“log_stream_name” : “xxxxxxxxxxxxxxxxxxxxxxxxxxxx”,
“create_time” : “2022-08-15 16:25:30”,
“log_path” : “/path/to/log”,
“deploy_type” : “vm”
},
{
“server_ip” : “192.168.177.128”,
“log_stream_name” : “111”,
“create_time” : “2022-08-15 16:25:30”,
“log_path” : “/path/to/log”,
“deploy_type” : “vm”
},
{
“server_ip” : “192.168.177.128”,
“log_stream_name” : “222”,
“create_time” : “2022-08-15 16:25:30”,
“log_path” : “/path/to/log”,
“deploy_type” : “vm”
}
]
}
},
{
“_index” : “test_index”,
“_type” : “_doc”,
“_id” : “TbhIj4cBfnlzLPVVwTgl”,
“_score” : 1.0,
“_source” : {
“log_group_name” : “hahaha”,
“group_create_time” : “2022-08-15 16:25:30”,
“log_stream” : [
{
“server_ip” : “192.168.177.128”,
“log_stream_name” : “111”,
“create_time” : “2022-08-15 16:25:30”,
“log_path” : “/path/to/log”,
“deploy_type” : “vm”,
“status” : “stop”
},
{
“server_ip” : “192.168.177.128”,
“log_stream_name” : “22”,
“create_time” : “2022-08-15 16:25:30”,
“log_path” : “/path/to/log”,
“deploy_type” : “vm”,
“status” : “stoped”
}
]
}
},
{
“_index” : “test_index”,
“_type” : “_doc”,
“_id” : “w7hhj4cBfnlzLPVVqjin”,
“_score” : 1.0,
“_source” : {
“log_group_name” : “heihei”,
“group_create_time” : “2022-08-15 16:25:30”,
“log_stream” : [
{
“server_ip” : “192.168.177.128”,
“log_stream_name” : “111”,
“create_time” : “2022-08-15 16:25:30”,
“log_path” : “/path/to/log”,
“deploy_type” : “vm”,
“status” : “stoped”
},
{
“server_ip” : “192.168.177.128”,
“log_stream_name” : “22”,
“create_time” : “2022-08-15 16:25:30”,
“log_path” : “/path/to/log”,
“deploy_type” : “vm”,
“status” : “stoped”
}
]
}
}
]
}
}
向其中的log\_stream添加数据 "ctx.\_source.log\_stream.add(params)这句脚本意思是向\_source下面的log\_stream映射添加元素params
POST test_index/_update/ITZfjocBwd7nfRg9WjsH
{
“script”: {
网上学习资料一大堆,但如果学到的知识不成体系,遇到问题时只是浅尝辄止,不再深入研究,那么很难做到真正的技术提升。
一个人可以走的很快,但一群人才能走的更远!不论你是正从事IT行业的老鸟或是对IT行业感兴趣的新人,都欢迎加入我们的的圈子(技术交流、学习资源、职场吐槽、大厂内推、面试辅导),让我们一起学习成长!
映射添加元素params
POST test_index/_update/ITZfjocBwd7nfRg9WjsH
{
  "script": {


[外链图片转存中...(img-xEPS6i2N-1714769010186)]
[外链图片转存中...(img-bMZ3hTRR-1714769010187)]

**网上学习资料一大堆,但如果学到的知识不成体系,遇到问题时只是浅尝辄止,不再深入研究,那么很难做到真正的技术提升。**

**[需要这份系统化资料的朋友,可以戳这里获取](https://bbs.csdn.net/topics/618545628)**


**一个人可以走的很快,但一群人才能走的更远!不论你是正从事IT行业的老鸟或是对IT行业感兴趣的新人,都欢迎加入我们的的圈子(技术交流、学习资源、职场吐槽、大厂内推、面试辅导),让我们一起学习成长!**


 958
958

 被折叠的 条评论
为什么被折叠?
被折叠的 条评论
为什么被折叠?
 到【灌水乐园】发言


