


前言
LNMP是指一组通常一起使用来运行动态网站或者服务器的自由软件名称首字母缩写。L指Linux,N指Nginx,M一般指MySQL,也可以指MariaDB,P一般指PHP,也可以指Perl或Python。
LNMP架构步骤
1.解压安装包
tar xzvf nginx-1.12.2.tar.gz
2.安装依赖包
yum -y install \
 gcc \
 gcc-c++ \
 make \
 pcre-devel \
 zlib-devel
3.配置configure
 ./configure \
--prefix=/usr/local/nginx \
--user=nginx \
--group=nginx \
--with-http_stub_status_module
4.编译安装并开启nginx
make && make install
ln -s /usr/local/nginx/sbin/nginx /usr/local/sbin/
 useradd -s /sbin/nologin nginx
 nginx
 netstat -ntap |grep 80
5.nginx服务文件
vi /etc/init.d/nginx
#!/bin/bash
# chkconfig: 35 99 20
# description: Nginx Service Control Script
PROG="/usr/local/nginx/sbin/nginx"
PIDF="/usr/local/nginx/logs/nginx.pid"
case "$1" in
   start)
     $PROG
     ;;
   stop)
     kill -s QUIT $(cat $PIDF)
     ;;
   restart)
     $0 stop
     $0 start
     ;;
   reload)
     kill -s HUP $(cat $PIDF)
     ;;
   *)
     echo "Usage: $0 {start|stop|restart|relad}"
     exit 1
esac
exit 0

nginx							#开启服务
killall -1 nginx				#重启服务
killall -3 nginx				#停止服务
chmod +x /etc/init.d/nginx
chkconfig --add nginx
6.配置nginx主配置文件
vi /usr/local/nginx/conf/nginx.conf
user nginx nginx;
worker_processes  1;
error_log logs/error.log info;
pid	logs/nginx.pid;
events {
    use epoll;
    worker_connections  4096;
}

http {
    include       mime.types;
    default_type  application/octet-stream;
    log_format  main  '$remote_addr - $remote_user [$time_local] "$request" '
                      '$status $body_bytes_sent "$http_referer" '
                      '"$http_user_agent" "$http_x_forwarded_for"';
 	   access_log  logs/access.log  main;
    sendfile        on;
    #tcp_nopush     on;
    #keepalive_timeout  0;
    keepalive_timeout  65;
    #gzip  on;

server {
        listen       80;
        server_name  20.0.0.15;
        charset utf-8;
        access_log  logs/host.access.log  main;
        location / {
            root   html;
            index  index.html index.htm;
        }
error_page   500 502 503 504  /50x.html;
        location = /50x.html {
            root   html;
        }
}
}
systemctl restart nginx
netstat -anpt | grep 80

Mysql配置
1.解压mysql安装包
mysql-boost-5.7.20.tar.gz
2.安装依赖包
yum -y install \
ncurses \
ncurses-devel \
bison \
cmake
3.编译安装
cd mysql-5.7.20
cmake \
-DCMAKE_INSTALL_PREFIX=/usr/local/mysql \
-DMYSQL_UNIX_ADDR=/usr/local/mysql.sock \
-DSYSCONFDIR=/etc \
-DSYSTEMD_PID_DIR=/usr/local/mysql \
-DDEFAULT_CHARSET=utf8 \
-DDEFAULT_COLLATION=utf8_general_ci \
-DWITH_INNOBASE_STORAGE_ENGINE=1 \
-DWITH_ARCHIVE_STORAGE_ENGINE=1 \
-DWITH_BLACKHOLE_STORAGE_ENGINE=1 \
-DWITH_PERFSCHEMA_STORAGE_ENGINE=1 \
-DMYSQL_DATADIR=/usr/local/mysql/data \
-DWITH_BOOST=boost \
-DWITH_SYSTEMD=1

make && make install
4.修改mysql配置文件
vi /etc/my.cnf
[client]
port = 3306
default-character-set=utf8
socket = /usr/local/mysql/mysql.sock

[mysql]
port = 3306
default-character-set=utf8
socket = /usr/local/mysql/mysql.sock

[mysqld]
user = mysql
basedir = /usr/local/mysql
datadir = /usr/local/mysql/data
port = 3306
character_set_server=utf8
pid-file = /usr/local/mysql/mysqld.pid
socket = /usr/local/mysql/mysql.sock
server-id = 1

sql_mode=NO_ENGINE_SUBSTITUTION,STRICT_TRANS_TABLES,NO_AUTO_CREATE_USER,NO_AUTO_VALUE_ON_ZERO,NO_ZERO_IN_DATE,NO_ZERO_DATE,ERROR_FOR_DIVISION_BY_ZERO,PIPES_AS_CONCAT,ANSI_QUOTES
#直接登录mysql
datadir=/var/lib/mysql
socket=/var/lib/mysql/mysql.sock
skip-name-resolve
5.设置环境变量
echo 'PATH=/usr/local/mysql/bin:/usr/local/mysql/lib:$PATH' >> /etc/profile
echo 'export PATH' >> /etc/profile
source /etc/profile
6.添加mysql用户并给权限
useradd -s /sbin/nologin mysql
chown -R mysql:mysql /usr/local/mysql
chown mysql:mysql /etc/my.cnf
7.初始化数据库
mysqld \
--initialize-insecure \
--user=mysql \
--basedir=/usr/local/mysql \
--datadir=/usr/local/mysql/data
8.登录数据库修改密码
mysql
UPDATE mysql.mysql SET authentication_string= password ( ‘123456’ ) WHERE User = ‘root’ ;
9.访问localhost
安装PHP
1.解压安装包
tar xjvf php-7.1.10.tar.bz2
2.安装依赖包
 yum -y install \
libjpeg \
libjpeg-devel \
libpng libpng-devel \
freetype freetype-devel \
libxml2 \
libxml2-devel \
zlib zlib-devel \
curl curl-devel \
openssl openssl-devel
3.configure配置
./configure \
--prefix=/usr/local/php \
--with-mysql-sock=/usr/local/mysql/mysql.sock \
--with-mysqli \
--with-zlib \
--with-curl \
--with-gd \
--with-jpeg-dir \
--with-png-dir \
--with-freetype-dir \
--with-openssl \
--enable-fpm \
--enable-mbstring \
--enable-xml \
--enable-session \
--enable-ftp \
--enable-pdo \
--enable-tokenizer \
--enable-zip

make && make install
4.修改php配置文件
cd php-7.1.10
cp php.ini-development /usr/local/php/lib/php.ini
cd /usr/local/php/etc/
cp php-fpm.conf.default php-fpm.conf
cd /usr/local/php/etc/php-fpm.d/
cp www.conf.default www.conf

vi /usr/local/php/lib/php.ini
mysqli.default_socket = /usr/local/mysql/mysql.sock
date.timezone = Asia/Shanghai

vi /usr/local/php/etc/php-fpm.conf
pid = run/php-fpm.pid

/usr/local/php/sbin/php-fpm -c /usr/local/php/lib/php.ini
ln -s /usr/local/php/bin/* /usr/local/bin/

vi /usr/local/nginx/conf/nginx.conf
location ~ \.php$ {
	root	html;
	fastcgi_pass	127.0.0.1:9000;
	fastcgi_index	index.php;
	 fastcgi_param  SCRIPT_FILENAME  /usr/local/nginx/html$fastcgi_script_name;
	include	fastcgi_params;
}
5.测试php
cd /usr/local/nginx/html
vi index.php
<?php
phpinfo()
?>
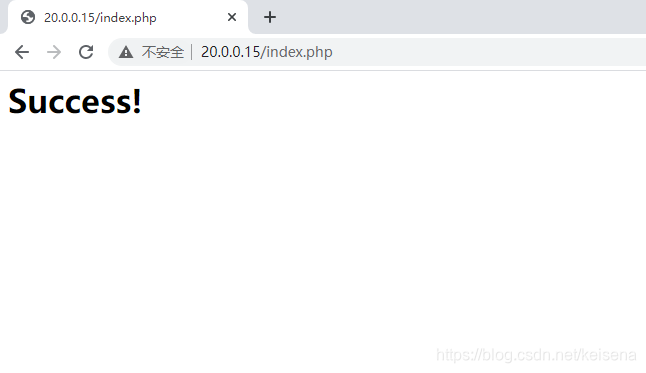
6.测试php和数据库
CREATE DATABASE lzw;
use lzw;
grant all privileges on lzw.* to 'lzw'@'%' IDENTIFIED BY ‘123456’;
grant all privileges on lzw.* to 'root'@'20.0.0.15' IDENTIFIED BY ‘123456’;
flush privileges;
vi /usr/local/nginx/html/index.php
<?php
$link=mysqli_connect('20.0.0.15','myadm','123456');
if($link) echo "<h1>Success</h1>";
else echo "Fail";
?>


 被折叠的 条评论
为什么被折叠?
被折叠的 条评论
为什么被折叠?
 到【灌水乐园】发言


