


自从上次“劫持”事情后,项目经理将所有跟安全相关的都推给我了(不算 KPI 又要被白嫖,烦死了)。这次客户又提了一个服务器安全扫描和漏洞修复的“活”,我这边顺手将过程记录一下,就当经验总结跟各位分享一下。
本次扫描的是一台 Ubuntu Server,用的是 22.04 版本操作系统。据说客户一直都是用 CentOS 7 ,但由于今年 6 月 30 日后 CentOS 7 不再提供安全维护了,索性新应用的机器全部换成 Ubuntu Server (额…其实我想说换 openEuler 也挺好的,也符合信创标准)。
1. Ubuntu OVAL 数据扫描
由于用的是 Ubuntu 操作系统,为此本次扫描将使用 Canonical (Ubuntu 母公司)安全小组提供的 Ubuntu OVAL 数据,如下图:
具体就是使用 oscap 读取 OVAL 数据(USN 和 CVE)进行扫描,为了方便我写了一个 shell 脚本,如下图:
# 先从官网下载最新 OVAL 数据
wget https://security-metadata.canonical.com/oval/com.ubuntu.$(lsb_release -cs).usn.oval.xml.bz2
wget https://security-metadata.canonical.com/oval/com.ubuntu.$(lsb_release -cs).cve.oval.xml.bz2

# 通过 bunzip2 对压缩包进行解压
bunzip2 com.ubuntu.$(lsb_release -cs).usn.oval.xml.bz2
bunzip2 com.ubuntu.$(lsb_release -cs).cve.oval.xml.bz2

# 使用 oscap 读取 oval 数据并产出 html 报告
oscap oval eval --report report_usn.html com.ubuntu.$(lsb_release -cs).usn.oval.xml
oscap oval eval --report report_cve.html com.ubuntu.$(lsb_release -cs).cve.oval.xml
扫描结果如下图所示:

上图是 CVE 漏洞统计共有 171 个,而 USN 有 11 个,如下图所示。

2. 修复处理
2.1 基础修复
面对如此数量的漏洞,第一个想到的办法肯定是直接通过升级批量修复漏洞。如下图:
sudo apt update
sudo apt upgrade
sudo apt dist-upgrade
升级后再进行 oscap 扫描得到以下结果:


CVE 减少到 151 个,而 USN 减少到 3 个。
2.2 解除“不更新”标记
以上结果跟我预估有所出入,本以为通过更新能至少解决三分之一的漏洞,但 CVE 只修复了 20 个,有点不太正常。于是我执行了 apt list --upgradable 指令发现仍存在部分可升级内容,如下图:
ubuntu@VM-0-6-ubuntu:~$ apt list --upgradable
Listing... Done
linux-generic/jammy-updates,jammy-security 5.15.0.113.113 amd64 [upgradable from: 5.15.0.107.107]
linux-headers-generic/jammy-updates,jammy-security 5.15.0.113.113 amd64 [upgradable from: 5.15.0.107.107]
linux-image-generic/jammy-updates,jammy-security 5.15.0.113.113 amd64 [upgradable from: 5.15.0.107.107]
python3-update-manager/jammy-updates 1:22.04.20 all [upgradable from: 1:22.04.9]
ubuntu-minimal/jammy-updates 1.481.2 amd64 [upgradable from: 1.481.1]
ubuntu-server/jammy-updates 1.481.2 amd64 [upgradable from: 1.481.1]
ubuntu-standard/jammy-updates 1.481.2 amd64 [upgradable from: 1.481.1]
update-manager-core/jammy-updates 1:22.04.20 all [upgradable from: 1:22.04.9]
嗯…估计是客户方运维将这些组件进行了标记,导致不能自动升级。于是尝试执行 apt-mark showhold 指令来验证一下自己的猜想,如下图:
ubuntu@VM-0-6-ubuntu:~$ sudo apt-mark showhold
containerd.io
docker-buildx-plugin
docker-ce
docker-ce-cli
docker-ce-rootless-extras
docker-compose-plugin
docker-scan-plugin
linux-generic
linux-generic-hwe-20.04
linux-generic-hwe-20.04-edge
linux-generic-hwe-22.04
linux-generic-hwe-22.04-edge
linux-headers-generic
linux-headers-generic-hwe-20.04
linux-headers-generic-hwe-20.04-edge
linux-headers-generic-hwe-22.04
linux-headers-generic-hwe-22.04-edge
linux-image-generic
linux-image-generic-hwe-20.04
linux-image-generic-hwe-20.04-edge
linux-image-generic-hwe-22.04
linux-image-generic-hwe-22.04-edge
如上图所示 linux-generic、linux-headers-generic 和 linux-image-generic 都被标记为“不随系统更新”,这印证了我的想法,但为什么要这样做呢?
先不管了,在做完快照备份后接着将 linux-generic、linux-headers-generic 和 linux-image-generic 解除标记,如下图:
ubuntu@VM-0-6-ubuntu:~$ sudo apt-mark unhold linux-generic* linux-headers-generic* linux-image-generic*
Canceled hold on linux-generic.
Canceled hold on linux-generic-hwe-20.04.
Canceled hold on linux-generic-hwe-22.04.
Canceled hold on linux-generic-hwe-20.04-edge.
Canceled hold on linux-generic-hwe-22.04-edge.
Canceled hold on linux-headers-generic.
Canceled hold on linux-headers-generic-hwe-22.04.
Canceled hold on linux-headers-generic-hwe-22.04-edge.
Canceled hold on linux-headers-generic-hwe-20.04.
Canceled hold on linux-headers-generic-hwe-20.04-edge.
Canceled hold on linux-image-generic.
Canceled hold on linux-image-generic-hwe-22.04.
Canceled hold on linux-image-generic-hwe-22.04-edge.
Canceled hold on linux-image-generic-hwe-20.04.
Canceled hold on linux-image-generic-hwe-20.04-edge.
之后执行分布更新,如下图:
ubuntu@VM-0-6-ubuntu:~$ sudo apt-get dist-upgrade
Reading package lists... Done
Building dependency tree... Done
Reading state information... Done
Calculating upgrade... Done
The following NEW packages will be installed:
  linux-headers-5.15.0-113 linux-headers-5.15.0-113-generic linux-image-5.15.0-113-generic linux-modules-5.15.0-113-generic
  linux-modules-extra-5.15.0-113-generic
The following packages have been kept back:
  python3-update-manager ubuntu-minimal ubuntu-server ubuntu-standard update-manager-core
The following packages will be upgraded:
  linux-generic linux-headers-generic linux-image-generic
3 upgraded, 5 newly installed, 0 to remove and 5 not upgraded.
Need to get 113 MB of archives.
After this operation, 583 MB of additional disk space will be used.
再重新扫描一次。嗯…问题依然存在(漏洞数没有改变,这里就不再截图展示了)。
2.3 查“漏”补“缺”
因为漏洞数没有改变,于是再次执行 upgrade 命令得到新的发现,如下图:
ubuntu@VM-0-6-ubuntu:~$ sudo apt upgrade
Reading package lists... Done
Building dependency tree... Done
Reading state information... Done
Calculating upgrade... Done
The following packages have been kept back:
  python3-update-manager ubuntu-minimal ubuntu-server ubuntu-standard update-manager-core
0 upgraded, 0 newly installed, 0 to remove and 5 not upgraded.
5 not upgrade?提示中明显标注了 python3-update-manager、ubuntu-minimal、ubuntu-server、ubuntu-standard、update-manager-core 没有更新。既然没有更新那就针对这 5 个组件进行 upgrade 操作,如下图:
ubuntu@VM-0-6-ubuntu:~$ sudo apt upgrade python3-update-manager ubuntu-minimal ubuntu-server ubuntu-standard update-manager-core
Reading package lists... Done
Building dependency tree... Done
Reading state information... Done
Calculating upgrade... Done
The following packages will be upgraded:
  python3-update-manager ubuntu-minimal ubuntu-server ubuntu-standard update-manager-core
5 upgraded, 0 newly installed, 0 to remove and 0 not upgraded.
Need to get 59.1 kB of archives.
After this operation, 6,144 B of additional disk space will be used.
再扫描一次,结果如下:


CVE 漏洞减少到 127 个,而 USN 漏洞减少到 2 个。还是有 100+ 的 CVE 漏洞没有修复完毕,究竟是为什么呢?带着这些疑问我执行以下语句:
sudo unattended-upgrades --dry-run
本以为还有安全补丁没有更新,结果直接没有返回,看来应该做的一切都已经做了。
3. 进一步排查
这 100+ 的 CVE 漏洞究竟为什么无法修复呢?难道是内核导致的?带着这个疑问我注册了一个 Canonical Livepatch 的账号,想通过 livepatch 检查一下是否跟内核有关,如下图:
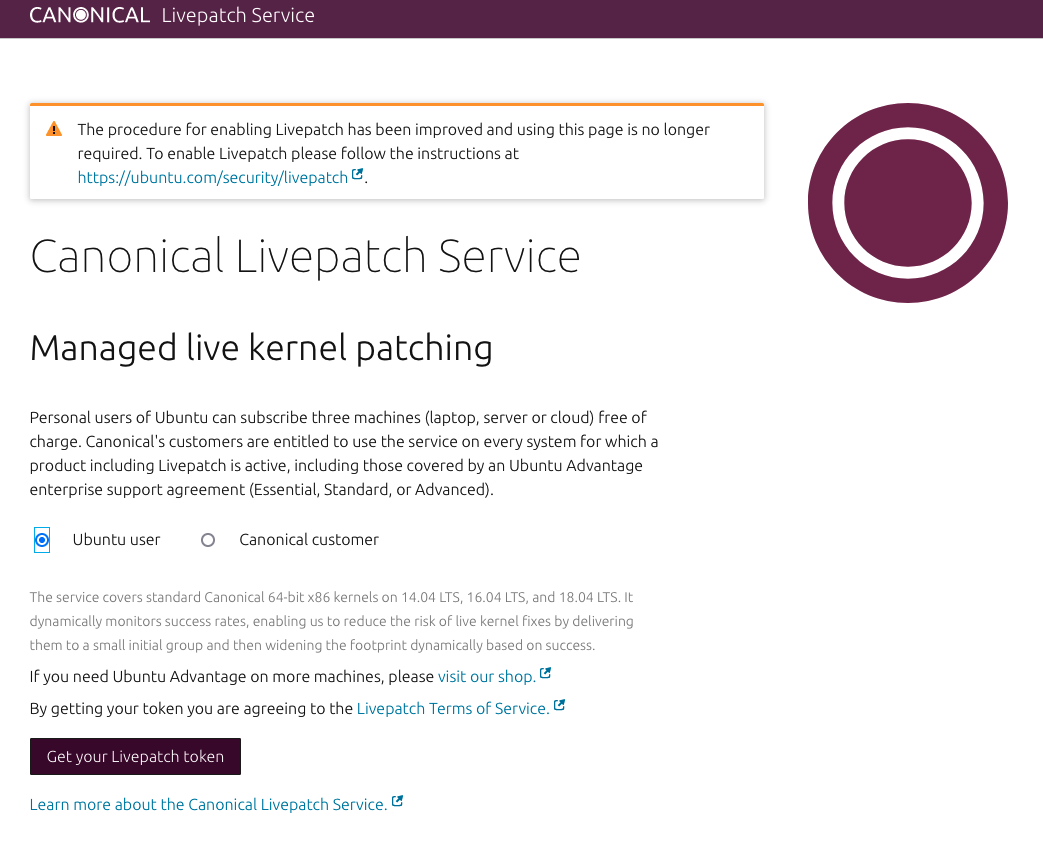
关于 Canonical Livepatch 账号申请我就不多说了(这个不是重点)。注册完成后会得到一个 token,这个 token 将用于服务器与 Canonical Livepatch 进行通讯的。但在此之前还需要使用 snap 安装 canonical-livepatch ,如下图:
ubuntu@VM-0-6-ubuntu:~/openscap$ sudo snap install canonical-livepatch
canonical-livepatch 10.8.3 from Canonical✓ installed
ubuntu@VM-0-6-ubuntu:~/openscap$ sudo canonical-livepatch enable <Your Token>
Successfully enabled device. Using machine-token: xxxxx
接着就可以通过 canonical-livepatch 查看一下系统的状态,如下图:
ubuntu@VM-0-6-ubuntu:~/openscap$ sudo canonical-livepatch status --verbose
last check: 2 minutes ago
kernel:  (unsupported)
server check-in: succeeded
kernel state: ✗ kernel is not covered by Livepatch
patch state: ✓ no livepatches available for kernel  (unsupported)
tier: updates (Free usage; This machine beta tests new patches.)
machine id: e0fd450343fa48d8acc471dc903518d1
client version: 10.8.3
architecture: amd64
cpu model: AMD EPYC 9754 128-Core Processor
boot time: 37 minutes ago
kernel unsupported?kernel is not covered by Livepatch?
呃…我应该没做什么骚操作吧。什么也别说了,我还是先重启一下系统吧(自我安慰一下)。
不过这次重启我特别留意了一下内核版本,如下图:
Welcome to Ubuntu 22.04.4 LTS (GNU/Linux 6.6.16-060616-generic x86_64)

 * Documentation:  https://help.ubuntu.com
 * Management:     https://landscape.canonical.com
 * Support:        https://ubuntu.com/pro

 System information as of Wed Jul 10 10:58:45 AM CST 2024
 ...
GNU/Linux 6.6.16-060616-generic x86_64?我印象中 Ubuntu 最新内核应该是 5.15.x 才对(我开发电脑也是使用 22.04 的 Ubuntu Desktop)。后面找了客户方运维了解得知这个 6.6.16 版本是他从 kernel.org 手动下载升级的。原因是他们集团发公告告知需要升级,如下图:
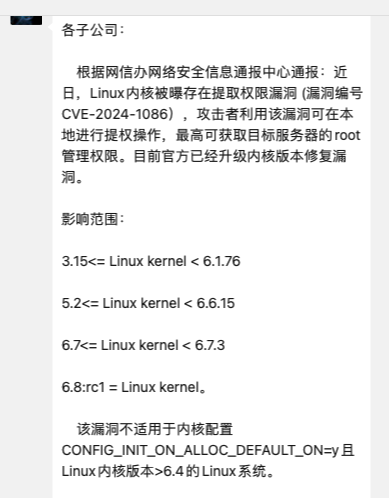
如公告所示,内核升级主要是为了解决 CVE-2024-1086 漏洞,但如果直接按照公告提示升级,内核就需要升级到 6.6.15 版本以上。但事实真的是这样吗?
通过 Canonical 安全小组发布的公告得知 CVE-2024-1086 漏洞已经在 5.15.0 内核版本中得到修复,如下图:
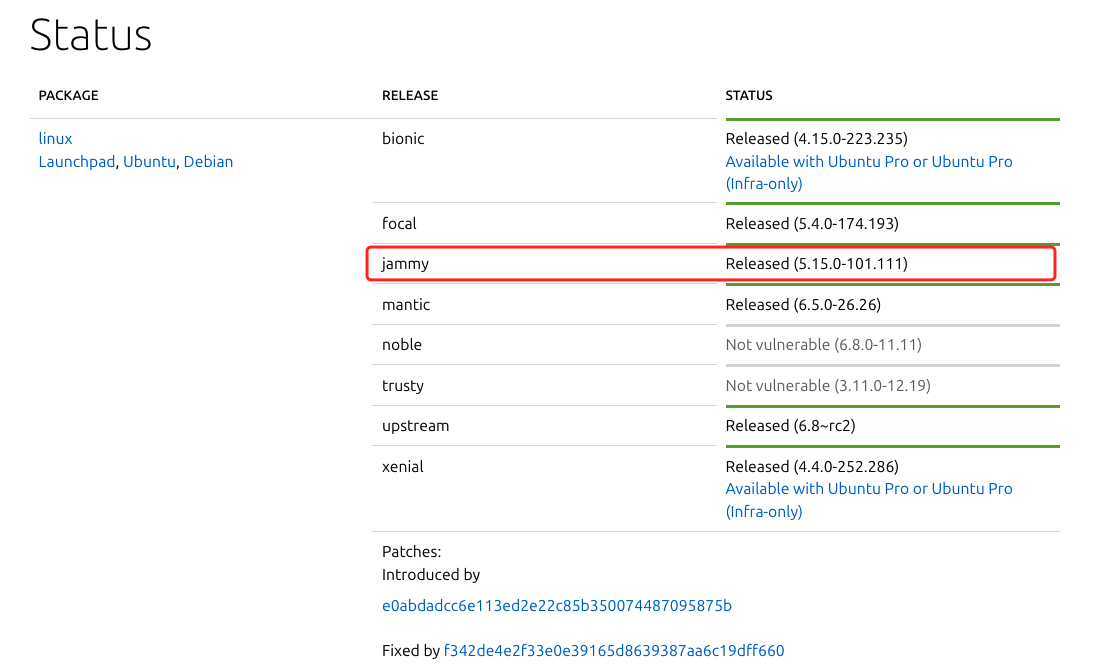
公告地址:https://ubuntu.com/security/CVE-2024-1086
如此一来就没有必要升级到 6.6.16 版本的内核。
4. 内核降级(吃瘪开始)
由于现在使用的是 6.6.16 内核,要先切换到 5.15.x 版本,如下图:
ubuntu@VM-0-6-ubuntu:~$ dpkg --list | grep linux-image
rc  linux-image-5.15.0-101-generic             5.15.0-101.111                          amd64        Signed kernel image generic
rc  linux-image-5.15.0-105-generic             5.15.0-105.115                          amd64        Signed kernel image generic
ii  linux-image-5.15.0-107-generic             5.15.0-107.117                          amd64        Signed kernel image generic
ii  linux-image-5.15.0-113-generic             5.15.0-113.123                          amd64        Signed kernel image generic
ii  linux-image-generic                        5.15.0.113.113                          amd64        Generic Linux kernel image
pi  linux-image-unsigned-6.6.16-060616-generic 6.6.16-060616.202402051536              amd64        Linux kernel image for version 6.6.16 on 64 bit x86 SMP
如上图所示,使用 dpkg --list | grep linux-image 指令查看可用的内核版本。再使用 update-initramfs 更新使用内核版本,如下图:
ubuntu@VM-0-6-ubuntu:~$ sudo update-initramfs -u -k 5.15.0-113-generic
update-initramfs: Generating /boot/initrd.img-5.15.0-113-generic
再之后使用 update-grub 更新引导
ubuntu@VM-0-6-ubuntu:~$ sudo update-grub
Sourcing file `/etc/default/grub'
Sourcing file `/etc/default/grub.d/init-select.cfg'
Sourcing file `/etc/default/grub.d/kdump-tools.cfg'
Generating grub configuration file ...
Found linux image: /boot/vmlinuz-5.15.0-113-generic
Found initrd image: /boot/initrd.img-5.15.0-113-generic
Found linux image: /boot/vmlinuz-5.15.0-107-generic
Found initrd image: /boot/initrd.img-5.15.0-107-generic
Warning: os-prober will not be executed to detect other bootable partitions.
Systems on them will not be added to the GRUB boot configuration.
Check GRUB_DISABLE_OS_PROBER documentation entry.
done
之后就能够使用 dpkg -r 来删除内核
sudo dpkg -r linux-image-unsigned-6.6.16-060616-generic
sudo dpkg --purge linux-image-unsigned-6.6.16-060616-generic
重启之后就能看到内核版本已经恢复到 5.15.x 版本,如下图:
Welcome to Ubuntu 22.04.4 LTS (GNU/Linux 5.15.0-113-generic x86_64)

 * Documentation:  https://help.ubuntu.com
 * Management:     https://landscape.canonical.com
 * Support:        https://ubuntu.com/pro

 System information as of Wed Jul 10 11:52:19 AM CST 2024
 ...
再执行 dpkg --list | grep linux-image 会发现原 6.6.16 内核已经删除,如下图:
ubuntu@VM-0-6-ubuntu:~$ dpkg --list | grep linux-image
rc  linux-image-5.15.0-101-generic         5.15.0-101.111                          amd64        Signed kernel image generic
rc  linux-image-5.15.0-105-generic         5.15.0-105.115                          amd64        Signed kernel image generic
ii  linux-image-5.15.0-107-generic         5.15.0-107.117                          amd64        Signed kernel image generic
ii  linux-image-5.15.0-113-generic         5.15.0-113.123                          amd64        Signed kernel image generic
ii  linux-image-generic                    5.15.0.113.113                          amd64        Generic Linux kernel image
5. 吃瘪结果
接下来再重新执行 upgrade 和 dist-upgrade 的更新指令,在更新完成后再进行一次扫描,结果炸裂:


这…这…内核降级后漏洞激增,从原来 127 个 CVE 漏洞上升到 1010 个。通过报告中提供的链接得知这些漏洞 Canonical 安全小组也在积极修复中,但大部分漏洞目前还处于 pending 状态。
虽然这样…也不全是坏消息,如下图:
ubuntu@VM-0-6-ubuntu:~$ sudo canonical-livepatch status --verbose
last check: 1 minute ago
kernel: 5.15.0-113.123-generic
server check-in: succeeded
kernel state: ✓ kernel series 5.15 is covered by Livepatch
patch state: ✓ no livepatches available for kernel 5.15.0-113.123-generic
tier: updates (Free usage; This machine beta tests new patches.)
machine id: e0fd450343fa48d8acc471dc903518d1
client version: 10.8.3
architecture: amd64
cpu model: AMD EPYC 9754 128-Core Processor
boot time: 1 minute ago
内核降级后 canonical-livepatch 已经能识别当前内核并提供实时保护。
至此,我也没有办法了,将情况反馈给项目经理。项目经理与客户沟通后决定先暂时使用 5.15.x 内核,主要是基于以下原因:
- 目前 5.15.x 内核是受到 canonical-livepatch 保护的,新的安全补丁发布后可以“一键修复”且不用重启,这个大大减少客户方运维的工作量;
- 目前扫描出来的漏洞基本都是 low 级别漏洞,对系统使用影响不大;
- 最最重要的是客户方运维不想揽活,而我又没有时间了,等有时间再帮他们修复吧;


 6685
6685

 被折叠的 条评论
为什么被折叠?
被折叠的 条评论
为什么被折叠?
 到【灌水乐园】发言


