


目录
本文涉及到的组件源码及使用demo工程可以从我github上下载到。
spring-boot-velocity-starter地址:https://github.com/sadeychai/spring-boot-velocity-starter/tree/main
spring-boot-velocity-demo工程地址:https://github.com/sadeychai/spring-boot-velocity-demo
背景
springboot从1.5.x以后停止了对velocity的支持,在2.x版本中移除了和veLocity的相关代码。对于很多springmvc+velocity的老项目来说,升级springboot时就面临一个艰难的抉择,是改用其他模板还是继续使用velocity,如果工程页面量大,换模板的工作量无疑是巨大的,所以不得不寻求一个支持velocity的办法。
方案
由于老的springboot是支持velocity的,所以我们可以想到的方案就是将springboot早期支持velocity的代码单独抽取出来进行二次开发,开发独立的spring-boot-velocity-stater组件来再次支持velocity。
实施步骤
步骤一:新建一个空的maven目标工程备用
步骤二:从spring-boot源码中抽取相关代码
使用git clone https://github.com/spring-projects/spring-boot.git下载spring-boot的源码到本地。
切换到v1.4.x分支;拷贝:org.springframework.boot.autoconfigure.velocity包下的相关代码放到步骤一新建的目标工程内,保持包路径不变。

步骤三:从springframwork中抽取源码
-
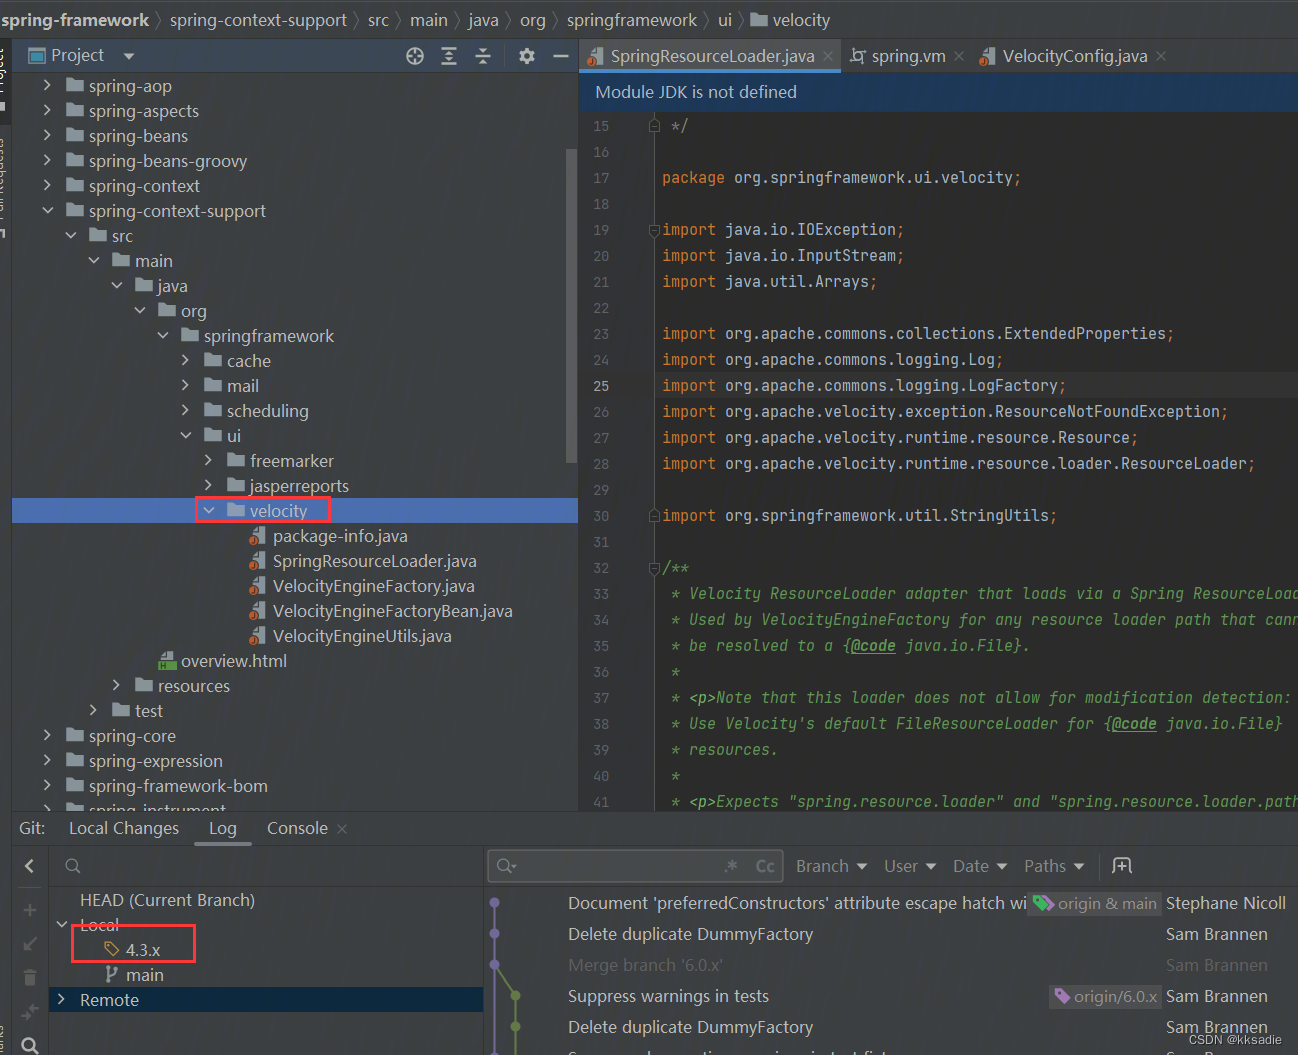
利用git clone https://github.com/spring-projects/spring-framework.git将spring-framework的源码下载到本地。
-
切换到 4.3.x 分支;拷贝org.springframework.ui.velocity(在spring-context-support模块内)和 org.springframework.web.servlet.view.velocity (在spring-webmvc模块内)包下velocity的相关代码到目标工程内;
另外,还要将spring-webmvc模块resources下的spring.vm文件拷贝到目标工程内。
步骤四:目标工程整理
- 拷贝完代码的目标工程内含以下代码,这里需要自己添加的spring.factories文件,并且配置自动配置相关的如图配置
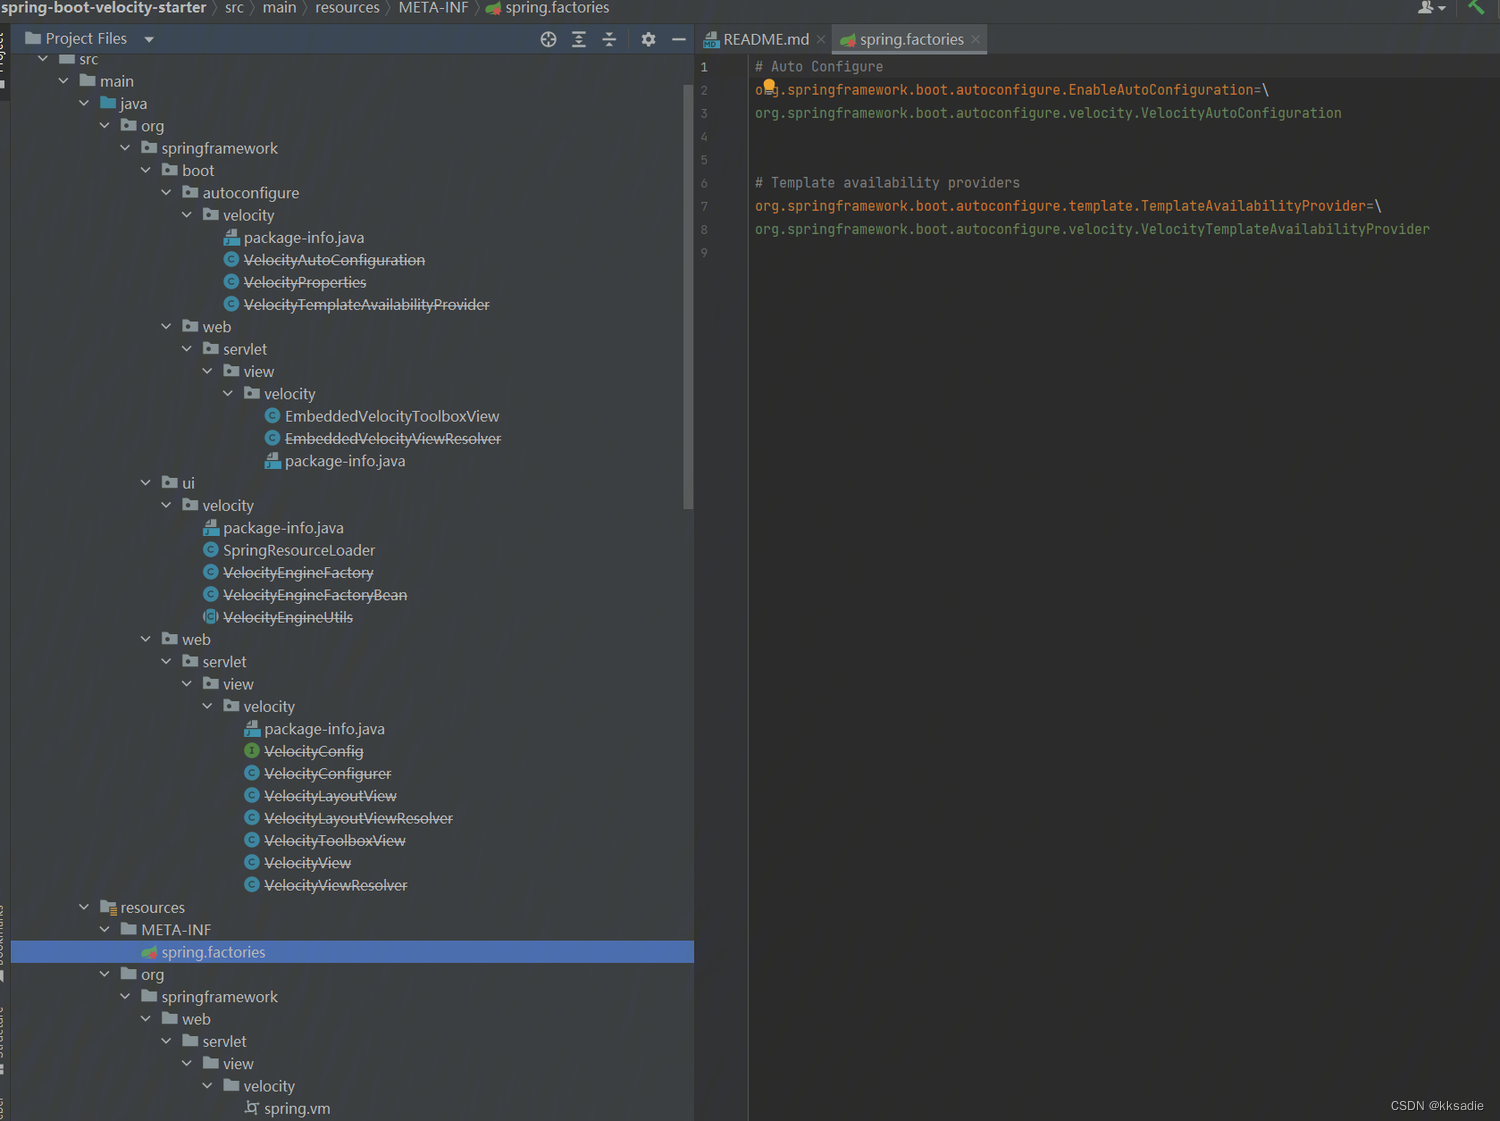
- pom依赖配置如下。这一步注意resource的配置,保证spring.vm文件可以打到jar包对应的路径下
<?xml version="1.0" encoding="UTF-8"?>
<project xmlns="http://maven.apache.org/POM/4.0.0"
        xmlns:xsi="http://www.w3.org/2001/XMLSchema-instance"
        xsi:schemaLocation="http://maven.apache.org/POM/4.0.0 https://maven.apache.org/xsd/maven-4.0.0.xsd">
    <modelVersion>4.0.0</modelVersion>
    <groupId>com.sadeychai.boot</groupId>
    <artifactId>spring-boot-velocity-starter</artifactId>
    <version>1.0.0-SNAPSHOT</version>
    <name>spring-boot-velocity-starter</name>
    <description>spring-boot-velocity-starter</description>

    <parent>
        <groupId>org.springframework.boot</groupId>
        <artifactId>spring-boot-starter-parent</artifactId>
        <version>2.7.10</version>
    </parent>

    <properties>
        <velocity.version>1.7</velocity.version>
        <velocity-tools.version>2.0</velocity-tools.version>
    </properties>

    <dependencies>
        <dependency>
            <groupId>org.apache.velocity</groupId>
            <artifactId>velocity</artifactId>
            <version>${velocity.version}</version>
        </dependency>
        <dependency>
            <groupId>org.apache.velocity</groupId>
            <artifactId>velocity-tools</artifactId>
            <version>${velocity-tools.version}</version>
            <exclusions>
                <exclusion>
                    <artifactId>struts-core</artifactId>
                    <groupId>org.apache.struts</groupId>
                </exclusion>
                <exclusion>
                    <artifactId>servlet-api</artifactId>
                    <groupId>javax.servlet</groupId>
                </exclusion>
            </exclusions>
        </dependency>
        <dependency>
            <groupId>org.springframework.boot</groupId>
            <artifactId>spring-boot-starter</artifactId>
        </dependency>
        <dependency>
            <groupId>org.springframework</groupId>
            <artifactId>spring-webmvc</artifactId>
        </dependency>
        <dependency>
            <groupId>javax.annotation</groupId>
            <artifactId>javax.annotation-api</artifactId>
        </dependency>
        <dependency>
            <groupId>org.springframework.boot</groupId>
            <artifactId>spring-boot-starter-test</artifactId>
            <scope>test</scope>
            <exclusions>
                <exclusion>
                    <groupId>org.junit.vintage</groupId>
                    <artifactId>junit-vintage-engine</artifactId>
                </exclusion>
            </exclusions>
        </dependency>
        <dependency>
            <groupId>org.springframework.boot</groupId>
            <artifactId>spring-boot-configuration-processor</artifactId>
            <optional>true</optional>
        </dependency>
        <dependency>
            <groupId>javax.servlet</groupId>
            <artifactId>javax.servlet-api</artifactId>
            <scope>provided</scope>
        </dependency>
    </dependencies>
    <build>
        <resources>
            <resource>
                <directory>src/main/resources</directory>
                <filtering>true</filtering>
                <includes>
                    <include>**/*.vm</include>
                </includes>
            </resource>
            <resource>
                <directory>src/main/resources/META-INF/</directory>
                <!-- 打包META-INF文件 -->
                <targetPath>META-INF</targetPath>
            </resource>
        </resources>
    </build>
</project>
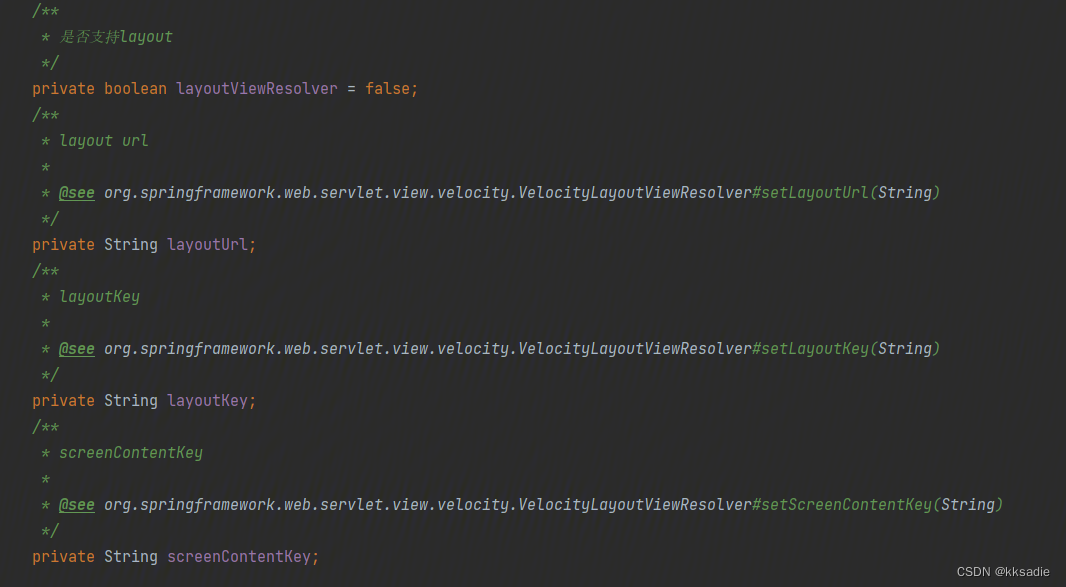
步骤五:二次开发,支持VelocityLayoutViewResolver自动装配
由于原始的starter内支持的ViewResolver为EmbeddedVelocityViewResolver,为了支持layout,我们需要自己改造一下。
- properties先支持layout相关属性配置,在VelocityProperties类中添加如下四个属性,其中layoutViewResolver是为了控制stater是否初始化VelocityLayoutViewResolver用的。其他三个对应VelocityLayoutViewResolver内的三个配置属性
- 另外,applyToMvcViewResolver方法也需要增加三个属性的支持:

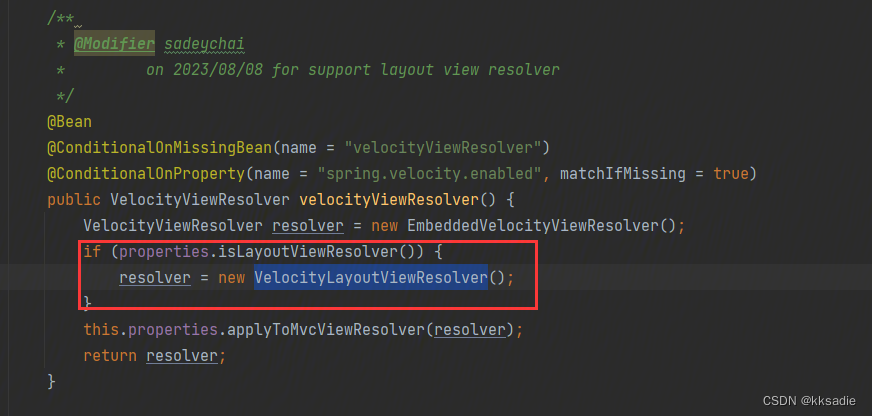
- VelocityAutoConfiguration内支持初始化VelocityLayoutViewResolver。根据属性layoutViewResolver来控制
- 修改继承关系,修复toolbox读取不到问题
本以为到上面步骤就万事大吉了,结果发现运行起来toolbox获取不到,出错的位置在ServletToolboxManager.getInstance()方法内,这里的context获取不到jar包内的toolbox配置文件。
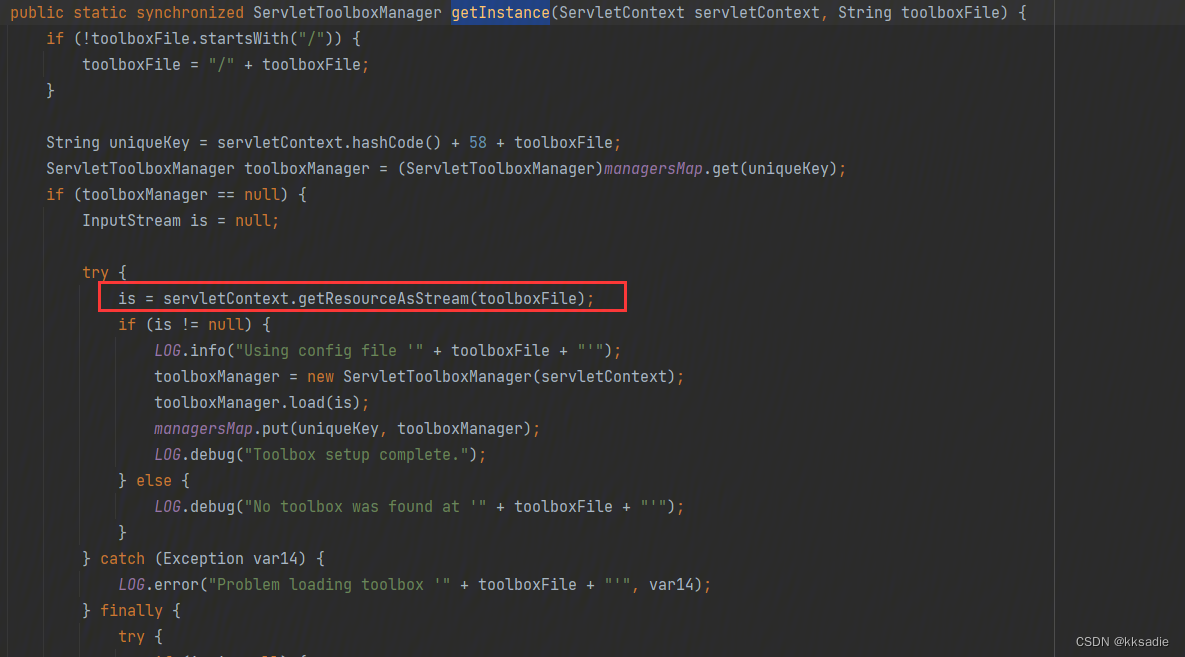
分析对比发现EmbeddedVelocityToolboxView(内嵌型)和VelocityLayoutView内的上下文是不同的,EmbeddedVelocityToolboxView自己重写了velocity上下文使得可以读取jar包内的文件。所以这里将
VelocityLayoutView修改成继承自EmbeddedVelocityToolboxView至此完美解决。

使用
本文涉及到的组件源码及使用demo工程可以从我的github上下载,直接使用。
spring-boot-velocity-starter地址:https://github.com/sadeychai/spring-boot-velocity-starter/tree/main
demo工程地址:https://github.com/sadeychai/spring-boot-velocity-demo
pom.xml引入自定义组件
<dependency>
            <groupId>com.sadeychai.boot</groupId>
            <artifactId>spring-boot-velocity-starter</artifactId>
            <version>1.0.0-SNAPSHOT</version>
        </dependency>
application.properties增加配置:
spring.velocity.enabled=true
    spring.velocity.cache= false
    spring.velocity.charset=UTF-8
    spring.velocity.properties.input.encoding=UTF-8
    spring.velocity.properties.output.encoding=UTF-8
    spring.velocity.check-template-location=true
    spring.velocity.resource-loader-path=classpath:/templates/
    spring.velocity.suffix=.vm
    spring.velocity.toolbox-config-location=/velocity/toolbox.xml
    #layout支持
    spring.velocity.layout-view-resolver= true
    spring.velocity.layout-url= /src/page/layout/default.vm
    spring.velocity.screen-content-key= content


 367
367


 被折叠的 条评论
为什么被折叠?
被折叠的 条评论
为什么被折叠?
 到【灌水乐园】发言


