


web开发基础之综合使用
学习目标和内容
1、能够描述jQuery的作用
2、能够使用jQuery的选择器获取元素
3、能够使用jQuery对HTML标签元素注册事件
4、能够使用jQuery对HTML元素的属性进行操作
5、能够描述Bootstrap的作用
6、能够使用Bootstrap创建简单网页
7、能够描述AJAX的作用
8、能够实现AJAX发送请求到后端服务
一、jQuery
1、jQuery相关介绍
jQuery 是一个 JavaScript 的脚本库,提供了很多便捷的操作 DOM 的方法。
jQuery 中提供的操作如下:
选择器、属性操作、样式操作、节点操作、动画、注册事件
2、下载和部署
jQuery 官网:
英文:http://jquery.com/
中文:https://www.jquery123.com/
下载地址:
使用方式注意:
①在HTML文档的前引入即可。
②在使用一些js插件时,依赖jQuery的,必须先引入jquery,再引入js的插件。
<script src="jquery-3.3.1.js"></script>
3、使用jQuery
$和jQuery
// 遍历数组
$.each(arr, function (index, item) {
  // index 当前项的索引
  // item 当前项
});
// 获取第一个参数,在数组中出现的索引,如果数组中没有返回 -1
$.inArray('linux', arr);
4、jQuery选择器
jQuery中的选择器和CSS选择器使用基本类似。
$('.box').css('color', 'red');
5、jQuery注册事件
$('#btn').click(function() {
   //执行代码
});
$('.box').mouseover(function () {
//执行代码
});
6、jQuery属性操作
//获取或者设置表单元素的值
$('#username').val()
//获取或者设置标签之间的内容
$('.box').html()
//获取或者设置元素属性的值
$('.box').attr()
7、jQuery隐藏显示
//显示
$('.box').show()
//隐藏
$('.box').hide()
8、jQuery样式操作
//操作行内样式
$('.box').css();
//操作类样式
//添加类样式
$('.box').addClass();
//移除类样式
$('.box').removeClass();
二、Bootstrap
1、Bootstrap介绍
简洁、直观、强悍的前端开发框架,让web开发更迅速、简单。
作用:可以快速搭建响应式的网页,而不需要书写大量的 css
中文文档: https://v3.bootcss.com/
2、下载和部署
下载地址:https://v3.bootcss.com/getting-started/#download
2.1、目录结构
bootstrap/
├── css/
│ ├── bootstrap.css
│ ├── bootstrap.css.map
│ ├── bootstrap.min.css
│ ├── bootstrap.min.css.map
│ ├── bootstrap-theme.css
│ ├── bootstrap-theme.css.map
│ ├── bootstrap-theme.min.css
│ └── bootstrap-theme.min.css.map
├── js/
│ ├── bootstrap.js
│ └── bootstrap.min.js
└── fonts/
├── glyphicons-halflings-regular.eot
├── glyphicons-halflings-regular.svg
├── glyphicons-halflings-regular.ttf
├── glyphicons-halflings-regular.woff
└── glyphicons-halflings-regular.woff2
如何学习使用bootstrap
1、官方文档学习
2、第三方学习网站http://www.runoob.com/bootstrap/bootstrap-tutorial.html>

2.2、基本模板演示
<!DOCTYPE html>
<html lang="zh-CN">
<head>
    <meta charset="utf-8">
    <meta http-equiv="X-UA-Compatible" content="IE=edge">
    <meta name="viewport" content="width=device-width, initial-scale=1">
    <!-- 上述3个meta标签*必须*放在最前面,任何其他内容都*必须*跟随其后! -->
     <title>Bootstrap 101 Template</title>
    <!-- Bootstrap -->
    <link href="https://cdn.jsdelivr.net/npm/bootstrap@3.3.7/dist/css/bootstrap.min.css" rel="stylesheet">
</head>
<body>
    <h1>你好,Boostrap!</h1>
    <!-- jQuery (Bootstrap 的所有 JavaScript 插件都依赖 jQuery,所以必须放在前边) -->
    <script src="https://cdn.jsdelivr.net/npm/jquery@1.12.4/dist/jquery.min.js"></script>
    <!-- 加载 Bootstrap 的所有 JavaScript 插件。你也可以根据需要只加载单个插件。 -->
	<script src="https://cdn.jsdelivr.net/npm/bootstrap@3.3.7/dist/js/bootstrap.min.js"></script>
</body>
</html>
2.3、全局CSS
Bootstrap中提供了很多类样式方便编写页面。
①容器类样式
.container 类用于固定宽度并支持响应式布局的容器。
<div class="container">
</div>
.container-fluid 类用于 100% 宽度,占据全部视窗口(viewport)的容器。
<div class="container-fluid">
</div>
②按钮类样式
.btn开头的类 给按钮添加不同类样式
<a class="btn btn-default" href="#" role="button">(默认样式)Default</a>
<button class="btn btn-primary" type="submit">(首选项)Primary</button>
<input class="btn btn-success" type="button" value="(成功)Success">
<input class="btn btn-info" type="submit" value="(一般信息)Info">

<button class="btn btn-warning" type="submit">(警告)Warning</button>
<button class="btn btn-danger" type="submit">(危险)Danger</button>
<button class="btn btn-link" type="submit">(链接)Link</button>
③表格类样式
.table
为任意
标签添加 .table 类可以为其赋予基本的样式 — 少量的内补(padding)和水平方向的分隔线
.table-striped
通过 .table-striped 类可以给 之内的每一行增加斑马条纹样式。
.table-bordered
添加 .table-bordered 类为表格和其中的每个单元格增加边框。
.table-hover
通过添加 .table-hover 类可以让 中的每一行对鼠标悬停状态作出响应。
④表单
单独的表单控件会被自动赋予一些全局样式。所有设置了 .form-control 类的 、 和 元素都将被默认设置宽度属性为 width: 100%;。 将 label 元素和前面提到的控件包裹在 .form-group 中可以获得最好的排列。
<form>
  <div class="form-group">
    <label for="exampleInputEmail1">Email address</label>
    <input type="email" class="form-control" id="exampleInputEmail1" placeholder="Email">
  </div>
  <div class="form-group">
    <label for="exampleInputPassword1">Password</label>
    <input type="password" class="form-control" id="exampleInputPassword1" placeholder="Password">
  </div>
  <div class="form-group">
    <label for="exampleInputFile">File input</label>
    <input type="file" id="exampleInputFile">
    <p class="help-block">Example block-level help text here.</p>
  </div>
  <div class="checkbox">
   <label>
      <input type="checkbox"> Check me out
   </label>
  </div>
  <button type="submit" class="btn btn-default">Submit</button>
</form>
⑤分页
<nav aria-label="Page navigation">
  <ul class="pagination">
    <li>
      <a href="#" aria-label="Previous">
        <span aria-hidden="true">«</span>
      </a>
    </li>
    <li><a href="#">1</a></li>
    <li><a href="#">2</a></li>
    <li><a href="#">3</a></li>
    <li><a href="#">4</a></li>
    <li><a href="#">5</a></li>
    <li>
      <a href="#" aria-label="Next">
        <span aria-hidden="true">»</span>
      </a>
    </li>
  </ul>
</nav>
2.4、Bootstrap插件
交互的效果要通过 JavaScript 来实现,Bootstrap 的插件在使用前,需要先引用两个 js 文件。
<script src="js/jquery-3.3.1.min.js"></script>
<script src="js/bootstrap.js"></script>
①模态框实现
cmdb项目中,资产管理-主机添加,使用到了模态框
https://v3.bootcss.com/javascript/#modals
第一步:获取官方的模态框demo
<div id="myModal" class="modal fade" tabindex="-1" role="dialog">
  <div class="modal-dialog" role="document">
    <div class="modal-content">
      <div class="modal-header">
        <button type="button" class="close" data-dismiss="modal" aria-label="Close"><span aria-hidden="true">×</span></button>
        <h4 class="modal-title">Modal title</h4>
      </div>
     <div class="modal-body">
        <!-- 此处是在模态框中显示的内容 -->
        <p>One fine body…</p>
     </div>
     <div class="modal-footer">
        <button type="button" class="btn btn-default" data-dismiss="modal">Close</button>
        <button type="button" class="btn btn-primary">Save changes</button>
    </div>
    </div><!-- /.modal-content -->
  </div><!-- /.modal-dialog -->
</div><!-- /.modal -->
第二步 点击按钮弹出模态框
设置按钮的属性data-target属性设置为模态框的id
<!-- Button trigger modal -->
<button type="button" class="btn btn-primary" data-toggle="modal" data-target="#myModal">
  Launch demo modal
</button>
第三步 隐藏模态框
给 Save Changes 按钮的 id 属性设置值,myModal
$('#btn').click(function () {
  $('#myModal').modal('hide');
});
3、基于Bootstrap的案例
https://v3.bootcss.com/getting-started/#examples-framework
案例:快速实现一个资产管理,主机列表的页面
使用examples案例中的dashboard页面
第一步:使用模板页面
引入css

第二步:根据实际情况,修改html标签
查看最后呈现效果

实现点击按钮,模态框表单,操作按钮

三、Layer

官方文档地址:https://layer.layui.com/
1、部署使用
①解压之后,部署layer插件


②引入layer.js

③实现confirm效果

四、Ajax
1、ajax介绍
Ajax 即“Asynchronous Javascript And XML”(异步 JavaScript 和 XML)
创建交互式网页应用的网页开发的一组技术。
作用:异步发送请求,提升了用户体验。
2、使用jQuery发送AJAX
2.1、发送get请求
$.ajax({
  type: 'get',
  url: 'xxxxx',
  success: function (res) {
      //成功后执行的代码
  }
})
2.2、发送post请求
$.post('/path/to/file', {param1: 'value1'}, function(data, textStatus, xhr) {
      /*optional stuff to do after success */
});
2.3、Ajax方法
$.ajax({
  type: 'post',
  url: 'xxxxx',
  data: data,
  success: function (res) {
      //成功执行的代码
  }
});
3、实现聊天机器人
API:http://www.tuling123.com/openapi/api
请求方法:POST
请求参数:key=d7c82ebd8b304abeacc73b366e42b9ed&info=你好
| 参数名称 | 参数值 |
|---|---|
| key | 请求权限标识符 |
| info | 关键字参数 |
4、操作主机列表页面
4.1、接口服务器搭建
使用json-server启动一个接口服务器,借助node进行开发的。安装node系统环境。
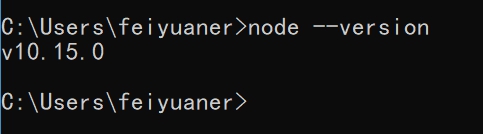
①安装json-serser
cmd > npm install -g json-server
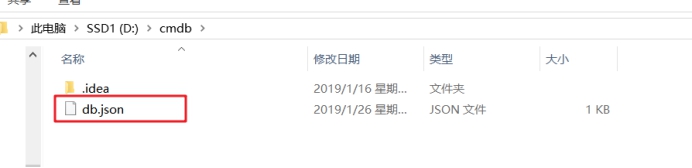
②编写json数据文件

③cmd进入路径,启动json-server服务

服务接口启动成功

4.2、动态获取主机列表
①复制主机列表 清空tbody的数据内容

②通过ajax发送请求 获取json格式数据 拼接字符串模板 追加写入页面


 666
666


 被折叠的 条评论
为什么被折叠?
被折叠的 条评论
为什么被折叠?
 到【灌水乐园】发言


