


前阵子帮朋友开发一个公众号,其中有一个需求是自动根据用户输入的指定内容生成海报
刚开始直接用Graphics.DrawString。生成的普通文字,然后朋友看了之后说说可不可以生成和他提供的海报模板里面那样的文字(带某些特效的)
刚开始觉得挺麻烦的,就直接说这个不太好做,大家都是生成普通文字(朋友给我参考的几个同行网站都没有生成特效文字的,最多就是换换文字颜色和字体。)
后面回头想了一想,这个功能还挺有趣的,于是睡觉的时候就构思了一下实现方案,第二天起来开始动手。
结果还真实现了。可能实现的方案不是很好,毕竟很少用Graphics这个东西,但功能毕竟都实现了。
Demo用到的图片都是网上随便找的,要达到更好的显示效果,那就需要寻找合适的图片或者自己设计
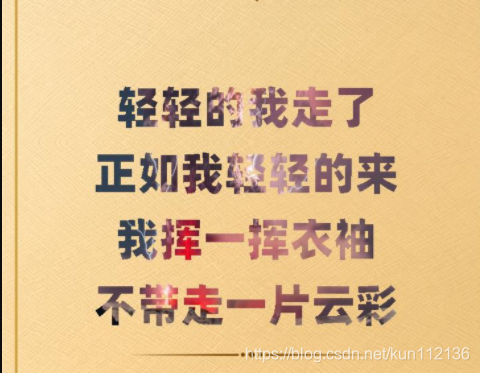
先上一个效果图

demo用到的其中两张图片
海报图片背景图片

用来做文字颜色的背景图片

废话不多说了,直接上Demo(demo用的ASP.NET Core3.1)。
 public class DrawHelper
    {
        /// <summary>
        /// 绘制海报
        /// </summary>
        /// <param name="pathBg">海报背景</param>
        /// <param name="pathFontBg">文字背景</param>
        /// <returns></returns>
        public string DrawPoster(string pathBg,string pathFontBg)
        {
            //背景图片,海报背景

            System.Drawing.Image imgSrc = System.Drawing.Image.FromFile(pathBg);

            using (Graphics g = Graphics.FromImage(imgSrc))
            {

                //画头像
                //g.DrawImage(titleImage, 8, 8, titleImage.Width, titleImage.Height);

                //Font font1 = new Font("Alibaba PuHuiTi Heavy", 60, FontStyle.Bold);
                //g.DrawString("测试锯齿", font1, new SolidBrush(Color.Black), 0, 100);
                var newImg = GetFontsBg(pathFontBg);

                g.DrawImage(newImg, new Rectangle((imgSrc.Width - newImg.Width) / 2,//居中
                imgSrc.Height - newImg.Height-250,//高度
                newImg.Width,
                newImg.Height),
                0, 0, newImg.Width, newImg.Height, GraphicsUnit.Pixel);

                string basePath = "D:\\pic\\";
                string newpath = Guid.NewGuid().ToString() + ".jpg";
                imgSrc.Save(basePath+newpath, System.Drawing.Imaging.ImageFormat.Jpeg);
                return newpath;
            }

        }

        /// <summary>
        /// 根据背景图片绘制文字
        /// </summary>
        /// <param name="path">图片路径</param>
        /// <returns></returns>
        public Image GetFontsBg(string path)
        {

            Bitmap imgSrc = new Bitmap(ReduceImage(System.Drawing.Image.FromFile(path), 500, 500));//压缩背景图片到指定尺寸

            using (Graphics g = Graphics.FromImage(imgSrc))
            {


                Font font = new Font("Alibaba PuHuiTi Heavy", 50, FontStyle.Bold);

                string key1 = "轻轻的我走了";
                string key2 = "正如我轻轻的来";
                string key3 = "我挥一挥衣袖";
                string key4 = "不带走一片云彩";

                float w1 = g.MeasureString(key1, font).Width;
                float w2 = g.MeasureString(key2, font).Width;
                float w3 = g.MeasureString(key3, font).Width;
                float w4 = g.MeasureString(key4, font).Width;


                float l1 = (imgSrc.Width - w1) / 2;
                float l2 = (imgSrc.Width - w2) / 2;
                float l3 = (imgSrc.Width - w3) / 2;
                float l4 = (imgSrc.Width - w4) / 2;


                Bitmap newImg2 = new Bitmap(imgSrc);//把背景图片赋值给中间变量


                g.DrawString(key1, font, new SolidBrush(Color.FromArgb(10, 154, 56)), l1, 20);//向imgSrc绘制文字,文字颜色是绿色 RGB(10, 154, 56)
                g.DrawString(key2, font, new SolidBrush(Color.FromArgb(10, 154, 56)), l2, 120);
                g.DrawString(key3, font, new SolidBrush(Color.FromArgb(10, 154, 56)), l3, 220);
                g.DrawString(key4, font, new SolidBrush(Color.FromArgb(10, 154, 56)), l4, 320);

                //循环遍历imgSrc所有像素点
                for (var x = 0; x < imgSrc.Width; x++)
                {
                    //Y轴
                    for (var y = 0; y < imgSrc.Height; y++)
                    {
                        var color = imgSrc.GetPixel(x, y); //得到X,Y处的像素

                        if (color.Name != "ff0a9a38") // 检查当前文字是否是绿色,也就是上面绘制文字时所指定的单色
                        {
                             //将中间变量对应imgSrc相同坐标像素点设置为透明
                             //这样最后得到的结果就是newImg2对应imgSrc非文字部分都变为透明,
                             //也就是将newImg2不透明部分作为文字的颜色
                             newImg2.SetPixel(x, y, Color.FromArgb(0));
                             //这里用Color.FromArgb(0)来设置像素点透明
                             //如果用Color.Transparent,发布到linux透明部分会变成白色
                             //win系统下的话两个没问题
                        }

                    }
                }

                return newImg2;//返回中间变量

            }

        }

        //设置图片为指定宽度高度
        public Image ReduceImage(Image originalImage, int toWidth, int toHeight)
        {

            if (toWidth <= 0 && toHeight <= 0)
            {
                return originalImage;//这里直接返回
            }
            else if (toWidth > 0 && toHeight > 0)
            {
                if (originalImage.Width < toWidth && originalImage.Height < toHeight)
                    return originalImage;
            }
            else if (toWidth <= 0 && toHeight > 0)
            {
                if (originalImage.Height < toHeight)
                    return originalImage;
                toWidth = originalImage.Width * toHeight / originalImage.Height;
            }
            else if (toHeight <= 0 && toWidth > 0)
            {
                if (originalImage.Width < toWidth)
                    return originalImage;
                toHeight = originalImage.Height * toWidth / originalImage.Width;
            }
            Bitmap toBitmap = new Bitmap(toWidth, toHeight);
            using (Graphics g = Graphics.FromImage(toBitmap))
            {
                g.InterpolationMode = System.Drawing.Drawing2D.InterpolationMode.High;
                g.SmoothingMode = System.Drawing.Drawing2D.SmoothingMode.HighQuality;
                g.Clear(Color.Transparent);
                g.DrawImage(originalImage,
                            new Rectangle(0, 0, toWidth, toHeight),
                            new Rectangle(0, 0, originalImage.Width, originalImage.Height),
                            GraphicsUnit.Pixel);
                originalImage.Dispose();
                return toBitmap;
            }
        }
    }
测试一下看看效果
  [HttpGet]
        public ActionResult Test()
        {

            string pathBg = "D:\\pic\\202103270103297447.jpg";//为了方便测试,直接写物理路径了
            string pathFontBg = "D:\\pic\\202103271235349995.jpg";
            DrawHelper draw = new DrawHelper();
            string imgPath = draw.DrawPoster(pathBg, pathFontBg);

            return Redirect(imgPath);
        }
下面换一下另一张文字背景图片,看看其他图片的效果

以下是生成的效果

再来一个

效果截图

最后再来一个

效果截图


 1923
1923


 被折叠的 条评论
为什么被折叠?
被折叠的 条评论
为什么被折叠?
 到【灌水乐园】发言


