


下载:http://www.jpox.org/docs/download.html
另外还需要JDO,可以使用sun的实现,也可以使用apache的实现(http://db.apache.org/jdo/downloads.html)。
测试步骤如下:
MySQL中新建数据库jpox备用。
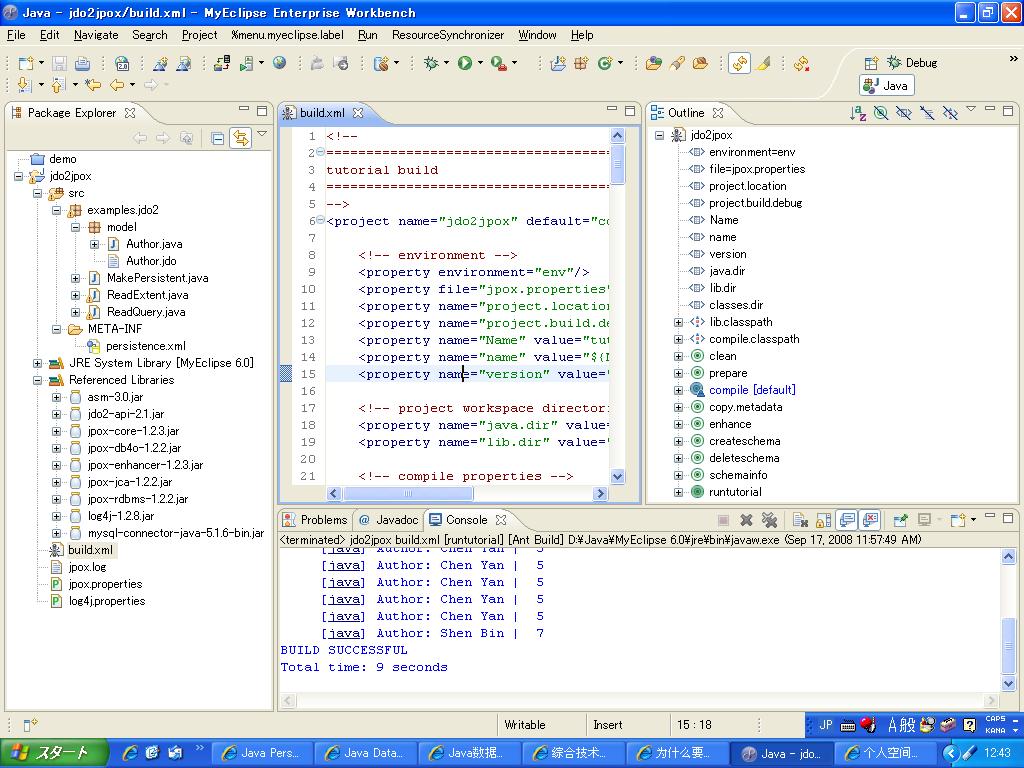
工程布局如下图:
jpox.properties:
- javax.jdo.PersistenceManagerFactoryClass=org.jpox.jdo.JDOPersistenceManagerFactory
- javax.jdo.option.ConnectionDriverName=com.mysql.jdbc.Driver
- javax.jdo.option.ConnectionURL=jdbc:mysql://localhost:3306/jpox
- javax.jdo.option.ConnectionUserName=root
- javax.jdo.option.ConnectionPassword=root
- org.jpox.autoCreateSchema=true
- org.jpox.validateTables=false
- org.jpox.validateConstraints=false
log4j.properties
- # LOG4J Configuration
- # ===================
- # Basic logging goes to "jpox.log"
- log4j.appender.A1=org.apache.log4j.FileAppender
- log4j.appender.A1.File=jpox.log
- log4j.appender.A1.layout=org.apache.log4j.PatternLayout
- log4j.appender.A1.layout.ConversionPattern=%d{HH:mm:ss,SSS} (%t) %-5p [%c] - %m%n
- #log4j.appender.A1.Threshold=INFO
- # Categories
- # Each category can be set to a "level", and to direct to an appender
- # Default to DEBUG level for all JPOX categories
- log4j.logger.JPOX = DEBUG, A1
- #log4j.category.JPOX.JDO=DEBUG, A1
- #log4j.category.JPOX.JPA=DEBUG, A1
- #log4j.category.JPOX.Persistence=DEBUG, A1
- #log4j.category.JPOX.Lifecycle=DEBUG, A1
- #log4j.category.JPOX.Query=DEBUG, A1
- #log4j.category.JPOX.Cache=DEBUG, A1
- #log4j.category.JPOX.Reachability=DEBUG, A1
- #log4j.category.JPOX.MetaData=DEBUG, A1
- #log4j.category.JPOX.General=DEBUG, A1
- #log4j.category.JPOX.Utility=DEBUG, A1
- #log4j.category.JPOX.Transaction=DEBUG, A1
- #log4j.category.JPOX.Store.Poid=DEBUG, A1
- #log4j.category.JPOX.Naming=DEBUG, A1
- #log4j.category.JPOX.Management=DEBUG, A1
- #log4j.category.JPOX.Datastore=DEBUG, A1
- #log4j.category.JPOX.Connection=DEBUG, A1
- #log4j.category.JPOX.ClassLoading=DEBUG, A1
- #log4j.category.JPOX.Plugin=DEBUG, A1
- #log4j.category.JPOX.Enhancer=DEBUG, A1
- #log4j.category.JPOX.SchemaTool=DEBUG, A1
- #log4j.category.JPOX.TEST=DEBUG, A1
- #
- # C3P0 logging
- #
- #log4j.category.com.mchange.v2.c3p0=INFO, A1
- #log4j.category.com.mchange.v2.resourcepool=INFO, A1
- #
- # Proxool logging
- #
- #log4j.category.org.logicalcobwebs.proxool=INFO,A1
Author.java
- package examples.jdo2.model;
- public class Author {
- private int books;
- private String name;
- public Author(String name, int books) {
- this.name = name;
- this.books = books;
- }
- protected Author() {
- }
- public String getName() {
- return name;
- }
- public void setName(String name) {
- this.name = name;
- }
- public int getBooks() {
- return books;
- }
- public void setBooks(int books) {
- this.books = books;
- }
- }
Author.jdo
- <?xml version="1.0" encoding="UTF-8"?>
- <!DOCTYPE jdo PUBLIC
- "-//Sun Microsystems, Inc.//DTD Java Data Objects Metadata 2.0//EN"
- "http://java.sun.com/dtd/jdo_2_0.dtd">
- <jdo>
- <package name="examples.jdo2.model">
- <class name="Author" identity-type="datastore">
- <field name="books" persistence-modifier="persistent"></field>
- <field name="name" persistence-modifier="persistent">
- <column length="50" jdbc-type="VARCHAR"/>
- </field>
- </class>
- </package>
- </jdo>
MakePersistent.java
- package examples.jdo2;
- import javax.jdo.JDOHelper;
- import javax.jdo.PersistenceManager;
- import javax.jdo.PersistenceManagerFactory;
- import javax.jdo.Transaction;
- import examples.jdo2.model.Author;
- public class MakePersistent {
- public static void main(String[] args) {
- PersistenceManagerFactory pmf = JDOHelper.getPersistenceManagerFactory("jpox.properties");
- PersistenceManager pm = pmf.getPersistenceManager();
- Transaction tx = pm.currentTransaction();
- tx.begin();
- Author au = new Author("Chen Yan", 5);
- System.out.println("Author: " + au.getName() + "/t" + au.getBooks() + " Books");
- pm.makePersistent(au);
- tx.commit();
- // tx.rollback();
- // Can not read fields outside of transactions. Or set:
- // pmf.setNontransactionalRead(true);
- // System.out.println("Author: " + au.getName() + "/t" + au.getBooks() + " Books");
- tx.begin();
- String name = au.getName();
- System.out.println("Author: " + name);
- tx.commit();
- pm.close();
- pmf.close();
- }
- }
ReadExtent.java
- package examples.jdo2;
- import java.util.Iterator;
- import javax.jdo.Extent;
- import javax.jdo.JDOHelper;
- import javax.jdo.PersistenceManager;
- import javax.jdo.PersistenceManagerFactory;
- import javax.jdo.Transaction;
- import examples.jdo2.model.Author;
- public class ReadExtent {
- public static void main(String[] args) {
- PersistenceManagerFactory pmf = JDOHelper.getPersistenceManagerFactory("jpox.properties");
- PersistenceManager pm = pmf.getPersistenceManager();
- Transaction tx = pm.currentTransaction();
- tx.begin();
- Extent extent = pm.getExtent(Author.class, false);
- Iterator itor = extent.iterator();
- Author au;
- while (itor.hasNext()) {
- au = (Author) itor.next();
- System.out.println("Author: " + au.getName() + " |/t"
- + au.getBooks());
- }
- extent.close(itor);
- tx.commit();
- pm.close();
- pmf.close();
- }
- }
ReadQuery.java
- package examples.jdo2;
- import java.util.Collection;
- import java.util.Iterator;
- import javax.jdo.JDOHelper;
- import javax.jdo.PersistenceManager;
- import javax.jdo.PersistenceManagerFactory;
- import javax.jdo.Query;
- import javax.jdo.Transaction;
- import examples.jdo2.model.Author;
- public class ReadQuery {
- public static void main(String[] args) {
- PersistenceManagerFactory pmf = JDOHelper.getPersistenceManagerFactory("jpox.properties");
- PersistenceManager pm = pmf.getPersistenceManager();
- Transaction tx = pm.currentTransaction();
- tx.begin();
- Query query = pm.newQuery(Author.class, "books == 7");
- Collection result = (Collection) query.execute();
- Iterator itor = result.iterator();
- Author au;
- while (itor.hasNext()) {
- au = (Author) itor.next();
- System.out.println("Author: " + au.getName() + " |/t" + au.getBooks());
- }
- query.close(result);
- tx.commit();
- pm.close();
- pmf.close();
- }
- }
因为在JDO需要Enhance以得到的PO,而且只能静态编译,不能运行期编译。这里使用ant脚本。
build.xml
- <!--
- ===================================================================
- tutorial build
- ===================================================================
- -->
- <project name="jdo2jpox" default="compile">
- <!-- environment -->
- <property environment="env"/>
- <property file="jpox.properties"/>
- <property name="project.location" location="."/>
- <property name="project.build.debug" value="on"/>
- <property name="Name" value="tutorial"/>
- <property name="name" value="${Name}"/>
- <property name="version" value="1.2"/>
- <!-- project workspace directories -->
- <property name="java.dir" value="src"/>
- <property name="lib.dir" value="."/>
- <!-- compile properties -->
- <property name="classes.dir" value="bin"/>
- <!--
- ===================================================================
- Classpath properties
- ===================================================================
- -->
- <!-- the classpath for running -->
- <path id="lib.classpath">
- <fileset dir="${lib.dir}">
- <include name="**/*.jar"/>
- </fileset>
- <pathelement location="${classes.dir}"/>
- <pathelement location="${basedir}"/>
- </path>
- <!-- the classpath for the compile -->
- <path id="compile.classpath">
- <pathelement location="${classes.dir}"/>
- <path refid="lib.classpath"/>
- </path>
- <!--
- ===================================================================
- TARGET : clean
- ===================================================================
- -->
- <target name="clean">
- <delete includeEmptyDirs="true" quiet="true">
- <fileset dir="${classes.dir}" includes="**/*.class,**/*.properties,**/*.*"/>
- </delete>
- </target>
- <!--
- ===================================================================
- TARGET : prepare
- ===================================================================
- -->
- <target name="prepare">
- <mkdir dir="${classes.dir}"/>
- </target>
- <!--
- ===================================================================
- TARGET : compile.java
- ===================================================================
- -->
- <target name="compile" depends="clean,prepare">
- <echo message="==================================================================="/>
- <echo message="Compile configuration:"/>
- <echo message="java.dir = ${java.dir}"/>
- <echo message="classes.dir = ${classes.dir}"/>
- <echo message="basedir = ${basedir}"/>
- <echo message="==================================================================="/>
- <javac srcdir="${java.dir}" destdir="${classes.dir}" debug="${project.build.debug}" classpathref="compile.classpath">
- <include name="**/*.java"/>
- </javac>
- </target>
- <!--
- ===================================================================
- TARGET : copy jdo metadata files
- ===================================================================
- -->
- <target name="copy.metadata">
- <copy todir="${classes.dir}">
- <fileset dir="${java.dir}" includes="**/*.jdo"/>
- </copy>
- </target>
- <!--
- ===================================================================
- TARGET : enhance
- ===================================================================
- -->
- <target name="enhance" depends="compile,copy.metadata">
- <!-- define the task enhancer -->
- <taskdef name="enhancer" classname="org.jpox.enhancer.tools.EnhancerTask">
- <classpath refid="compile.classpath"/>
- </taskdef>
- <!-- enhance -->
- <enhancer classpathref="compile.classpath"
- dir="${classes.dir}"
- verbose="true">
- <sysproperty key="log4j.configuration" value="file:log4j.properties"/>
- </enhancer>
- </target>
- <!-- SchemaTool "create" -->
- <target name="createschema">
- <taskdef name="schematool" classname="org.jpox.SchemaToolTask">
- <classpath refid="compile.classpath"/>
- </taskdef>
- <schematool classpathref="compile.classpath"
- failonerror="true" verbose="true" mode="create" props="jpox.properties">
- <fileset dir="${basedir}/bin">
- <include name="**/*.jdo"/>
- </fileset>
- <sysproperty key="log4j.configuration" value="${basedir}/log4j.properties"/>
- </schematool>
- </target>
- <!-- SchemaTool "delete" -->
- <target name="deleteschema">
- <taskdef name="schematool" classname="org.jpox.SchemaToolTask">
- <classpath refid="compile.classpath"/>
- </taskdef>
- <schematool classpathref="compile.classpath"
- failonerror="true" fork="true" verbose="true" mode="delete" props="jpox.properties">
- <fileset dir="${basedir}/bin">
- <include name="**/*.jdo"/>
- </fileset>
- <sysproperty key="log4j.configuration" value="log4j.properties"/>
- </schematool>
- </target>
- <!-- SchemaTool "dbinfo" -->
- <target name="schemainfo">
- <taskdef name="schematool" classname="org.jpox.SchemaToolTask">
- <classpath refid="compile.classpath"/>
- </taskdef>
- <schematool classpathref="compile.classpath"
- failonerror="true" fork="true" verbose="true" mode="dbinfo" props="jpox.properties">
- <fileset dir="${basedir}/bin">
- <include name="**/*.jdo"/>
- </fileset>
- <sysproperty key="log4j.configuration" value="log4j.properties"/>
- </schematool>
- </target>
- <!-- Run the Tutorial -->
- <target name="runtutorial" description="Run the application">
- <java classname="examples.jdo2.MakePersistent" classpathref="lib.classpath" fork="true"/>
- <java classname="examples.jdo2.ReadExtent" classpathref="lib.classpath" fork="true"/>
- <java classname="examples.jdo2.ReadQuery" classpathref="lib.classpath" fork="true"/>
- </target>
- </project>
先进行enhance后再进行runtutorial操作即可。
这时数据库中将直接生成数据库并进行数据操作。
注意:JDO在运行时会自动生成jpox_tables和sequence_table这2张表。
当然我们还可以使用persistence.xml文件配置数据库连接:
- <?xml version="1.0" encoding="UTF-8" ?>
- <persistence xmlns="http://java.sun.com/xml/ns/persistence"
- xmlns:xsi="http://www.w3.org/2001/XMLSchema-instance"
- xsi:schemaLocation="http://java.sun.com/xml/ns/persistence
- http://java.sun.com/xml/ns/persistence/persistence_1_0.xsd" version="1.0">
- <persistence-unit name="JPoxStore">
- <provider>org.jpox.jpa.PersistenceProviderImpl</provider>
- <class>examples.jdo2.model.Author</class>
- <properties>
- <property name="javax.jdo.option.ConnectionDriverName" value="com.mysql.jdbc.Driver"/>
- <property name="javax.jdo.option.ConnectionURL" value="jdbc:mysql://localhost:3306/jpox"/>
- <property name="javax.jdo.option.ConnectionUserName" value="root"/>
- <property name="javax.jdo.option.ConnectionPassword" value="root"/>
- </properties>
- </persistence-unit>
- </persistence>
调用的方法是:
Properties props = new Properties();
props.put("javax.jdo.option.PersistenceUnitName", "JPoxStore");
PersistenceManagerFactory pmf = JDOHelper.getPersistenceManagerFactory(props);
参考:http://www.jpox.org/docs/1_2/persistence_unit.html
本例参考自:http://blog.csdn.net/e_ville/archive/2006/12/27/1464180.aspx
关于Hibernate和JDO的比较:http://www.bitscn.com/mysql/JSPMySQL/200701/93732.html
其他资料:http://blog.csdn.net/liumm1983/archive/2007/03/19/1533726.aspx


 712
712


 被折叠的 条评论
为什么被折叠?
被折叠的 条评论
为什么被折叠?
 到【灌水乐园】发言


