


1. SpringBoot整合JSP
SpringBoot
应⽤默认⽀持的动态⽹⻚技术是
Thymeleaf
,并不⽀持
JSP
;因此在
SpringBoot
应⽤想要使⽤
JSP
需要通过⼿动整合来实现
1.1 添加依赖
<dependency>
    <groupId>org.apache.tomcat.embed</groupId>
    <artifactId>tomcat-embed-jasper</artifactId>
    <version>9.0.45</version>
</dependency>
<dependency>
    <groupId>javax.servlet</groupId>
    <artifactId>jstl</artifactId>
    <version>1.2</version>
</dependency>
1.2 创建jsp页面
1.2.1 修改pom文件打包方式为war
<packaging>war</packaging>1.2.2 在main中创建webapp目录,在webapp下创建WEB-INF
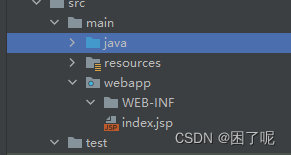
1.2.3 在webapp创建.jsp页面

<%@ page contentType="text/html;charset=UTF-8" language="java" %>
<html>
<head>
    <title>Title</title>
</head>
<body>
index..
</body>
</html>
1.3 将jsp页面放在WEB-INF中访问
出现问题
出现错误: webxml attribute is required (or pre-existing WEB-INF/web.xml if executing in update mode)
分析:webapp目录下缺少WEB-INF/web.xml
当是在servlet 3.0之后,对于web.xml文件本身是可选的
解决:1.在pom.xml文件中定义一个参数配置
<properties>
        <java.version>1.8</java.version>
        <project.build.sourceEncoding>UTF-8</project.build.sourceEncoding>
        <project.reporting.outputEncoding>UTF-8</project.reporting.outputEncoding>
        <spring-boot.version>2.4.1</spring-boot.version>
        <!--添加这个-->
        <failOnMissingWebXml>false</failOnMissingWebXml>
    </properties>
2.在webapp目录下创建WEB-INF/web.xml
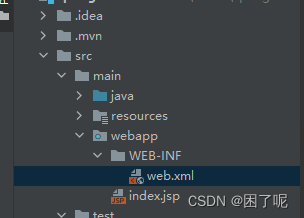
1.3.1 将jsp文件存放到WEB-INF目录运行
http://localhost:8080/index.jsp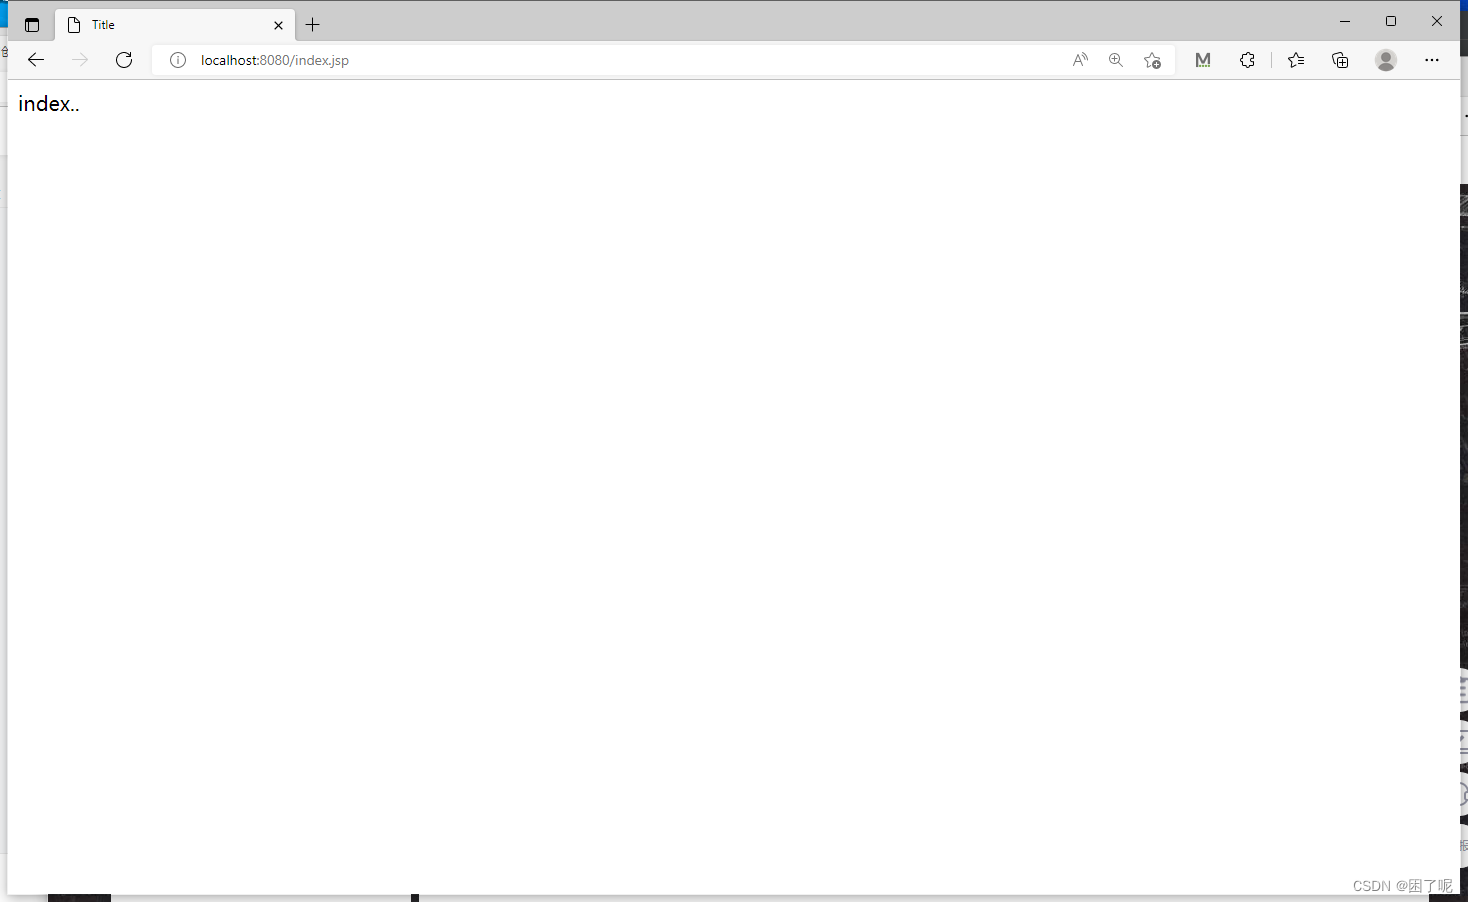
1.3.2 在application.yml文件配置SpringMVC视图解析方法
# 支持 yaml 语法配置
server:
  port: 9999
  servlet:
    context-path: /demo1

spring:
  datasource:
    url: jdbc:mysql://localhost:3306/maven_demo1?serverTimezone=UTC&useUnicode=true&characterEncoding=utf-8&useSSL=false&allowPublicKeyRetrieval=true
    driver-class-name: com.mysql.jdbc.Driver
    username: root
    password: 123456
#    视图解析器的配置
  mvc:
    view:
      prefix: /WEB-INF/
      suffix: .jsp

mybatis:
  mapper-locations: classpath:mappers/*Mapper.xml
  type-aliases-package: com.qfedu.springboot.demo.entity
创建PageController
package com.qfedu.springboot.demo.controller;

import org.springframework.stereotype.Controller;
import org.springframework.web.bind.annotation.RequestMapping;


@Controller
public class PageController {

    @RequestMapping("/index.html")
    public String index(){
        return "index";
    }
}
2. 基于SpringBoot的SSM整合
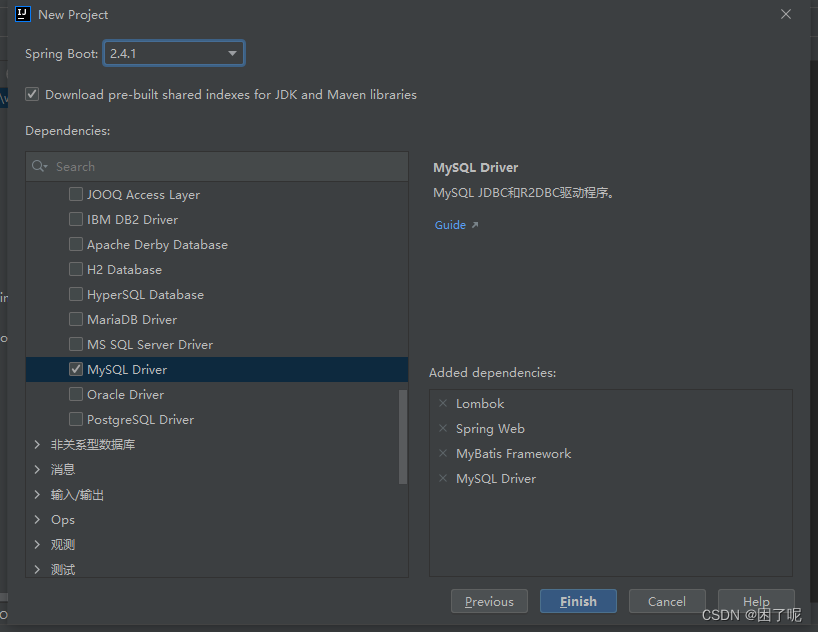
2.1 创建SpringBoot项目
创建项目时添加依赖
lombok,spring,mysql driver,mybatis framework
进行mybatis所需要的配置
配置 aplication.yml
spring:
datasource:
driver-class-name: com.mysql.jdbc.Driver
url: jdbc:mysql://localhost:3306/maven_demo1?serverTimezone=UTC&useUnicode=true&characterEncoding=utf-8&useSSL=false&allowPublicKeyRetrieval=true
username: root
password: 123456
mybatis:
type-aliases-package: com.qfedu.springboot.ssm.beans
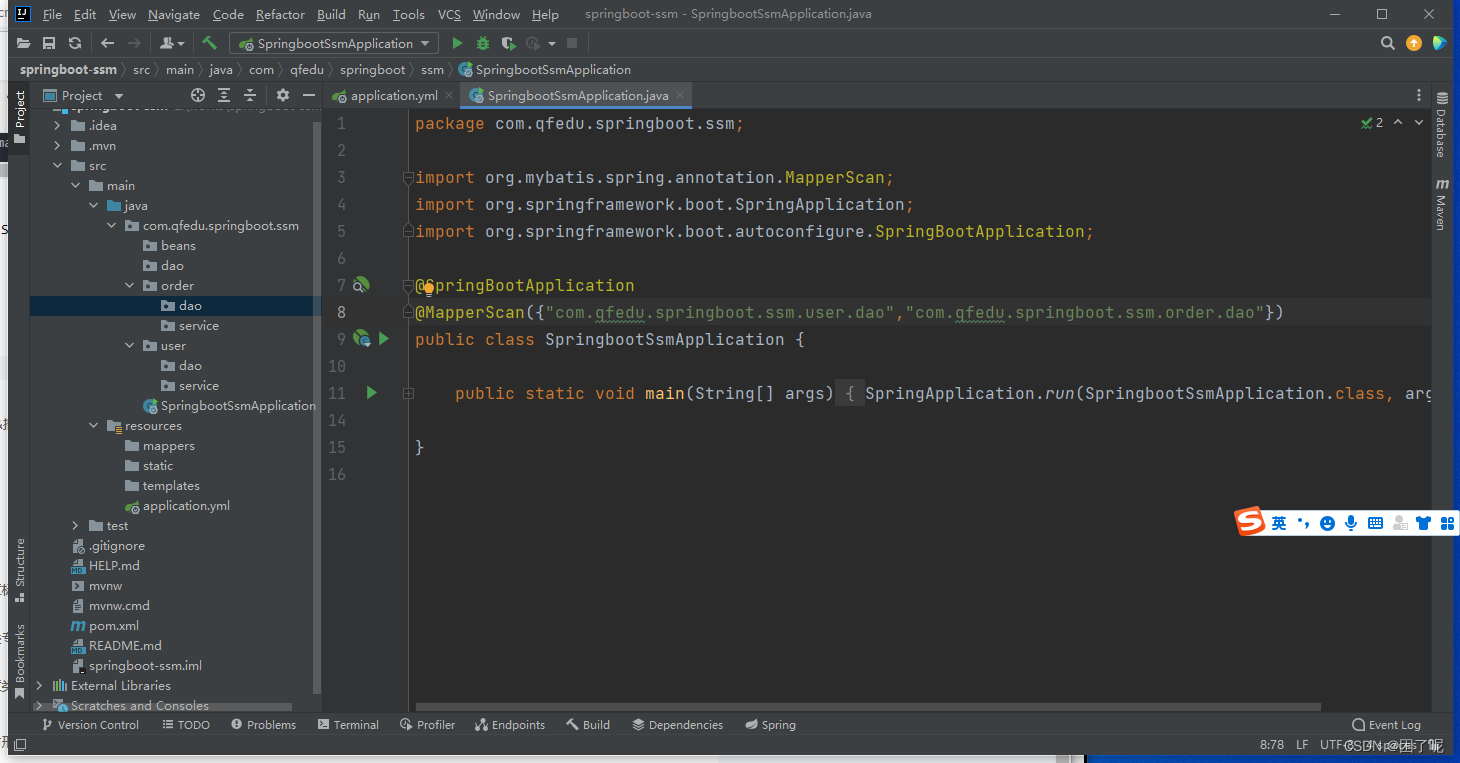
mapper-locations: classpath:mappers/*.xml在启动类配置dao扫描,配置SpringbootSsmApplication,如果多个dao,@MapperScan({"",""})
整合Druid连接池
在
SpringBoot
中整合
MyBatis
的时候,默认集成了
Hikari
连接池,
Hikari
的效率⽐
Druid
要⾼,但是得益于
Druid 提供了⽐较便捷的监控系统在企业开发中。
添加druid的starter
<dependency>
            <groupId>com.alibaba</groupId>
            <artifactId>druid-spring-boot-starter</artifactId>
            <version>1.1.10</version>
        </dependency>
配置druid数据源 在application.yam中配置
spring:
datasource:
druid:
driver-class-name: com.mysql.jdbc.Driver
url: jdbc:mysql://localhost:3306/maven_demo1?serverTimezone=UTC&useUnicode=true&characterEncoding=utf-8&useSSL=false&allowPublicKeyRetrieval=true
username: root
password: 123456
initial-size: 1
min-idle: 1
max-active: 20
mybatis:
type-aliases-package: com.qfedu.springboot.ssm.beans
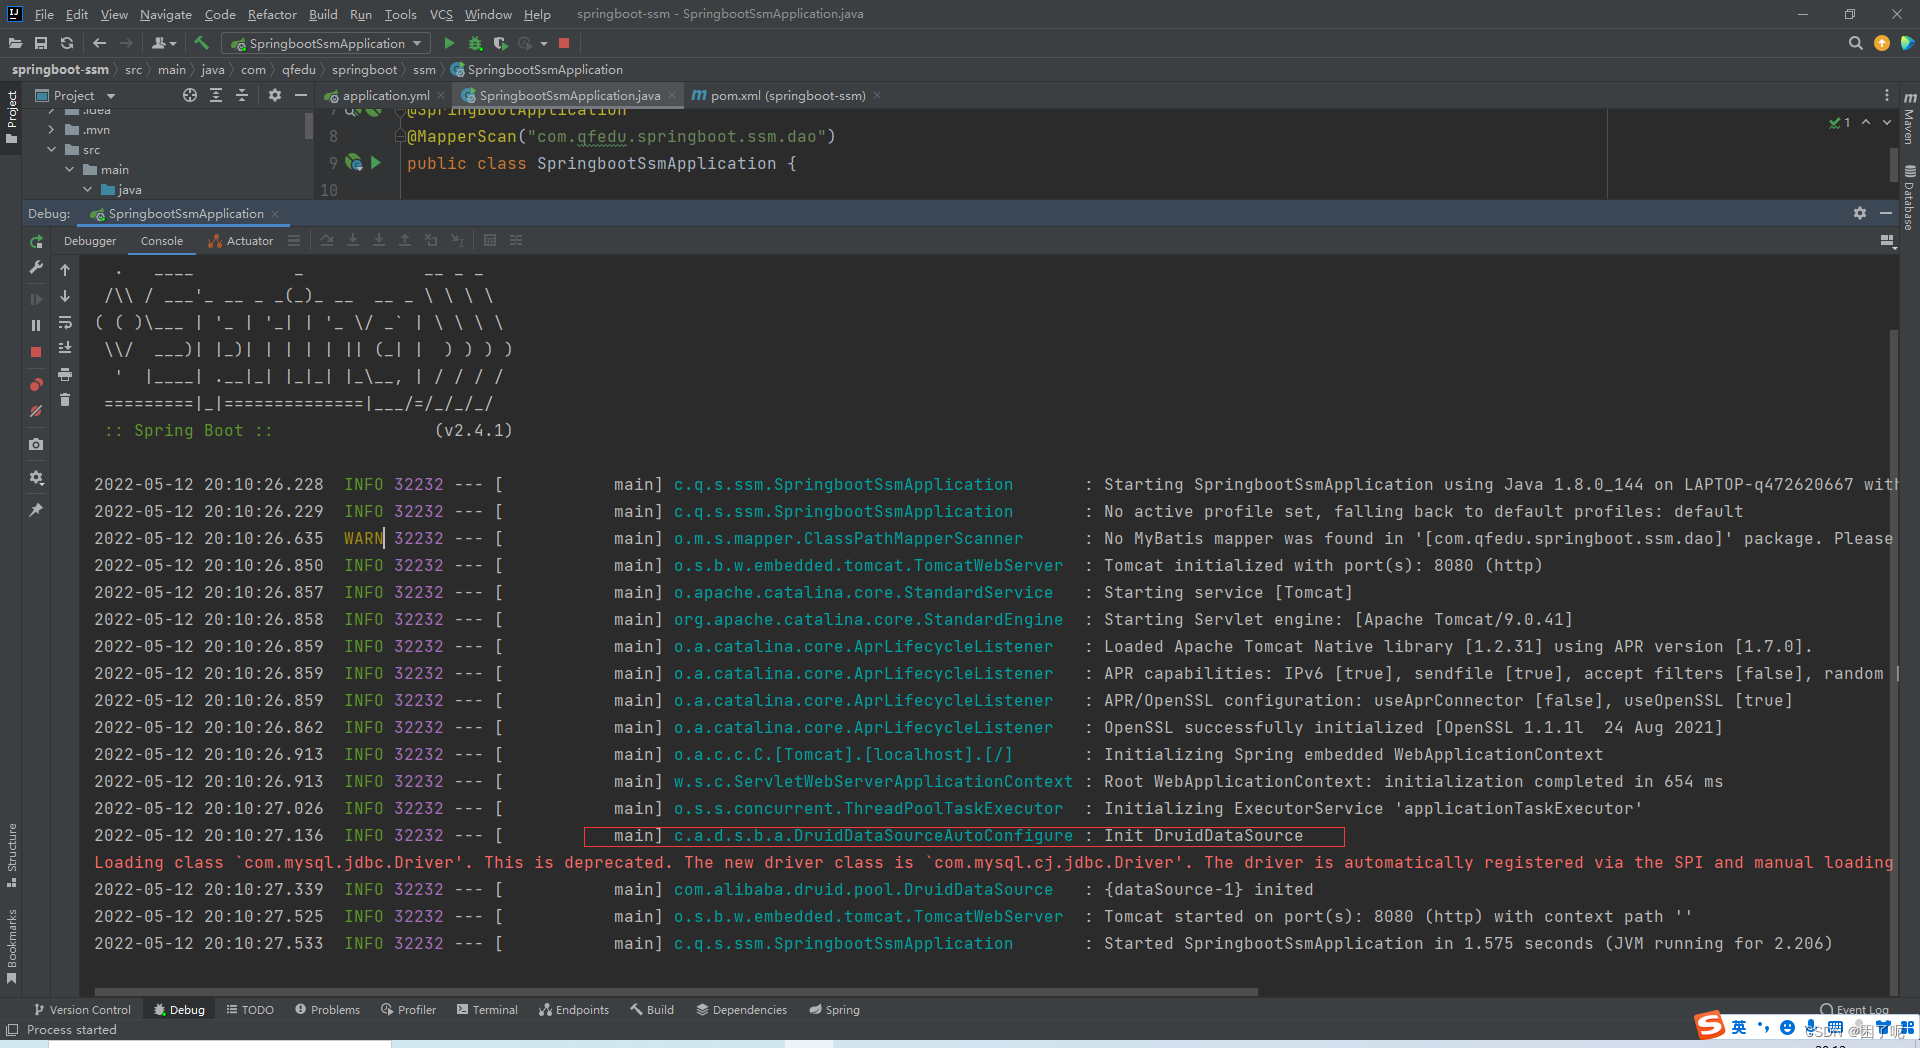
mapper-locations: classpath:mappers/*.xml验证是否配置成功


 592
592


 被折叠的 条评论
为什么被折叠?
被折叠的 条评论
为什么被折叠?
 到【灌水乐园】发言


