


今天研究了一下NDK 的使用,以为写个hello world还是很简单的,竟然被一堆bug弄了几个小时。所以就详细的研究了一下,先摘一段NDK简介:
一、NDK简介
1.NDK是一系列工具的集合
NDK提供了一系列的工具,帮助开发者快速开发C(或C++)的动态库,并能自动将so和java应用一起打包成apk。这些工具对开发者的帮助是巨大的。
2.NDK提供了一份稳定、功能有限的API头文件声明
Google明确声明该API是稳定的,在后续所有版本中都稳定支持当前发布的API。从该版本的NDK中看出,这些API支持的功能非常有限,包含有:C标准库(libc)、标准数学库(libm)、压缩库(libz)、Log库(liblog)。
二、为什么使用NDK
1.代码的保护。由于apk的java层代码很容易被反编译,而C/C++库反汇难度较大。
2.可以方便地使用现存的开源库。大部分现存的开源库都是用C/C++代码编写的。
3.提高程序的执行效率。将要求高性能的应用逻辑使用C开发,从而提高应用程序的执行效率。
4.便于移植。用C/C++写得库可以方便在其他的嵌入式平台上再次使用。
至于开发环境搭建,这里就不说了。下面开始
1.创建一个android工程,名字随意,比如 hellondk
2. 在MainActivity中定义被调用方法,用native修饰
package com.example.hellondk;
import android.app.Activity;
import android.os.Bundle;
import android.view.Menu;
import android.view.MenuItem;
import android.widget.TextView;
public class MainActivity extends Activity {
@Override
protected void onCreate(Bundle savedInstanceState) {
super.onCreate(savedInstanceState);
TextView tv = new TextView(this);
int a = 1;
int b = 3;
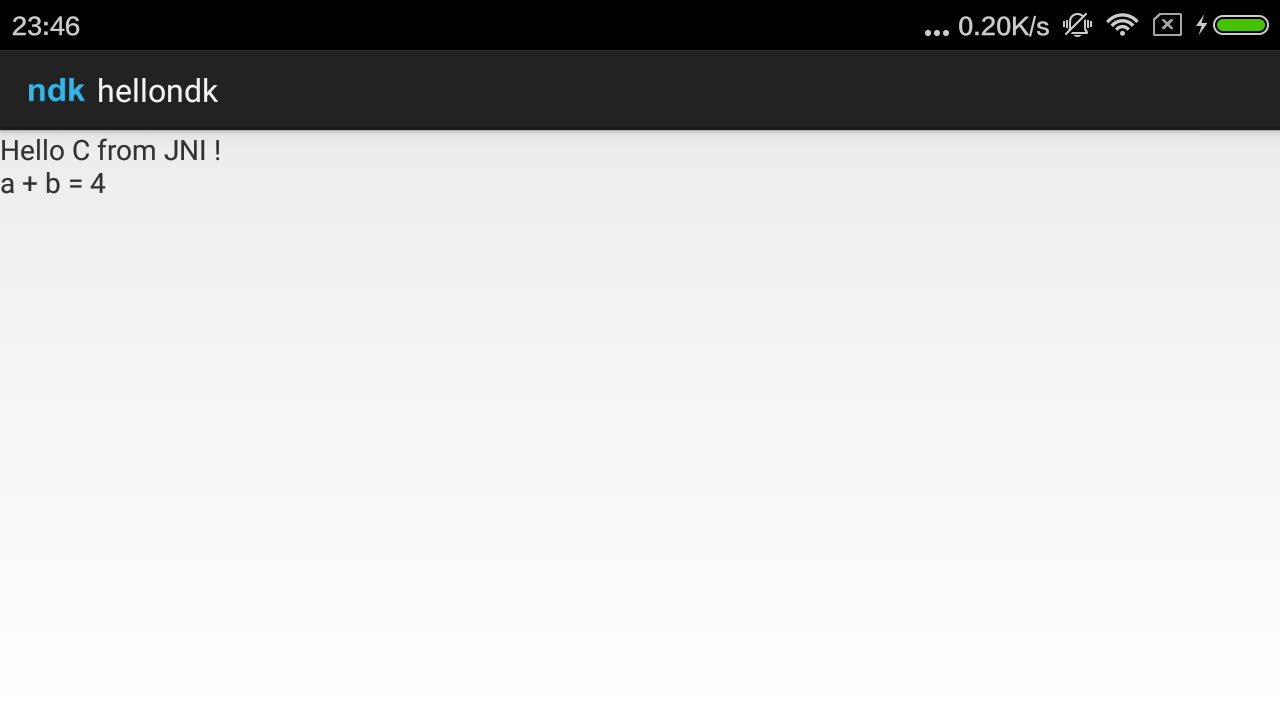
tv.setText(getStringFromC()+"\na + b = "+add(a,b));
setContentView(tv);
}
//这里定义了两个方法,getStringFromC()和add(int,int)
public static native int add(int a, int b);
public static native String getStringFromC();
//这里被static修饰的静态代码块,在类加载时加载,会加载对应的so文
//件,上面声明的两个函数就是在这个so文件中
static {
System.loadLibrary("helloc");
}
}3.项目,右键,新建jni文件夹,然后在jni中新建一个helloc.c文件
#include <string.h>
#include <jni.h>

/*这些函数可以用javah命令生成,这里先不讲,这个函数名很长,但是却是有                *规律的,包名com.example.hellondk,类名MainActivity,
*方法名getStringFromC,以下划线分割
*com.example.hellondk.MainActivity.getStringFromC
*/
jstring
Java_com_example_hellondk_MainActivity_getStringFromC( JNIEnv* env,
                                                  jobject thiz ){
    return (*env)->NewStringUTF(env, "Hello C from JNI !");
}

jint
Java_com_example_hellondk_MainActivity_add( JNIEnv* env,
                                                  jobject thiz,
                                                  jint a, jint b){
    return a+b;
}
4.项目,右键,android tools -> add native support

在jni目录下会自动新建一个Android.mk文件,内容如下:格式不用记,copy就行。helloc.c是同目录的helloc.c,helloc同System.loadLibrary(“helloc”);,这两个要保持一致
LOCAL_PATH := $(call my-dir)
include $(CLEAR_VARS)
LOCAL_MODULE    := helloc
LOCAL_SRC_FILES := helloc.c
include $(BUILD_SHARED_LIBRARY)
5. 构建安装运行
我用的IDE是adt bundle加NDK,如果环境搭建正确,这个时候,就应该能 项目右键 -> build project了,我测试的,没问题,但是c/c++文件有错误,无法通过eclipse安装。貌似是bug,以为编译生成都ok了,说明没有编译错误。项目根目录下面有个bin目录,里面有刚生成的apk文件,adb install hellondk.apk,安装到手机,运行OK
到这,已经手动完成了一个简单的NDK 函数调用。
如果是C++文件呢,则有点儿小不同,具体参见这篇博客,讲的很详细
http://blog.sina.com.cn/s/blog_72a98b310100x4r6.html
为防止外部链接失效,还是把代码贴出来吧
两处差异,
- 函数块被 extern “C”{}包裹
- jstring 类型 变成 JNIEXPORT jstring JNICALL
同理jint变成JNIEXPORT jint JNICALL,等等
#include <string.h>
#include <jni.h>

extern "C"
{
    JNIEXPORT jstring JNICALL
    Java_com_example_hellondk_MainActivity_getStringFromC( JNIEnv* env,
                                                      jobject thiz ){
        return env->NewStringUTF("Hello C++ from JNI !");
    }

    JNIEXPORT jint JNICALL
    Java_com_example_hellondk_MainActivity_add( JNIEnv* env,
                                                      jobject thiz,
                                                      jint a, jint b){
        return a+b;
    }
}
下面是另一种方式:
1. 第一步一样,在activity中声明native 方法,代码和上面第一步一样
2. 第二步,用javah生成头文件
命令格式
javah -classpath bin/classes;E:\androidsdk\platforms\android-15\android.jar -d jni com.example.hellondk.MainActivity
-classpath 指定了类路径,在这里,指定的是MainActivity的类的路径:
*.class文件就在hellondk/bin/classes/com/example/hellondk/…下面
-d 指定了自动生成的 .h文件的存放目录,最后面跟的是类的全名,即包名加类名
javah 能根据Mactivity的类文件,识别出里面声明的native方法,自动生成上面提到的超长方法名如
Java_com_example_hellondk_MainActivity_getStringFromC 和
Java_com_example_hellondk_MainActivity_add
下面看一下生成代码
/* DO NOT EDIT THIS FILE - it is machine generated */
#include <jni.h>
/* Header for class com_example_hellondk_MainActivity */

#ifndef _Included_com_example_hellondk_MainActivity
#define _Included_com_example_hellondk_MainActivity
#ifdef __cplusplus
extern "C" {
#endif
#undef com_example_hellondk_MainActivity_MODE_PRIVATE
#define com_example_hellondk_MainActivity_MODE_PRIVATE 0L
#undef com_example_hellondk_MainActivity_MODE_WORLD_READABLE
#define com_example_hellondk_MainActivity_MODE_WORLD_READABLE 1L
#undef com_example_hellondk_MainActivity_MODE_WORLD_WRITEABLE
#define com_example_hellondk_MainActivity_MODE_WORLD_WRITEABLE 2L
#undef com_example_hellondk_MainActivity_MODE_APPEND
#define com_example_hellondk_MainActivity_MODE_APPEND 32768L
#undef com_example_hellondk_MainActivity_MODE_MULTI_PROCESS
#define com_example_hellondk_MainActivity_MODE_MULTI_PROCESS 4L
#undef com_example_hellondk_MainActivity_BIND_AUTO_CREATE
#define com_example_hellondk_MainActivity_BIND_AUTO_CREATE 1L
#undef com_example_hellondk_MainActivity_BIND_DEBUG_UNBIND
#define com_example_hellondk_MainActivity_BIND_DEBUG_UNBIND 2L
#undef com_example_hellondk_MainActivity_BIND_NOT_FOREGROUND
#define com_example_hellondk_MainActivity_BIND_NOT_FOREGROUND 4L
#undef com_example_hellondk_MainActivity_BIND_ABOVE_CLIENT
#define com_example_hellondk_MainActivity_BIND_ABOVE_CLIENT 8L
#undef com_example_hellondk_MainActivity_BIND_ALLOW_OOM_MANAGEMENT
#define com_example_hellondk_MainActivity_BIND_ALLOW_OOM_MANAGEMENT 16L
#undef com_example_hellondk_MainActivity_BIND_WAIVE_PRIORITY
#define com_example_hellondk_MainActivity_BIND_WAIVE_PRIORITY 32L
#undef com_example_hellondk_MainActivity_BIND_IMPORTANT
#define com_example_hellondk_MainActivity_BIND_IMPORTANT 64L
#undef com_example_hellondk_MainActivity_BIND_ADJUST_WITH_ACTIVITY
#define com_example_hellondk_MainActivity_BIND_ADJUST_WITH_ACTIVITY 128L
#undef com_example_hellondk_MainActivity_CONTEXT_INCLUDE_CODE
#define com_example_hellondk_MainActivity_CONTEXT_INCLUDE_CODE 1L
#undef com_example_hellondk_MainActivity_CONTEXT_IGNORE_SECURITY
#define com_example_hellondk_MainActivity_CONTEXT_IGNORE_SECURITY 2L
#undef com_example_hellondk_MainActivity_CONTEXT_RESTRICTED
#define com_example_hellondk_MainActivity_CONTEXT_RESTRICTED 4L
#undef com_example_hellondk_MainActivity_RESULT_CANCELED
#define com_example_hellondk_MainActivity_RESULT_CANCELED 0L
#undef com_example_hellondk_MainActivity_RESULT_OK
#define com_example_hellondk_MainActivity_RESULT_OK -1L
#undef com_example_hellondk_MainActivity_RESULT_FIRST_USER
#define com_example_hellondk_MainActivity_RESULT_FIRST_USER 1L
#undef com_example_hellondk_MainActivity_DEFAULT_KEYS_DISABLE
#define com_example_hellondk_MainActivity_DEFAULT_KEYS_DISABLE 0L
#undef com_example_hellondk_MainActivity_DEFAULT_KEYS_DIALER
#define com_example_hellondk_MainActivity_DEFAULT_KEYS_DIALER 1L
#undef com_example_hellondk_MainActivity_DEFAULT_KEYS_SHORTCUT
#define com_example_hellondk_MainActivity_DEFAULT_KEYS_SHORTCUT 2L
#undef com_example_hellondk_MainActivity_DEFAULT_KEYS_SEARCH_LOCAL
#define com_example_hellondk_MainActivity_DEFAULT_KEYS_SEARCH_LOCAL 3L
#undef com_example_hellondk_MainActivity_DEFAULT_KEYS_SEARCH_GLOBAL
#define com_example_hellondk_MainActivity_DEFAULT_KEYS_SEARCH_GLOBAL 4L
/*
 * Class:     com_example_hellondk_MainActivity
 * Method:    add
 * Signature: (II)I
 */
JNIEXPORT jint JNICALL Java_com_example_hellondk_MainActivity_add
  (JNIEnv *, jclass, jint, jint);

#ifdef __cplusplus
}
#endif
#endif
上面的大量的宏,忽视它们,重点是最后几行那个函数,很眼熟对不对。
是的,他就是自动生成的,上文中我们手动拼写的那个函数。
有了它,我们就不用在手动拼写,避免错误。
然后,在同目录(jni)下面新建文件helloc.c,记得include这个头文件
helloc.c的内容上文已经贴出,除了引用头文件,其他一样。
3.ndk-build编译c/c++文件
Android.mk文件和上面一样
cmd进入项目根目录,ndk-build开始编译C/C++文件。如果成功,项目会多出一个文件夹obj,里面就是so文件libhelloc.so,lib + helloc+.so
4.构建安装运行
项目右键,run as Android Applecation
如果还是build正常,但是运行app时显示C/C++有错误,还是手动命令行安装吧,这些bug太头大
因为捉bug弄了一下午,有些问题估计是确实ndk本身的问题,就先搁置了。以后在研究:
- 不知道为什么,有时用javah 生成的.h头文件会不一样。比如下面这个
为节省控件,我把宏和一些注释删除了
/* DO NOT EDIT THIS FILE - it is machine generated */
#include <jni.h>
#ifdef __cplusplus
extern "C" {
#endif
JNIEXPORT jstring JNICALL Java_com_example_hellondk3_MainActivity_getStringFromC
  (JNIEnv *, jobject);

#ifdef __cplusplus
}
#endif
2.项目编译生成OK,手动安装到手机运行演示OK,但是C/C++文件在IDE报错误,是bug,还是环境配置问题


 2372
2372

 被折叠的 条评论
为什么被折叠?
被折叠的 条评论
为什么被折叠?
 到【灌水乐园】发言


