Spring的依赖注入和自动装配(byName、byType)
1、概念
1.1依赖注入:又可以叫做控制反转, 即将初始化的控制权交给他人(Spring容器)。
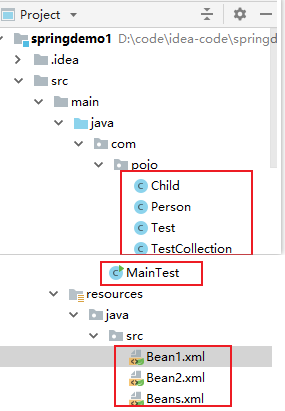
2、文件位置截图
3、代码
3.1、要点说明:
注意:在实体类中要有相应的getter和setter方法
1、包括:构造器注入的测试、集合注入测试、byName注入测试、byType注入测试、没有指定autowire的类型测试
2、相关说明
2.1、构造器注入的方式:名称、下标、类型
2.2、byType:搜索整个配置文件中的bean,如果有一个相同类型的bean则自动装配,如果没有或超过一个则显示异常(即没有com.pojo.Child或多于一个)。
2.3、byName: 搜索整个配置文件中的bean,如果有相同名称的bean则自动装配(相同id或name),否则显示异常。
3.2、实体类对象
3.2.1、Person类
package com.pojo;

public class Person {
    private String pName;
    private String pAccount;
    private Child child;
    public Child getChild() {
        return child;
    }
    public void setChild(Child child) {
        this.child = child;
    }
    public String getpName() {
        return pName;
    }
    public void setpName(String pName) {
        this.pName = pName;
    }
    public String getpAccount() {
        return pAccount;
    }
    public void setpAccount(String pAccount) {
        this.pAccount = pAccount;
    }
}
3.2.2、Child类
package com.pojo;
public class Child {
private String cName;
private String cAccount;
public String getcName() {
return cName;
}
public void setcName(String cName) {
this.cName = cName;
}
public Child() {
}
public Child(String cName) {
this.cName = cName;
}
public Child(String cName, String cAccount) {
this.cName = cName;
this.cAccount = cAccount;
System.out.println("有参构造器信息-->名称:"+cName+",账号:"+cAccount);
}
public String getcAccount() {
return cAccount;
}
public void setcAccount(String cAccount) {
this.cAccount = cAccount;
}
@Override
public String toString() {
return "Child{" +
"cName='" + cName + '\'' +
", cAccount='" + cAccount + '\'' +
'}';
}
}
3.2.3、Test类
package com.pojo;

public class Test {
    private Integer age;
    private Child child;
    public Test() {
        System.out.println("test的无参构造");
    }
    public Test(Integer age) {
        this.age = age;
        if(age<18){
            System.out.println("你"+age+"岁还是未成年人!");
        }else{
            System.out.println("你"+age+"岁已经是成年人了!");
        }
    }
    public Integer getAge() {
        return age;
    }
    public void setAge(Integer age) {
        this.age = age;
    }
    public Child getChild() {
        return child;
    }
    public void setChild(Child child) {
        this.child = child;
    }
}
3.2.4、TestCollection类
package com.pojo;


import java.util.List;
import java.util.Map;
import java.util.Properties;
import java.util.Set;

public class TestCollection {
    private List list;
    private Set set;
    private Map map;
    private Properties properties;
    public List getList() {
        System.out.println("list:"+list);
        return list;
    }
    public void setList(List list) {
        this.list = list;
    }

    public Set getSet() {
        System.out.println("set:"+set);
        return set;
    }
    public void setSet(Set set) {
        this.set = set;
    }
    public Map getMap() {
        System.out.println("map:"+map);
        return map;
    }
    public void setMap(Map map) {
        this.map = map;
    }
    public Properties getProperties() {
        System.out.println("properties:"+properties);
        return properties;
    }
    public void setProperties(Properties properties) {
        this.properties = properties;
    }
}
3.3、XML文件
3.3.1、Bean1.xml
<?xml version="1.0" encoding="UTF-8"?>
<beans xmlns="http://www.springframework.org/schema/beans"
xmlns:xsi="http://www.w3.org/2001/XMLSchema-instance" xmlns:p="http://www.springframework.org/schema/p"
xsi:schemaLocation="http://www.springframework.org/schema/beans
http://www.springframework.org/schema/beans/spring-beans-3.0.xsd">
<bean id="test" class="com.pojo.Test">
<property name="age" value="11"></property>
<property name="child">
<bean id="child" class="com.pojo.Child" p:cName="lcb" p:cAccount="123">
<constructor-arg name="cName" value="lcb"></constructor-arg>
<constructor-arg name="cAccount" value="123"></constructor-arg>
</bean>
</property>
<constructor-arg type="java.lang.Integer" value="16"></constructor-arg>
</bean>
</beans>
3.3.2、Bean2.xml
<?xml version="1.0" encoding="UTF-8"?>
<beans xmlns="http://www.springframework.org/schema/beans"
xmlns:xsi="http://www.w3.org/2001/XMLSchema-instance" xmlns:p="http://www.springframework.org/schema/p"
xsi:schemaLocation="http://www.springframework.org/schema/beans
http://www.springframework.org/schema/beans/spring-beans-3.0.xsd">
<bean id="testCollection" class="com.pojo.TestCollection">
<property name="list">
<list>
<value>list1</value>
<value>list2</value>
<value>list3</value>
</list>
</property>
<property name="map">
<map>
<entry key="mp1" value="map1"></entry>
<entry key="mp2" value="map2"></entry>
<entry key="mp3" value="map3"></entry>
</map>
</property>
<property name="properties">
<props>
<prop key="one">1</prop>
<prop key="two">2</prop>
<prop key="three">3</prop>
</props>
</property>
<property name="set">
<set>
<value>set1</value>
<value>set2</value>
<value>set3</value>
</set>
</property>
</bean>
</beans>
3.3.3、Beans.xml
<?xml version="1.0" encoding="UTF-8"?>
<beans xmlns="http://www.springframework.org/schema/beans"
xmlns:xsi="http://www.w3.org/2001/XMLSchema-instance" xmlns:p="http://www.springframework.org/schema/p"
xsi:schemaLocation="http://www.springframework.org/schema/beans
http://www.springframework.org/schema/beans/spring-beans-3.0.xsd">
<bean id="person0" class="com.pojo.Person" autowire="byName">
<property name="pName" value="lcb"></property>
<property name="pAccount" value="123"></property>
</bean>
<bean id="child" class="com.pojo.Child">
<property name="cName" value="laj"></property>
<property name="cAccount" value="124"></property>
</bean>
<bean id="person1" class="com.pojo.Person">
<property name="pName" value="lcb"></property>
<property name="pAccount" value="123"></property>
<property name="child">
<bean id="child" class="com.pojo.Child" autowire="byType">
<property name="cName" value="laj"></property>
<property name="cAccount" value="124"></property>
</bean>
</property>
</bean>
<bean id="person2" class="com.pojo.Person" parent="persons">
</bean>
<bean id="persons" class="com.pojo.Person">
<property name="pName" value="lcb"></property>
<property name="pAccount" value="123"></property>
<property name="child" ref="child2">
</property>
</bean>
<bean id="child2" class="com.pojo.Child">
<property name="cName" value="laj"></property>
<property name="cAccount" value="124"></property>
</bean>
<bean id="person3" class="com.pojo.Person">
<property name="child" ref="child3"></property>
<property name="pName" value="lcb"></property>
<property name="pAccount" value="123"></property>
</bean>
<bean id="child3" class="com.pojo.Child">
<property name="cName" value="laj"></property>
<property name="cAccount" value="124"></property>
</bean>
<bean id="person4" class="com.pojo.Person" p:pAccount="123" p:pName="lcb">
<property name="child">
<bean class="com.pojo.Child" p:cName="laj" p:cAccount="124">
</bean>
</property>
</bean>
<bean id="person5" class="com.pojo.Person" p:pAccount="123" p:pName="lcb" p:child-ref="child5">
</bean>
<bean id="child5" class="com.pojo.Child">
<property name="cName" value="laj"></property>
<property name="cAccount" value="124"></property>
</bean>
<bean id="person6" class="com.pojo.Person" p:pAccount="123" p:pName="lcb" p:child-ref="child6">
</bean>
<bean id="child6" class="com.pojo.Child" p:cName="laj" p:cAccount="124">
</bean>
</beans>
3.4、测试类MainTest.java
package com;
import com.pojo.Person;
import com.pojo.Test;
import com.pojo.TestCollection;
import org.springframework.context.support.ClassPathXmlApplicationContext;
import org.springframework.context.support.FileSystemXmlApplicationContext;
public class MainTest {
public static void main(String[] args) {
test();
testCollection();
testAutowire("person0");
testAutowire("person1");
testAutowire("person2");
testAutowire("person3");
testAutowire("person4");
testAutowire("person5");
testAutowire("person6");
}
private static void test(){
ClassPathXmlApplicationContext context = new ClassPathXmlApplicationContext("java/src/Bean1.xml");
Test test = (Test) context.getBean("test");
System.out.println("注入年龄:"+test.getAge()+"--"+test.getChild());
}
private static void testCollection(){
FileSystemXmlApplicationContext context = new FileSystemXmlApplicationContext("src/main/resources/java/src/Bean2.xml");
TestCollection testCollection = (TestCollection) context.getBean("testCollection");
System.out.println("<-- 集合测试开始 -->");
testCollection.getList();
testCollection.getMap();
testCollection.getSet();
testCollection.getProperties();
System.out.println("<-- 集合测试结束 -->");
}
private static void testAutowire(String p) {
ClassPathXmlApplicationContext context = new ClassPathXmlApplicationContext("java/src/Beans.xml");
Person person = (Person) context.getBean(p);
String cName = person.getChild().getcName();
String cAccount = person.getChild().getcAccount();
System.out.println(p + "==>账号:" + person.getpAccount() + ",用户名:" + person.getpName() + ",子信息:账号:" + cAccount + ",用户名:" + cName);
}
}


 500
500

 被折叠的 条评论
为什么被折叠?
被折叠的 条评论
为什么被折叠?
 到【灌水乐园】发言


