Ubuntu14.04配置opencv2.4.11

1. 先下载OpenCV的源码  https://github.com/Itseez/opencv/tree/2.4


2. 解压到任意目录

    unzip opencv-2.4.zip

3.进入源码目录

    cd opencv-2.4

4. 事先安装一些软件

    sudo apt-get install build-essential cmake libgtk2.0-dev pkg-config Python-dev python-numpy libavcodec-dev libavformat-dev libswscale-dev  


5.  进入cmake

    cd cmake

6. cmake编译生成Makefile,

    cmake -D CMAKE_BUILD_TYPE=RELEASE -D CMAKE_INSTALL_PREFIX=/usr/local ..  

    安装所有的lib文件都会被安装到/usr/local目录


7. 编译,并安装

    make

    sudo make install  

-------------------------------------------------------------------------------------

补充部分:

Now you have to configure OpenCV. First, open the opencv.conf file with the following code:

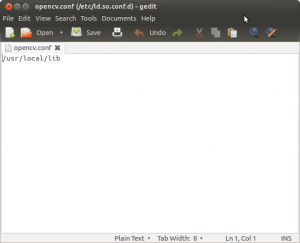
sudo gedit /etc/ld.so.conf.d/opencv.conf

Add the following line at the end of the file(it may be an empty file, that is ok) and then save it:

/usr/local/lib

Run the following code to configure the library:

sudo ldconfig

Now you have to open another file:

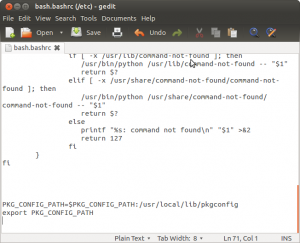
sudo gedit /etc/bash.bashrc

Add these two lines at the end of the file and save it:

PKG_CONFIG_PATH=$PKG_CONFIG_PATH:/usr/local/lib/pkgconfig
export PKG_CONFIG_PATH

Finally, close the console and open a new one, restart the computer or logout and then login again. OpenCV will not work correctly until you do this.


--------------------------------------------------------------------------------------


8. 测试,在某个目录下建立一个test.cpp文件

[cpp]  view plain  copy
  1. #include <cv.h>  
  2. #include <highgui.h>  
  3.   
  4. using namespace cv;  
  5.   
  6. int main(int argc, char* argv[]) {  
  7.     Mat image;  
  8.     image = imread(argv[1], 1);  
  9.   
  10.     if (argc != 2 || !image.data) {  
  11.         printf("No image data\n");  
  12.         return -1;  
  13.     }  
  14.   
  15.     namedWindow("Display Image", CV_WINDOW_AUTOSIZE);  
  16.     imshow("Display Image", image);  
  17.     waitKey(0);  
  18.     return 0;  
  19. }  

9. 同目录,新建一个文件CMakeLists.txt,写入如下内容

[plain]  view plain  copy
  1. project(test)    
  2. find_package(OpenCV REQUIRED)    
  3. add_executable(test test)    
  4. target_link_libraries(test ${OpenCV_LIBS})    
  5. cmake_minimum_required(VERSION 2.8)  

10. 编译成可执行文件

    cmake .

    make


11.  随便弄个jpg图片做个测试,注意要和上面那个可执行文件放在同一目录下面,我这里名字取的是test.jpg。


12.    ./test   test.jpg    

    如果能看到照片,那就表示成功了。

  • 0
    点赞
  • 1
    收藏
    觉得还不错? 一键收藏
  • 0
    评论
要在Ubuntu 14.04配置国内镜像源,可以按照以下步骤进行操作: 1. 打开终端窗口,可以通过按下Ctrl + Alt + T键组合来快速打开。 2. 编辑"/etc/apt/sources.list"文件,可以使用命令行编辑器如nano或vi进行编辑。例如,可以使用以下命令打开并编辑文件: ``` sudo nano /etc/apt/sources.list ``` 3. 备份原始源列表(可选):如果你想保留原始源列表的备份,可以将其复制到另一个文件中。可以使用以下命令来完成备份: ``` sudo cp /etc/apt/sources.list /etc/apt/sources.list.backup ``` 4. 将默认的源替换为国内镜像源。你可以选择使用清华大学、阿里云或其他可靠的镜像站点。以下是一些常用的源的示例: - 清华大学(https://mirrors.tuna.tsinghua.edu.cn/) - 阿里云(http://mirrors.aliyun.com/) 将源地址修改为上述地址中的一个。例如,将源地址修改为清华大学的源: ``` deb https://mirrors.tuna.tsinghua.edu.cn/ubuntu/ trusty main restricted universe multiverse deb https://mirrors.tuna.tsinghua.edu.cn/ubuntu/ trusty-updates main restricted universe multiverse deb https://mirrors.tuna.tsinghua.edu.cn/ubuntu/ trusty-backports main restricted universe multiverse deb https://mirrors.tuna.tsinghua.edu.cn/ubuntu/ trusty-security main restricted universe multiverse ``` 5. 保存并关闭文件。在nano编辑器中,可以按下Ctrl + O,然后按下Enter来保存文件。然后按下Ctrl + X来关闭编辑器。 6. 更新软件包列表。运行以下命令来更新软件包列表以使用新的镜像源: ``` sudo apt-get update ``` 7. 完成!现在你的Ubuntu 14.04系统将使用国内镜像源进行软件包的安装和更新。 请注意,即使配置了国内镜像源,也建议定期运行"sudo apt-get update"命令来更新软件包列表。
评论
添加红包

请填写红包祝福语或标题

红包个数最小为10个

红包金额最低5元

当前余额3.43前往充值 >
需支付:10.00
成就一亿技术人!
领取后你会自动成为博主和红包主的粉丝 规则
hope_wisdom
发出的红包
实付
使用余额支付
点击重新获取
扫码支付
钱包余额 0

抵扣说明:

1.余额是钱包充值的虚拟货币,按照1:1的比例进行支付金额的抵扣。
2.余额无法直接购买下载,可以购买VIP、付费专栏及课程。

余额充值