


安装部署
- 安装NFS和rpc
-
什么是NFS
NFS就是Network File System的缩写,即网络文件系统。他可以通过网络,让不同的机器,不同的操作系统可以共享彼此的文件
要部署NFS服务,必须要安装两个软件包:nfs-utils:NFS主程序,rpcbind:PRC主程序
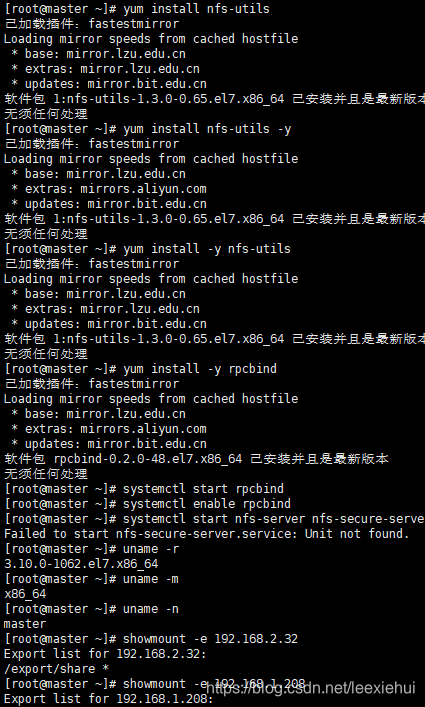
yum install -y nfs-utils
yum install -y rpcbind
- 启动服务和设置开机启动
#先启动rpc
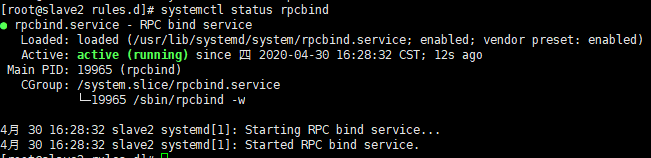
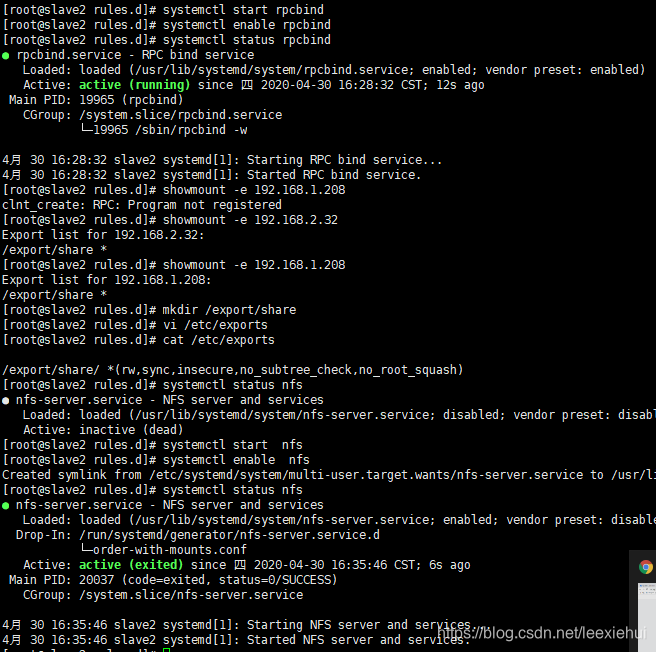
systemctl start rpcbind
systemctl enable rpcbind
#设置安全传输
systemctl start nfs-server nfs-secure-server
systemctl enable nfs-server nfs-secure-server
#设置防火墙放行或关闭防火墙
firewall-cmd --permanent --add-service=nfs
firewall-cmd --reload
showmount -e 遇到防火墙问题
配置NFS服务
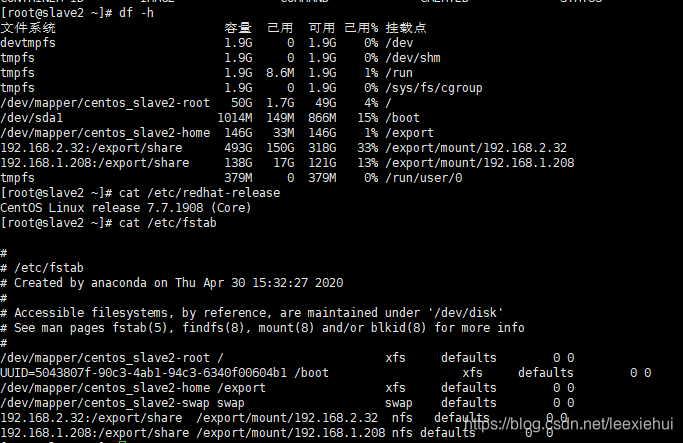
虚拟机CentOS系统版本信息:
[root@nfs-client ~]# cat /etc/redhat-release
CentOS Linux release 7.4.1708 (Core)
[root@nfs-client ~]#
[root@nfs-client ~]# uname -r
3.10.0-693.el7.x86_64
[root@nfs-client ~]#
[root@nfs-client ~]# uname -m
x86_64
[root@nfs-client ~]# uname -n
客户端使用showmount -e 服务器ip 查看共享目录
- 配置共享文件目录
mkdir /mnt/data
vim /etc/exports
#设置所有网段均可访问
/export/share/ *(rw,sync,insecure,no_subtree_check,no_root_squash)
/mnt/data 172.16.10.0/24(rw,sync,all_squash) 172.16.20.0/24(rw,sync,all_squash) 172.16.30.0/24(rw,sync,all_squash) 172.16.40.0/24(rw,sync,all_squash)
NFS权限设置,即/etc/exports文件配置中小括号内的参数
rw:可读写ro:只读sync:同步写入async:异步写入root_squash:对于访问NFS server共享目录的用户,如果是root的话会被压缩成为nobody用户身份all_squash:不管访问nfs server共享目录的用户身份如何 包括root,它的权限都将被压缩成为匿名用户,同时他们的udi和gid都会变成nobody或nfsnobody账户的uid,gid。在多个nfs客户端同时读写nfs server数据时,这个参数很有用,可以确保大家写入的数据的权限是一样的。但不同系统有可能匿名用户的uid,gid不同。因为此处我们需要服务端和客户端之间的用户是一样的。比如说:服务端指定匿名用户的UID为2000,那么客户端也一定要存在2000这个账号才可以anonuid:anonuid就是匿名的uid,说明客户端以什么权限来访问服务端anongid:同anongid,就是把uid换成gid
- 客户端远程挂载
showmount -e ip
RPC服务启动之后再启动NFS服务
默认未启动,要启动NFS服务并设置为开机自启
systemctl start nfs
systemctl enable nfs-server.service
查看NFS的状态
systemctl status nfs
mount -t nfs -o vers=3,proto=tcp,nolock,sync,rsize=1048576,wsize=1048576 172.16.40.102:/mnt/data /home/data
挂载nfs
mount -t nfs -o nolock 192.168.2.36:/export/share/ /export/docker/docker/volumes/data1/192.168.2.36
- 设置开机自动挂载
Vim /etc/fstab
172.16.10.14:/mnt/data /home/data nfs defaults,_rnetdev 1 1
mount -t nfs -o nolock 192.168.1.208:/export/share/ /export/mount/192.168.1.208

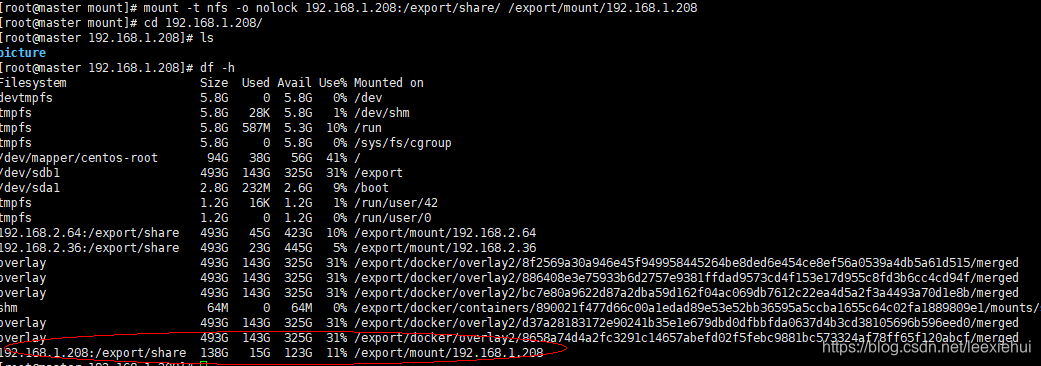
- 服务端查看服务运行
[root@mypie ~]# systemctl status nfs
设置开机自动挂载:
开机自动挂载:
如果服务端或客户端的服务器重启之后需要手动挂载,我们可以加入到开机自动挂载
在客户端/etc/fstab里添加
192.168.163.128:/nfsdir /nfsdir nfs defaults,_rnetdev 1 1
备注:第1个1表示备份文件系统,第2个1表示从/分区的顺序开始fsck磁盘检测,0表示不检测。
_rnetdev 表示主机无法挂载直接跳过,避免无法挂载主机无法启动
此处,CentOS 7中,在fstab中添加了自动挂载NFS的配置,但是系统启动后没有成功挂载的解决办法是:
1.先确保CentOS 7中的rc.local系统启动时可以自动运行
->需要确保该文件有可执行的权限
->/etc/rc.local是个软链接,所链接的实际文件是/ect/rc.d/rc.local,CentOS 7中默认没有执行权限
->所以此处要去给/etc/rc.d/rc.local添加可执行权限:
chmod +x /etc/rc.d/rc.local
2.然后再给/etc/rc.local中最后添加一行:
mount -a
如此,系统启动后,就会运行/etc/rc.local,然后就会执行到
mount -a
即执行fstab中的所有项,最终执行到NFS的mount。
参考:https://www.crifan.com/centos_7_fstab_add_auto_mount_but_fail_to_run_nfs/
https://www.crifan.com/remote_ubuntu_server_setup_nfs_server_for_other_access_files/
查看启动日志 /var/log/boot.log
centos 7 版本加入_rnetdev不生效
离线安装:
安装包:链接: https://pan.baidu.com/s/1dv95Wfc9wLQaop_xDIBteg 提取码: d1pf
离线安装nfs
将安装目录下的rpm文件执行以下命令:
rpm -Uvh *.rpm --nodeps --force


 2486
2486


 被折叠的 条评论
为什么被折叠?
被折叠的 条评论
为什么被折叠?
 到【灌水乐园】发言


