


一、前言
Firmadyne是一款自动化分析嵌入式Linux系统安全的开源软件,由卡内基梅隆大学的Daming D. Chen开发完成的。
它支持批量检测,整个系统包括固件的爬取、root文件系统的提取、QEMU模拟执行以及漏洞的挖掘。
Firmware Analysis Toolkit固件分析工具包(以下简称为 FAT)基于 Firmadyne 并进行了一些更改。
FAT 是在 Python 3 中开发的。但是,您需要同时安装 Python 3 和 Python 2,因为 Firmadyne 的部分及其依赖项使用 Python 2。强烈建议在虚拟机中安装 FAT。
实验环境及需要的工具:
1、系统:Ubuntu 18.04.52、工具:2.1、Firmadyne项目地址:GitHub - firmadyne/firmadyne: Platform for emulation and dynamic analysis of Linux-based firmwareREADME.md中有详细的配置和安装步骤2.2、Firmware Analysis Toolkit该工具集包含了binwalk、Firmadyne等必须的工具。这里我们只需要克隆该仓库到本地即可。
要求环境python默认对应python3版本
二、安装Firmadyne
2.1 克隆Firmware Analysis Toolkit工具集仓库
# 1. 安装依赖
sudo apt-get install busybox-static fakeroot git dmsetup kpartx netcat-openbsd nmap python-psycopg2 python3-psycopg2 snmp uml-utilities util-linux vlan
# 2. clone
cd /home
git clone --recursive https://github.com/firmadyne/firmadyne.git2.2、Extractor--安装binwalk
提取器依赖于 binwalk 工具,因此我们需要安装它及其依赖项。
# 1. 安装依赖和binwalk
git clone https://github.com/ReFirmLabs/binwalk.git
cd binwalk
sudo ./deps.sh
sudo python ./setup.py install

# 2. 对于 python2.x,还需要安装以下的库
sudo -H pip install git+https://github.com/ahupp/python-magic
sudo -H pip install git+https://github.com/sviehb/jefferson

# 3. 测试是否安装成功
$ binwalk
Binwalk v2.1.2-c036535
Craig Heffner, ReFirmLabs
https://github.com/ReFirmLabs/binwalk

Usage: binwalk [OPTIONS] [FILE1] [FILE2] [FILE3] ...

Disassembly Scan Options:
    -Y, --disasm                 Identify the CPU architecture of a file using the capstone disassembler

... ...
    -s, --status=<int>           Enable the status server on the specified port
2.3、安装配置postgresql数据库
sudo apt-get install postgresql
# 用户的密码设置为:firmadyne
sudo -u postgres createuser -P firmadyne
sudo -u postgres createdb -O firmadyne firmware
# 注意这里的数据库文件是在firmadyne/目录下,也就是该命令要在根目录firmadyne/目录下执行
sudo -u postgres psql -d firmware < /home/firmadyne/database/schema
sudo service postgresql start
sudo service postgresql status2.4、安装Firmadyne
2.4.1、要为所有组件下载我们预先构建的二进制文件
sh ./download.sh
2.4.2、进入Firmadyne目录,然后打开firmadyne.config,修改 FIRMWARE_DIR的路径为当前Firmadyne目录的绝对路径
vi /home/firmadyne/firmadyne.config
# 以下为firmadyne.config中的内容
# uncomment and specify full path to FIRMADYNE repository
FIRMWARE_DIR=/home/firmadyne/         # 重点修改
# specify full paths to other directories
BINARY_DIR=${FIRMWARE_DIR}/binaries/
TARBALL_DIR=${FIRMWARE_DIR}/images/
SCRATCH_DIR=${FIRMWARE_DIR}/scratch/
SCRIPT_DIR=${FIRMWARE_DIR}/scripts/
# functions to safely compute other paths
... ...
2.5、安装qemu
QEMU是一套由法布里斯·贝拉(Fabrice Bellard)所编写的以GPL许可证分发源码的模拟处理器,在GNU/Linux平台上使用广泛。
两种安装方法: apt list --installed | grep qemu 或者 qemu-img -V # 查看版本
-
直接通过apt-get安装:sudo apt-get install qemu-system-arm qemu-system-mips qemu-system-x86 qemu-utils
-
编译安装
git clone git://git.qemu.org/qemu.git
cd qemu
git submodule init
git submodule update --recursive
apt install libglib2.0 libglib2.0-dev
apt install autoconf automake libtool
./configure
make
make install三、安装FAT(firmware-analysis-toolkit)
3.1、clone并执行./setup.sh
git clone https://github.com/attify/firmware-analysis-toolkit
cd firmware-analysis-toolkit
./setup.sh3.2、编辑fat.config
安装完成后,编辑fat.config文件并提供sudo密码。 Firmadyne 的某些操作需要 sudo 权限。 提供 sudo 密码以自动执行该过程。

3.3、安装qemu
cd qemu-builds
wget -O qemu-system-static-2.5.0.zip "https://github.com/attify/firmware-analysis-toolkit/files/4244529/qemu-system-static-2.5.0.zip"
unzip -qq qemu-system-static-2.5.0.zip && rm qemu-system-static-2.5.0.zip
cd ..
四、测试运行FAT
4.1、运行FAT
$ ./fat.py <firmware file>
-
提供固件文件名作为脚本的参数。
-
该脚本将显示分配给创建的网络接口的 IP 地址。 记下来。
-
最后,它会说运行固件。 按 ENTER 并等待固件启动。 Ping 上一步中显示的 IP,或在浏览器中打开。
要删除所有分析的固件映像,请运行:$ ./reset.py
4.2、下载要模拟的路由器固件
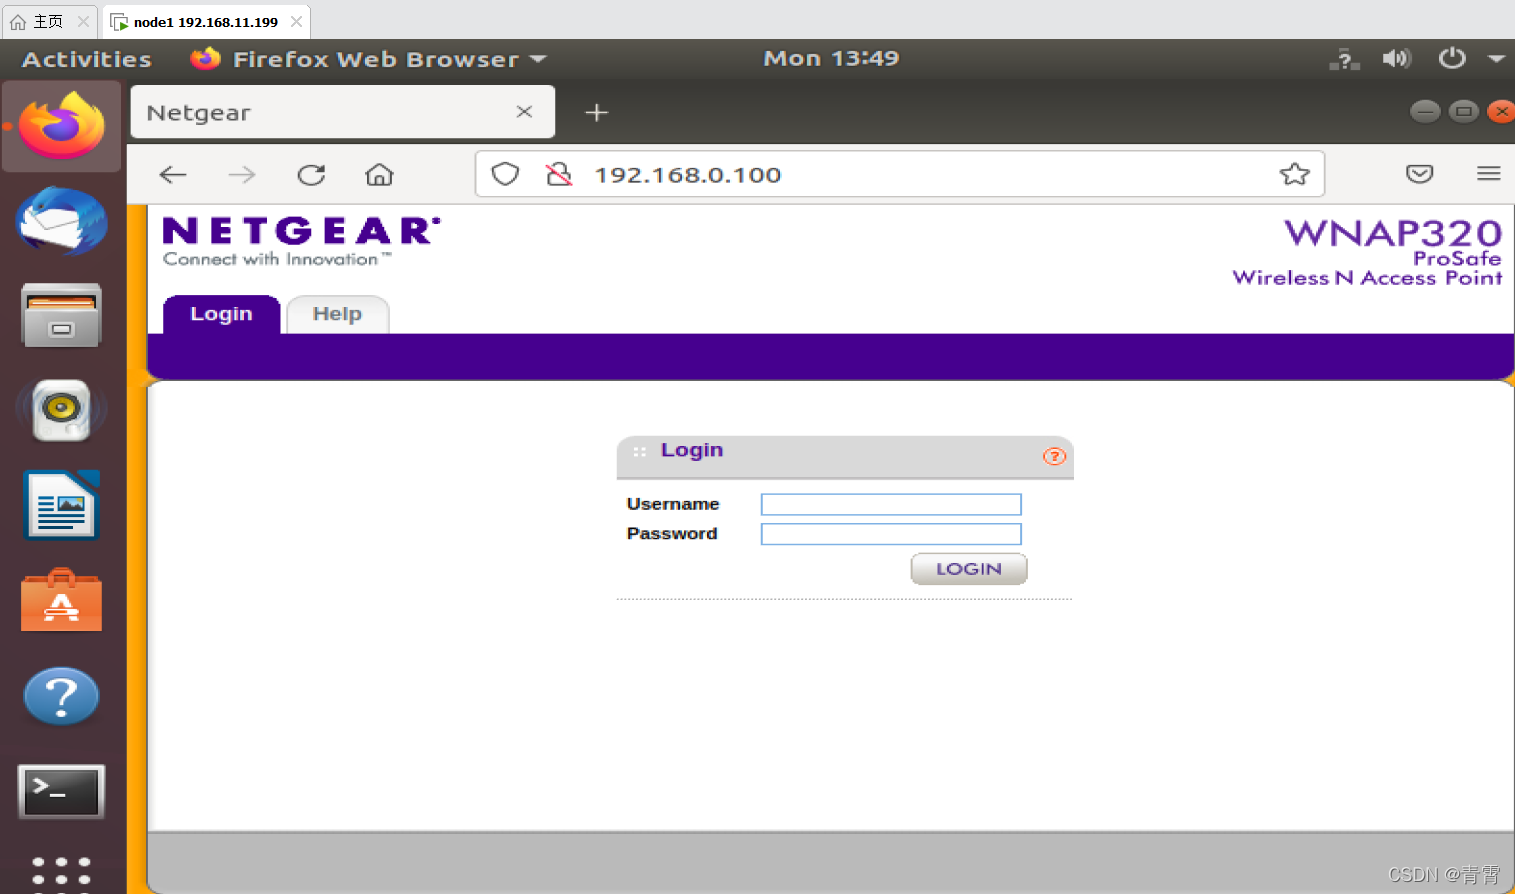
要模拟的路由器为:WNAP320
在WNAP320 | Access Point | NETGEAR Support中下载固件文件,并放在/home/firmware-analysis-toolkit/目录下
4.3、测试运行
root@node1:/home/firmware-analysis-toolkit# ./fat.py /home/firmware-analysis-toolkit/'WNAP320 Firmware Version 2.0.3.zip'
firmadyne_path0:/home/firmadyne
sudo_pass:firmadyne
                               __           _
                              / _|         | |
                             | |_    __ _  | |_
                             |  _|  / _` | | __|
                             | |   | (_| | | |_
                             |_|    \__,_|  \__|
                Welcome to the Firmware Analysis Toolkit - v0.3
    Offensive IoT Exploitation Training http://bit.do/offensiveiotexploitation
                  By Attify - https://attify.com  | @attifyme
args.firm_path:/home/firmware-analysis-toolkit/WNAP320 Firmware Version 2.0.3.zip
[+] Firmware: WNAP320 Firmware Version 2.0.3.zip
[+] Extracting the firmware...
firmadyne_path:/home/firmadyne
extractor_cmd:/home/firmadyne/sources/extractor/extractor.py, extractor_args:['-np', '-nk', '/home/firmware-analysis-toolkit/WNAP320 Firmware Version 2.0.3.zip', '/home/firmadyne/images']
tag:WNAP320 Firmware Version 2.0.3.zip_51eddc7046d77a752ca4b39fbda50aff
image_tgz:/home/firmadyne/images/WNAP320 Firmware Version 2.0.3.zip_51eddc7046d77a752ca4b39fbda50aff.tar.gz
[+] Image ID: 7
[+] Identifying architecture...
[+] Architecture: mipseb
[+] Building QEMU disk image...
[+] Setting up the network connection, please standby...
[+] Network interfaces: [('brtrunk', '192.168.0.100')]
[+] All set! Press ENTER to run the firmware... #空格键
[+] When running, press Ctrl + A X to terminate qemu
[+] Command line: /home/firmadyne/scratch/7/run.sh
Creating TAP device tap7_0...
Set 'tap7_0' persistent and owned by uid 0
Bringing up TAP device...
Adding route to 192.168.0.100...
Starting firmware emulation... use Ctrl-a + x to exit
firmadyne
.........................................................
System initilization is ..  [DONE...]
Welcome to SDK.
Have a lot of fun...
netgear123456 login: [   25.872000] brtrunk: port 1(eth0) entering forwarding state
[   31.376000] eth0: no IPv6 routers present
[ 31.784000] brtrunk: no IPv6 routers present从[+] Network interfaces : [('brtrunk', '192.168.0.100')]可以看到,启动了一个服务,可以通过http://192.168.0.100/访问
中间过程需要按Enter键运行该固件,等运行完了以后就可以从浏览器访问了 admin/password:
五、制作firmware-analysis-toolkit镜像
GitHub - leiwuhen92/firmware-analysis-toolkit_docker: 制作firmware-analysis-toolkit的docker镜像,用于固件模拟与仿真
docker pull 1162886013/simulation:1.0
docker run -it --rm --privileged -p 8066:80 -v /dev:/dev -v /home/firmware_run/input:/root/input 1162886013/simulation:1.0 ./fat.py /root/input/"WNAP320 Firmware Version 2.0.3.zip"
端口映射以便可以访问Netgear 固件的网页:
在docker容器内(IP:172.17.0.2)添加端口映射
```shell
root@30f4fcce93c7:~/firmware-analysis-toolkit# iptables -t nat -A POSTROUTING -j MASQUERADE
root@30f4fcce93c7:~/firmware-analysis-toolkit# iptables -t nat -A PREROUTING -d 172.17.0.2 -p tcp --dport 80 -j DNAT --to-destination 192.168.0.100:80
root@30f4fcce93c7:~/firmware-analysis-toolkit# iptables -t nat -A POSTROUTING -d 192.168.0.100 -p tcp --dport 80 -j SNAT --to 172.17.0.2

web访问地址:http://宿主机hostip:8066    # admin/password
六、参考
https://github.com/firmadyne/firmadyne 安装可行
https://github.com/attify/firmware-analysis-toolkit
https://github.com/leiwuhen92/firmware-analysis-toolkit_docker


 1万+
1万+

 被折叠的 条评论
为什么被折叠?
被折叠的 条评论
为什么被折叠?
 到【灌水乐园】发言


