


0. 开始之前
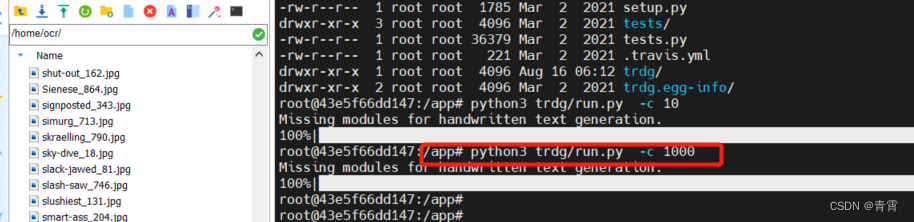
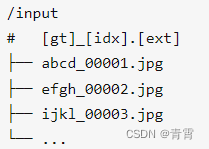
1. 创建训练数据
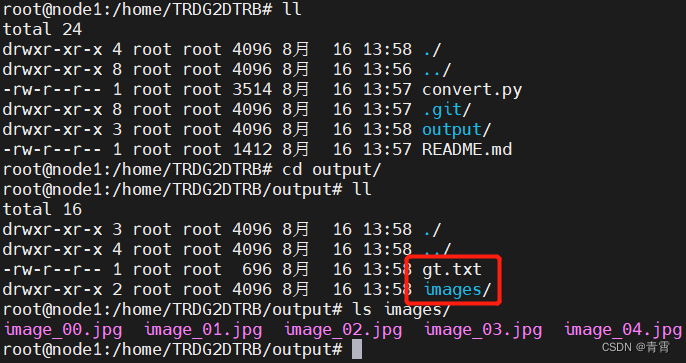
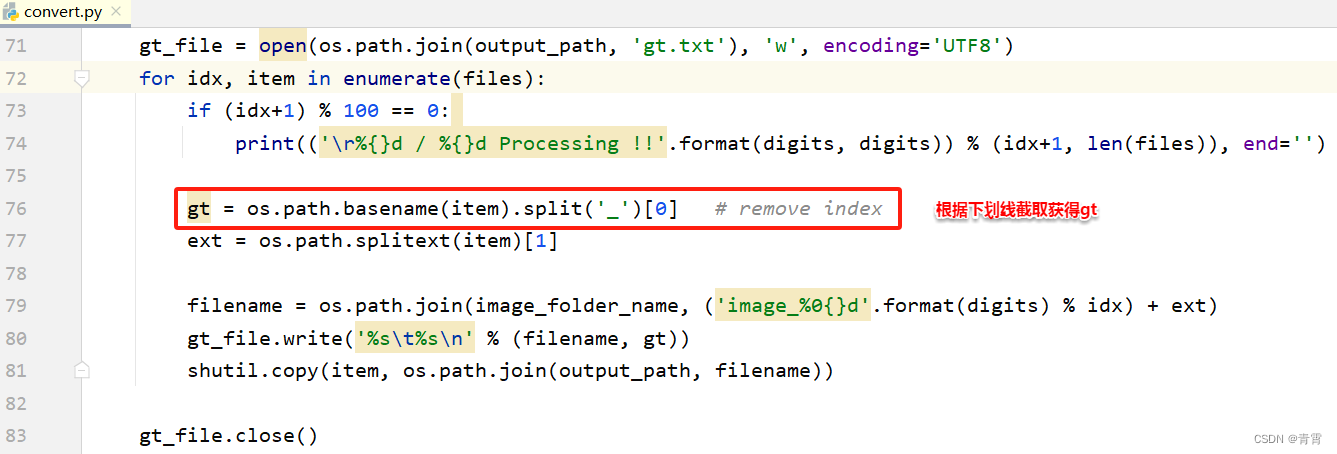
2. 学习数据转换
2.1、项目安装
$ git clone https://github.com/DaveLogs/TRDG2DTRB.git2.2、数据转换
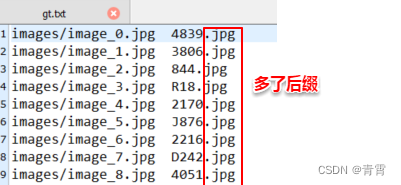
python3 convert.py --input_path /home/ocr/ --output_path ./output输出:


3. 训练模型
3.1、项目安装
# 下载源代码
$ git clone https://github.com/clovaai/deep-text-recognition-benchmark.git

# 搭建开发环境
$ pip3 install torch torchvision
$ pip3 install lmdb pillow nltk natsort
$ pip3 install fire
3.2、准备阶段
3.2.1、训练数据

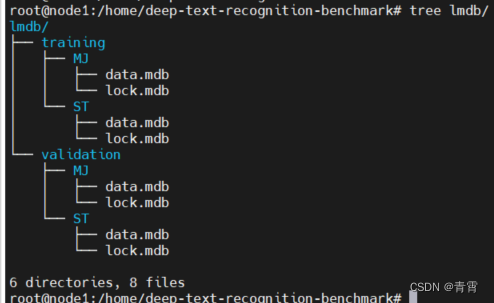
3.2.2、将训练数据转换为lmdb格式
# deep-text-recognition-benchmark 从项目根运行
(venv) $ python3 create_lmdb_dataset.py \
        --inputPath /home/TRDG2DTRB/output/ \
        --gtFile /home/TRDG2DTRB/output/gt.txt \
        --outputPath result/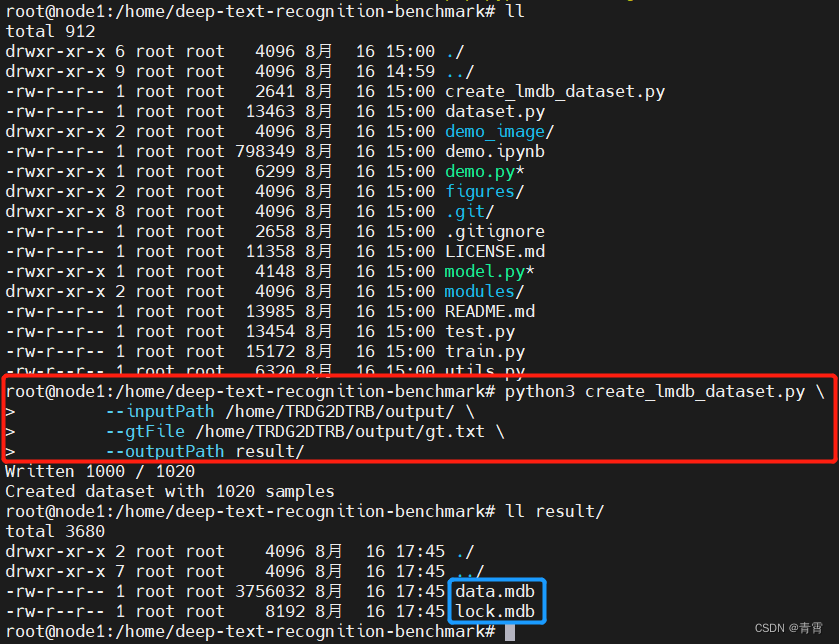
3.2.3、准备预训练模型
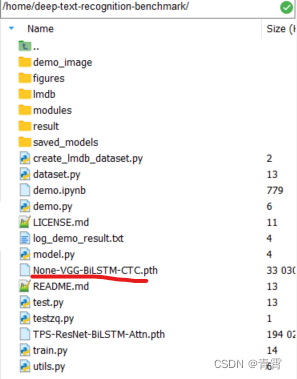
3.2.4、项目和预模型正常运行的确认

python3 demo.py \
--Transformation None \
--FeatureExtraction VGG \
--SequenceModeling BiLSTM \
--Prediction CTC \
--image_folder demo_image/ \
--saved_model None-VGG-BiLSTM-CTC.pth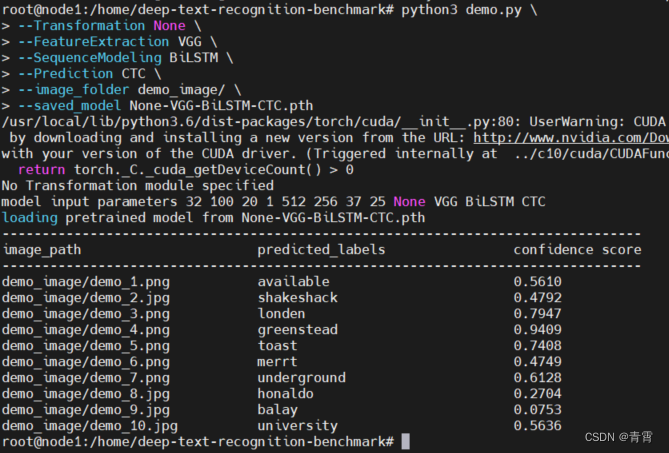
3.3、训练模型
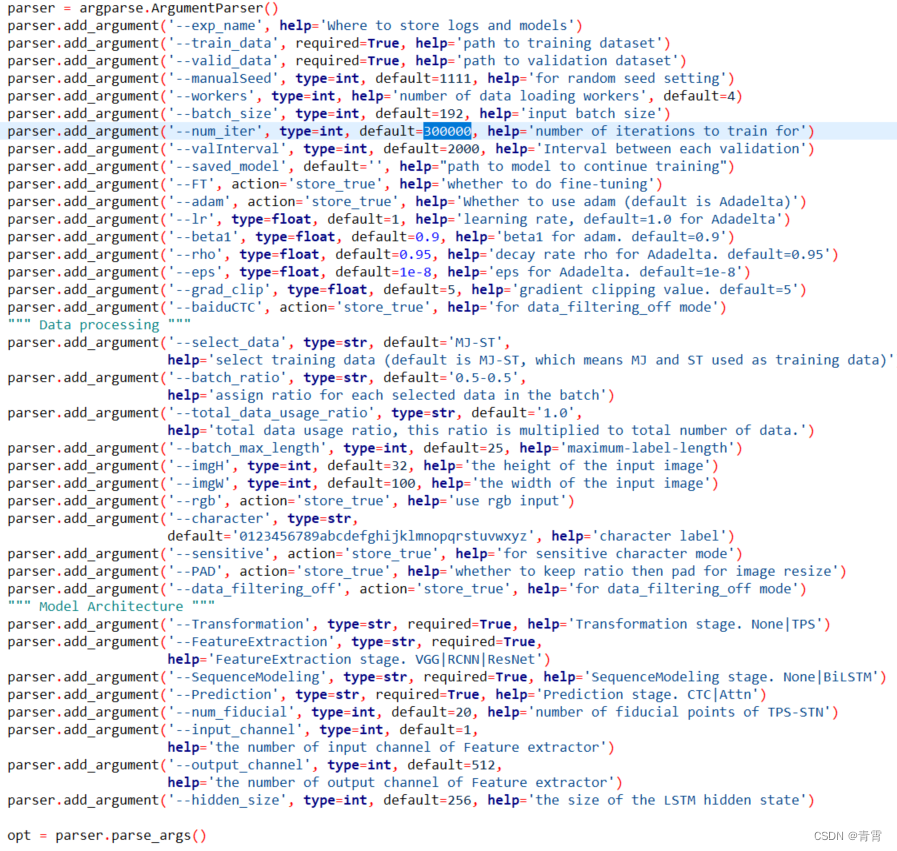
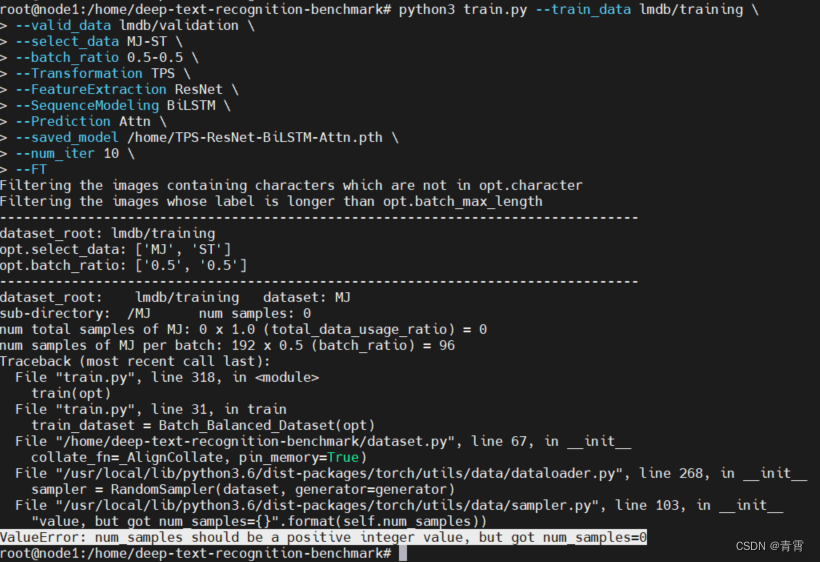
python3 train.py --train_data lmdb/training \
--valid_data lmdb/validation \
--select_data MJ-ST \
--batch_ratio 0.5-0.5 \
--Transformation None \
--FeatureExtraction VGG \
--SequenceModeling BiLSTM \
--Prediction CTC \
--saved_model None-VGG-BiLSTM-CTC.pth \
--num_iter 2000 \
--valInterval 20 \
--FT
上述命令语法的简要说明如下。

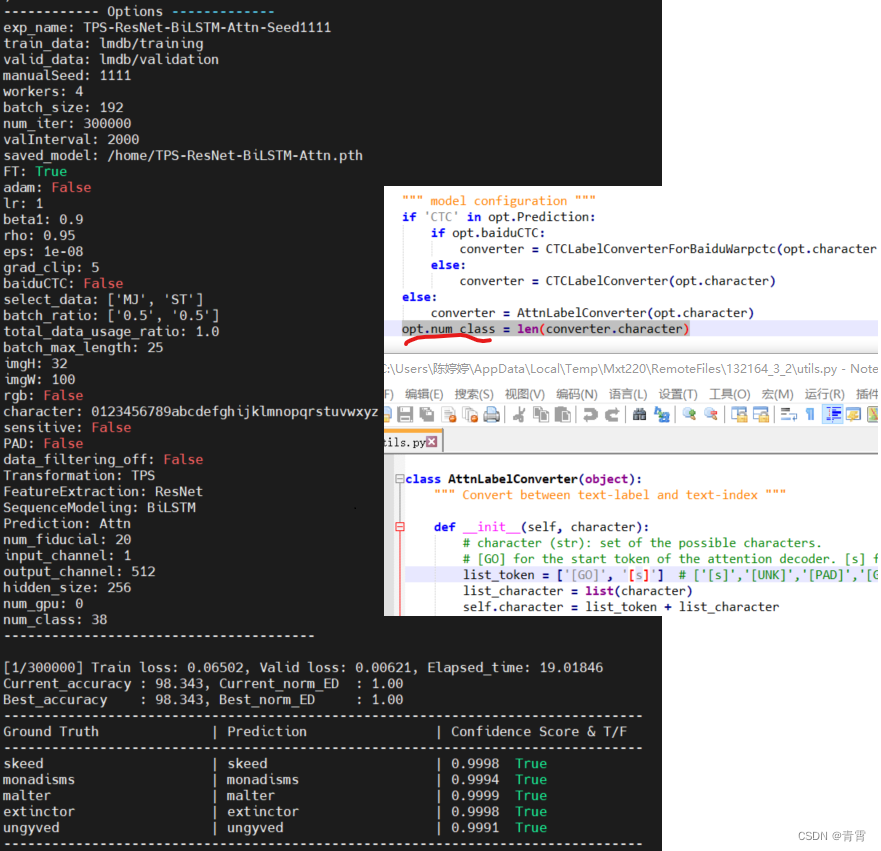
3.4、测试模型
# 测试项目中包含的演示图像
python3 demo.py \
--Transformation None \
--FeatureExtraction VGG \
--SequenceModeling BiLSTM \
--Prediction CTC \
--image_folder demo_image/ \
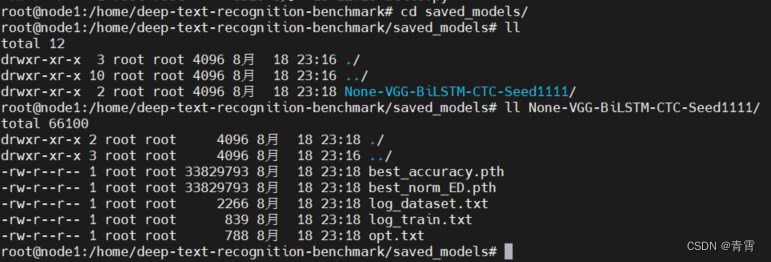
--saved_model ./saved_models/None-VGG-BiLSTM-CTC-Seed1111/best_accuracy.pth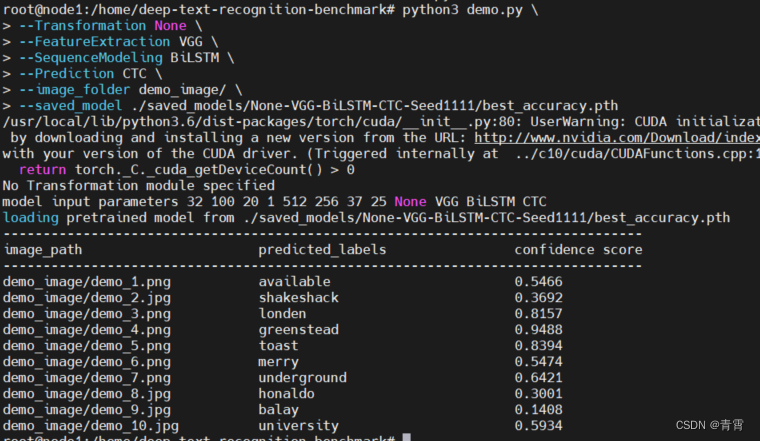
4. 使用模型
4.1、用户模型环境配置
-
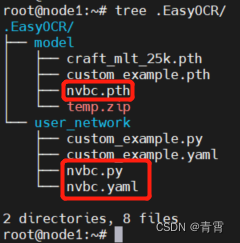
复制3.3节生成的用户模型./saved_models/None-VGG-BiLSTM-CTC-Seed1111/best_accuracy.pth到/root/.EasyOCR/model/,改名为nvbc.pth;
-
在/root/.EasyOCR/user_network/下建立用户识别模型网络模块nvbc.py,用户识别配置模块nvbc.yaml。
4.1.1、创建nvbc.yaml
network_params:
  input_channel: 1
  output_channel: 512
  hidden_size: 256
imgH: 32
lang_list:
         - 'nvbc'   # 语言代码   对应与/usr/local/lib/python3.6/dist-packages/easyocr/character/nvbc_char.txt,没有则创建
character_list: 0123456789abcdefghijklmnopqrstuvwxyz   # 学习数据类
4.1.2、创建nvbc.py
import torch.nn as nn

class Model(nn.Module):
    def __init__(self, input_channel, output_channel, hidden_size, num_class):
        super(Model, self).__init__()
        """ FeatureExtraction """
        self.FeatureExtraction = VGG_FeatureExtractor(input_channel, output_channel)
        self.FeatureExtraction_output = output_channel
        self.AdaptiveAvgPool = nn.AdaptiveAvgPool2d((None, 1))

        """ Sequence modeling"""
        self.SequenceModeling = nn.Sequential(
            BidirectionalLSTM(self.FeatureExtraction_output, hidden_size, hidden_size),
            BidirectionalLSTM(hidden_size, hidden_size, hidden_size))
        self.SequenceModeling_output = hidden_size

        """ Prediction """
        self.Prediction = nn.Linear(self.SequenceModeling_output, num_class)

    def forward(self, input, text):
        """ Feature extraction stage """
        visual_feature = self.FeatureExtraction(input)
        visual_feature = self.AdaptiveAvgPool(visual_feature.permute(0, 3, 1, 2))
        visual_feature = visual_feature.squeeze(3)

        """ Sequence modeling stage """
        contextual_feature = self.SequenceModeling(visual_feature)

        """ Prediction stage """
        prediction = self.Prediction(contextual_feature.contiguous())

        return prediction

class BidirectionalLSTM(nn.Module):
    def __init__(self, input_size, hidden_size, output_size):
        super(BidirectionalLSTM, self).__init__()
        self.rnn = nn.LSTM(input_size, hidden_size, bidirectional=True, batch_first=True)
        self.linear = nn.Linear(hidden_size * 2, output_size)

    def forward(self, input):
        """
        input : visual feature [batch_size x T x input_size]
        output : contextual feature [batch_size x T x output_size]
        """
        try: # multi gpu needs this
            self.rnn.flatten_parameters()
        except: # quantization doesn't work with this
            pass
        recurrent, _ = self.rnn(input)  # batch_size x T x input_size -> batch_size x T x (2*hidden_size)
        output = self.linear(recurrent)  # batch_size x T x output_size
        return output


class VGG_FeatureExtractor(nn.Module):
    def __init__(self, input_channel, output_channel=256):
        super(VGG_FeatureExtractor, self).__init__()
        self.output_channel = [int(output_channel / 8), int(output_channel / 4),
                               int(output_channel / 2), output_channel]
        self.ConvNet = nn.Sequential(
            nn.Conv2d(input_channel, self.output_channel[0], 3, 1, 1), nn.ReLU(True),
            nn.MaxPool2d(2, 2),
            nn.Conv2d(self.output_channel[0], self.output_channel[1], 3, 1, 1), nn.ReLU(True),
            nn.MaxPool2d(2, 2),
            nn.Conv2d(self.output_channel[1], self.output_channel[2], 3, 1, 1), nn.ReLU(True),
            nn.Conv2d(self.output_channel[2], self.output_channel[2], 3, 1, 1), nn.ReLU(True),
            nn.MaxPool2d((2, 1), (2, 1)),
            nn.Conv2d(self.output_channel[2], self.output_channel[3], 3, 1, 1, bias=False),
            nn.BatchNorm2d(self.output_channel[3]), nn.ReLU(True),
            nn.Conv2d(self.output_channel[3], self.output_channel[3], 3, 1, 1, bias=False),
            nn.BatchNorm2d(self.output_channel[3]), nn.ReLU(True),
            nn.MaxPool2d((2, 1), (2, 1)),
            nn.Conv2d(self.output_channel[3], self.output_channel[3], 2, 1, 0), nn.ReLU(True))

    def forward(self, input):
return self.ConvNet(input)4.2、EasyOCR 运行参数
from easyocr.easyocr import *
# # GPU 环境
# os.environ['CUDA_VISIBLE_DEVICES'] = '0,1'
def get_files(path):
files = [f for f in os.listdir(path) if not f.startswith('.')] # skip hidden file
files.sort()
abspath = os.path.abspath(path)
file_list = []
for file in files:
file_path = os.path.join(abspath, file)
file_list.append(file_path)
return file_list, len(file_list)
if __name__ == '__main__':
# Using custom model
reader = Reader(['nvbc'], gpu=False, # 语言存储在/usr/local/lib/python3.6/dist-packages/easyocr/character/nvbc_char.txt
model_storage_directory='/root/.EasyOCR/model',
user_network_directory='/root/.EasyOCR/user_network',
recog_network='nvbc')
files, count = get_files(path='/home/deep-text-recognition-benchmark/demo_image/')
for idx, file in enumerate(files):
filename = os.path.basename(file)
result = reader.readtext(file)
# ./easyocr/utils.py 733 lines
# result[0]: bbox
# result[1]: string
# result[2]: confidence
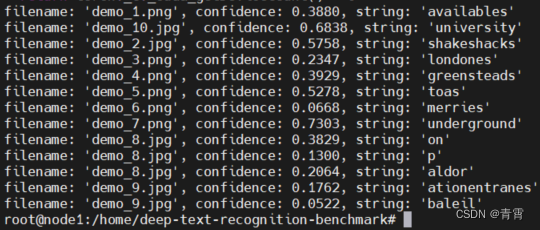
for (bbox, string, confidence) in result:
print("filename: '%s', confidence: %.4f, string: '%s'" % (filename, confidence, string))使用用户模型运行: python3 testzq.py,结果如下:
五、参考
【扫盲】RCNN+CTC字符训练识别_哔哩哔哩_bilibili欢迎关注公众号:小鸡炖技术 ,后台回复:“RCNN+CTC”获取本教程素材~~~, 视频播放量 3161、弹幕量 0、点赞数 38、投硬币枚数 34、收藏人数 103、转发人数 5, 视频作者 小鸡炖技术, 作者简介 公众号:小鸡炖技术,相关视频:【陈巍学基因】视频30:CellSearch检测CTC,见微知著的查癌方法——CTC循环肿瘤细胞检测,字符识别,时间序列LSTM深度学习模型代码讲解,1.1Faster RCNN理论合集,6、字符分割,如何读懂PyTorch深度学习代码-第一个深度学习实例-手写字符识别代码解析,【扫盲】DarkNet下YoloV4训练,阿丘科技深度学习AIDI讲解之字符识别,美国铁路CTC调度集中系统 - BNSF铁路官方科普【搬运】![]() https://www.bilibili.com/video/BV1JA411t7H9 deep-text-recognition-benchmark
https://www.bilibili.com/video/BV1JA411t7H9 deep-text-recognition-benchmark![]() https://link.zhihu.com/?target=https%3A//github.com/clovaai/deep-text-recognition-benchmark
https://link.zhihu.com/?target=https%3A//github.com/clovaai/deep-text-recognition-benchmark
PyTorch加载模型出现Error(s) in loading state_dict() for Model问题,Unexpected key(s) in state_dict: “...“_行走的笔记的博客-CSDN博客问题:模型在训练过程中可以正常训练,但是测试的时候出现了错误,如下所示:RuntimeError: Error(s) in loading state_dict for ModuleList:Missing key(s) in state_dict: "0.weight", "1.weight", "1.bias", "1.running_mean", "1.running_var", Unexpected key(s) in state_dict: "conv1.weight", "bn1.wehttps://blog.csdn.net/qq_45777045/article/details/109481993 Ubuntu 18.04 安装 NVIDIA 显卡驱动 - 知乎我们今天的目标是在 Ubuntu 18.04 上安装 NVIDIA 显卡驱动,请注意,你的显卡一定要是 NVIDIA 的显卡才能按照这篇文章的方法安装。我将给大家介绍三种安装方法,建议使用第一种方法安装。 先来说说带有 NVIDIA 独…
![]() https://zhuanlan.zhihu.com/p/59618999
https://zhuanlan.zhihu.com/p/59618999


 597
597


 被折叠的 条评论
为什么被折叠?
被折叠的 条评论
为什么被折叠?
 到【灌水乐园】发言


