


服务器基础搭建最全教程
CentOS 7.0编译安装 Nginx1.6.0 + MySQL5.6.19 + PHP5.6.30
关于服务器的相关搭建配置,以及CentOS 的编译安装网上教程非常多,我这里总结了一下,囊括了所有安装步骤以及大部分的出错问题,图文并茂展示,希望一些初级同行可以顺利编译安装,你可以反复操作直至熟练应用。当然了,你首先要掌握基础的Linux命令,不懂的童鞋可以点击这里查看:
相关的硬件条件我不多叙述了,一切准备好后,我们开始相关编译安装步骤

一、安装Linux系统
这里不多讲了,提2点,其他的步骤可以自行百度。

按 tab 键,按照下图输入,查看安装文件路径:

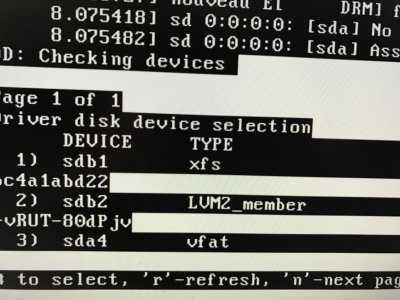
重启计算机,U盘启动,到下图步骤时,按图输入:

回车,开始安装。
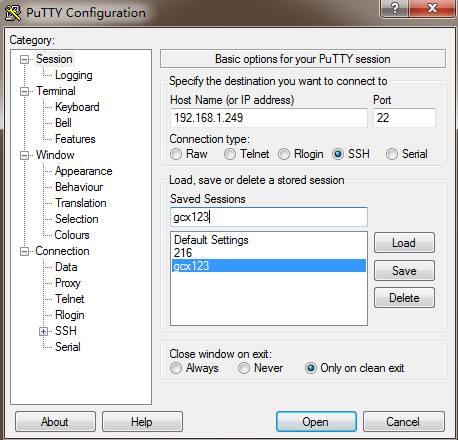
全部安装后,你先要去下载一个Putty,链接: http://www.chiark.greenend.org.uk/~sgtatham/putty/latest.html
然后配置,调整好你自己喜欢的字体大小颜色,然后Open:
二、更改配色方案
这里我有一个配色方案,你也可以根据自己的喜好配置,若无需改变,直接跳过即可。
vim etc/vimrc #进入修改配色方案
先将原先的内容全部删除,然后把下面的内容复制进去,切记复制完整。
全选删除方法:ctrl+v 再按Caps Lock 键 再按v ,然后一直往下拉,选择,最后按delete删除
##################################################################################################
if v:lang =~ "utf8$" || v:lang =~ "UTF-8$"
set fileencodings=ucs-bom,utf-8,latin1
endif
set nocompatible " Use Vim defaults (much better!)
set bs=indent,eol,start " allow backspacing over everything in insert mode
"set ai " always set autoindenting on
"set backup " keep a backup file
set viminfo='20,\"50 " read/write a .viminfo file, don't store more
" than 50 lines of registers
set history=50 " keep 50 lines of command line history
set ruler " show the cursor position all the time
" Only do this part when compiled with support for autocommands
if has("autocmd")
augroup redhat
autocmd!
" In text files, always limit the width of text to 78 characters
" autocmd BufRead *.txt set tw=78
" When editing a file, always jump to the last cursor position
autocmd BufReadPost *
\ if line("'\"") > 0 && line ("'\"") <= line("$") |
\ exe "normal! g'\"" |
\ endif
" don't write swapfile on most commonly used directories for NFS mounts or USB sticks
autocmd BufNewFile,BufReadPre /media/*,/run/media/*,/mnt/* set directory=~/tmp,/var/tmp,/tmp
" start with spec file template
autocmd BufNewFile *.spec 0r /usr/share/vim/vimfiles/template.spec
augroup END
endif
if has("cscope") && filereadable("/usr/bin/cscope")
set csprg=/usr/bin/cscope
set csto=0
set cst
set nocsverb
" add any database in current directory
if filereadable("cscope.out")
cs add $PWD/cscope.out
" else add database pointed to by environment
elseif $CSCOPE_DB != ""
cs add $CSCOPE_DB
endif
set csverb
endif
" Switch syntax highlighting on, when the terminal has colors
" Also switch on highlighting the last used search pattern.
if &t_Co > 2 || has("gui_running")
syntax on
set hlsearch
endif
filetype plugin on
if &term=="xterm"
set t_Co=8
set t_Sb=^[[4%dm
set t_Sf=^[[3%dm
endif
" Don't wake up system with blinking cursor:
" http://www.linuxpowertop.org/known.php
let &guicursor = &guicursor . ",a:blinkon0"
set ts=4 sw=4 et
set cindent
set smartindent
set number
set autoindent
autocmd FileType python set omnifunc=pythoncomplete#Complete
autocmd FileType javascript set omnifunc=javascriptcomplete#CompleteJS
autocmd FileType html set omnifunc=htmlcomplete#CompleteTags
autocmd FileType css set omnifunc=csscomplete#CompleteCSS
autocmd FileType xml set omnifunc=xmlcomplete#CompleteTags
autocmd FileType php set omnifunc=phpcomplete#CompletePHP
autocmd FileType c set omnifunc=ccomplete#Complete
let g:closetag_html_style=1
autocmd FileType python set expandtab
if !exists("b:unaryTagsStack") || exists("b:closetag_html_style")
if &filetype == "html" || exists("b:closetag_html_style")
let b:unaryTagsStacktack="area base br dd dt hr img input link meta param"
else " for xml and xsl
let b:unaryTagsStack=""
endif
endif
if !exists("b:unaryTagsStack")
let b:unaryTagsStack=""
endif
colorscheme darkblue
au BufNewFile,BufRead *.html colorscheme default
au BufNewFile,BufRead *.shtml colorscheme default
##################################################################################################
:wq! #保存退出
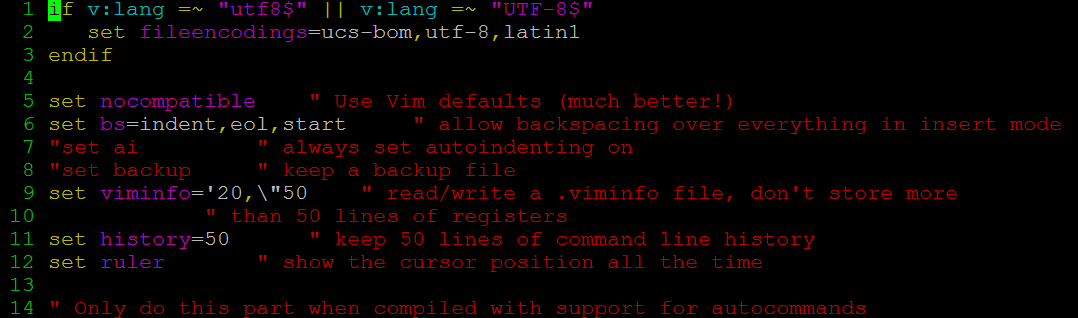
vim etc/vimrc #再次进入
你会发现配色已经改变:
二、配置防火墙
CentOS 7.0 默认使用的是 firewall 作为防火墙,这里改为 iptables 防火墙。1、关闭firewall:
systemctl stop firewalld.service #停止firewall
systemctl disable firewalld.service #禁止firewall开机启动
2、安装iptables防火墙
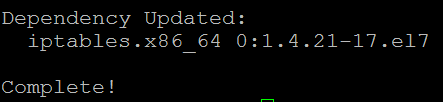
yum install iptables-services #安装
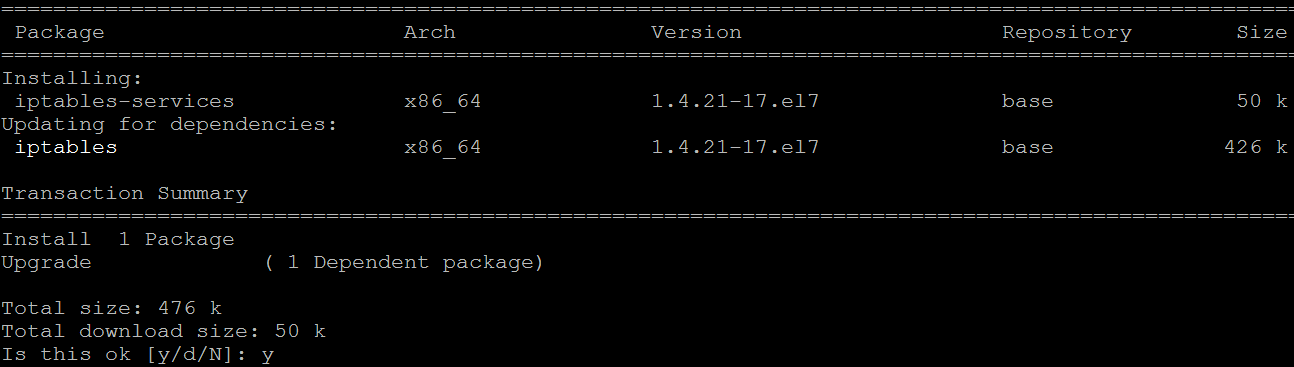
输入 y 到底即可
vim /etc/sysconfig/iptables #编辑防火墙配置文件
这里我们要开启80端口、3306端口、开启21端口,如图所示:

:wq! #保存退出
systemctl restart iptables.service #最后重启防火墙使配置生效
systemctl enable iptables.service #设置防火墙开机启动
三、配置FTP
1、vsftp安装yum -y install vsftpd # 安装vsftpd
systemctl start vsftpd.service # 启动
chkconfig vsftpd on # 开机启动
2、熟悉了解一下 vsftp 相关服务命令
systemctl start vsftpd.service # 启动ftp服务
systemctl stop vsftpd.service # 关闭ftp服务
systemctl restart vsftpd.service # 重启ftp服务
service vsftpd status # 查看ftp服务状态
3、vsftp配置
vim /etc/vsftpd/vsftpd.conf : #进入配置
可以根据以下的配置参考,来进行配置更改
##################################################################################################
1 # Example config file /etc/vsftpd/vsftpd.conf
2 #
3 # The default compiled in settings are fairly paranoid. This sample file
4 # loosens things up a bit, to make the ftp daemon more usable.
5 # Please see vsftpd.conf.5 for all compiled in defaults.
6 #
7 # READ THIS: This example file is NOT an exhaustive list of vsftpd options.
8 # Please read the vsftpd.conf.5 manual page to get a full idea of vsftpd's
9 # capabilities.
10 #
11 # Allow anonymous FTP? (Beware - allowed by default if you comment this out).
12 anonymous_enable=NO
13 #
14 # Uncomment this to allow local users to log in.
15 # When SELinux is enforcing check for SE bool ftp_home_dir
16 local_enable=YES
17 #
18 # Uncomment this to enable any form of FTP write command.
19 write_enable=YES
20 #
21 # Default umask for local users is 077. You may wish to change this to 022,
22 # if your users expect that (022 is used by most other ftpd's)
23 local_umask=022
24 #
25 # Uncomment this to allow the anonymous FTP user to upload files. This only
26 # has an effect if the above global write enable is activated. Also, you will
27 # obviously need to create a directory writable by the FTP user.
28 # When SELinux is enforcing check for SE bool allow_ftpd_anon_write, allow_ftpd_full_access
29 #anon_upload_enable=YES
30 #
31 # Uncomment this if you want the anonymous FTP user to be able to create
32 # new directories.
33 #anon_mkdir_write_enable=YES
34 #
35 # Activate directory messages - messages given to remote users when they
36 # go into a certain directory.
37 dirmessage_enable=YES
38 #
39 # Activate logging of uploads/downloads.
40 xferlog_enable=YES
41 #
42 # Make sure PORT transfer connections originate from port 20 (ftp-data).
43 connect_from_port_20=YES
44 #
45 # If you want, you can arrange for uploaded anonymous files to be owned by
46 # a different user. Note! Using "root" for uploaded files is not
47 # recommended!
48 #chown_uploads=YES
49 #chown_username=whoever
50 #
51 # You may override where the log file goes if you like. The default is shown
52 # below.
53 xferlog_file=/var/log/vsftpd.log
54 #
55 # If you want, you can have your log file in standard ftpd xferlog format.
56 # Note that the default log file location is /var/log/xferlog in this case.
57 xferlog_std_format=NO
58 #
59 # You may change the default value for timing out an idle session.
60 #idle_session_timeout=600
61 #
62 # You may change the default value for timing out a data connection.
63 #data_connection_timeout=120
64 #
65 # It is recommended that you define on your system a unique user which the
66 # ftp server can use as a totally isolated and unprivileged user.
67 #nopriv_user=ftpsecure
68 #
69 # Enable this and the server will recognise asynchronous ABOR requests. Not
70 # recommended for security (the code is non-trivial). Not enabling it,
71 # however, may confuse older FTP clients.
72 #async_abor_enable=YES
73 #
74 # By default the server will pretend to allow ASCII mode but in fact ignore
75 # the request. Turn on the below options to have the server actually do ASCII
76 # mangling on files when in ASCII mode.
77 # Beware that on some FTP servers, ASCII support allows a denial of service
78 # attack (DoS) via the command "SIZE /big/file" in ASCII mode. vsftpd
79 # predicted this attack and has always been safe, reporting the size of the
80 # raw file.
81 # ASCII mangling is a horrible feature of the protocol.
82 ascii_upload_enable=YES
83 ascii_download_enable=YES
84 #
85 # You may fully customise the login banner string:
86 #ftpd_banner=Welcome to blah FTP service.
87 #
88 # You may specify a file of disallowed anonymous e-mail addresses. Apparently
89 # useful for combatting certain DoS attacks.
90 #deny_email_enable=YES
91 # (default follows)
92 #banned_email_file=/etc/vsftpd/banned_emails
93 #
94 # You may specify an explicit list of local users to chroot() to their home
95 # directory. If chroot_local_user is YES, then this list becomes a list of
96 # users to NOT chroot().
97 # (Warning! chroot'ing can be very dangerous. If using chroot, make sure that
98 # the user does not have write access to the top level directory within the
99 # chroot)
100 chroot_local_user=YES
101 chroot_list_enable=YES
102 # (default follows)
103 chroot_list_file=/etc/vsftpd/chroot_list
104 use_localtime=YES
105 #
106 # You may activate the "-R" option to the builtin ls. This is disabled by
107 # default to avoid remote users being able to cause excessive I/O on large
108 # sites. However, some broken FTP clients such as "ncftp" and "mirror" assume
109 # the presence of the "-R" option, so there is a strong case for enabling it.
110 #ls_recurse_enable=YES
111 #
112 # When "listen" directive is enabled, vsftpd runs in standalone mode and
113 # listens on IPv4 sockets. This directive cannot be used in conjunction
114 # with the listen_ipv6 directive.
115 listen=NO
116 #/
117 # This directive enables listening on IPv6 sockets. By default, listening
118 # on the IPv6 "any" address (::) will accept connections from both IPv6
119 # and IPv4 clients. It is not necessary to listen on *both* IPv4 and IPv6
120 # sockets. If you want that (perhaps because you want to listen on specific
121 # addresses) then you must run two copies of vsftpd with two configuration
122 # files.
123 # Make sure, that one of the listen options is commented !!
124 listen_ipv6=YES
125
126 pam_service_name=vsftpd
127 userlist_enable=YES
128 tcp_wrappers=YES
##################################################################################################
:wq! #保存退出
systemctl restart vsftpd.service # 重启 vsftpd
4、vsftp建立用户
这里假设约定 如下:home/data/ftpdata/ftpuser #用户目录
ftpgcx #FTP用户登录名为(不可于linux登录名重名)
下面我们开始创建用户流程:
cd / # 退回到根目录
cd home # 进入home文件夹
mkdir data # 创建data文件夹
cd data # 进入data文件夹
mkdir ftpdata # 创建ftpdata 文件夹
cd ftpdata # 进入ftpdata文件夹
mkdir ftpuser # 创建ftpuser 文件夹
cd / # 退回到根目录
useradd -d /home/data/ftpdata/ftpuser -s /sbin/nologin -M ftpgcx # 创建用户
chown -R ftpgcx /home/data/ftpdata/ftpuser # 设置用户到文件夹
chmod -R 777 /home/data/ftpdata/ftpuser # 设置权限
passwd ftpgcx # 添加密码 -> 密码 -> 确认密码

设置密码成功:

vim /etc/vsftpd/chroot_list
在首行增加 ftpgcx

:wq! #保存退出
5、关闭SELINUX
vim /etc/selinux/config #进入编辑修改
进行以下修改:
#SELINUX=enforcing #注释掉
#SELINUXTYPE=targeted #注释掉
增加: SELINUX=disabled
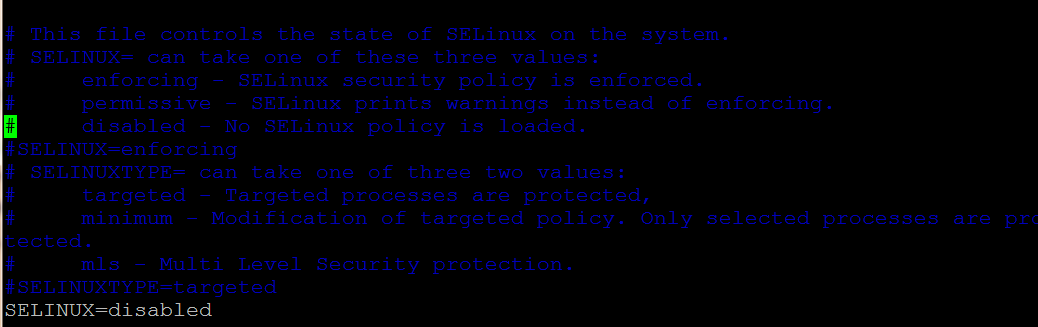
:wq! #保存退出
setenforce 0 #使配置立即生效
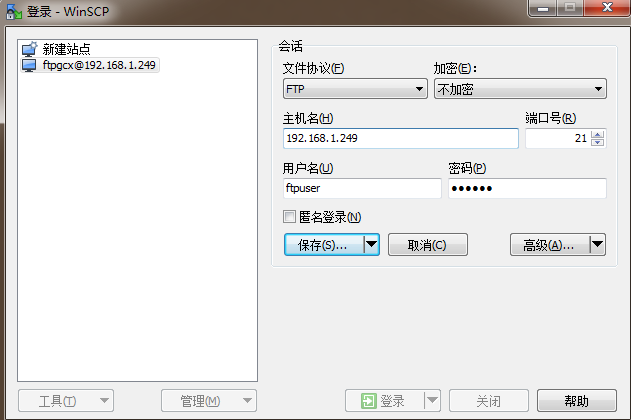
登录FTP:
四、下载并准备源码包
步骤一、安装gcc等必备程序包(已安装则略过此步)
yum install -y gcc gcc-c++ make automake
步骤二、安装wget (已安装则略过此步)
yum install -y wget
步骤三、安装编译工具及库文件(使用yum命令安装)
yum install -y apr* autoconf automake bison bzip2 bzip2* cloog-ppl compat* cpp curl curl-devel fontconfig fontconfig-devel freetype freetype* freetype-devel gcc gcc-c++ gtk+-devel gd gettext gettext-devel glibc kernel kernel-headers keyutils keyutils-libs-devel krb5-devel libcom_err-devel libpng libpng-devel libjpeg* libsepol-devel libselinux-devel libstdc++-devel libtool* libgomp libxml2 libxml2-devel libXpm* libtiff libtiff* make mpfr ncurses* ntp openssl openssl-devel patch pcre-devel perl php-common php-gd policycoreutils telnet t1lib t1lib* nasm nasm* wget zlib-devel步骤四、源码包的下载和存放准备
首先,约定源码包存放位置和编译安装位置:
软件源代码包存放位置: /usr/local/src
源码包编译安装位置: /usr/local/ 软件名字
一、wget安装
1、下载nginx(目前稳定版)
wget http://nginx.org/download/nginx-1.6.0.tar.gz
2、下载MySQL
wget http://cdn.mysql.com/Downloads/MySQL-5.6/mysql-5.6.19.tar.gz
3、下载php
wget http://cn2.php.net/distributions/php-5.6.30.tar.gz
4、下载pcre (支持nginx伪静态)
wget ftp://ftp.csx.cam.ac.uk/pub/software/programming/pcre/pcre-8.38.tar.gz
5、下载openssl(nginx扩展)
wget http://www.openssl.org/source/openssl-1.0.1h.tar.gz
6、下载zlib(nginx扩展)
wget http://zlib.net/zlib-1.2.8.tar.gz
7、下载cmake(MySQL编译工具)
wget http://www.cmake.org/files/v2.8/cmake-2.8.11.2.tar.gz
8、下载libmcrypt(php扩展)
wget http://nchc.dl.sourceforge.net/project/mcrypt/Libmcrypt/2.5.8/libmcrypt-2.5.8.tar.gz
9、下载yasm(php扩展)
wget http://www.tortall.net/projects/yasm/releases/yasm-1.2.0.tar.gz
10、t1lib(php扩展)
wget ftp://sunsite.unc.edu/pub/Linux/libs/graphics/t1lib-5.1.2.tar.gz
11、下载gd库安装包
wget https://bitbucket.org/libgd/gd-libgd/downloads/libgd-2.1.0.tar.gz
12、libvpx(gd库需要)
wget https://webm.googlecode.com/files/libvpx-v1.3.0.tar.bz2
13、tiff(gd库需要)
wget http://download.osgeo.org/libtiff/tiff-4.0.3.tar.gz
14、libpng(gd库需要)
wget ftp://ftp.simplesystems.org/pub/png/src/libpng16/libpng-1.6.18.tar.gz
15、freetype(gd库需要)
wget http://download.savannah.gnu.org/releases/freetype/ft2demos-2.5.3.tar.gz
16、jpegsrc(gd库需要)
wget http://www.ijg.org/files/jpegsrc.v9a.tar.gz
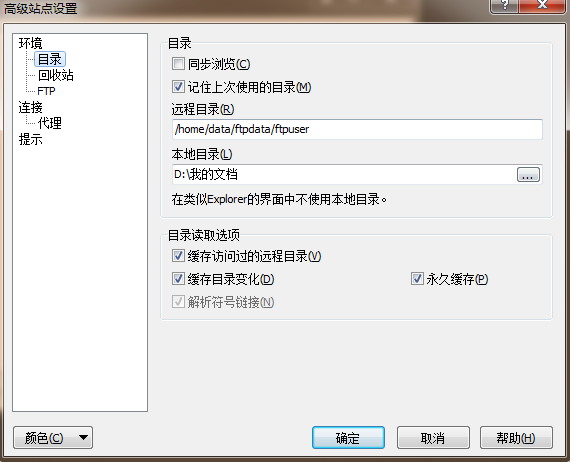
二、自带软件包上传到 /usr/local/src 目录,再进行操作安装
使用 WinSCP 工具上传到 /home/data/ftpdata/ftpuser 里面(FTP用户文件)
(WinSCP下载地址:http://winscp.net/download/winscp554.zip)
之后,将源码安装包全部拷贝到 /usr/local/src目录下:
cp 安装包名 /usr/local/src
五、安装源码包
这里注意一下:
tar zxvf xxxxx #解压.tar.gz格式文件
tar -xvf xxxxx #解压.tar.xz格式文件
(一)、安装cmake
tar zxvf cmake-2.8.11.2.tar.gz #解压安装文件 cmake
cd cmake-2.8.11.2 #到cmake目录下
./configure #运行配置文件make
make install
(二)、安装Nginx
1、安装pcrePCRE(Perl Compatible Regular Expressions) 是一个Perl库,包括 perl 兼容的正则表达式库。nginx 的 http 模块使用 pcre 来解析正则表达式,所以需要在 linux 上安装 pcre 库,pcre-devel 是使用 pcre 开发的一个二次开发库。
按步操作:
cd /usr/local/src #到安装包目录
mkdir /usr/local/pcre # 创建文件夹
tar zxvf pcre-8.38.tar.gz #解压
cd pcre-8.38 #到解压文件下
./configure --prefix=/usr/local/pcre #配置解析安装
make
make install
2、安装zlib
zlib 库提供了很多种压缩和解压缩的方式, nginx 使用 zlib 对 http 包的内容进行 gzip ,所以需要在 Centos 上安装 zlib 库。cd /usr/local/src #到安装包目录
mkdir /usr/local/zlib # 创建文件夹
tar zxvf zlib-1.2.8.tar.gz #解压
cd zlib-1.2.8 #到解压文件下
./configure --prefix=/usr/local/zlib #配置解析安装
make
make install
3、安装openssl
OpenSSL 是一个强大的安全套接字层密码库,包括了主要的密码算法、常用的密钥和证书封装管理功能及 SSL 协议,并提供丰富的应用程序供测试或其它目的使用。nginx 不仅支持 http 协议,还支持 https(即在ssl协议上传输http),所以需要在 Centos 安装 OpenSSL 库。cd /usr/local/src #到安装包目录
mkdir /usr/local/openssl # 创建文件夹
tar zxvf openssl-1.0.1h.tar.gz #解压
cd openssl-1.0.1h #到解压文件下
./config --prefix=/usr/local/openssl #配置解析安装
make install
vim /etc/profile #到vim中,在末尾增加下面这句:
export PATH=$PATH:/usr/local/openssl/bin #作为配置全局路径
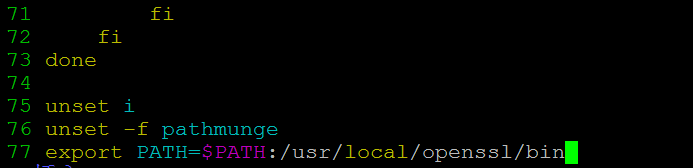
:wq! #保存退出
source /etc/profile #立即生效4、安装Nginx
groupadd www #建工作组
useradd -g www www -s /bin/false #设定最严格的禁止login选项,一切服务都不能用
cd /usr/local/src
tar zxvf nginx-1.6.0.tar.gz
cd nginx-1.6.0
./configure --prefix=/usr/local/nginx --without-http_memcached_module --user=www --group=www --with-http_stub_status_module --with-http_ssl_module --with-http_gzip_static_module --with-openssl=/usr/local/src/openssl-1.0.1h --with-zlib=/usr/local/src/zlib-1.2.8 --with-pcre=/usr/local/src/pcre-8.38注意:1、--with-openssl=/usr/local/src/openssl-1.0.1h --with-zlib=/usr/local/src/zlib-1.2.8 --with-pcre=/usr/local/src/pcre-8.38 指向的是源码包解压的路径,而不是安装的路径,否则会报错;2、后缀各个版本编号要对应,以你自己的实际版本为准。
make
make install
/usr/local/nginx/sbin/nginx #启动Nginx
vim /etc/rc.d/init.d/nginx #编辑启动文件,添加下面内容:
全部复制进去:
#############################################################################################
#!/bin/sh
#
# nginx - this script starts and stops the nginx daemon
#
# chkconfig: - 85 15
# description: Nginx is an HTTP(S) server, HTTP(S) reverse \
# proxy and IMAP/POP3 proxy server
# processname: nginx
# config: /etc/nginx/nginx.conf
# config: /usr/local/nginx/conf/nginx.conf
# pidfile: /usr/local/nginx/logs/nginx.pid
# Source function library.
. /etc/rc.d/init.d/functions
# Source networking configuration.
. /etc/sysconfig/network
# Check that networking is up.
[ "$NETWORKING" = "no" ] && exit 0
nginx="/usr/local/nginx/sbin/nginx"
prog=$(basename $nginx)
NGINX_CONF_FILE="/usr/local/nginx/conf/nginx.conf"
[ -f /etc/sysconfig/nginx ] && . /etc/sysconfig/nginx
lockfile=/var/lock/subsys/nginx
make_dirs() {
# make required directories
user=`$nginx -V 2>&1 | grep "configure arguments:" | sed 's/[^*]*--user=\([^ ]*\).*/\1/g' -`
if [ -z "`grep $user /etc/passwd`" ]; then
useradd -M -s /bin/nologin $user
fi
options=`$nginx -V 2>&1 | grep 'configure arguments:'`
for opt in $options; do
if [ `echo $opt | grep '.*-temp-path'` ]; then
value=`echo $opt | cut -d "=" -f 2`
if [ ! -d "$value" ]; then
# echo "creating" $value
mkdir -p $value && chown -R $user $value
fi
fi
done
}
start() {
[ -x $nginx ] || exit 5
[ -f $NGINX_CONF_FILE ] || exit 6
make_dirs
echo -n $"Starting $prog: "
daemon $nginx -c $NGINX_CONF_FILE
retval=$?
echo
[ $retval -eq 0 ] && touch $lockfile
return $retval
}
stop() {
echo -n $"Stopping $prog: "
killproc $prog -QUIT
retval=$?
echo
[ $retval -eq 0 ] && rm -f $lockfile
return $retval
}
restart() {
#configtest || return $?
stop
sleep 1
start
}
reload() {
#configtest || return $?
echo -n $"Reloading $prog: "
killproc $nginx -HUP
RETVAL=$?
echo
}
force_reload() {
restart
}
configtest() {
$nginx -t -c $NGINX_CONF_FILE
}
rh_status() {
status $prog
}
rh_status_q() {
rh_status >/dev/null 2>&1
}
case "$1" in
start)
rh_status_q && exit 0
$1
;;
stop)
rh_status_q || exit 0
$1
;;
restart|configtest)
$1
;;
reload)
rh_status_q || exit 7
$1
;;
force-reload)
force_reload
;;
status)
rh_status
;;
condrestart|try-restart)
rh_status_q || exit 0
;;
*)
echo $"Usage: $0 {start|stop|status|restart|condrestart|try-restart|reload|force-reload|configtest}"
exit 2
esac
#############################################################################################
:wq! #保存退出
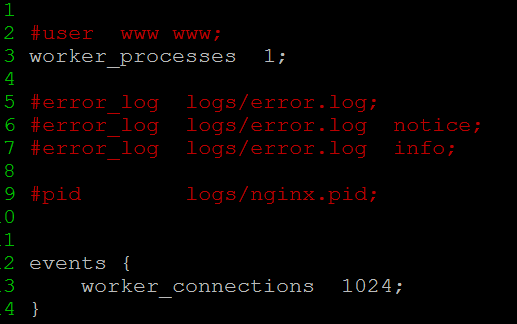
vim /usr/local/nginx/conf/nginx.conf #打开这个配置文件,做一些修改
这里的开头 #user nobody 做修改,修改后如下:
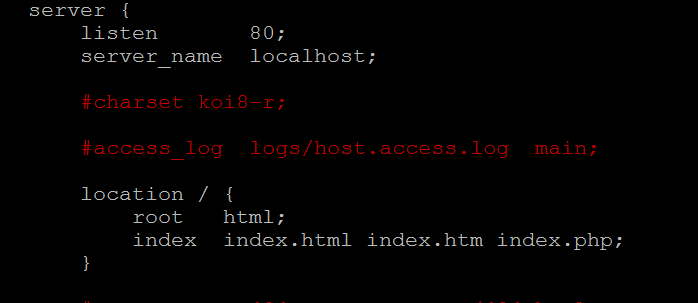
location index 做修改,修改后如下:
:wq! #保存退出
www 为之前创建的建工作组,为实际项目存放文件 ;location的index选项中增加 index.php 来支持 php。
chmod 775 /etc/rc.d/init.d/nginx #赋予文件执行权限
chkconfig nginx on #设置开机启动
killall nginx #关闭nginx
cd /usr/local/nginx/sbin
./nginx #启动
在浏览器中打开服务器IP地址,会看到下面的界面,说明Nginx安装成功。

(三)、安装MySQL
groupadd mysql #添加mysql组
useradd -g mysql mysql -s /bin/false #创建用户mysql并加入到mysql组,不允许mysql用户直接登录系统
mkdir -p /data/mysql #创建MySQL数据库存放目录
chown -R mysql:mysql /data/mysql #设置MySQL数据库存放目录权限
mkdir -p /usr/local/mysql #创建MySQL安装目录
cd /usr/local/src #进入软件包存放目录
tar zxvf mysql-5.6.19.tar.gz #解压
cd mysql-5.6.19 #进入目录
cmake . -DCMAKE_INSTALL_PREFIX=/usr/local/mysql -DMYSQL_DATADIR=/data/mysql -DSYSCONFDIR=/etc #配置
若是遇到如下问题:

该报错原因是未安装 ncurses-devel,运行下面命令
第一步:安装
yum -y install ncurses-devel
第二步:查找CMakeCache.txt
find / -name CMakeCache.txt #通过find命令找到所有CMakeCache.txt文档的位置
第三步:全部删除
rm -rf /usr/local/src/mysql-5.6.19/CMakeCache.txt
rm -rf /usr/local/src/cmake-2.8.11.2/Tests/Complex/Cache/CMakeCache.txt
rm -rf /usr/local/src/cmake-2.8.11.2/Tests/ComplexOneConfig/Cache/CMakeCache.txt
rm -rf /usr/local/src/cmake-2.8.11.2/Tests/CMakeFiles/CheckFortran/CMakeCache.txt
rm -rf /usr/local/src/mysql-2.8.11.2/CMakeCache.txt
。。。。。。。
如下图所示:
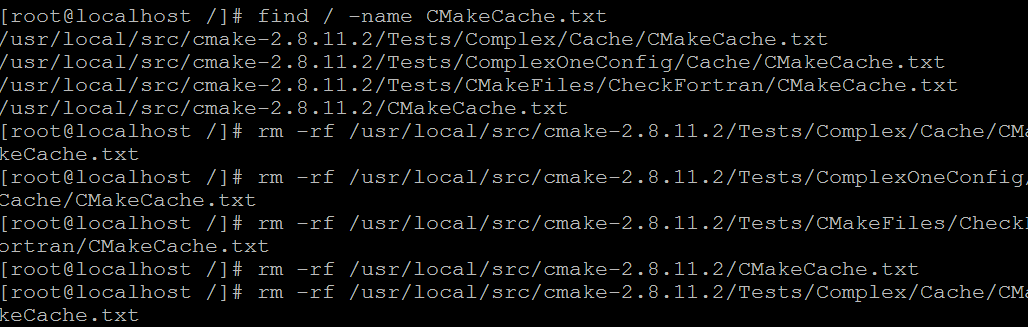
全部删除后再重新进行 cmake 操作 。
make #编译
make install #安装
rm -rf /etc/my.cnf #删除系统默认的配置文件(如果默认没有就不用删除)
cd /usr/local/mysql #进入MySQL安装目录
./scripts/mysql_install_db --user=mysql --basedir=/usr/local/mysql --datadir=/data/mysql #生成mysql系统数据库
生成好 mysql系统数据库,如下图:

ln -s /usr/local/mysql/my.cnf /etc/my.cnf #添加到/etc目录的软连接
cp ./support-files/mysql.server /etc/rc.d/init.d/mysqld #把Mysql加入系统启动
chmod 755 /etc/init.d/mysqld #增加执行权限
chkconfig mysqld on #加入开机启动
vim /etc/rc.d/init.d/mysqld #编辑
找到basedir和datadir,将其修改为:
basedir=/usr/local/mysql #MySQL程序安装路径
datadir=/data/mysql #MySQl数据库存放目录
如下图:

:wq! #保存退出
service mysqld start #启动

vim /etc/profile #进入profile文件做修改
把mysql服务加入系统环境变量,在最后添加下面这一行:
export PATH=$PATH:/usr/local/mysql/bin
如下图:

:wq! #保存退出
source /etc/profile #立即生效
下面这两行把myslq的库文件链接到系统默认的位置,这样你在编译类似PHP等软件时可以不用指定mysql的库文件地址。
ln -s /usr/local/mysql/lib/mysql /usr/lib/mysql
ln -s /usr/local/mysql/include/mysql /usr/include/mysql
mkdir /var/lib/mysql #创建目录
ln -s /tmp/mysql.sock /var/lib/mysql/mysql.sock #添加软链接
mysql_secure_installation #设置Mysql密码

回车,继续下一步,根据提示 输入2次密码并做出相应的 配置选择

不允许root远程登录,原则上yes(不允许)

service mysqld restart #重启一下mysql
至此安装部分已经结束,下面还需要做一些修改:
1、修改Mysql初始化root密码和允许远程访问
mysql -u root -p #从root切换到mysql
若:

不能正常切换,请仔细检查上述步骤输入的是否正确,或者重开putty或者重设Mysql密码
#开启从任何主机连接到mysql服务器,注意 密码 'xxxxxxxx' 和你上述步骤设置的密码要对应,前面的 mysql> 切记不要输入进去。
mysql> GRANT ALL PRIVILEGES ON *.* TO 'root'@'%' IDENTIFIED BY '123456' WITH GRANT OPTION;
mysql> FLUSH PRIVILEGES; #使配置生效
2、改默认编码格式(utf-8)
第一步:
exit; #退出当前用户(mysql),到默认的root
第二步:
vim /etc/my.cnf #进入etc文件中编辑
第三步:
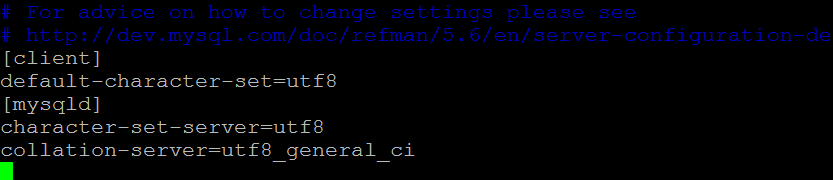
在头部加入以下语句:
在 [client] 段增加下面代码:
default-character-set=utf8
在 [mysqld] 段增加下面的代码:
character-set-server=utf8
collation-server=utf8_general_ci
如下图所示:
:wq! #保存退出
service mysqld restart #重启MySQL

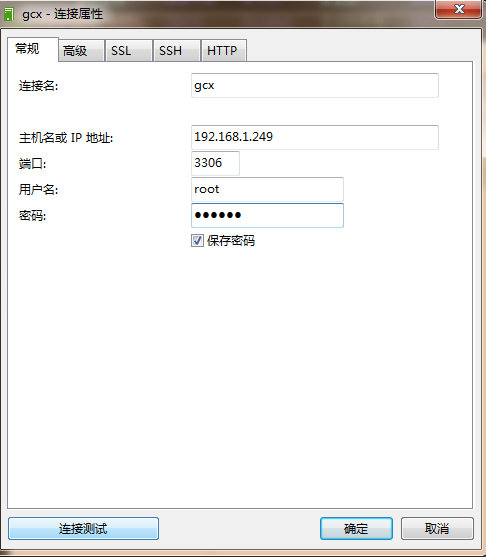
打开Navicat,新建链接:
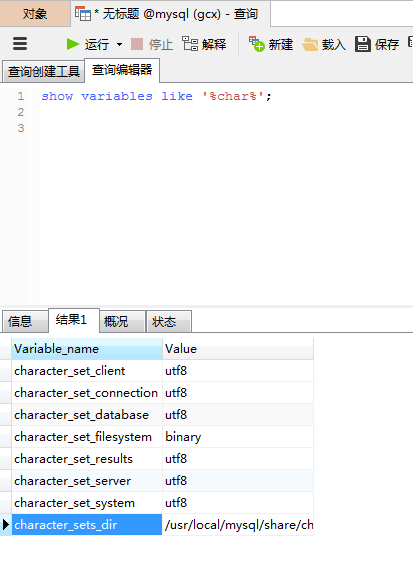
点击查询,输入: show VARIABLES like '%char%'; 显示结果如下,则说明成功了。
(四)、安装PHP
1、安装yasm
cd /usr/local/src
tar zxvf yasm-1.2.0.tar.gz
cd yasm-1.2.0/
./configure
make
make install
2、安装libmcrypt
cd /usr/local/src
tar zxvf libmcrypt-2.5.8.tar.gz
cd libmcrypt-2.5.8/
./configure
make
make install
3、安装libvpx
cd /usr/local/src
tar xvf libvpx-v1.3.0.tar.bz2
cd libvpx-v1.3.0/
./configure --prefix=/usr/local/libvpx --enable-shared --enable-vp9
make
make install
4、安装tiff
cd /usr/local/src
tar zxvf tiff-4.0.3.tar.gz
cd tiff-4.0.3/
./configure --prefix=/usr/local/tiff --enable-shared
make
make install
5、安装libpng
cd /usr/local/src
tar -xvf libpng-1.6.18.tar.xz #解压.tar.xz格式文件( tar -xvf xxxxx )
cd libpng-1.6.18/
./configure --prefix=/usr/local/libpng --enable-shared
注意:若是提示

则请安装一下 zlib
yum -y install zlib-devel
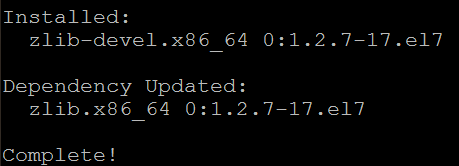
同理,出现什么没有安装就装什么: yum -y installxxx-devel
make
make install
6、安装freetype
cd /usr/local/src
tar zxvf freetype-2.5.3.tar.gz
cd freetype-2.5.3/
./configure --prefix=/usr/local/freetype --enable-shared
make #编译
make install #安装
7、安装jpeg
cd /usr/local/src
tar zxvf jpegsrc.v9a.tar.gz
cd jpeg-9a/
./configure --prefix=/usr/local/jpeg --enable-shared
make #编译
make install #安装
8、安装libgd
cd /usr/local/src
tar zxvf libgd-2.1.0.tar.gz #解压
cd libgd-2.1.0/ #进入目录
#配置
./configure --prefix=/usr/local/libgd --enable-shared --with-jpeg=/usr/local/jpeg --with-png=/usr/local/libpng --with-freetype=/usr/local/freetype --with-fontconfig=/usr/local/freetype --with-xpm=/usr/ --with-tiff=/usr/local/tiff --with-vpx=/usr/local/libvpx
若是有如下错误:

则说明 fontconfig 没有安装,则我们先安装一下,再重新配置
yum -y install fontconfig-devel

则说明 libXpm 没有安装,则我们先安装一下,再重新配置
yum -y install libXpm-devel
如下则说明配置成功:
make #编译
make install #安装
9、安装t1lib
cd /usr/local/src
tar zxvf t1lib-5.1.2.tar.gz
cd t1lib-5.1.2/
./configure --prefix=/usr/local/t1lib --enable-shared

make without_doc
make install
10、安装php
cd / #退出到根目录
注意:如果系统是64位,请执行以下两条命令,否则安装php会出错(32位系统不需要执行)
ln -s /usr/lib64/libltdl.so /usr/lib/libltdl.so
\cp -frp /usr/lib64/libXpm.so* /usr/lib/
cd /usr/local/src
tar -zvxf php-5.6.30.tar.gz
cd php-5.6.30/
export LD_LIBRARY_PATH=/usr/local/libgd/lib
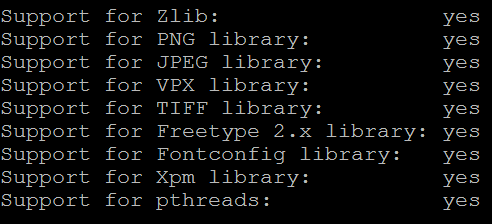
上述完成之后,我们开始配置,输入以下命令(切记复制准确,不可遗漏):
./configure --prefix=/usr/local/php --with-config-file-path=/usr/local/php/etc --with-mysql=/usr/local/mysql --with-mysqli=/usr/local/mysql/bin/mysql_config --with-mysql-sock=/tmp/mysql.sock --with-pdo-mysql=/usr/local/mysql --with-gd --with-png-dir=/usr/local/libpng --with-jpeg-dir=/usr/local/jpeg --with-freetype-dir=/usr/local/freetype --with-xpm-dir=/usr/ --with-vpx-dir=/usr/local/libvpx/ --with-zlib-dir=/usr/local/zlib --with-t1lib=/usr/local/t1lib --with-iconv --enable-libxml --enable-xml --enable-bcmath --enable-shmop --enable-sysvsem --enable-inline-optimization --enable-opcache --enable-mbregex --enable-fpm --enable-mbstring --enable-ftp --enable-gd-native-ttf --with-openssl --enable-pcntl --enable-sockets --with-xmlrpc --enable-zip --enable-soap --without-pear --with-gettext --enable-session --with-mcrypt --with-curl --enable-ctype若是碰到这个问题:

yum install libxml2-devel -y
若是碰到这个问题:

yum install -y curl-devel
再重新运行配置,成功如下:
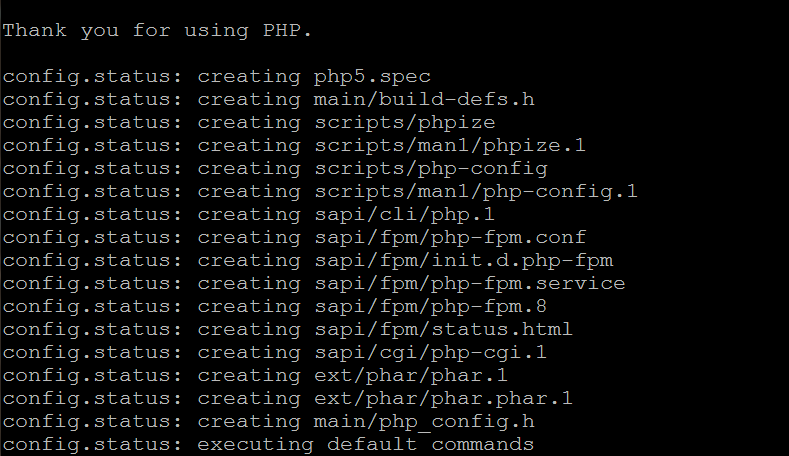
make #编译
make install #安装
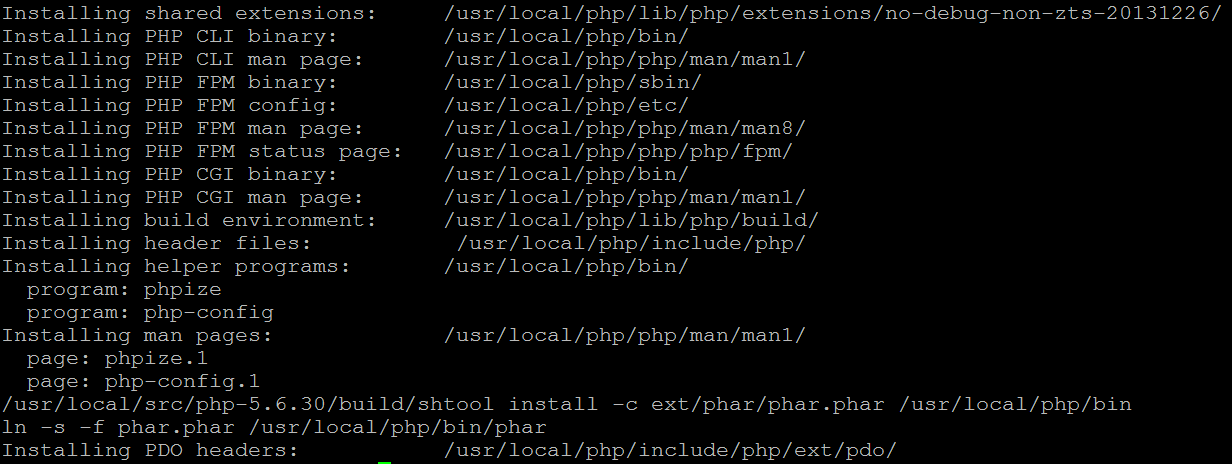
至此,安装成功,继续下面步骤:
cp php.ini-production /usr/local/php/etc/php.ini #复制php配置文件到安装目录
rm -rf /etc/php.ini #删除系统自带配置文件
ln -s /usr/local/php/etc/php.ini /etc/php.ini #添加软链接到 /etc目录
cp /usr/local/php/etc/php-fpm.conf.default /usr/local/php/etc/php-fpm.conf #拷贝模板文件为php-fpm配置文件
ln -s /usr/local/php/etc/php-fpm.conf /etc/php-fpm.conf #添加软连接到 /etc目录
vim /usr/local/php/etc/php-fpm.conf #编辑

user = www #设置php-fpm运行账号为www
group = www #设置php-fpm运行组为www

pid = run/php-fpm.pid #取消前面的分号
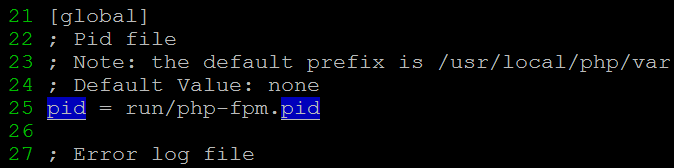
:wq! #保存退出
设置 php-fpm开机启动
cp /usr/local/src/php-5.6.30/sapi/fpm/init.d.php-fpm /etc/rc.d/init.d/php-fpm #拷贝php-fpm到启动目录
chmod +x /etc/rc.d/init.d/php-fpm #添加执行权限
chkconfig php-fpm on #设置开机启动
编辑配置文件php.ini
vim /usr/local/php/etc/php.ini #进入编辑配置文件
你可以在里面搜索:在非编辑模式下,按/ + 你要搜索的内容
第一步:
找到: disable_functions =
修改为: disable_functions = passthru,exec,system,chroot,scandir,chgrp,chown,shell_exec,proc_open,proc_get_status,ini_alter,ini_alter,ini_restore,dl,openlog,syslog,readlink,symlink,popepassthru,stream_socket_server,escapeshellcmd,dll,popen,disk_free_space,checkdnsrr,checkdnsrr,getservbyname,getservbyport,disk_total_space,posix_ctermid,posix_get_last_error,posix_getcwd, posix_getegid,posix_geteuid,posix_getgid, posix_getgrgid,posix_getgrnam,posix_getgroups,posix_getlogin,posix_getpgid,posix_getpgrp,posix_getpid, posix_getppid,posix_getpwnam,posix_getpwuid, posix_getrlimit, posix_getsid,posix_getuid,posix_isatty, posix_kill,posix_mkfifo,posix_setegid,posix_seteuid,posix_setgid, posix_setpgid,posix_setsid,posix_setuid,posix_strerror,posix_times,posix_ttyname,posix_uname#列出PHP可以禁用的函数,如果某些程序需要用到这个函数,可以删除,取消禁用。

这里注意,前面注释要用;,不要用#
第二步:
找到: ;date.timezone =
修改为: date.timezone = PRC #设置时区

第三步:
找到: expose_php = On
修改为: expose_php = Off #禁止显示php版本的信息

第四步:
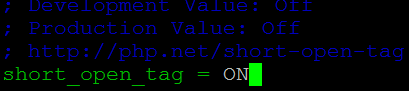
找到: short_open_tag = Off
修改为: short_open_tag = ON #支持php短标签
第五步:
找到: opcache.enable=0
修改为: opcache.enable=1 #php支持opcode缓存

第六步:
找到: ;opcache.enable_cli=0 #php支持opcode缓存
修改为: opcache.enable_cli=0

第七步:
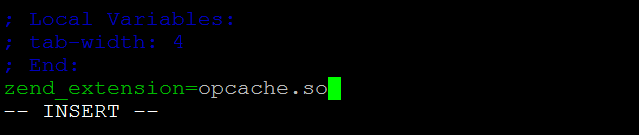
在最后一行添加: zend_extension=opcache.so #开启opcode缓存功能
第八步:
:wq! #保存退出
配置nginx支持php
vim /usr/local/nginx/conf/nginx.conf
第一步:
user www www; #首行user去掉注释,修改Nginx运行组为www www;必须与/usr/local/php/etc/php-fpm.conf中的user,group配置相同

第二步:
index index.html index.htm index.php; #添加index.php,如果有了就不用添加了

第三步:
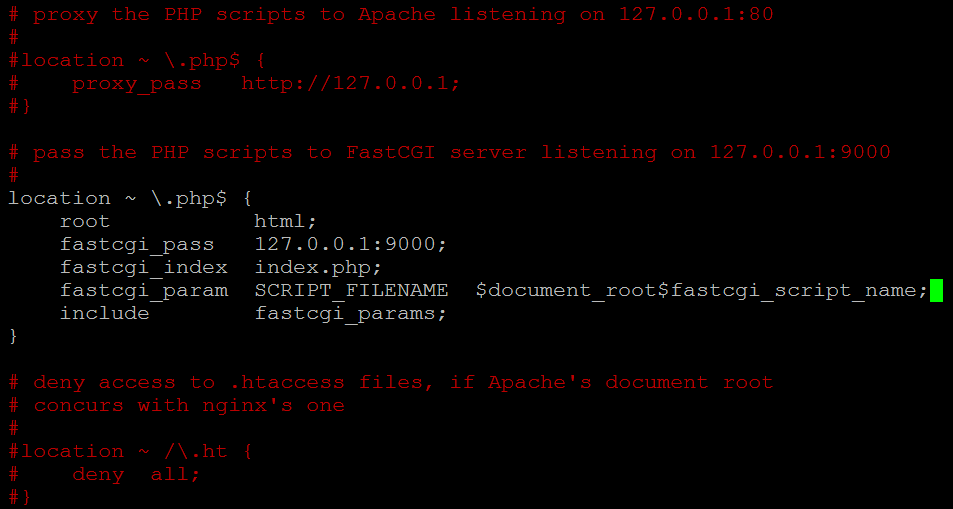
取消 FastCGI server 部分 location 的注释。
注意 fastcgi_param行的参数,将其改为 $document_root$fastcgi_script_name (指向入口文件),或者使用绝对路径。
如下图所示修改:
第四步:
:wq! #保存退出
配置nginx支持php完成后,我们继续往下操作:
/etc/init.d/nginx restart #重启nginx

若如下图情况:

则这样重启:
killall nginx #关闭nginx
/usr/local/nginx/sbin/nginx #打开nginx
ps -ef |grep nginx #查看 nginx 状态
如下图所示:

同理我们也要重启一下 php-fpm:
netstat -lntup | grep 9000
killall php-fpm #关闭php-fpm
service php-fpm start #启动php-fpm
ps -ef |grep nginx #查看 php-fpm 状态
如下图所示:

以上完成后,php安装和相关配置我们都结束了,下面我们来测试一下:
测试如下:
cd /usr/local/nginx/html/ #进入nginx默认网站根目录
rm -rf /usr/local/nginx/html/* #删除默认测试页
vim index.php #新建一个 index.php 文件
在这里面打入以下代码:
<?php
phpinfo();
?>
:wq! #保存退出
chown www.www /usr/local/nginx/html/ -R #设置目录所有者
chmod 700 /usr/local/nginx/html/ -R #设置目录权限
在浏览器中打开服务器IP地址,会看到下面的界面:

至此,以上所有步骤全部安装成功
若你在安装过程中出现其他问题,可以参考我的另外一篇转载博客查看 :
http://blog.csdn.net/lensgcx/article/details/64907212
最后感谢一下文章作者对本博客教程的支持:
http://www.jb51.net/php/188489
http://www.jb51.net/article/47795.htm
以上所有步骤正常情况下熟练手动安装大概2个小时即可完成,你可以反复多次安装直至熟练操作,若有纰漏之处,欢迎指正,转载请注明出处。


 186
186


 被折叠的 条评论
为什么被折叠?
被折叠的 条评论
为什么被折叠?
 到【灌水乐园】发言


