【转】Create Hello-JNI with Android Studio
访问需要翻墙。
没有翻译成中文是因为图片很详细,看不懂英文,根据图片一步一步也能完成。另外开发人员应该具备阅读英文技术博客的能力。
1. Overview
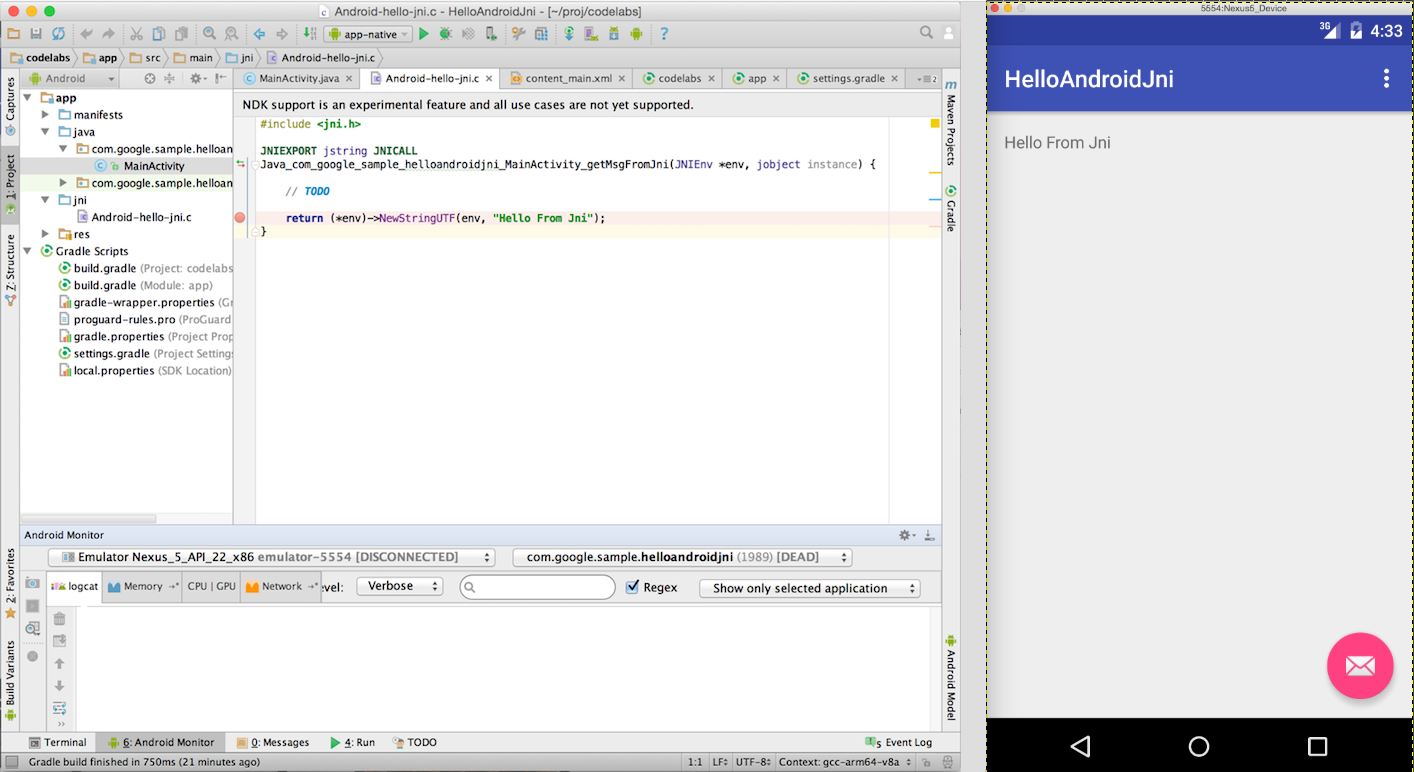
In this codelab, you'll learn how to use Android Studio to start Android NDK project development.
2. Create Java Sample App
- Find and start Android Studio on your development system:
a) Linux: Run studio.sh from your installed location
b) OSX: Find studio installation in Application folder, double click to start
If this is the first time you run this version of Android Studio on this system, Android Studio will prompt to import from previous settings, just select "I do not have a previous version of Studio or I do not want to import my settings", "Welcome to Android Studio" will be displayed.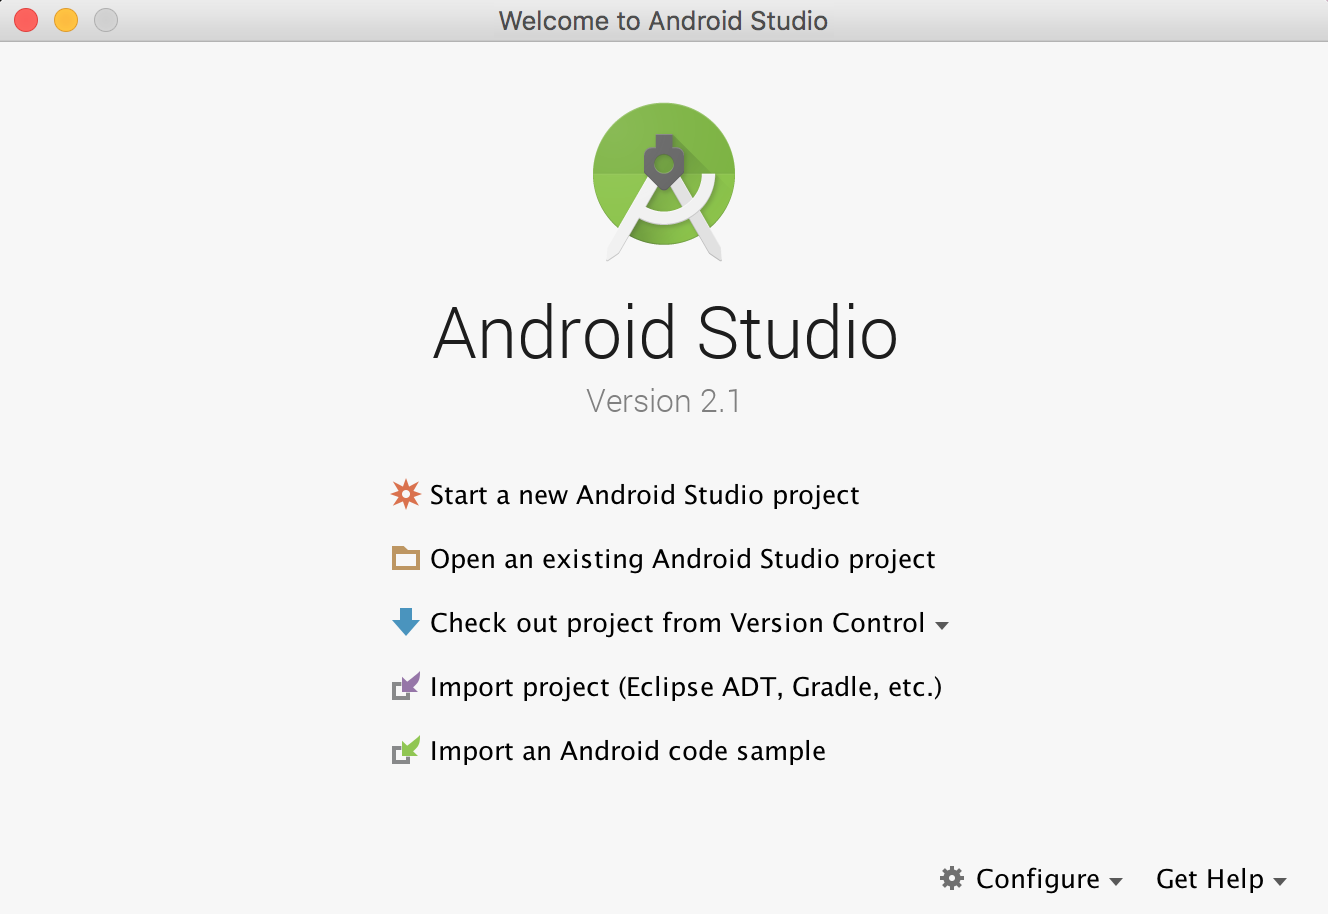
- Select "Start a new Android Studio project".
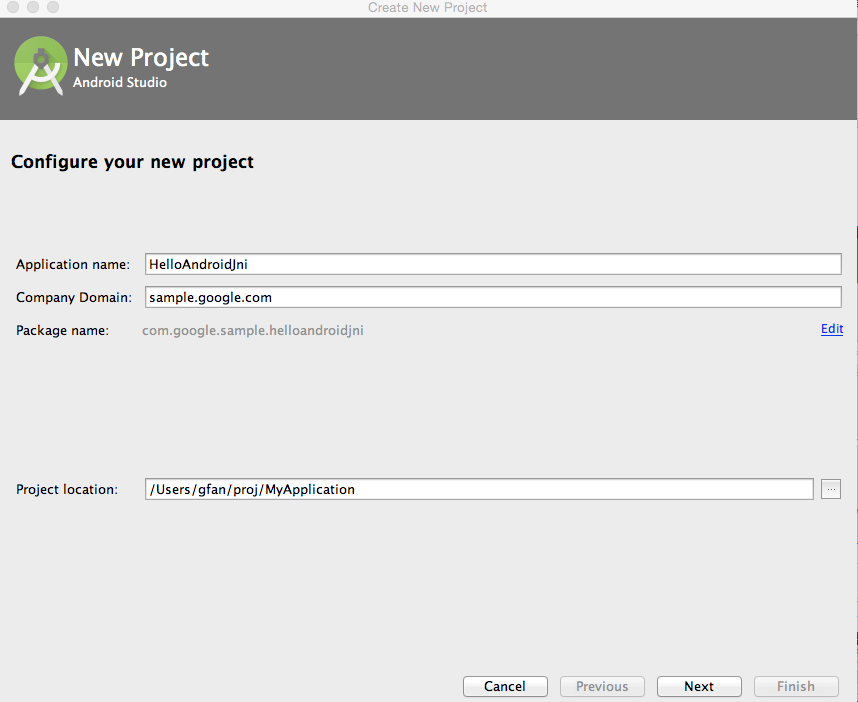
- On "New Project" page, change "Application Name" to HelloAndroidJni, and leave the default values for other fields.
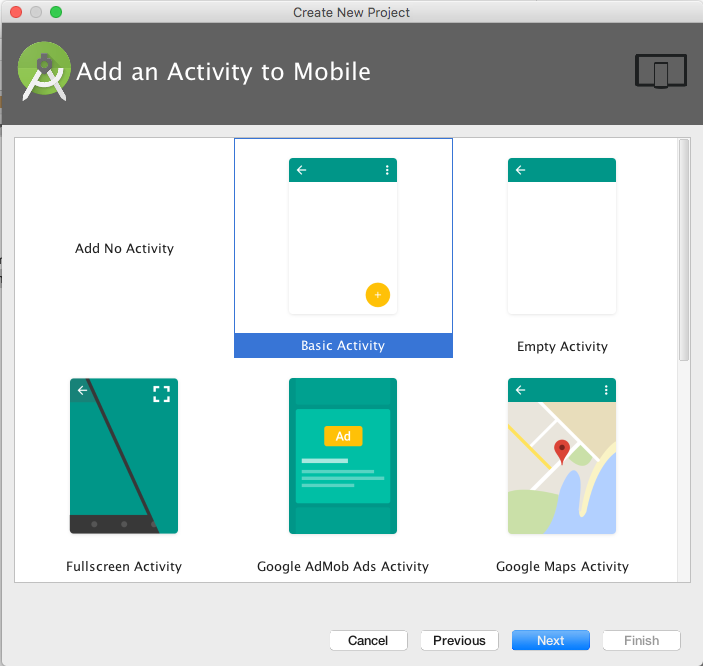
- Click "Next", select "Basic Activity" as our template in "Add an Activity to Mobile" page
- Click "Next" all the way to "Finish" to complete application creation.
This creates an Android "Hello World" Java app; your Android Studio looks like: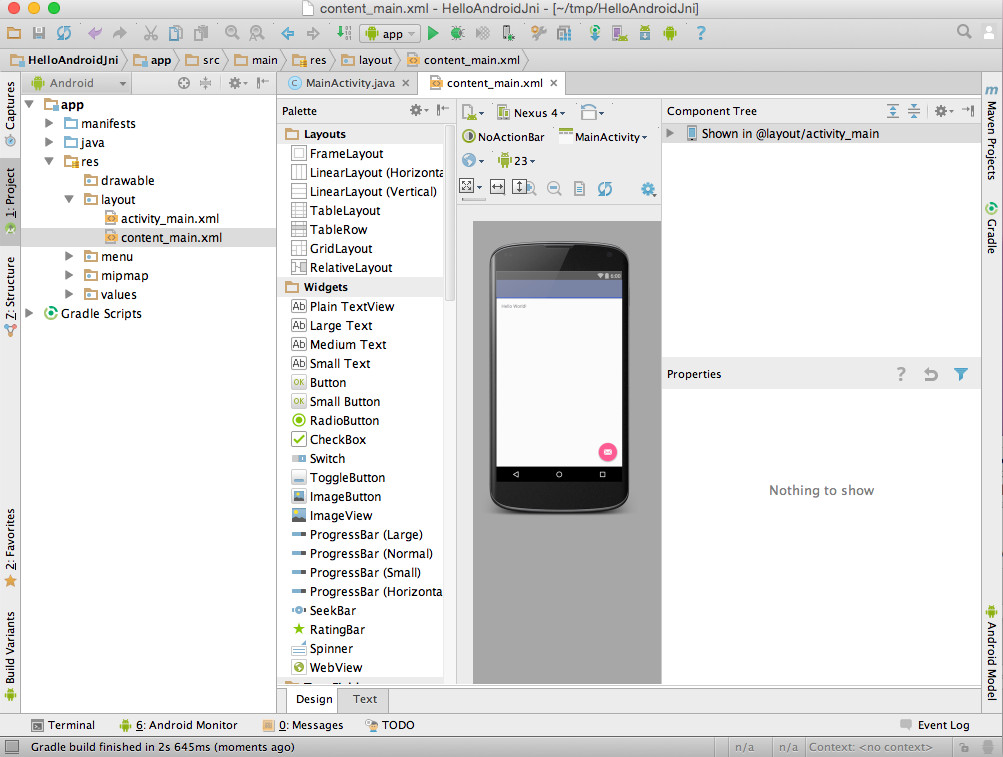
- (Optional) Connect your Android Device with USB cable if you have device available; otherwise, create an Emulator when Android Studio prompts you in the next step.
- Sync
 , Build
  and Run
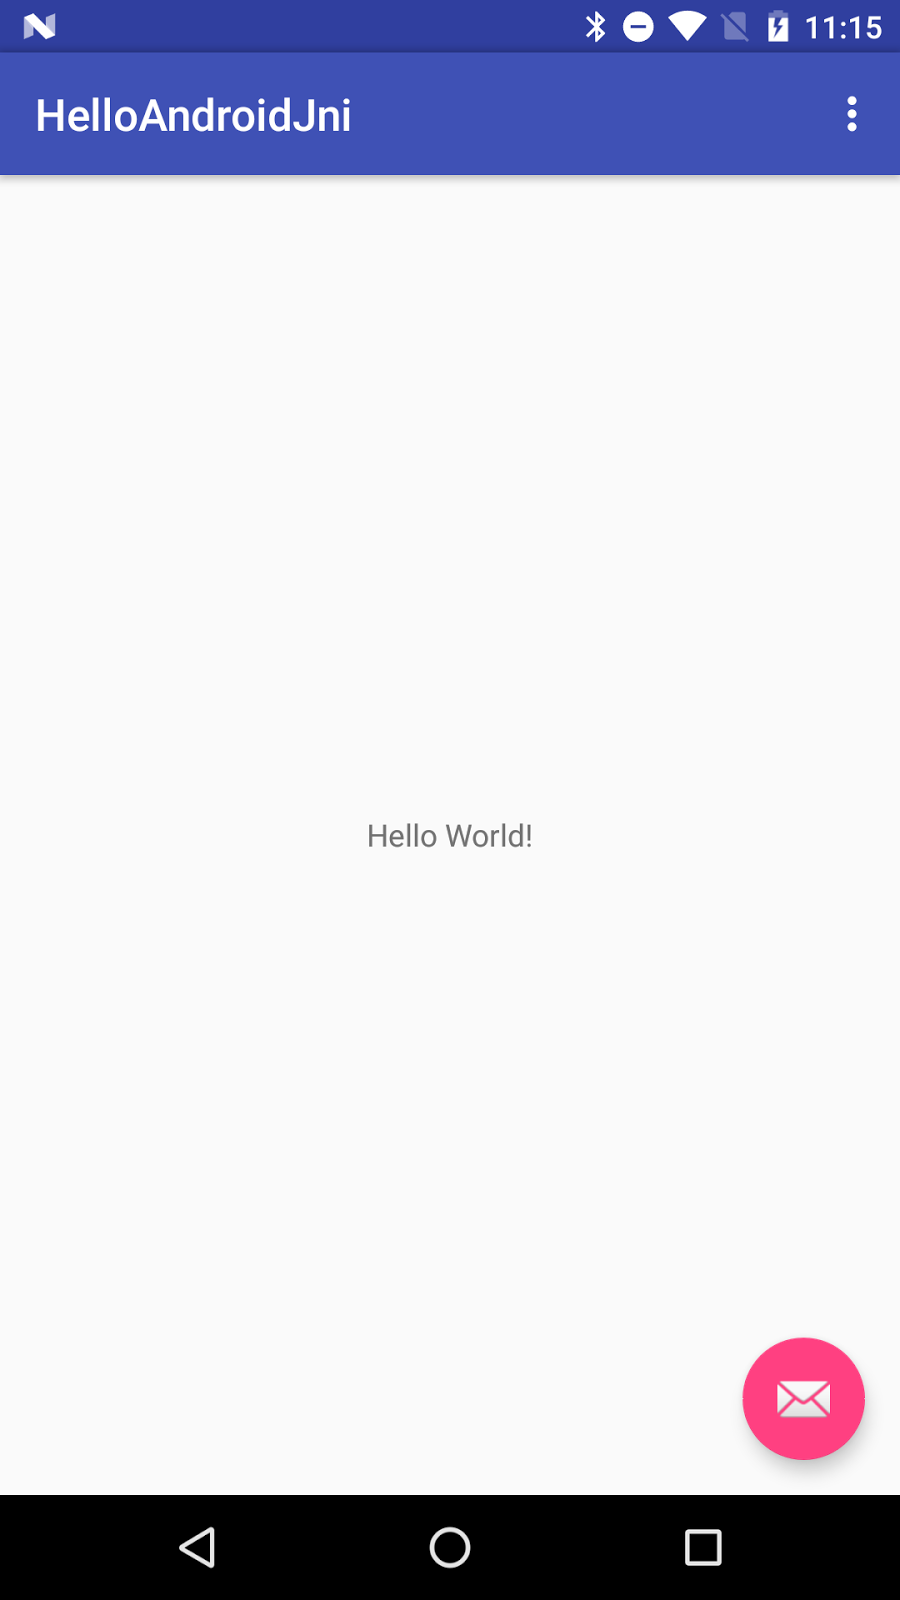
 , you will see the following on your target device or Emulator:
- Configure the project to use gradle wrapper.
a) On Mac OS, menu "Android Studio" > "Preferences".
b) On Linux, menu "File" > "Settings".
c) Then "Build, Execution, Deployment" > "Build Tools" > "Gradle".
d) Select "Use Default Gradle wrapper (recommended)", click "OK".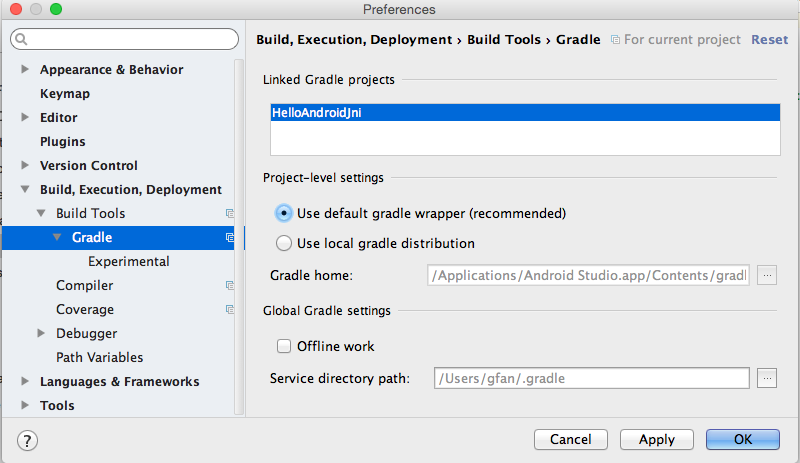
- Configure Android Studio to download NDK
a) Menu "Tools" > "Android" > "SDK Manager"
b) Select tab "SDK Tools"
c) Check "Android NDK"[ or "NDK"] if it is not checked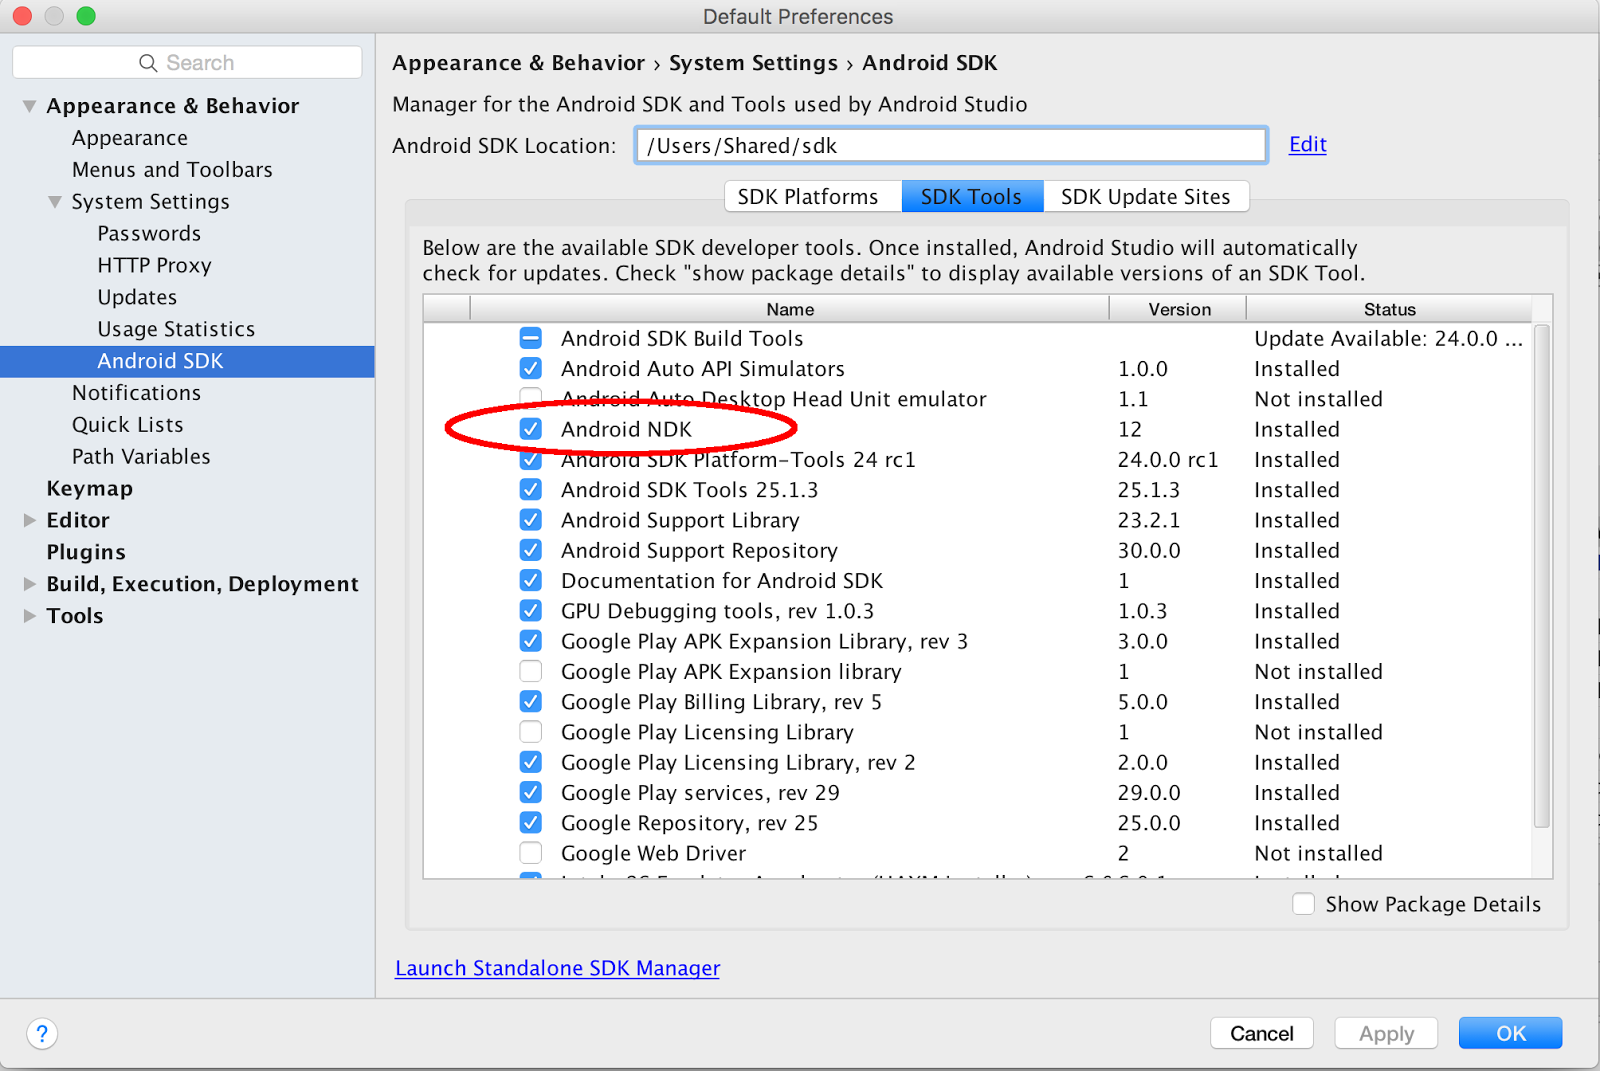
- Sync
 , Build
  and Run
  , you should see the same as in step 6.
3. Add JNI Build Capability to HelloAndroidJni Project
Android Studio supports native development via experimental plugin developed by Google, let's add it into our project.
- Find the latest gradle-experimental plugin version[currently is 0.7.2 at the writing]. Open project build.gradle in Android Studio's "Project" window.
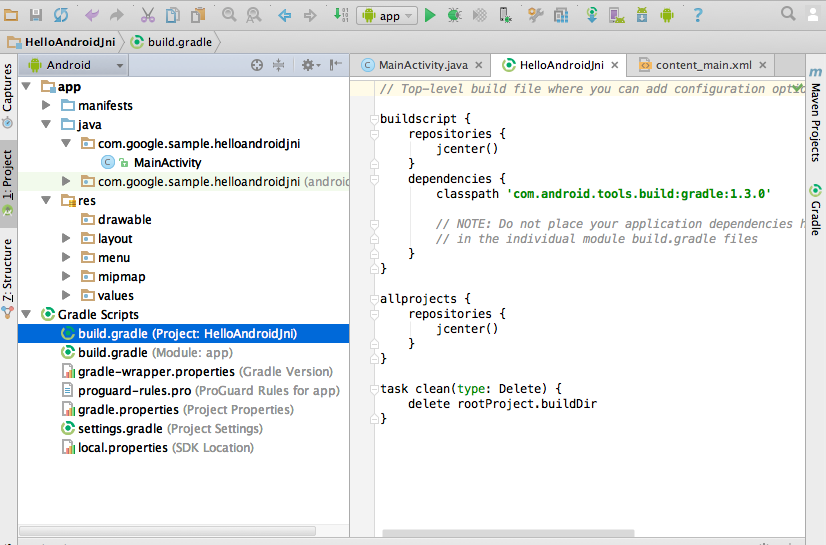
- Replace gradle plugin
classpath 'com.android.tools.build:gradle:2.1.0'
with your latest version[it does not have to be 0.7.2]:
classpath 'com.android.tools.build:gradle-experimental:0.7.2'
- Change to the latest gradle version (2.10 is required for plugin version 0.7.0).
Select Android Studio "Project" pane, "Gradle Scripts" > "gradle-wrapper.properties (Gradle Version)" and change:
distributionUrl=https\://services.gradle.org/distributions/gradle-2.4-all.zip
to:
distributionUrl=https\://services.gradle.org/distributions/gradle-2.10-all.zip - Convert the auto-generated module build.gradle to Gradle's component model DSL.
Select Android Studio "Project" pane > "Gradle Scripts" > "build.gradle (Module: app)" and replace:
apply plugin: 'com.android.application'

android {
   compileSdkVersion 23
   buildToolsVersion "23.0.1"

   defaultConfig {
       applicationId "com.google.sample.helloandroidjni"
       minSdkVersion 22
       targetSdkVersion 23
       versionCode 1
       versionName "1.0"
   }
   buildTypes {
       release {
           minifyEnabled false
           proguardFiles getDefaultProguardFile('proguard-android.txt'), 'proguard-rules.pro'
       }
   }
}
// others below this line: no change
with:
apply plugin: 'com.android.model.application'

model {
   android {
       compileSdkVersion 23
       buildToolsVersion "23.0.3"

       defaultConfig {
           applicationId "com.google.sample.helloandroidjni"
           minSdkVersion.apiLevel 22
           targetSdkVersion.apiLevel 23
           versionCode 1
           versionName "1.0"
       }
       buildTypes {
           release {
               minifyEnabled false
               proguardFiles.add(file('proguard-android.txt'))
           }
       }
   }
}
// others below this line: no change
- Sync
 , Build
  and Run
  . You should still see the same "Hello World" on your target device.
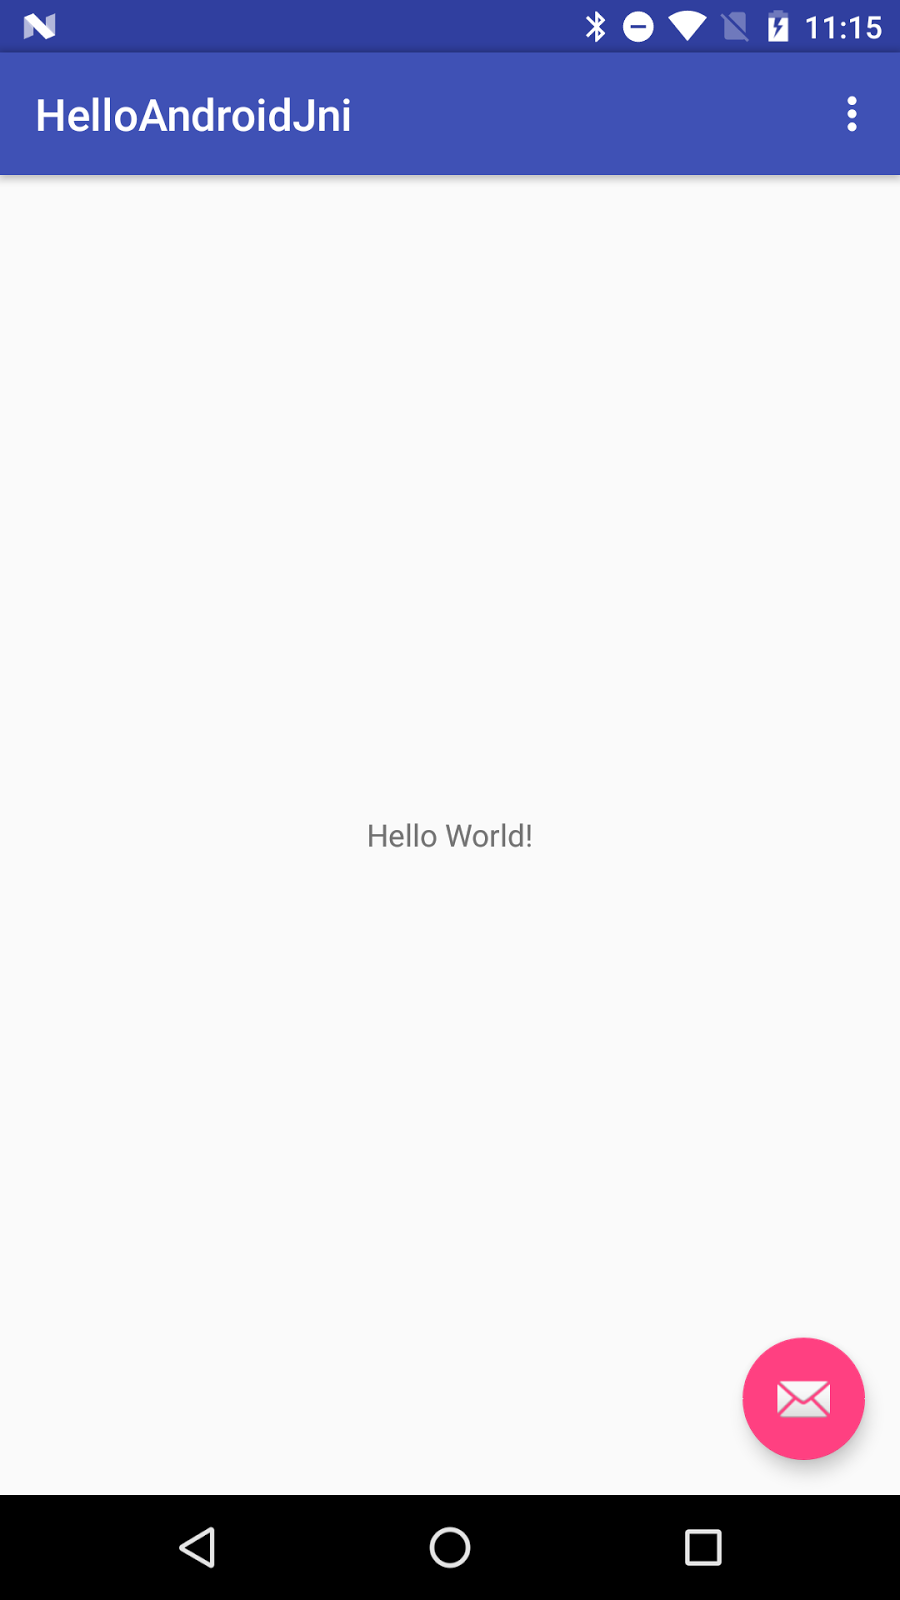
4. Add JNI Code Into Project
- Check the NDK Path.
Select the menu "File" > "Project Structure" > "SDK Location", "Android NDK Location" if it is not set yet, then click "...", and browse to your NDK location and click "OK" (you may also choose "download").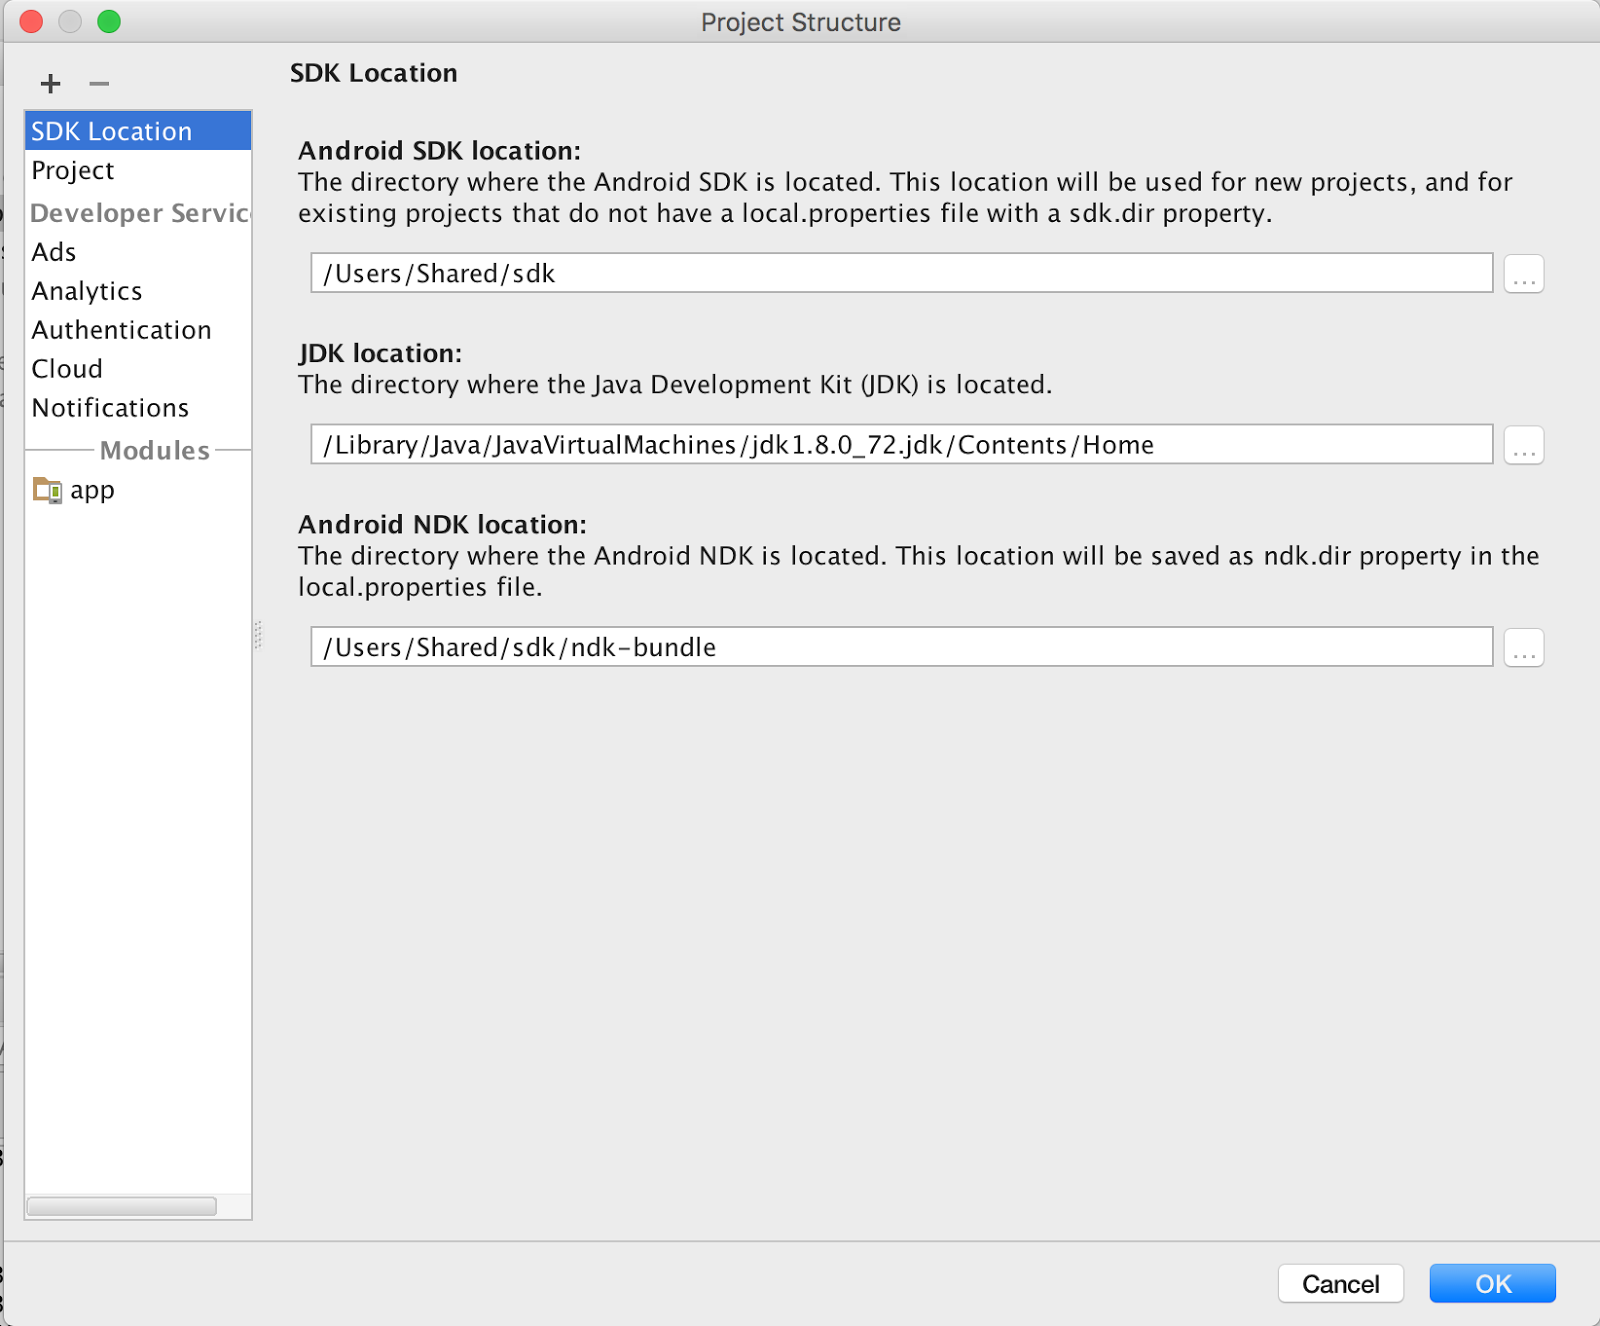
- Configure the module build.gradle to create "hello-android-jni" shared lib.
Select Android Studio "Project" pane > "Gradle Scripts" > "build.gradle (Module:app)", add the following inside the "model" block, after "buildTypes" block.
	buildTypes {
...
}
// New code
ndk {
    moduleName "hello-android-jni"
}
// New code finished
- Add JNI function and load jni shared lib into project.
Select Android Studio "Project" pane > "app" > "java" > "com.google.sample.helloandroidjni" > "MainActivity", and add JNI function getMsgFromJni() and System.loadLibrary() to the end of class MainActivity.
     ...
   // new code
   static {
       System.loadLibrary("hello-android-jni");
   }
   publicnativeString getMsgFromJni();
   // new code done
} // class MainActivity
- Sync , Build , there should be no errors from Android Studio.
Note:
- make sure library name is the same as moduleName inside build.gradle
- The "Build" step is just to build, do not load the built apk yet; if you load it, it will crash since there is no native implementation for getMsgFromJni() yet
- Generate the C/C++ prototype function for jni function getMsgFromJni().
In MainActivity.java file, "getMsgFromJni()" is highlighed with red because Android Studio could not find its implementation; let's get it implemented:
- Select function "getMsgFromJni()".
- Wait for context aware menu prompt
 to appear.
 - Click on
 to bring up the popup

- Select "Create Function Java_com_google_example_helloandroidjni_MainActivity_getMsgFromJni".
- Android Studio creates a prototype function for getMsgFromJNI() in hello-android-jni.c file under the "jni" folder. Both got created at once!
#include<jni.h>

JNIEXPORT jstring JNICALL
Java_com_google_sample_helloandroidjni_MainActivity_getMsgFromJni(JNIEnv *env, jobject instance) {

   // TODO

   return (*env)->NewStringUTF(env, returnValue);
}
- Replace "returnValue" in the above code with our own message:
// TODO
return (*env)->NewStringUTF(env, "Hello From Jni");
- Display our JNI message in the application.
- Add an ID to the existing TextView.
Open "Android Studio" pane, "res" > "layout" > "content_main.xml"[if you have chosen template "Empty Activity" in step "Create Java Sample App", you file might be "activity_main.xml" instead], select "design" view, and click or "Hello World", inside "Properties" pane, put "@+id/jni_msgView" into "ID" field:
[The other way is to directly add into "text" view, and put id in with android:id="@+id/jni_msgView".] - Display our jni message in the TextView.
In MainActivity::onCreate() function, append following code to the end of the function:
((TextView) findViewById(R.id.jni_msgView)).setText(getMsgFromJni());
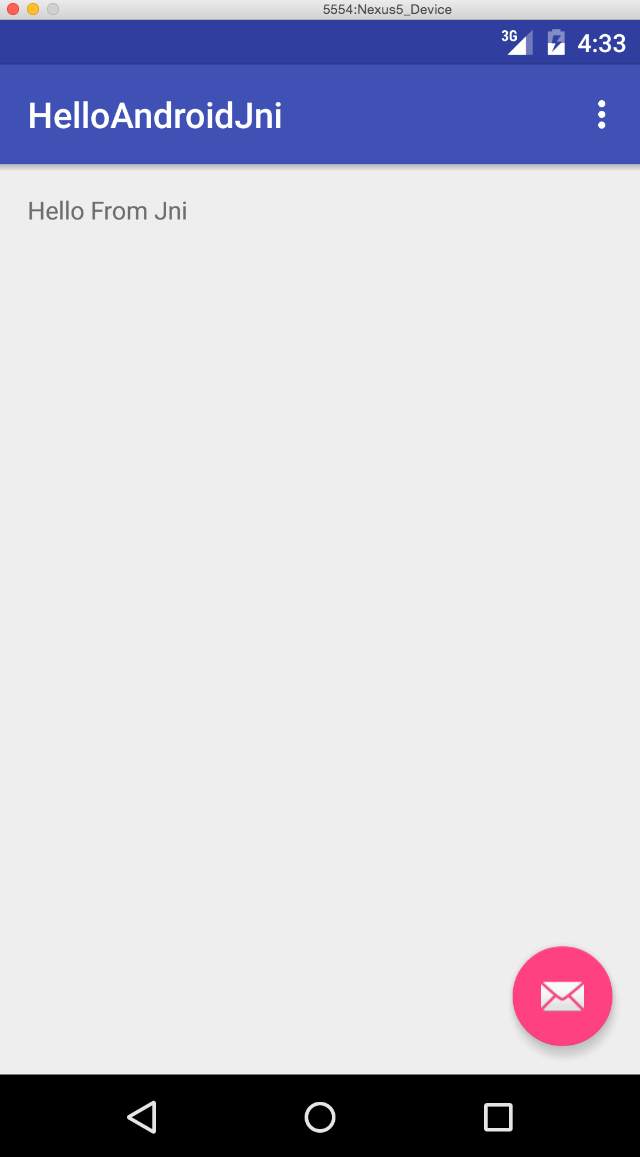
- Click the Run
 button, you should see "Hello From Jni" in your target device.
- Browse the Native Code
- Select "NewStringUTF" inside hello-android-jni.c, "right click" to bring up the pop-up menu.
- Select "Go To", and "Implementation(s)".
- You will see the function implementation of "NewStringUTF".
- Select other code to explore the native code browsing feature.
5. Debugging JNI Code
- Click the Run/Debug Configuration

[For Android Studio version earlier than 2.2, select . Android Studio auto-generates this native debug configuration when it detects JNI code. In this config, debug configurations are enabled by default. If
  is not visible, close this project and reopen it with Android Studio, it will be there; Android Studio version 2.2 integrated the debug functionality into app configure].
 - Open hello-android-jni.c inside Android Studio.
- Click the left edge of the native code to set a breakpoint:

- Click the Debug button
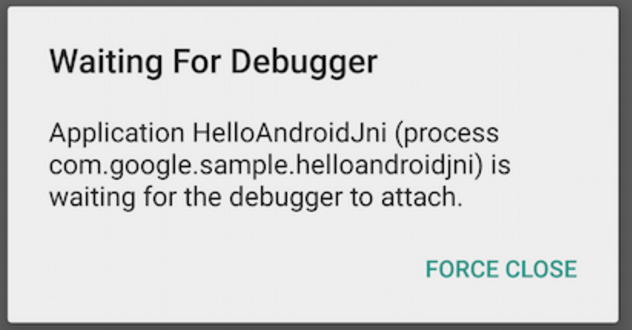
 , your android device should prompt "Waiting For Debugger" message:
- Wait until Android Studio connects to the debugger on your device ( it might take 1 - 2 minutes, depending on the device and OS version ), and stops at the breakpoint.
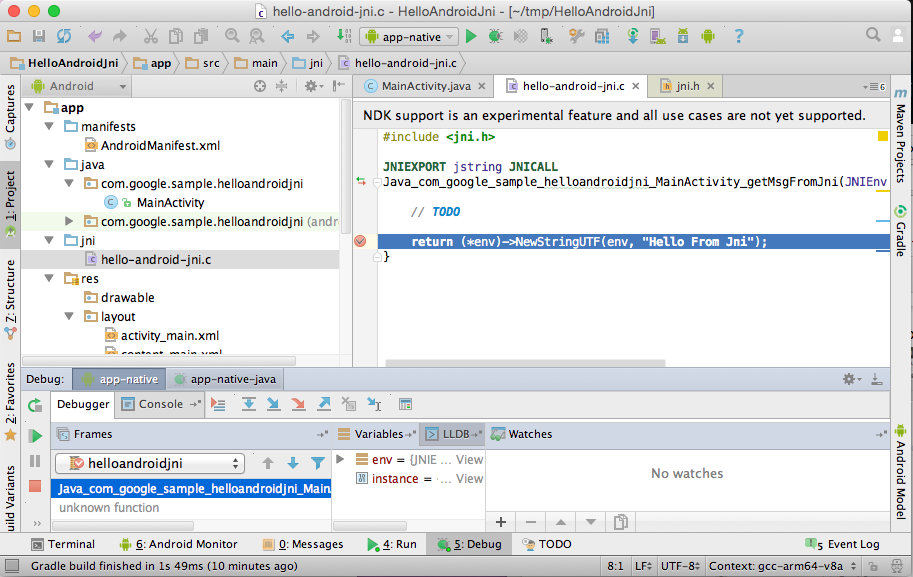
- Click "env" inside the "Variables" window at the bottom pane of Android Studio to observe contents of env pointer.
- Click "+" at the bottom of the "Watches" window (next to "Variables") and add "env", Android Studio will bring the content of env into watch window. The values should be the same as the values in "Variables" window.
- Click the "F8" key to step over, and menu "Run" > "Resume Program" to continue the execution.
[Note: if you are using Android Studio RC 1.5 or better, you can set a breakpoint on getMsgFromJni() in Java code and "trace into" JNI code]


 661
661


 被折叠的 条评论
为什么被折叠?


