


转自:http://blog.csdn.net/salonzhou/article/details/50352754
使用android studio开发android项目一:hello android
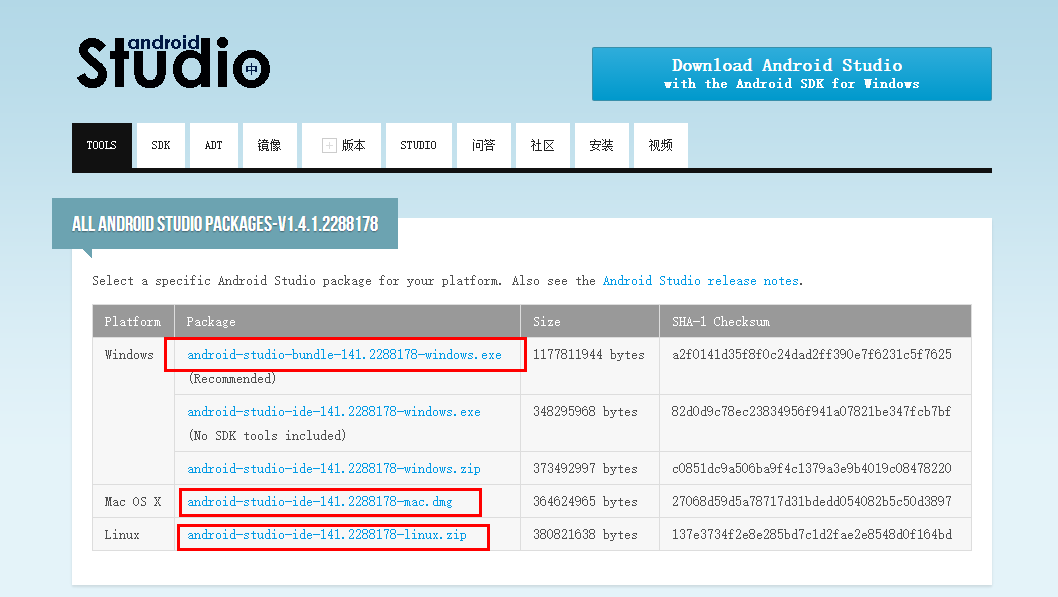
1 安装包的下载
http://tools.android-studio.org/
我下载的是windows版本2.2G,然后就是下一步。完成后可能需要配置一下Java开发环境(因为我电脑上以前有配置过,所以这次就没有配置,看别人的教程说需要配置)。
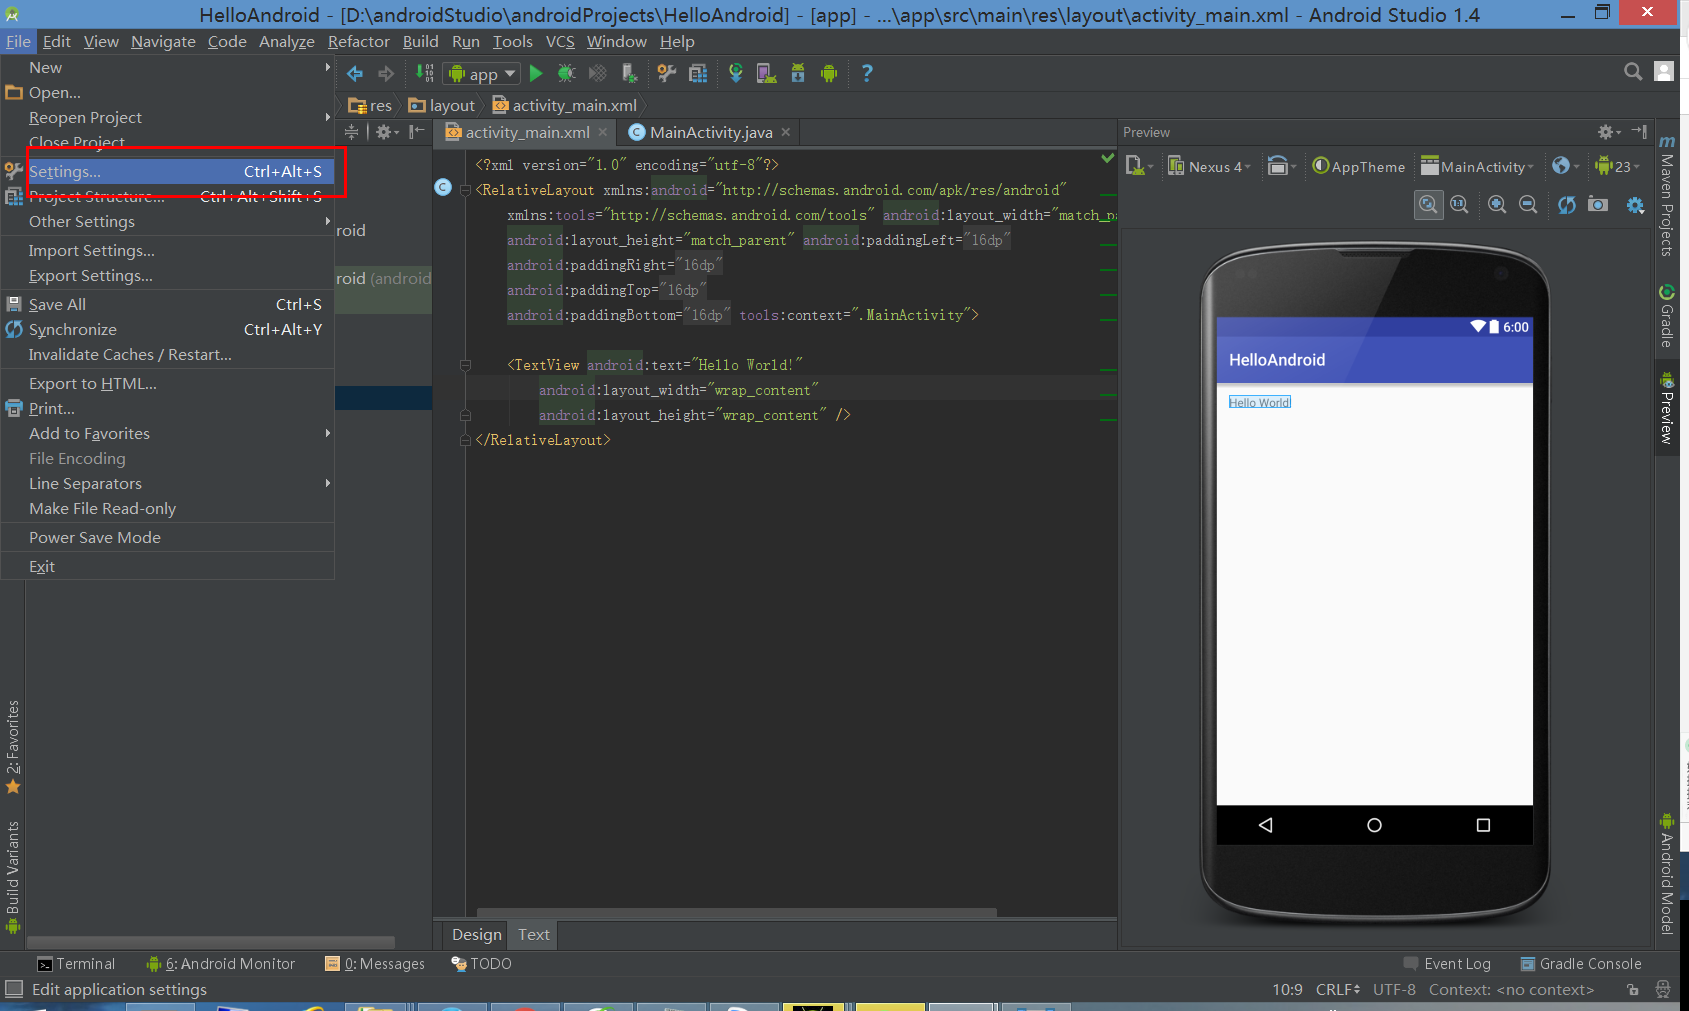
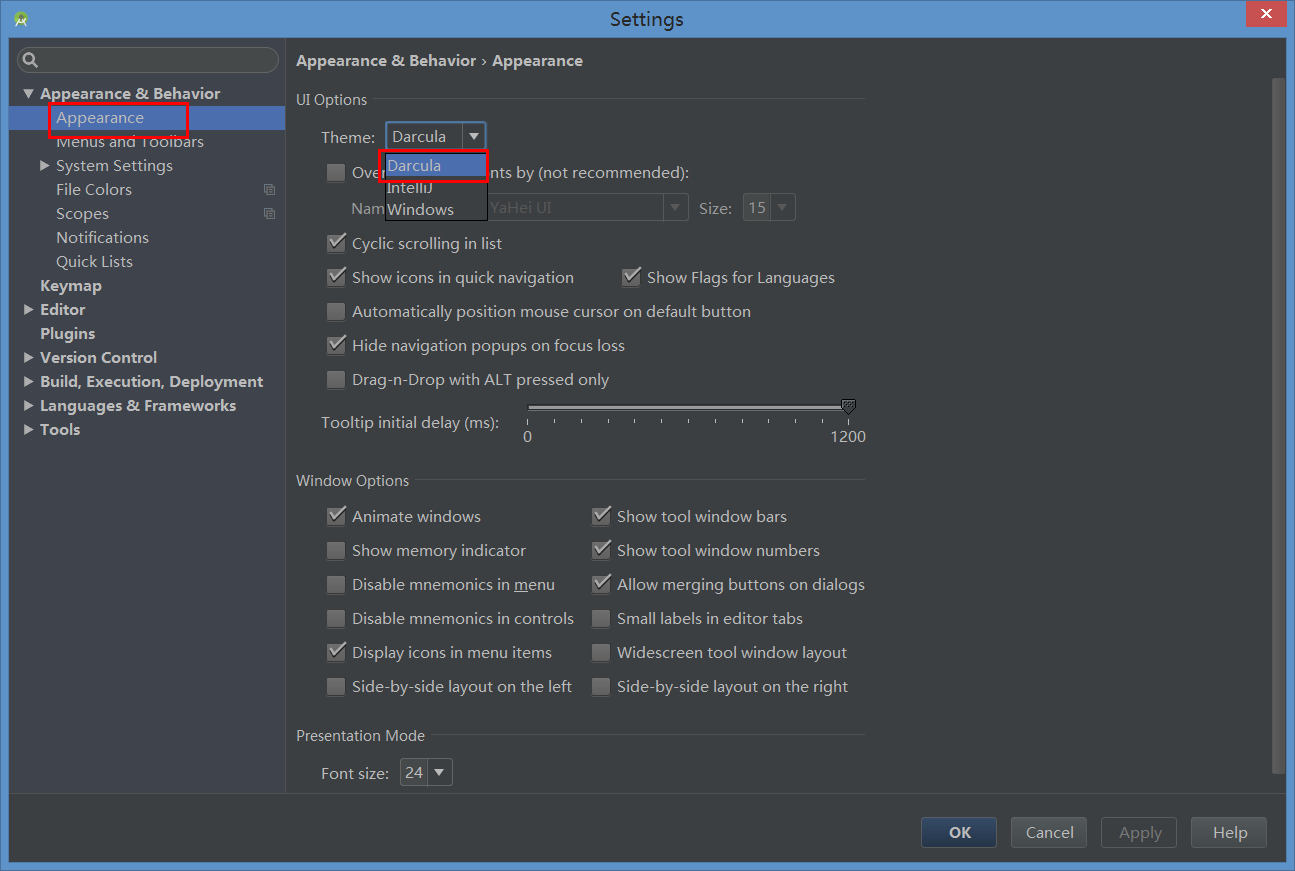
背景色修改
选择设置
apearance—>theme 选择darcula
2、界面介绍
以后再补上
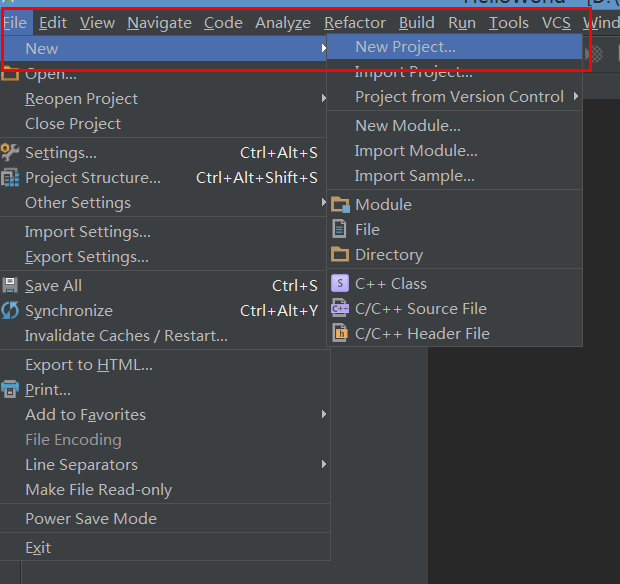
3、项目创建
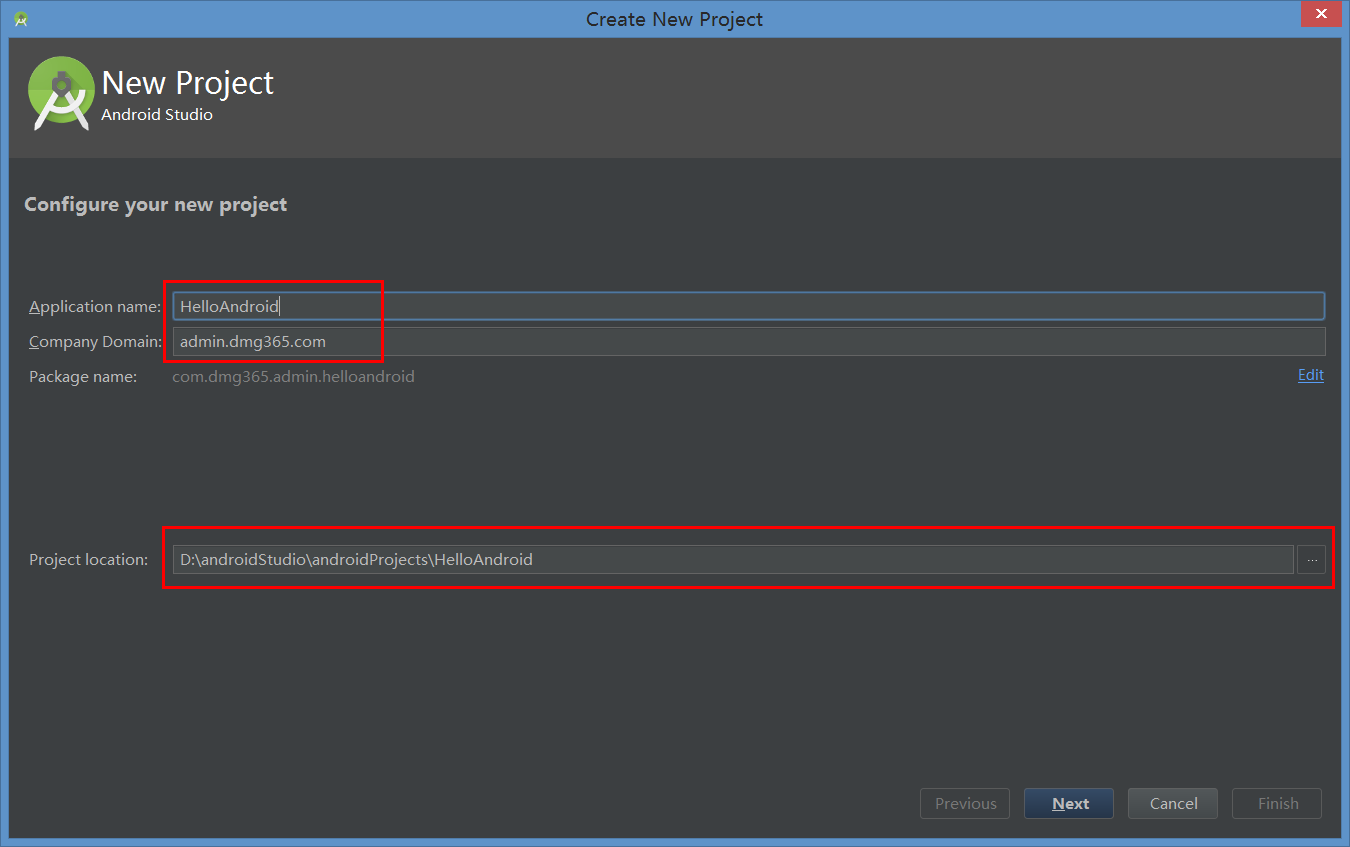
新建项目
填写项目名称
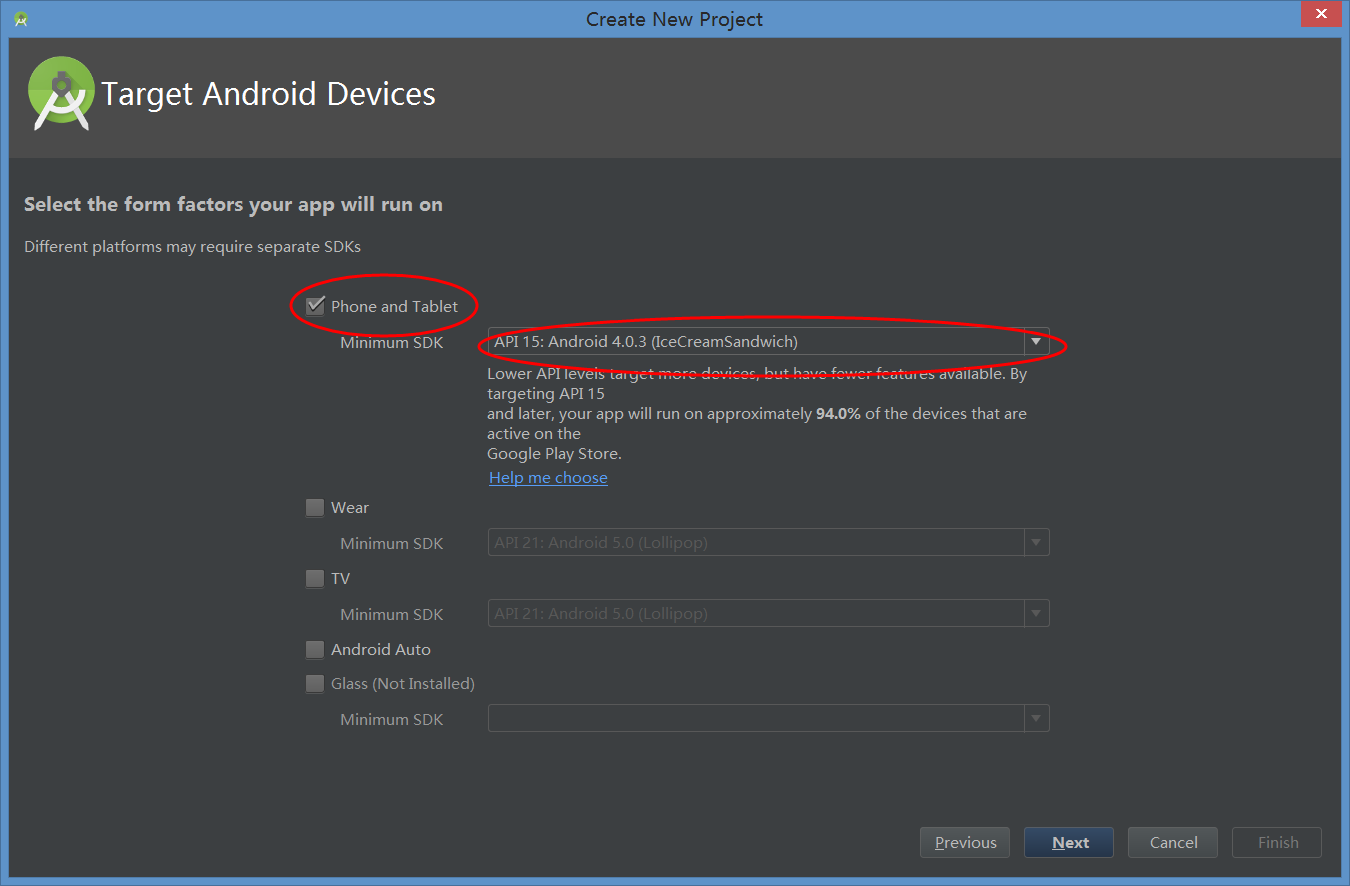
多选框只选择第一个,选择目标设置版本,版本可以为默认
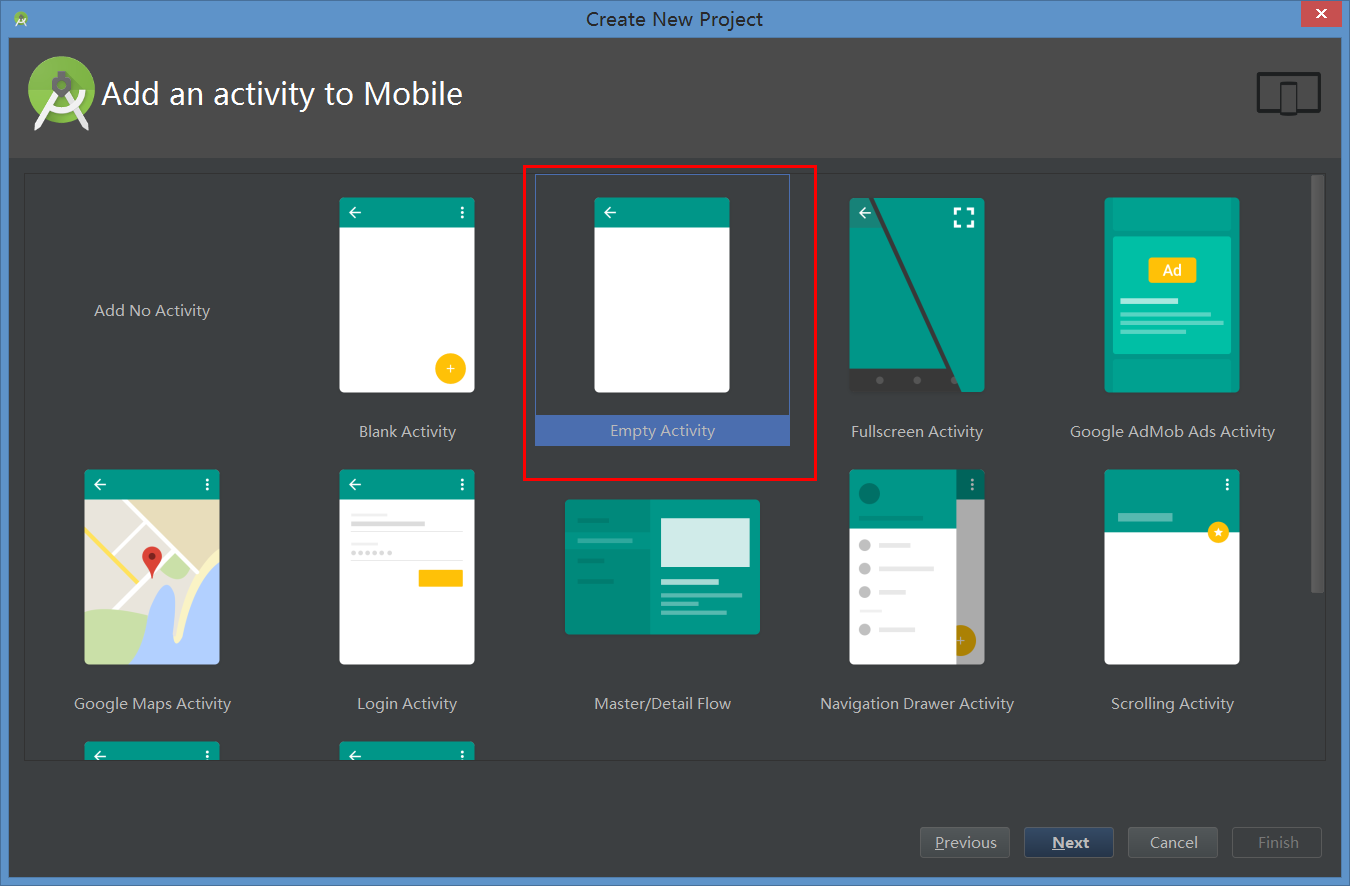
添加activity,我选择空白
最后选择finash即可。
如果是在现有的项目上新建的,默认会重新打开一个新的studio界面,这里也可以选择替换当前项目。
项目创建完成就是这样子的

4、Android目录基本介绍
res/layout/activity_main.xml App主窗体布局文件,你的应用长什么样都在这边定义,有Design和Text两种模式
res/values/strings.xml 可以理解为i18n文件,这个文件用来存放程序调用的各种字符串
src/com/dmg365/admin/helloandroid/MainActivity.java 这个就是我们的主程序类
我们试着添加一个按钮和按钮事件
activity_main.xml:
- 1
- 2
- 3
- 4
- 5
- 6
- 7
- 8
- 9
- 10
- 11
- 12
- 13
- 14
- 15
- 16
- 17
- 18
- 19
- 1
- 2
- 3
- 4
- 5
- 6
- 7
- 8
- 9
- 10
- 11
- 12
- 13
- 14
- 15
- 16
- 17
- 18
- 19
strings.xml:
- 1
- 2
- 3
- 4
- 5
- 6
- 1
- 2
- 3
- 4
- 5
- 6
效果为:
在MainActivity.java:

- 1
- 2
- 3
- 4
- 5
- 6
- 7
- 8
- 9
- 10
- 11
- 12
- 13
- 14
- 15
- 16
- 17
- 18
- 19
- 20
- 21
- 22
- 23
- 24
- 25
- 26
- 27
- 28
- 29
- 30
- 31
- 1
- 2
- 3
- 4
- 5
- 6
- 7
- 8
- 9
- 10
- 11
- 12
- 13
- 14
- 15
- 16
- 17
- 18
- 19
- 20
- 21
- 22
- 23
- 24
- 25
- 26
- 27
- 28
- 29
- 30
- 31
这时如果红色提示有错误,Alt+enter引入相应的包就可以了。
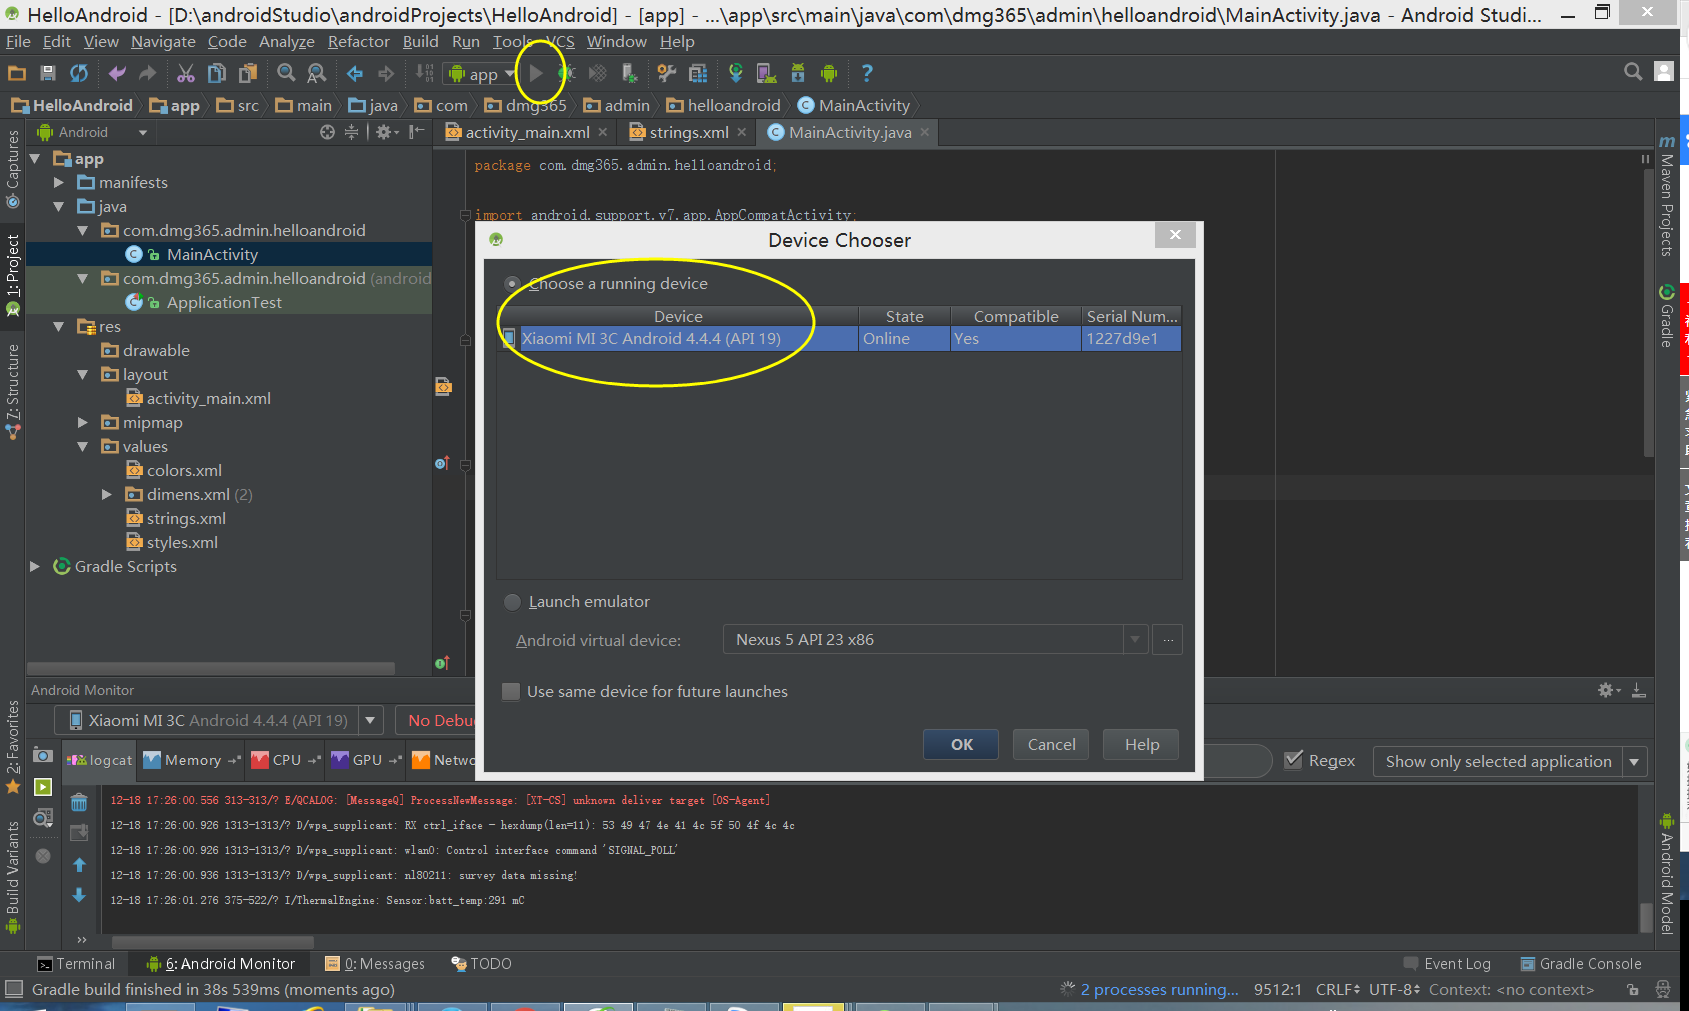
5、项目运行
代码写好后,电脑通过USB数据线连接手机,手机系统设置里的开发人员选项里打开USB调试,在IDE中直接点Run就可以在手机上看到运行的效果了。
这一步可能反应比较慢,在手机上确认安装即可。

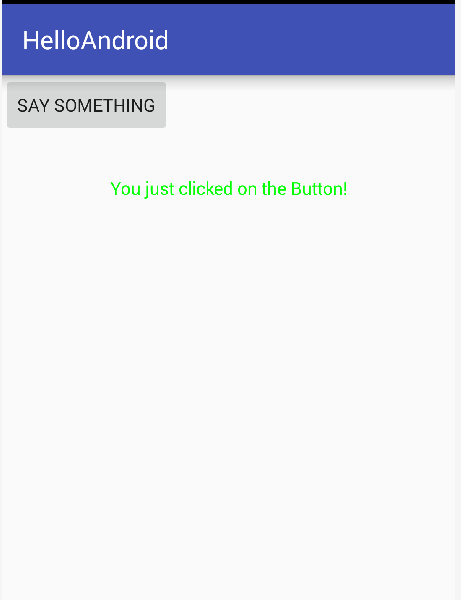
点击后:
6、生成apk包
应用开发完成后就要打包发布了,在IDE的Build菜单下选择Generate Signed APK来打包应用

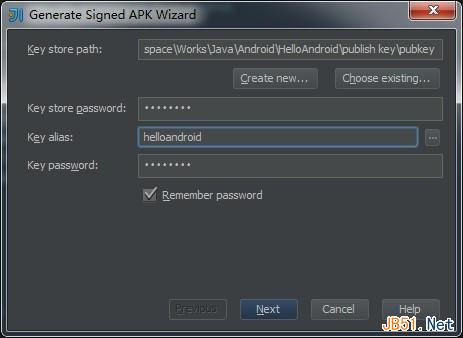
在弹出的Wizard对话框中需要指定签名的Key,一开始没有Key你可以点击Create New来新建一个Key用于签名,填入签名所需的一些字段后生成Key文件
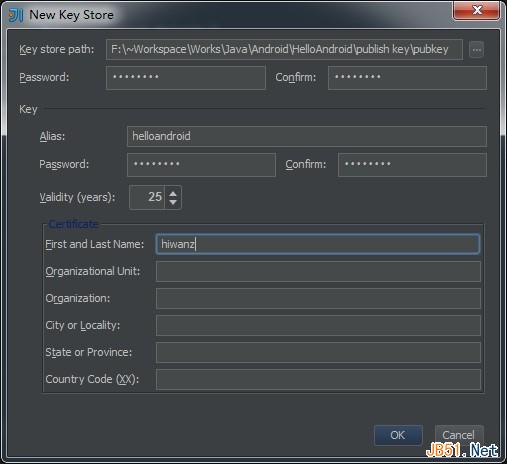
使用生成的Key来签名应用包
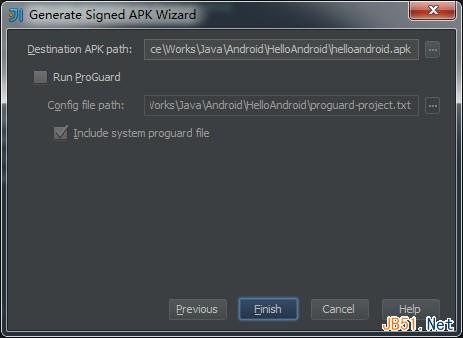
完成编译后会在刚才我们设置的Designation APK path下生成我们的helloandroid.apk应用包,接下来要怎么安装应用应该不用说了吧,我们的第一个android App就这样诞生了


 2048
2048

 被折叠的 条评论
为什么被折叠?
被折叠的 条评论
为什么被折叠?
 到【灌水乐园】发言


