


本文主要讲解使用Easycode插件快速开发。
项目使用maven SpringBoot+mybatis+Druid 构建
Easycode是idea的一个插件,可以直接对数据的表生成entity、controller、service、dao、mapper无需任何编码,简单而强大。
1 安装Easycode

我这里已经安装好了的。
在这里也建议大家在安装一个插件 Lombok。
Lombok可以通过注解的方式,在编译时自动为属性生成构造器、getter/setter、equals、hashcode、toString方法。
这个插件神奇的地方就在于源码中没有getter和setter方法,但是在编译生成的字节码文件中有getter和setter方法。
2 数据库建表
本人使用的是mysql 8版本
-- auto-generated definition
DROP TABLE IF EXISTS `user`;
create table users
(
  id      int auto_increment,
  name    varchar(50) null,
  sex     varchar(4)  null,
  address varchar(50) null,
  age     int         null,
  constraint users_id_uindex
    unique (id)
);

alter table users
  add primary key (id);
建完之后可以插入两条测试数据

3 idea里配置连接数据库
在这个之前,新建一个Springboot项目,这个应该是比较简单的,这里不做演示
建好SpringBoot项目之后,如下图所示,找到这个Database

按照下图所示进行操作:

然后填写自己的数据库名字,用户名,密码。点击OK。IDEA连接数据库就完成了。
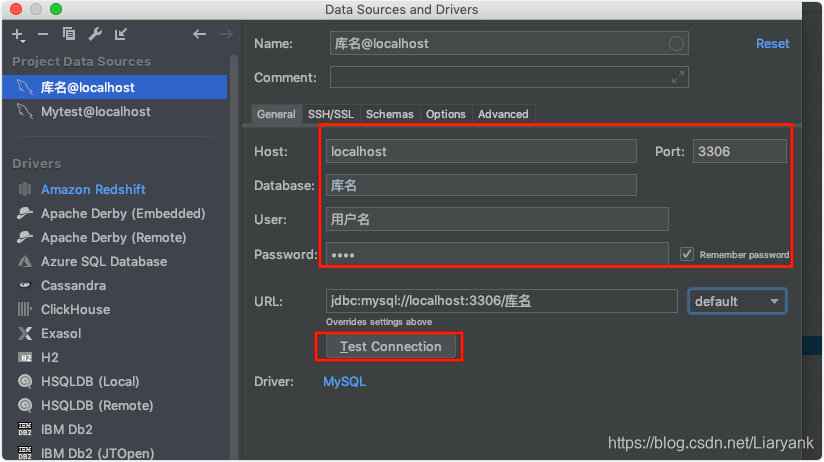
输入完成后记得Test Connection下看看是否成功。
4 开始生成代码
在这个里面找到你想生成的表,然后右键,就会出现如下所示的截面。

选择你要将生成的代码放入对应的包和路径中,选择完以后点击OK。

这样代码就生成好了,如下图

5 pom.xml
<dependencies>
    <dependency>
        <groupId>org.springframework.boot</groupId>
        <artifactId>spring-boot-starter-web</artifactId>
    </dependency>
    <!--mybatis-->
    <dependency>
        <groupId>org.mybatis.spring.boot</groupId>
        <artifactId>mybatis-spring-boot-starter</artifactId>
        <version>2.1.1</version>
    </dependency>

    <dependency>
        <groupId>org.springframework.boot</groupId>
        <artifactId>spring-boot-starter-test</artifactId>
        <scope>test</scope>
        <exclusions>
            <exclusion>
                <groupId>org.junit.vintage</groupId>
                <artifactId>junit-vintage-engine</artifactId>
            </exclusion>
        </exclusions>
    </dependency>
    <dependency>
        <groupId>org.projectlombok</groupId>
        <artifactId>lombok</artifactId>
        <optional>true</optional>
    </dependency>
    <!--热部署-->
    <dependency>
        <groupId>org.springframework.boot</groupId>
        <artifactId>spring-boot-devtools</artifactId>
        <optional>true</optional> <!-- 这个需要为 true 热部署才有效 -->
    </dependency>
    <!-- mysql 我的是8大家根据自己版本而定-->
    <dependency>
        <groupId>mysql</groupId>
        <artifactId>mysql-connector-java</artifactId>
        <version>8.0.19</version>
    </dependency>
    <!--阿里巴巴连接池-->
    <dependency>
        <groupId>com.alibaba</groupId>
        <artifactId>druid</artifactId>
        <version>1.0.9</version>
    </dependency>
</dependencies>
6 application.properties
大家根据自己喜好可以是 .properties 也可以yml 个人比较推荐yml
server.port:8088
server.servlet.context-path=/demo

spring:
datasource:
ds1.datasource.url: jdbc:mysql://localhost:3306/数据库名?characterEncoding=utf8&serverTimezone=UTC
ds1.datasource.username: 账号
ds1.datasource.password: 密码
type: com.alibaba.druid.pool.DruidDataSource
#低版本请使用这个
#driver-class-name: com.mysql.jdbc.Driver
#8版本使用
ds1.datasource.driverClassName:com.mysql.cj.jdbc.Driver
#数据库连接池使用
ds1.datasource.initialSize: 20
ds1.datasource.minIdle: 20
ds1.datasource.maxActive: 200
ds1.datasource.maxWait: 60000
ds1.datasource.timeBetweenEvictionRunsMillis: 60000
ds1.datasource.minEvictableIdleTimeMillis: 300000
ds1.datasource.testWhileIdle: true
ds1.datasource.testOnBorrow: false
ds1.datasource.testOnReturn: false
ds1.datasource.poolPreparedStatements: true
ds1.datasource.maxPoolPreparedStatementPerConnectionSize: 20

mybatis:
mapper-locations: classpath:/mapper/*Dao.xml
typeAliasesPackage: com.liuyan.demo.entity
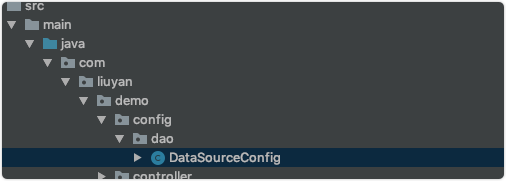
数据库类 DataSourceConfig 大家可以自己写下,如有需要可私聊联系我
7 mybatis 配置 mybatis-config.xml
<settings>
    <!-- Globally enables or disables any caches configured in any mapper under this configuration -->
    <setting name="cacheEnabled" value="true"/>
    <!-- Sets the number of seconds the driver will wait for a response from the database -->
    <setting name="defaultStatementTimeout" value="3000"/>
    <!-- Enables automatic mapping from classic database column names A_COLUMN to camel case classic Java property names aColumn -->
    <setting name="mapUnderscoreToCamelCase" value="true"/>
    <setting name="userColumnLabel" value="true"/>
    <!-- Allows JDBC support for generated keys. A compatible driver is required.
    This setting forces generated keys to be used if set to true,
     as some drivers deny compatibility but still work -->
    <setting name="useGeneratedKeys" value="true"/>
</settings>
<!-- Continue going here -->
8 启动项目
在启动项目之前,我们需要先修改两个地方。
在dao层加上@mapper注解

在启动类里面加上@MapperScan("com.liuyan.demo.dao")注解。

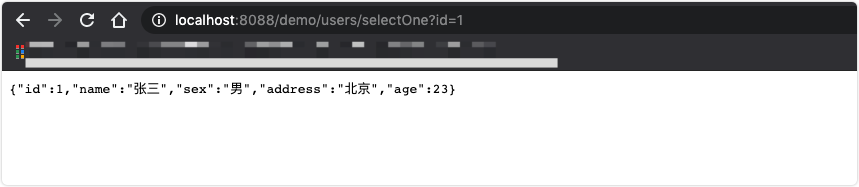
启动项目

测试访问
EasyCode的用法就先介绍到这里,有需要的小伙伴就尽情的使用吧。


 被折叠的 条评论
为什么被折叠?
被折叠的 条评论
为什么被折叠?
 到【灌水乐园】发言


