


一、实验目标
1、掌握服务器域名配置和临时服务器部署;2、掌握 wx.request 接口的用法。
二、实验步骤
列出实验的关键步骤、代码解析、截图。
步骤一
先是设计UI界面。
顶部城市位置,使用微信自带的picker模块,mode属性调为region,用以更换全国各地区。
  <picker mode='region' bindchange='changeRegion'>
    <view>{{region}}</view>
  </picker>
下面的信息显示,结合html和css的设计,用flex进行排版,设计出基本的UI界面。
css部分
.container{
height: 100vh;
display: flex;
flex-direction: column;
align-items: center;
color: #000;
justify-content: space-around;
}
.detail{
width: 100%;
display: flex;
flex-direction: column;
}
.bar{
display: flex;
flex-direction: row;
margin:20rpx 0;
}
.box{
width: 33%;
text-align: center;
}
text{
font-size: 80rpx;
color: #3c5f81;
}
image{
width: 350rpx;
height: 300rpx;
}
html部分
<view class="detail">
    <view class="bar">
      <view class="box">温度</view>
      <view class="box">气压</view>
      <view class="box">能见度</view>
    </view>
    <view class="bar">
      <view class="box">{{temp}}°C</view>
      <view class="box">{{pressure}}hPa</view>
      <view class="box">{{vis}}Km</view>
    </view>
    <view class="bar">
      <view class="box">风向</view>
      <view class="box">风速</view>
      <view class="box">风力</view>
    </view>
    <view class="bar">
      <view class="box">{{windDir}}</view>
      <view class="box">{{windSpeed}}Km/h</view>
      <view class="box">{{windScale}}Km</view>
    </view>
  </view>
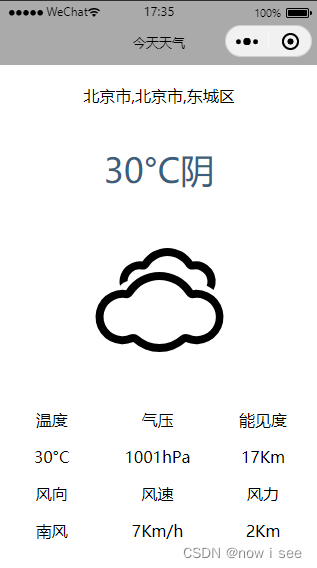
效果如图:
步骤二
获取和风天气的api,在微信小程序平台开放许可域名。在和风天气获取key用于request。
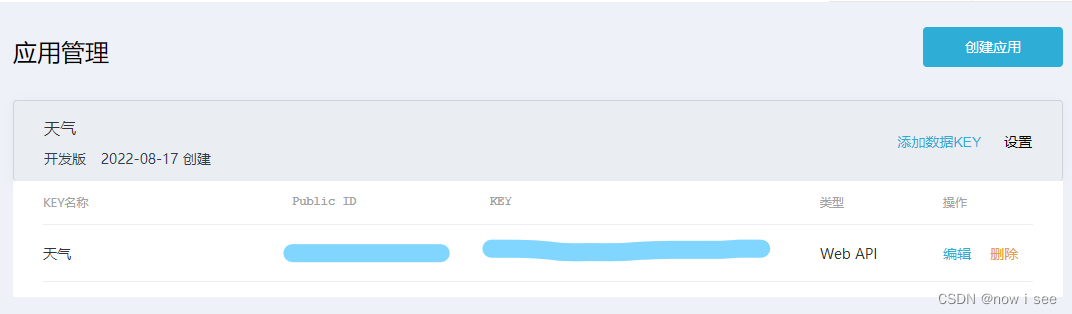
合法域名配置:
上面的域名用于获取天气,下面的域名用于获取城市id

步骤三
开始修改index.js文件,将需要的变量写入data。
data: {
    region: ["北京市", "北京市", "东城区"],
    regionID: 101010100,
    icon:999,
    text:"多云",
    temp:0,
    pressure:0,
    vis:0,
    windDir:0,
    windSpeed:0,
    windScale:0,
  },
步骤四
编写函数,利用每次更新城市的函数,调用getWeather函数。
getWeather函数中,location需要的是城市id,所以只能在添加一个函数getRegion,用于将城市名转换成id
changeRegion: function (e) {
this.setData({
region: e.detail.value
})
this.getWeather();
},
//用于将城市名转化为城市id
getRegion:function(){
var that = this;
wx.request({
url: 'https://geoapi.qweather.com/v2/city/lookup?',
data:{
location:that.data.region[1],
key:'b3247e83bb714301af7203e3f61b2d61'
},
success:function(res){
// console.log(res.data),
console.log(res.data.location[0].id),
that.data.regionID = res.data.location[0].id
},
})
},
getWeather: function () {
var that = this;
this.getRegion();
wx.request({
url: 'https://devapi.qweather.com/v7/weather/now?',
data:{
// location:that.data.region[1],
location:that.data.regionID,
key:'b3247e83bb714301af7203e3f61b2d61'
},
success:function(res){
console.log(res.data);
console.log(res.data.now.temp);
that.setData({
icon:res.data.now.icon,
text:res.data.now.text,
temp:res.data.now.temp,
pressure:res.data.now.pressure,
vis:res.data.now.vis,
windDir:res.data.now.windDir,
windSpeed:res.data.now.windSpeed,
windScale:res.data.now.windScale,
})
},
})
},
步骤五
添加打开程序自动获取城市信息。在onLoad函数中调用getWeather即可。
onLoad() {
    if (wx.getUserProfile) {
      this.setData({
        canIUseGetUserProfile: true
      })
      this.getWeather();
    }
  },
三、程序运行结果
启动
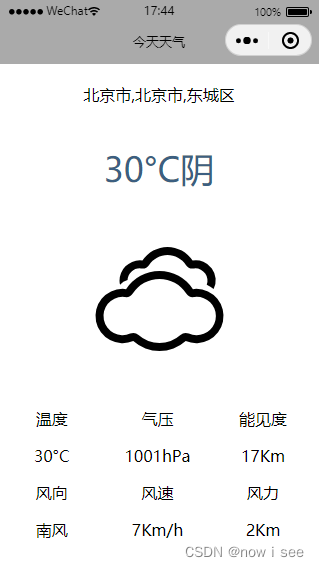
切换城市
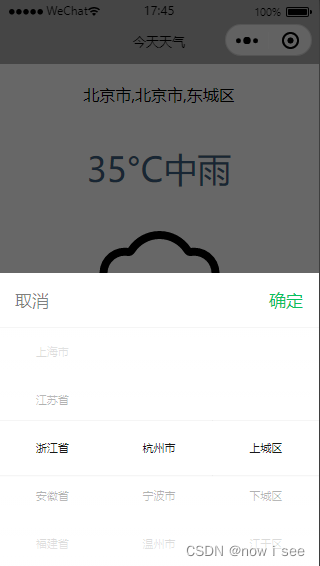
新城市的天气信息

四、问题总结与体会
描述实验过程中所遇到的问题,以及是如何解决的。有哪些收获和体会,对于课程的安排有哪些建议。
问题
因为开发工具版本更新,原先的风和天气url的request申请从城市名变成了城市id,所以一开始一直无法正常获取request。为了正常获取request,又调用了一个新的接口geoapi来实现从城市名到城市id的转换。后面的步骤就非常顺利了。


 506
506


 被折叠的 条评论
为什么被折叠?
被折叠的 条评论
为什么被折叠?
 到【灌水乐园】发言


