


从零实现一个脚手架
思路:
- 明确要实现一个工具包,发布在 npm 上使用
- npm init -y 初始化 json文件(配置当中的 main 与 bin 所对应的文件路径)
- 一般的目录结构为: bin 存放 cli.js 文件, lib 下存放具体的业务js 文件
- 在当前项目的根下执行 npm link 将当前命令做为全局(测试完成之后使用 npm unlink 卸载)
- 以上步骤完成之后,在命令行中执行 xxx 就会自动找到 bin 目录下的 js 文件执行
解析命令行
使用commander解析命令行。
const { program } = require("commander");
const pk = require("../package.json");

//版本
program.version(pk.version);

// 多余的options参数  options
program.option("-c --C", "test", true);
使用version配置版本号。使用option配置多余的参数
const actionMap = {
  create: {
    alias: "crt",
    description: "create a project",
    examples: ["yyl creae <projectname>"],
  },
  config: {
    alias: "cfg",
    description: "初始化项目配置",
    examples: ["yyl config set <k> <v>"],
  },
};

Reflect.ownKeys(actionMap).forEach((item) => {
  const { alias, description, examples } = actionMap[item];
  program.command(item).alias(alias).description(description);
});

//在输入-h之后添加更多的帮助提示
program.on("--help", () => {
  console.log("Examples: ");
  Reflect.ownKeys(actionMap).forEach((item) => {
    const { examples } = actionMap[item];
    examples.forEach((ctem) => {
      console.log("  " + ctem);
    });
  });
});
使用command可以配置更多的自定义命令行。
如上,自定义了create和config,
最后的最后,需要
//解析参数后才会生效
program.parse(process.argv);
调用parse解析参数之后才会生效。效果:
 // 输入 linz  -h
Usage: cli [options] [command]

Options:
  -V, --version   output the version number
  -c --C          test (default: true)
  -h, --help      display help for command

Commands:
  create|crt      create a project
  config|cfg      初始化项目配置
  help [command]  display help for command
Examples:
  yyl creae <projectname>
  yyl config set <k> <v>
配置actions,动作,在自定义命令之后需要对命令作出反应
Reflect.ownKeys(actionMap).forEach((item) => {
  const { alias, description, action } = actionMap[item];
  program
    .command(item)
    .alias(alias)
    .description(description)
    .action(() => {
      console.log(process.argv.slice(3));
      console.log(`name: ${item}执行`);
      // 派发命令
      moduleFn(item, process.argv.slice(3));
    });
});
通过派发命令
moduleFn的内容
 module.exports = (aname, args) => {
    require(`./command/${aname}`)(args)
 }
通过输入的参数匹配对应的文件。然后执行,达到派发命令的目的
/create.js
module.exports = (argv) => {
        console.log('argv',argv);
}
如:
输入linz create test之后
linz create test
[ 'test' ]
name: create执行
argv [ 'test' ] //create.js打印的内容
派发成功
create下载gitee仓库模板
yarn add ora inquirer chalk axios -D
ora用来显示友好的交互,inquirer用来与用户进行交互,chalk用来改变颜色, axios用来请求仓库数据。
如
const githubUrl = 'https://api.github.com/users/fine509/repos'
const githubRepo = nm => `https://api.github.com/repos/fine509/${nm}/tags`
定义好获取github仓库信息的地址
const ora = require("ora");
const axios = require("axios");
const { githubRepo, githubUrl } = require("../lib/config/repo-config");
// 获取仓库列表
const fetchRepoList = async () => {
  try {
    const { data } = await axios.get(githubUrl);
    const repos = data.map((item) => item.name);
    return repos;
  } catch (e) {
    console.log("拉取失败", e);
    return [];
  }
};

//添加耗时等待
const addLoading = async function (fn, params = [], message, successMsg, errorMsg,) {
  const spinner = ora(message);
  spinner.start();
  try {
    const ret = await fn(...params);
    spinner.succeed(successMsg);
    return ret;
  } catch (e) {
    console.log("err", e);
    spinner.fail(errorMsg);
    return {};
  }
};

// 获取tags列表
const fetchTagList = async (name) => {
  // 获取仓库版本号
  try {
    const ret = await axios.get(githubRepo(name));
    return ret;
  } catch (e) {
    console.log("拉取失败", e);
    return {};
  }
};
封装三个方法,分别是通过ora实现一个Loading的效果,通过aixos拉取仓库信息并且返回。
最后看现在的主要逻辑
module.exports = async (argv) => {
  let repos = [];
  try {
    repos = await addLoading(
      fetchRepoList,
      [],
      "开始拉取模板....",
      "拉取成功",
      "拉取失败"
    );
    // 获取所有仓库信息
  } catch (e) {
    return;
  }

  //让用户选择
  const { tmpname } = await inquirer.prompt({
    type: "list",
    name: "tmpname",
    message: "请选择目标仓库",
    choices: repos,
  });
  // 获取仓库版本号
  const tags= await addLoading(
    fetchTagList,
    [tmpname],
    "开始拉取仓库版本号.....",
    "拉取成功",
    "拉取失败"
  );
   if (Array.isArray(tags) && tags.length) {
    const { tagsName } = await inquirer.prompt({
      type: "list",
      name: "tagsName",
      message: "请选择目标版本",
      choices: tags,
    });
  } else {
    //直接下载
    const { isDownload } = await inquirer.prompt({
      type: "confirm",
      name: "isDownload",
      message: "当前不存在多个tags,是否直接下载",
    });
    console.log("isDownload", isDownload);
  }
};
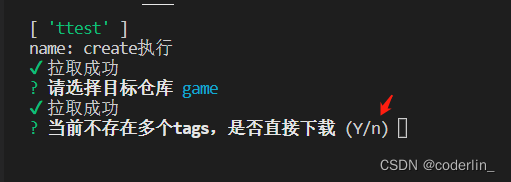
首先拉取仓库信息之后,通过inquirer根用户交互,让用户选择仓库,然后获取仓库版本号。效果如:

下载模板
yarn add download-git-repo -D
下载仓库使用download-git-repo这个库,可以帮助我们下载github仓库的内容。它不支持promise,所以需要通过promisfy转化
const { promisify } = require("util");
const download = promisify(require("download-git-repo"));

//下载仓库
const downloadRepo = async (repo, tag, projectName) => {
  // 定义缓存目录
  const cacheDir = `${
    process.env[process.platform === "win32" ? "USERPROFILE" : "HOME"]
  }/.tmp`;

  // 处理download入参
  let api = `fine509/${repo}${tag ? `#${tag}` : ""}`;

  //自定义模板输出目录
  const dest = path.resolve(cacheDir, repo);
  // 判断是否有缓存
  if (fs.existsSync(dest)) {
    return dest;
  }
  //clone项目
  await addLoading(
    download,
    "开始下载模板.....",
    "下载成功",
    "下载失败"
  )(api, dest, { clone: true });

  return dest;


};
通过process.platform可以判断是window还是Mac,然后创建缓存的目录,将第一次拉取到的仓库缓存到本机上,避免每次都去github拉取,然后返回文件夹所在的位置。
接着在用户确定直接下载之后
  let dest = "";
  if (Array.isArray(tags) && tags.length) {
    const { tagsName } = await inquirer.prompt({
      type: "list",
      name: "tagsName",
      message: "请选择目标版本",
      choices: tags,
    });
    dest = await downloadRepo(tmpname, tagsName);
  } else {
    //直接下载
    const { isDownload } = await inquirer.prompt({
      type: "confirm",
      name: "isDownload",
      message: "当前不存在多个tags,是否直接下载",
    });
    if (isDownload) {
      dest = await downloadRepo(tmpname);
    }
  }
就可以直接调用,然后返回文件夹所在目录。
通过指定项目中是否有que.js来判断模板是否需要ejs渲染。如
 // 是否需要模板渲染 ejs,约定通过que.js来判断
  if (fs.existsSync(path.join(dest, "que.js"))) {
    // 需要渲染

  } else {
    //不需要渲染, 将dest目录下的文件拷贝到新项目中去
    console.log("dest", dest);
    ncp(dest, projectName[0]);
  }
不需要渲染,直接使用ncp这个库,将dest目录下的项目复制到当前目录下。
如果需要渲染,就需要借助Metalsmith这个库,这个库可以遍历目录的所有文件,然后输出到指定的位置,如
if (fs.existsSync(path.join(dest, "que.js"))) {
    // 需要渲染
    await new Promise((resolve, reject) => {
      // 输出目录 Metalsmith中间件,将dest目录下的所有文件遍历一遍,生成到projectName下去。
      Metalsmith(__dirname)
        .source(dest)
        .destination(path.resolve(projectName[0]))
        .use(async (file, metal, done) => {
          // file是目标目录下所有的文件
          let quesArr = require(path.join(dest, "que.js"));
          const answers = await inquirer.prompt(quesArr);
          const meta = metal.metadata()
          Object.assign(meta, answers)
          delete file["que.js"];
          done();
        })
        .use(async (file, metal, done) => {
          // file是目标目录下所有的文件
          const data = metal.metadata()
          Reflect.ownKeys(file).forEach(item=>{
            if(file.includes('js') || file.includes('json')){
              const content = file[item].contents.toString()
              if(content.includes('<%')){
                content = await render(content, data) //转化
                file[item].contents = Buffer.from(content)
              }
            }
          })
          done();
        })
        .build((err) => {
          if (err) {
            reject();
          } else {
            resolve();
          }
        });
    });
  }
Metalsmith会解析source的所有文件,输出到destination上,use是中间件,通过中间件的形式处理数据,比如第一个use就是获取que.js的内容,然后根用户进行交互。调用done执行第二个中间件。
第二个中间件是用来渲染ejs模板的,Metalsmith可以读取到文件的内容,借助
const { render } = require("consolidate").ejs; //各种模板渲染工具
consolidate这个库,可以渲染ejs模板引擎。然后将渲染后的内容重新赋值,调用.build完成转换。输出到目录下。这样一个简单的脚手架就完成了。
效果:
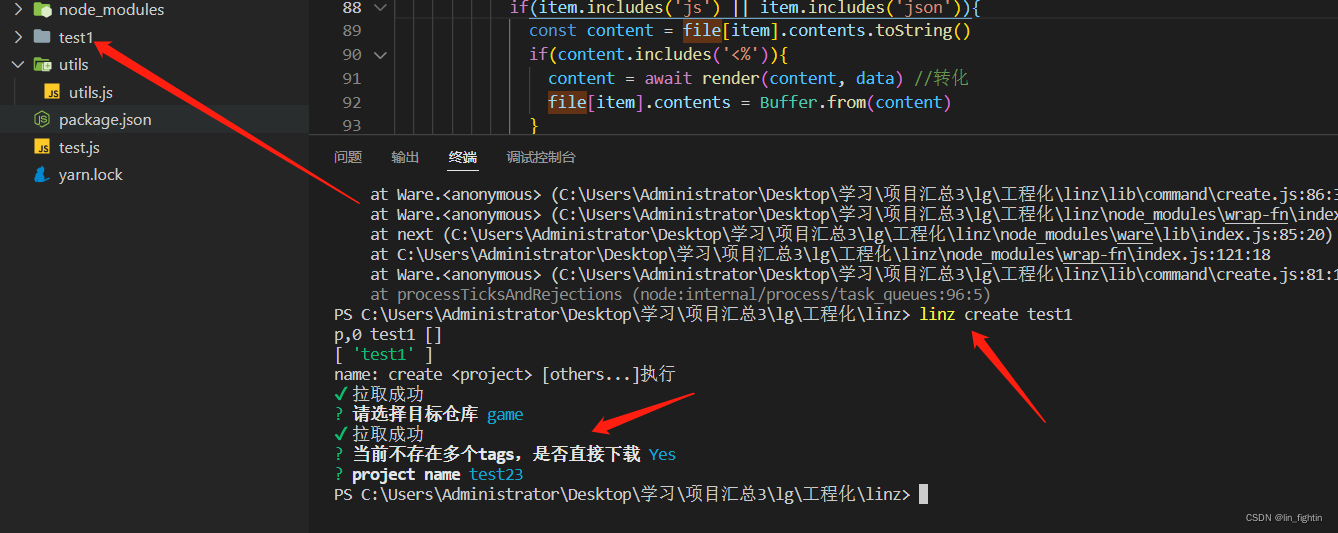
将仓库拉取到本地。
后续还可以继续优化、


 2291
2291


 被折叠的 条评论
为什么被折叠?
被折叠的 条评论
为什么被折叠?
 到【灌水乐园】发言


