


目录
application.yml中添加loadbalancer
为什么使用了LoadBalancer还要使用OpenFegin
在订单服务(全局事务发起者)的createOrder方法上面添加注解
在nacos配置中心添加配置文件lk-gateway.yml
前言
本人以笔记的方式来记录学习过程,仅当学习的输出,加深自己学习印象
版本信息
| 组件名称 | 版本号 | 备注 |
| SpringBoot | 3.2.4 | |
| SpringCloud | 2023.0.1 | |
| SpringCloudAlibaba | 2023.0.1.0 | |
| Nacos | 2.3.2 | |
| Sentinel | 1.8.6 | |
| Seata | 2.0.0 | |
| JDK | 21 | |
| maven | 3.6.1 | |
| idea | 2023.3.6 |
示例代码准备
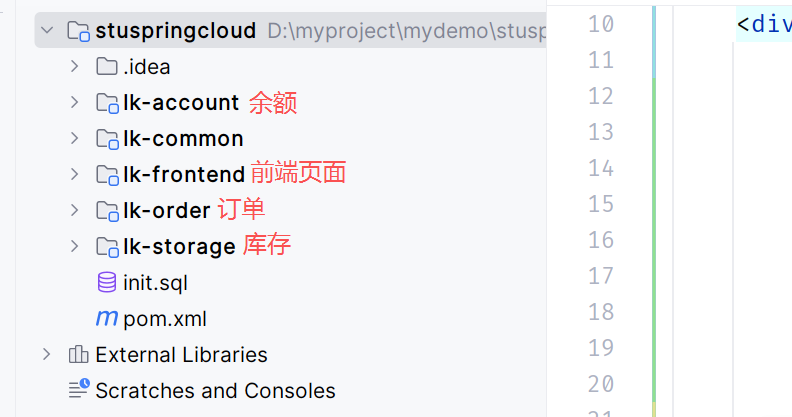
示例代码:https://gitee.com/lkhy/code-stu-demo.git
页面入口在lk-frontend中,启动之后,访问http://localhost:8080/order进行测试
Nacos之注册中心的使用
使用RestTemplate及问题点
在spring中,微服务之间的调用,可以通过RestTemplate来实现在创建订单的时候扣减库存和扣减余额,步骤如下:
(1)使用@Bean的方式来配置RestTemplate
@Configuration
public class RestConfig {

    @Bean
    RestTemplate restTemplate(){
        return new RestTemplate();
    }

}
(2)在service中引入RestTemplate,并且在创建订单的方法中通过restTemplate.postForObject()
来调用
// 引入RestTemplate
@Autowired
RestTemplate restTemplate;

// 远程调用扣减库存
String storage_url = "http://localhost:8010/storage/reduce-stock";
Integer storageCode = restTemplate.postForObject(storage_url,storageDTO, Result.class).getCode();
// 远程调用扣除余额
String account_url = "http://localhost:8020/account/reduce-balance";
Integer accountCode = restTemplate.postForObject(account_url, accountDTO, Result.class).getCode();
但是使用RestTemplate发现代码中的端口和ip是硬编码写死的,如果发生变化必须修改代码。
为什么要引入Nacos
(1)如果库存服务的IP地址或者端口号发生了变化,则订单服务将变得不可用,需要同步修改订单服务中调用库存服务的IP地址和端口号。
(2)如果系统中提供了多个库存服务,则无法实现微服务的负载均衡功能。
(3)如果系统需要支持更高的并发,需要部署更多的库存服务,硬编码订单服务则后续的维护会变得异常复杂。
所以,在微服务开发的过程中,需要引入服务治理功能,实现微服务之间的动态注册与发现。
使用步骤
下载
下面使用的Nacos版本是2.3.2
https://nacos.io/download/release-history/?spm=5238cd80.6a33be36.0.0.69bc1e5dJ3zRgi
启动Nacos
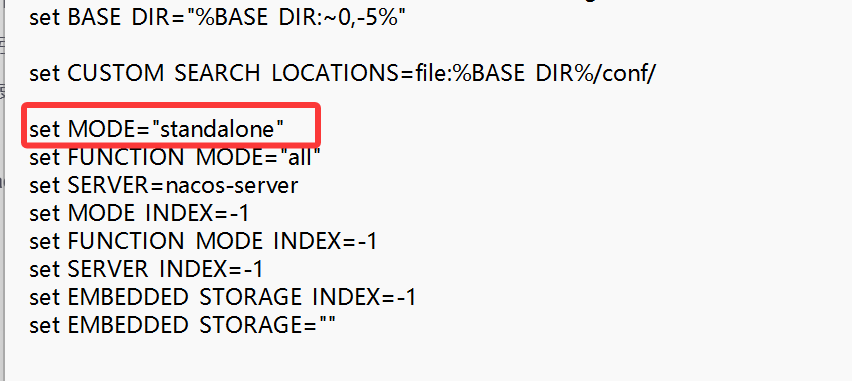
自己调试的话,使用window单机模式,有两种方式:
第一种:启动的时候,进入bin文件夹,打开cmd,然后输入startup.cmd -m standalone
第二种:直接修改bin目录下的startup.cmd,将MODE赋值为standalone
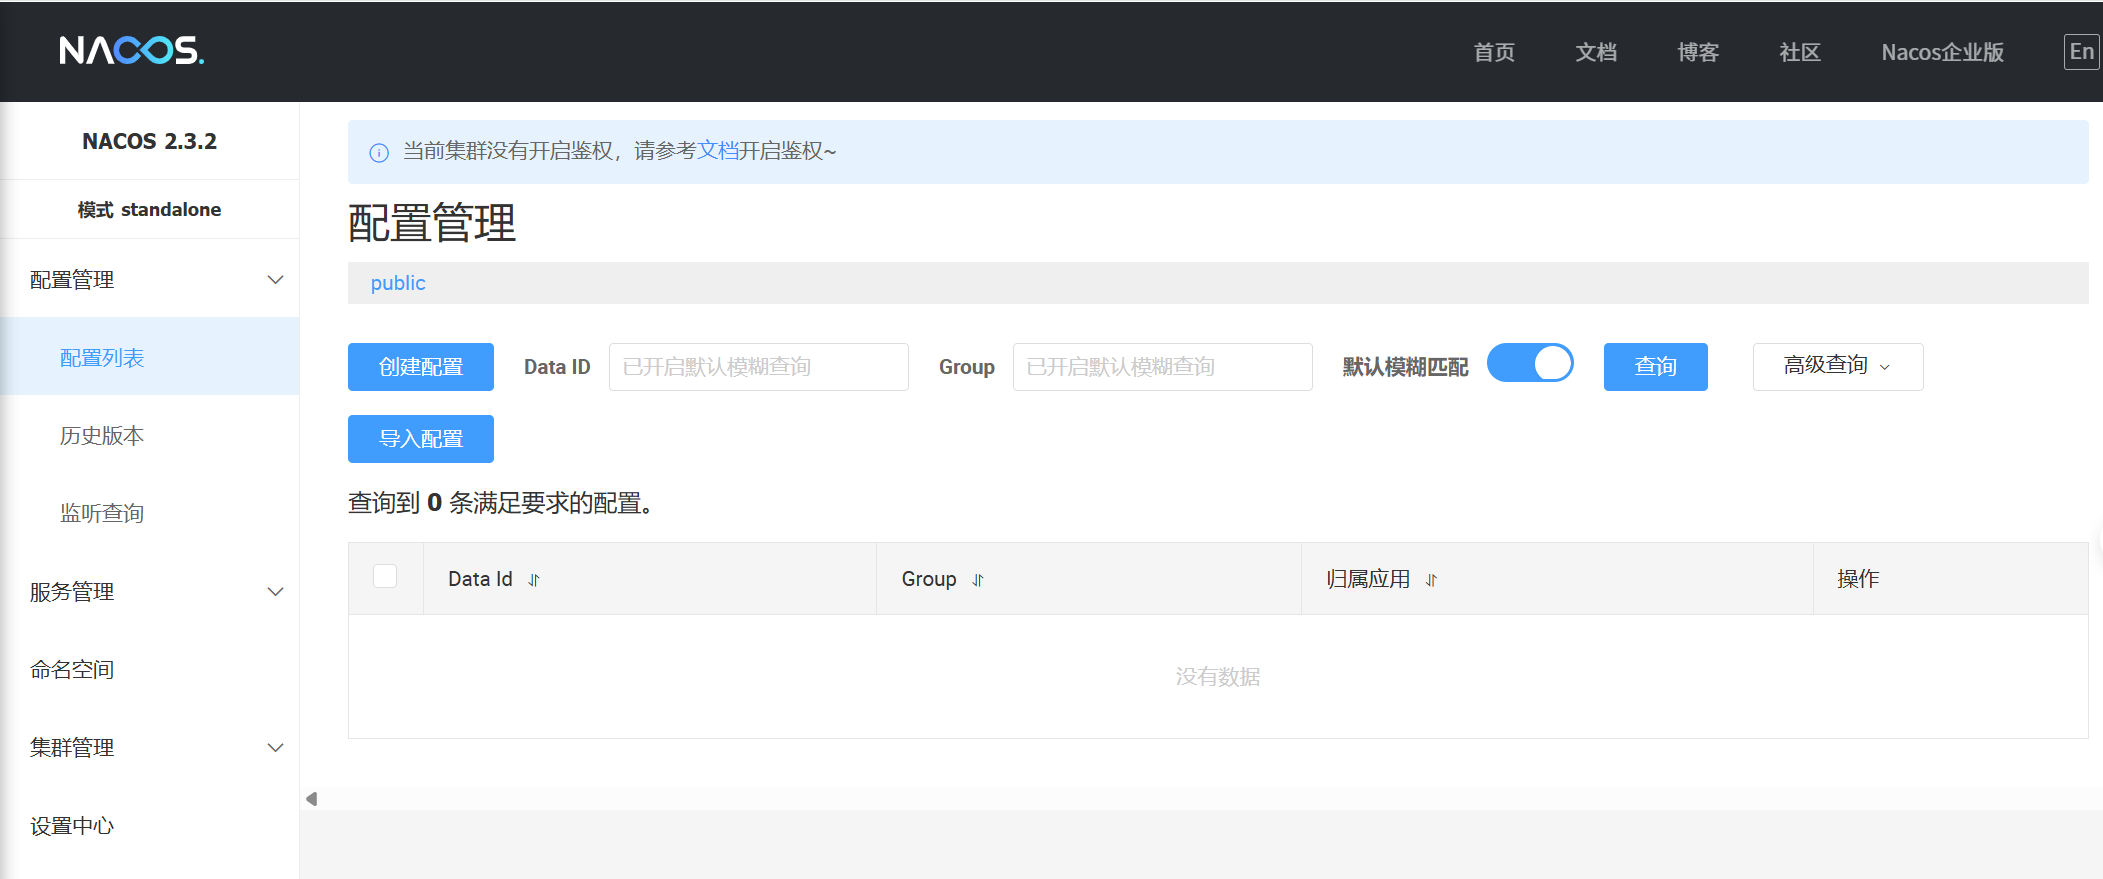
访问Nacos
http://localhost:8848/nacos/index.html
引入Nacos依赖
<!--nacos-discovery  注册中心依赖-->
<dependency>
    <groupId>com.alibaba.cloud</groupId>
    <artifactId>spring-cloud-starter-alibaba-nacos-discovery</artifactId>
</dependency>
注册服务
将余额服务的application.yml中配置Nacos注册中心地址
spring:
  application:
    name: lk-account
  cloud:
    nacos:
      discovery:
        server-addr: localhost:8848
在启动类上使用@EnableDiscoveryClient注解(貌似不用也可以)
@SpringBootApplication
@EnableDiscoveryClient
public class MallAccountApplication {

    public static void main(String[] args) {
        SpringApplication.run(MallAccountApplication.class, args);
    }

}
启动服务,在Nacos的服务列表中即可看到,完成注册的服务信息
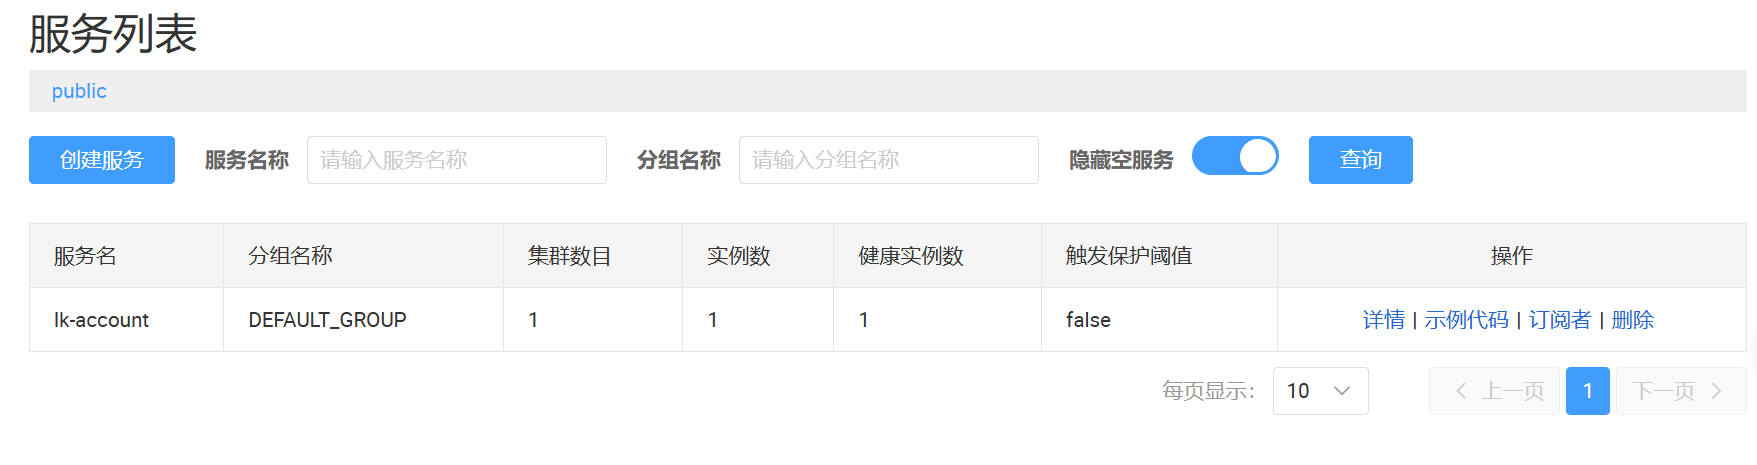
后续将库存、订单服务也一同注册到Nacos中
整合负载均衡器
由于同样的服务可能存在多个,因此引入负载均衡器来平衡各个服务直接的调用,这里使用loadbalancer
引入pom
<!-- loadbalancer 负载均衡器依赖-->
<dependency>
<groupId>org.springframework.cloud</groupId>
<artifactId>spring-cloud-loadbalancer</artifactId>
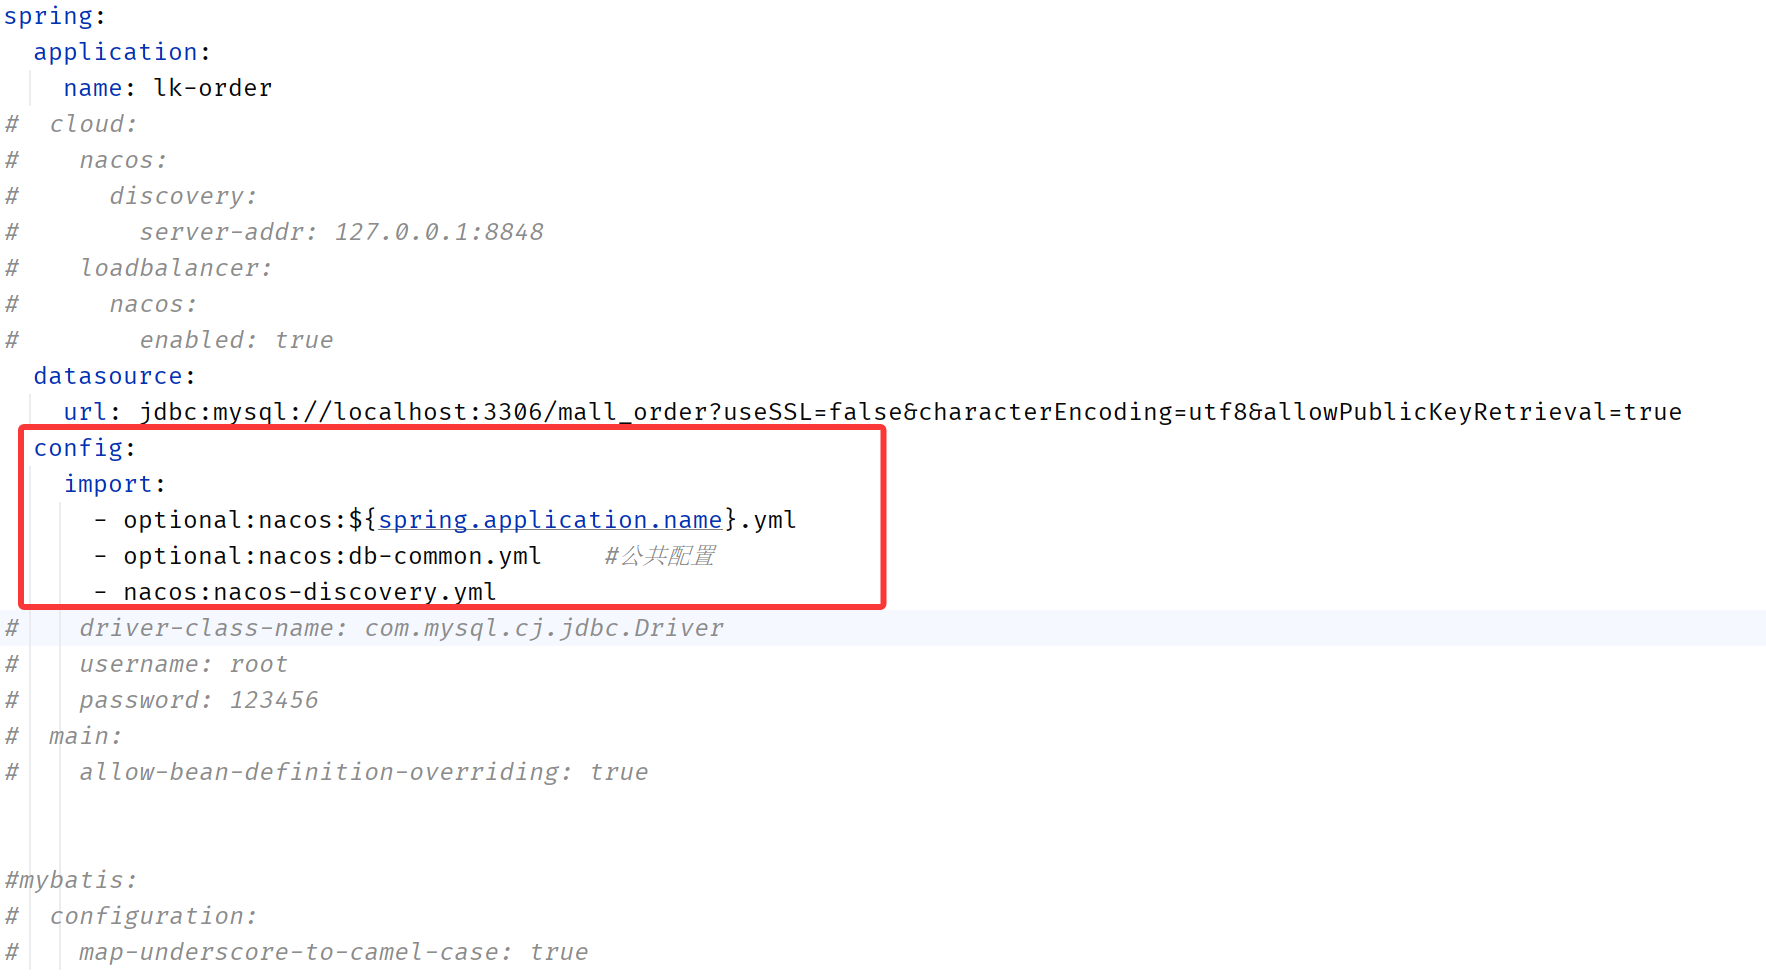
</dependency>application.yml中添加loadbalancer
spring:
  application:
    name: lk-order
  cloud:
    nacos:
      discovery:
        server-addr: 127.0.0.1:8848
    loadbalancer:
      nacos:
        enabled: true
RestTemplate添加@LoadBalanced注解
@Configuration
public class RestConfig {

    @Bean
    @LoadBalanced
    RestTemplate restTemplate(){
        return new RestTemplate();
    }

}
调整RestTemplate调用的url
OrderServiceImpl下的createOrder方法中调用库存和余额的服务ip地址用注册在nacos中的服务名称来代替
String storage_url = "http://lk-storage/storage/reduce-stock";
Integer storageCode = restTemplate.postForObject(storage_url,storageDTO, Result.class).getCode();

String account_url = "http://lk-account/account/reduce-balance";
Integer accountCode = restTemplate.postForObject(account_url, accountDTO, Result.class).getCode();
OpenFegin的使用
由于使用RestTemplate+LoadBalancer代码的可读性差,而且编码不统一,还是把url写死到代码中,因此,我们使用OpenFegin来简化服务调用。Feign可帮助我们更加便捷、优雅地调用HTTP API。Feign可以做到使用 HTTP 请求远程服务时就像调用本地方法一样的体验,开发者完全感知不到这是远程方法,更感知不到这是个 HTTP 请求。
为什么使用了LoadBalancer还要使用OpenFegin
在微服务架构中,LoadBalancer和OpenFeign虽然都提供了服务间调用的能力,但它们的设计目的和使用场景有所不同。
LoadBalancer主要关注于服务间的负载均衡,它可以帮助客户端在多个服务实例之间分配请求,以实现高可用性和性能优化。
而OpenFeign则提供了一种声明式的Web服务客户端编程模型,它使得编写服务间调用的代码更加简洁和直观。
使用步骤
添加pom依赖
在lk-order订单服务中添加OpenFeign依赖
<!-- openfeign 远程调用 -->
<dependency>
   <groupId>org.springframework.cloud</groupId>
   <artifactId>spring-cloud-starter-openfeign</artifactId>
</dependency>
启动类上添加注解@EnableFeignClients
@EnableFeignClients
@SpringBootApplication
@EnableDiscoveryClient
public class MallOrderApplication {

    public static void main(String[] args) {
        SpringApplication.run(MallOrderApplication.class, args);
    }

}
编写OpenFegin的客户端
@PostMapping中的url要写全,包含被调用的服务类上面的url,比如/storage是注解到库存controller类上的url,在加上方法上面的/reduce-stock。方法的返回值和名称保持和被调用的服务接口一致
@FeignClient(name = "lk-storage")
public interface StorageServiceFeignClient {

	@PostMapping("/storage/reduce-stock")
    Result<?> reduceStock(@RequestBody StorageDTO productReduceStockDTO);

}
@FeignClient(name = "lk-account")
public interface AccountServiceFeignClient {
@PostMapping("/account/reduce-balance")
Result<?> reduceBalance(@RequestBody AccountDTO accountReduceBalanceDTO);
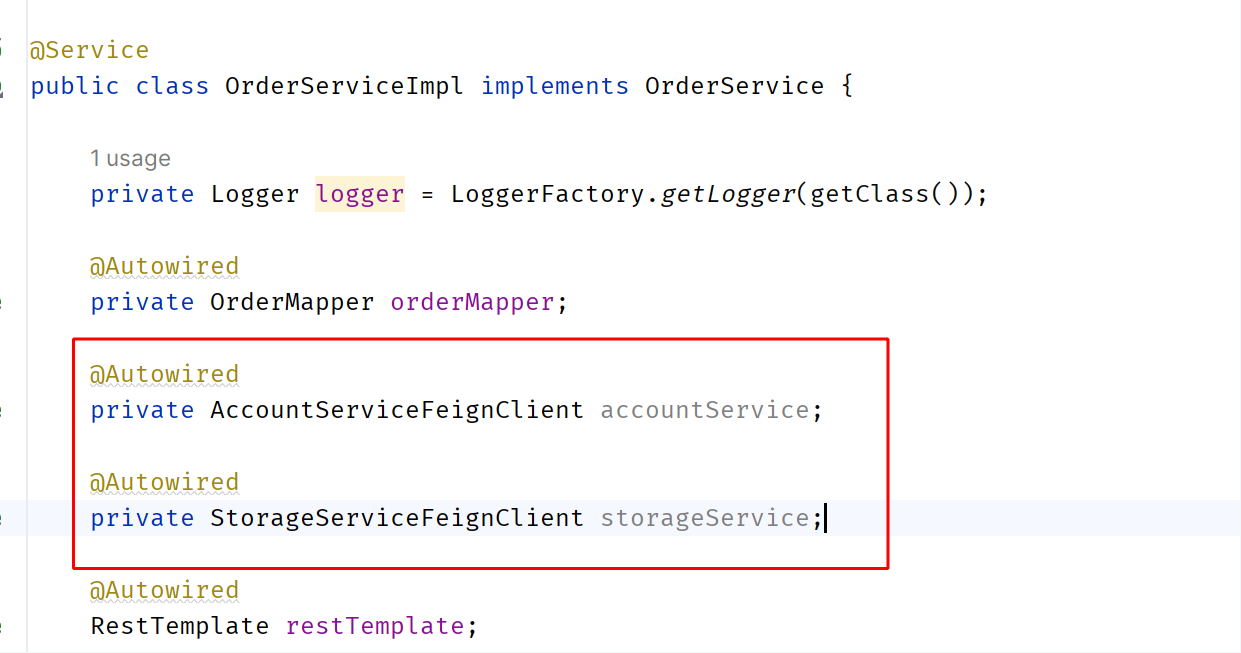
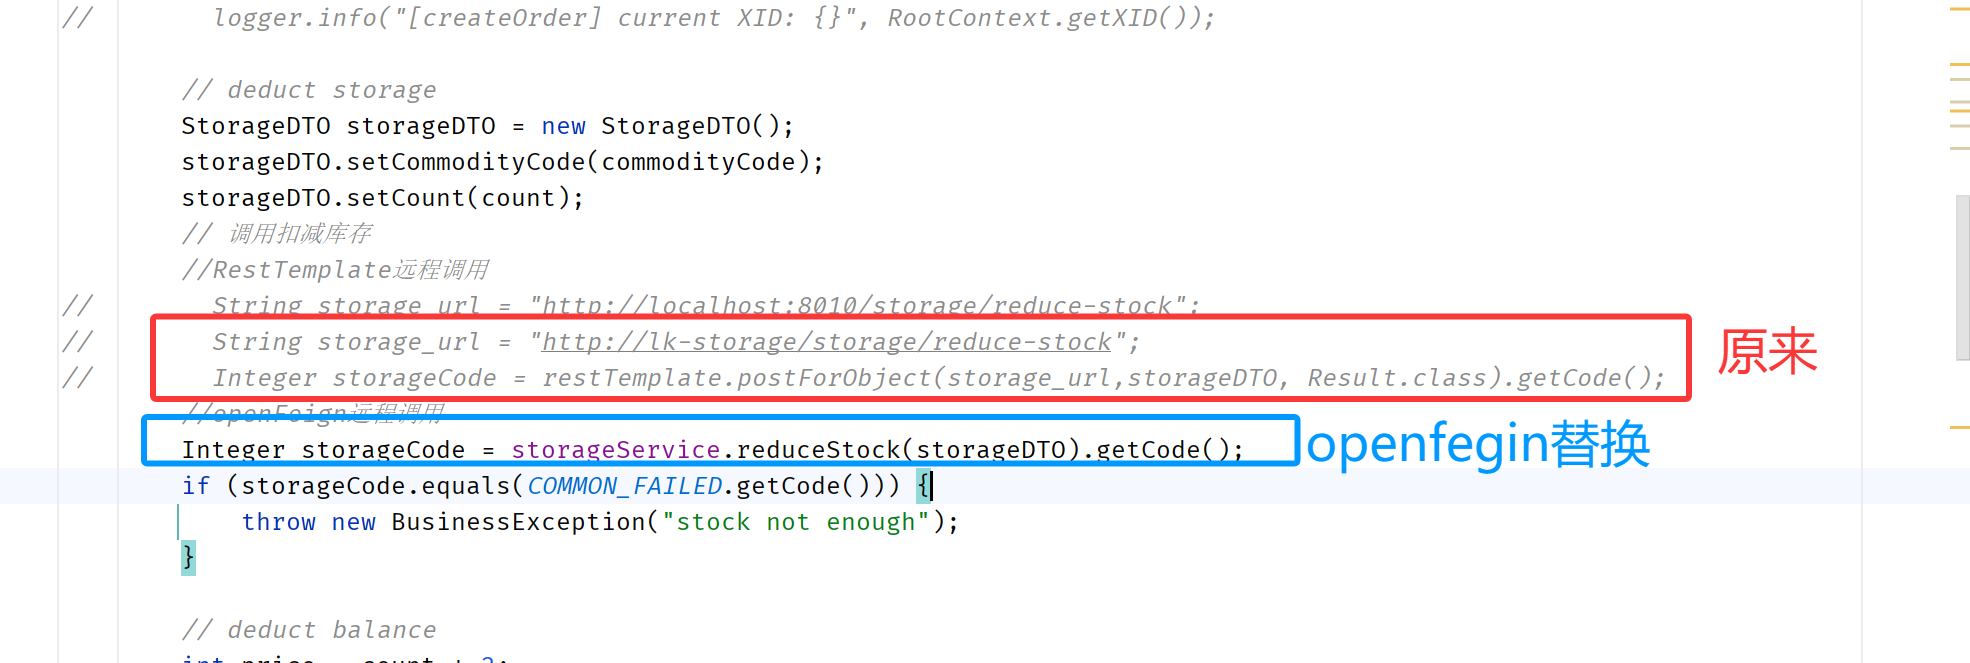
}服务service中注入OpenFegin,并修改方法调用
替换之后,重启服务即可
Nacos之配置中心的使用
通过使用Nacos的配置中心来统一管理配置。下面将使用spring.config.import
微服务为什么需要配置中心
在微服务架构中,当系统从一个单体应用,被拆分成分布式系统上一个个服务节点后,配置文件也必须跟着迁移(分割),这样配置就分散了,不仅如此,分散中还包含着冗余。
配置中心就是一种统一管理各种应用配置的基础服务组件。配置中心的出现,可以解决这些问题,使得配置信息集中管理,易于维护,并且可以动态更新配置,使得分布式系统更加稳定可靠。
使用步骤
在Nacos中创建Data Id
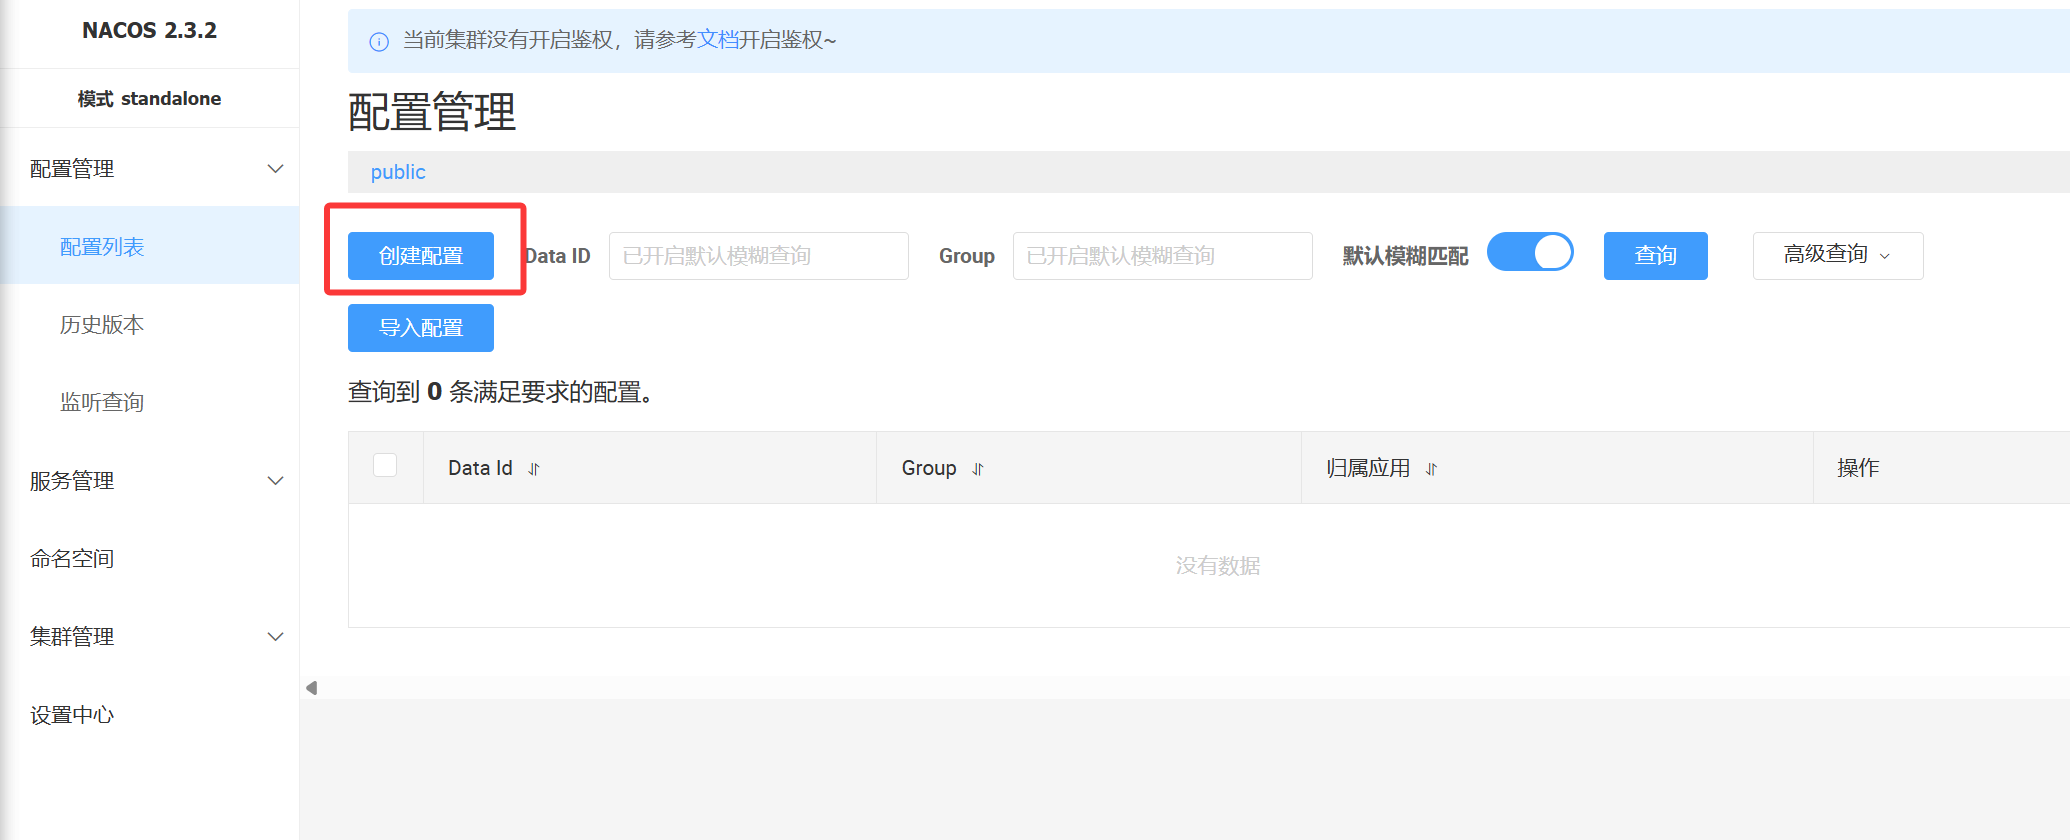
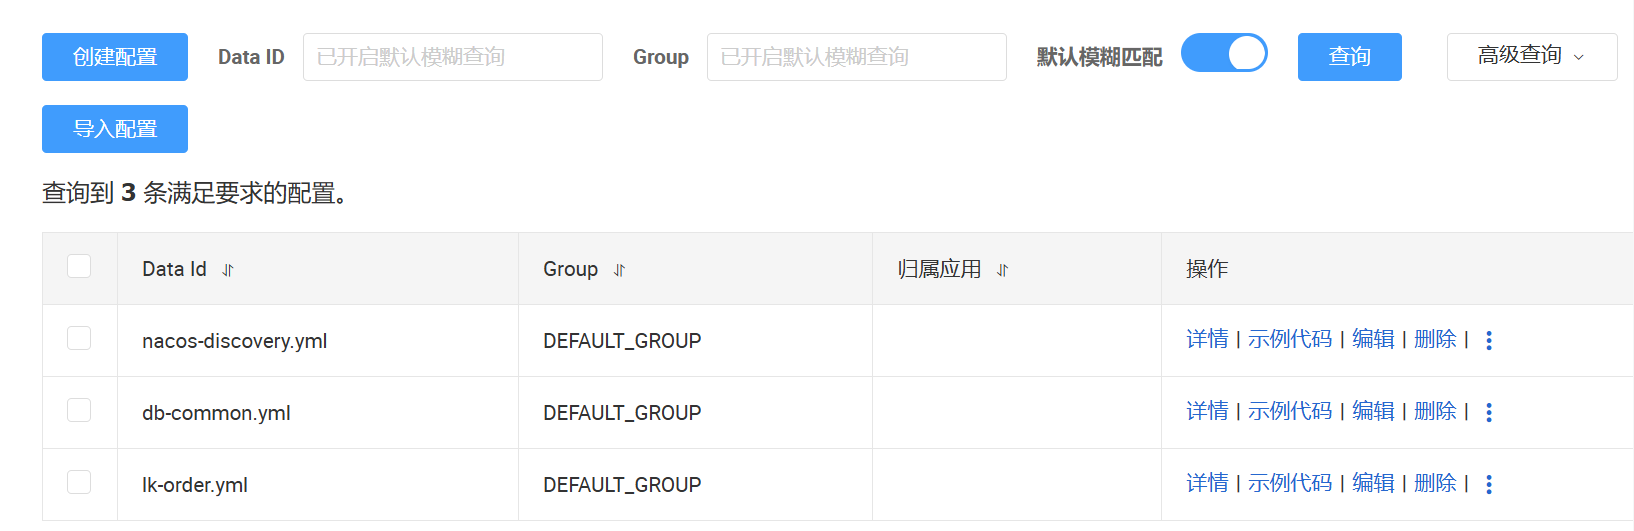
抽离配置,这里我把数据库配置、以及nacos的配置单独抽离出来nacos-discovery,db-common
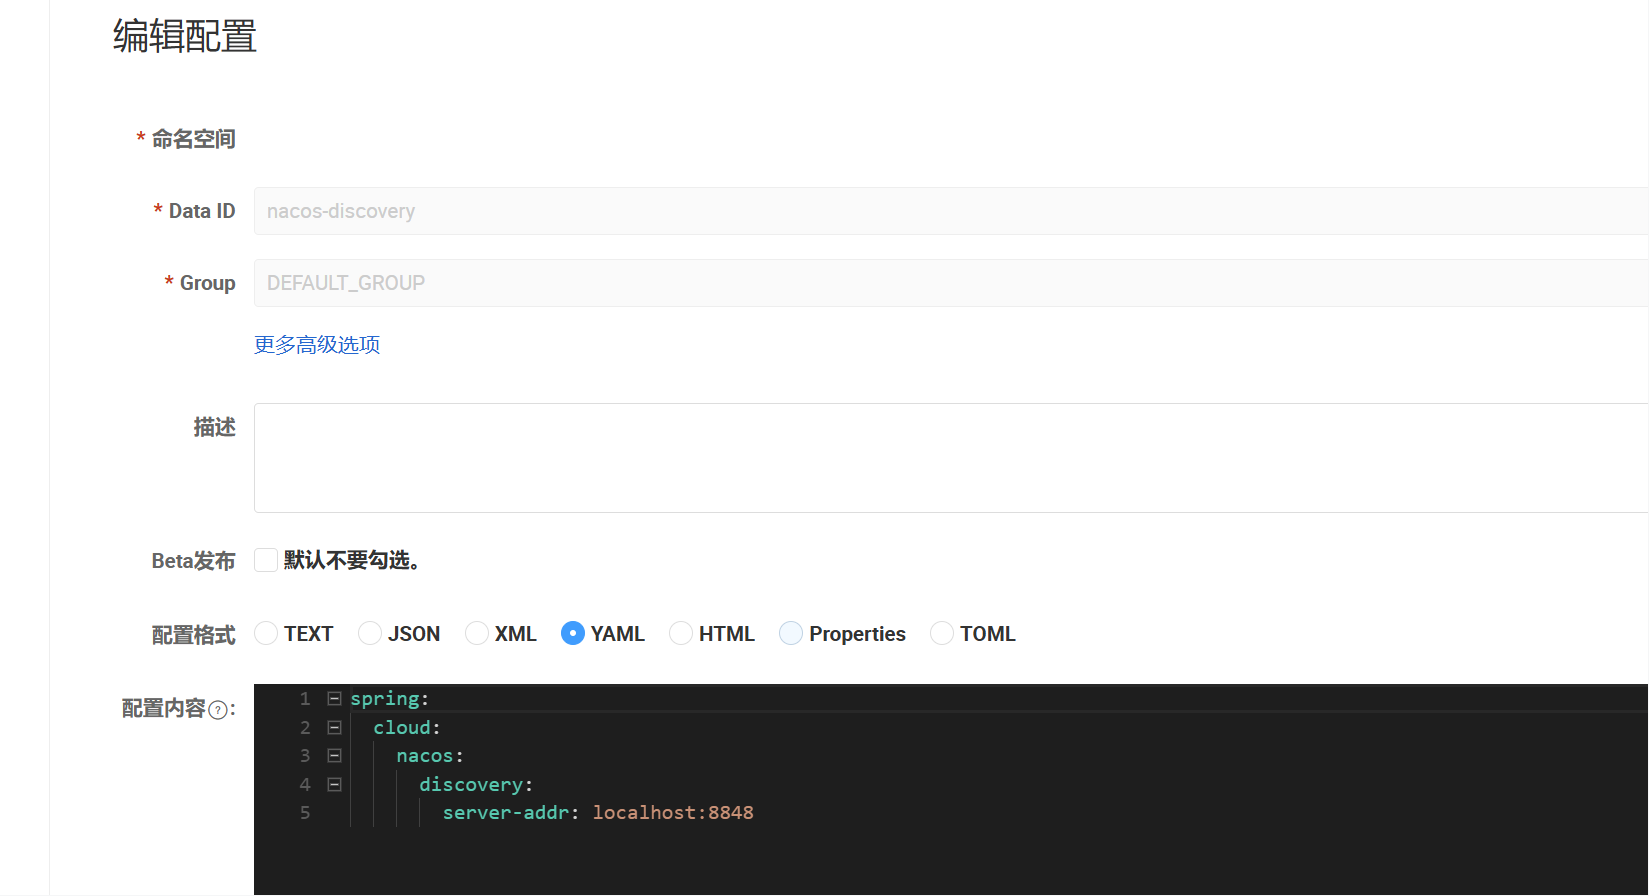
--nacos-discovery
spring:
  cloud:
    nacos:
      discovery:
        server-addr: localhost:8848
--db-common
spring:
datasource:
driver-class-name: com.mysql.cj.jdbc.Driver
username: root
password: 123456
main:
allow-bean-definition-overriding: true
mybatis:
configuration:
map-underscore-to-camel-case: true引入pom依赖
<dependency>
    <groupId>com.alibaba.cloud</groupId>
    <artifactId>spring-cloud-starter-alibaba-nacos-config</artifactId>
</dependency>
application.yml中引入配置
重启服务
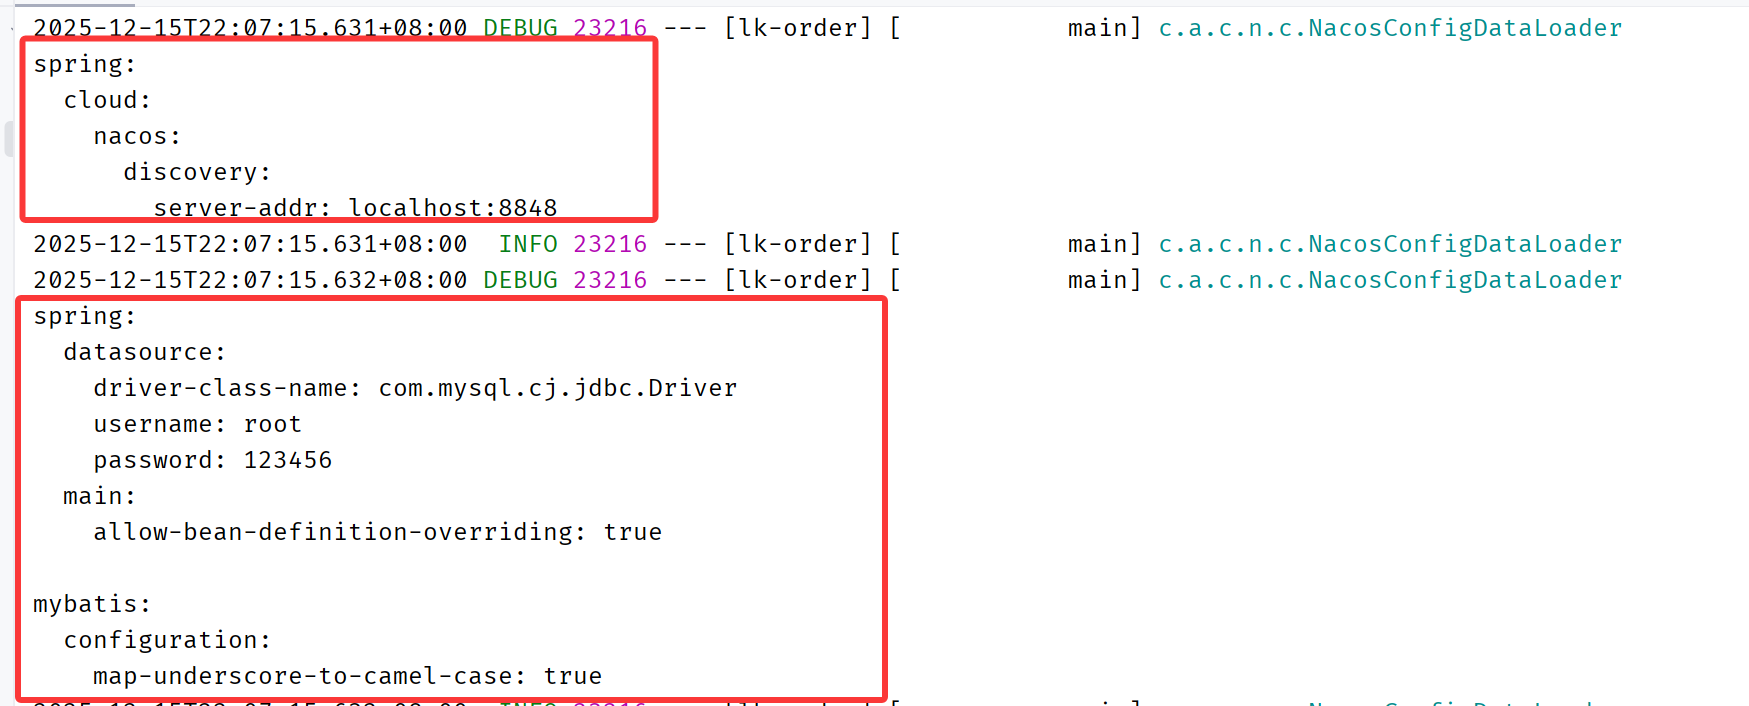
可以在application.yml中配置日志打印,看配置的拉取情况
logging:
  level:
    com.alibaba.cloud.nacos: debug
日志有打印出配置信息,说明配置拉取成功
Seata解决分布式事务
一次业务操作需要跨多个数据源或需要跨多个系统进行远程调用,就会产生分布式事务问题。
下面用Seata AT模式进行演示
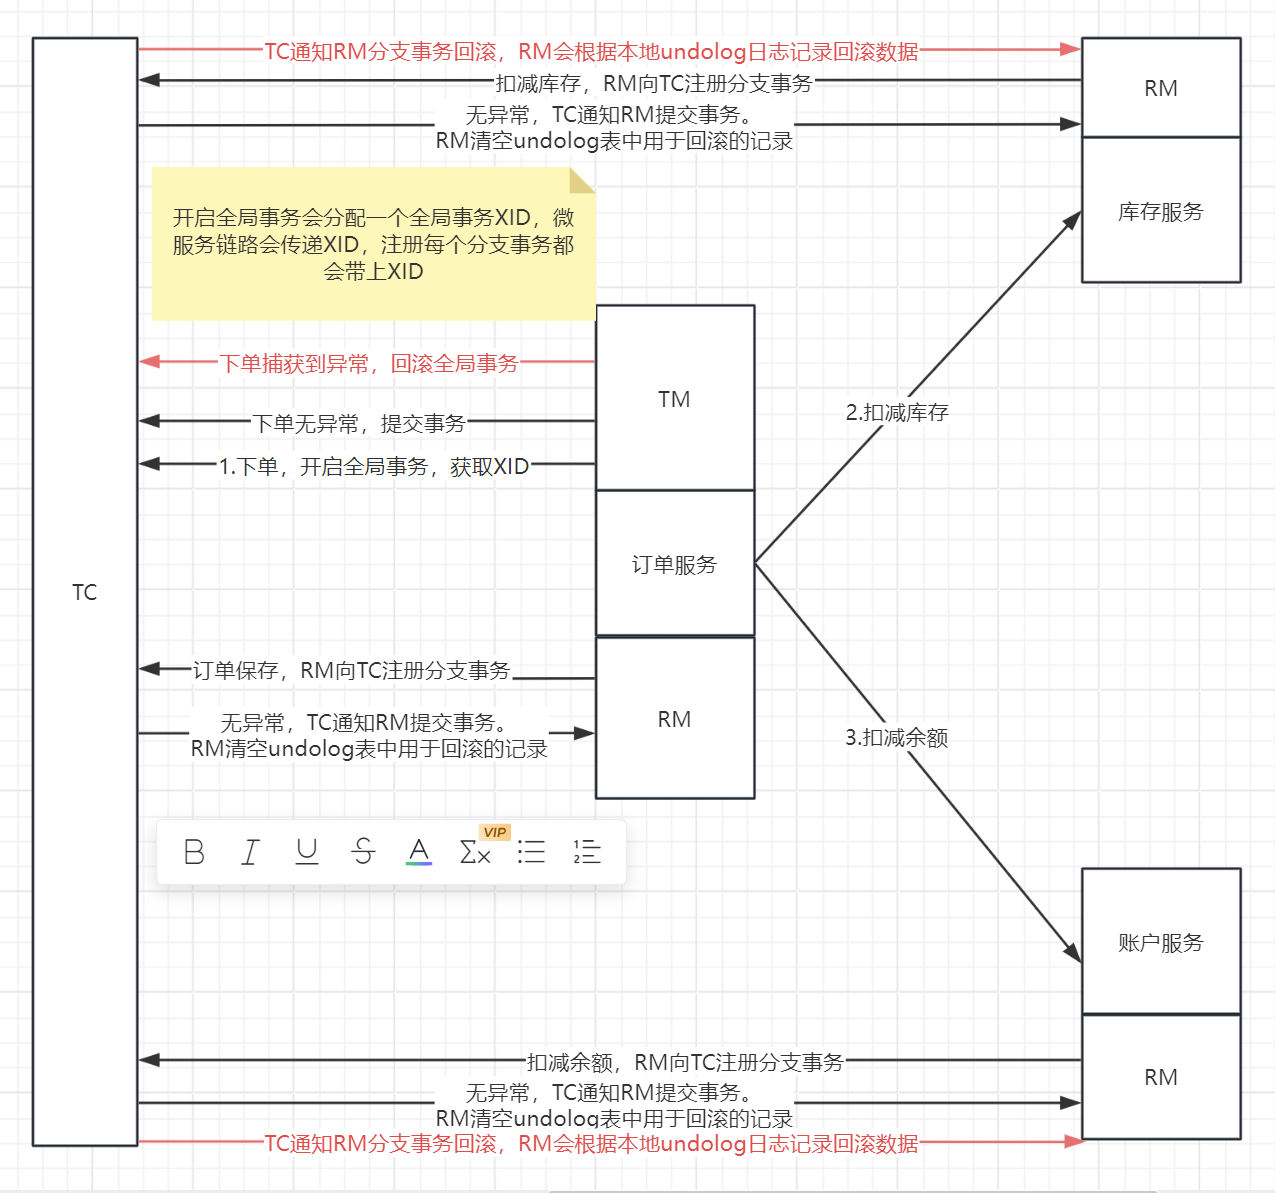
首先要了解三个概念
(1)TC(Transaction Coordinator)-事务协调者:维护全局和分支事务的状态,驱动全局事务提交或回滚。
(2)TM(TransactionManager)-事务管理器:定义全局事务的范围:开始全局事务、提交或回滚全局事务。
(3)RM(ResourceManager)-资源管理器:管理分支事务处理的资源,与TC交谈以注册分支事务和报告分支事务的状态,并驱动分支事务提交或回滚。
比如订单服务,下单之后需要调用库存服务扣减库存,调用余额服务扣减余额。流程如下图所示
使用步骤
下载Seata
这边使用的版本是2.0.0
https://github.com/apache/incubator-seata/releases/download/v2.0.0/seata-server-2.0.0.zip
Seata2.0.0支持的模式
(1)file:单机模式,全局事务会话信息内存中读写并持久化本地文件root.data,性能较高,但是只支持单机模式部署,生产环境不考虑。
(2)db:高可用模式,全局事务会话信息通过db共享,相应性能差些
(3)redis:1.3及以上版本支持,性能较高,存在事务信息丢失风险,需提前配置适合当前场景的redis持久化配置
(4)Raft模式:利用Raft算法实现多个TC之间数据的同步
创建seata数据库
下面演示用db模式,创建seata数据库
sql脚本在seata-server-2.0.0\seata\script\server\db\mysql.sql中
seata2.0.0
配置Seata的Nacos注册中心
打开seata/conf/application.yml,修改seata.registry的信息,创建的seata命名空间在配置里面要用对应命名空间的id,要不然可能会注册不上去
配置Seata的Nacos配置中心
打开seata/conf/application.yml,修改seata.config的信息
 获取seata\script\config-center下的config.txt,配置为db模式
store.mode=db
store.lock.mode=db
store.session.mode=db

store.db.driverClassName=com.mysql.cj.jdbc.Driver
store.db.url=jdbc:mysql://localhost:3306/seata2.0.0?useUnicode=true&rewriteBatchedStatements=true&useSSL=false&characterEncoding=utf8&allowPublicKeyRetrieval=true
store.db.user=root
store.db.password=123456
配置事务分组:seata的资源逻辑,可以按微服务的需要,在应用程序(客户端)对自行定义事务分组,每组取一个名字
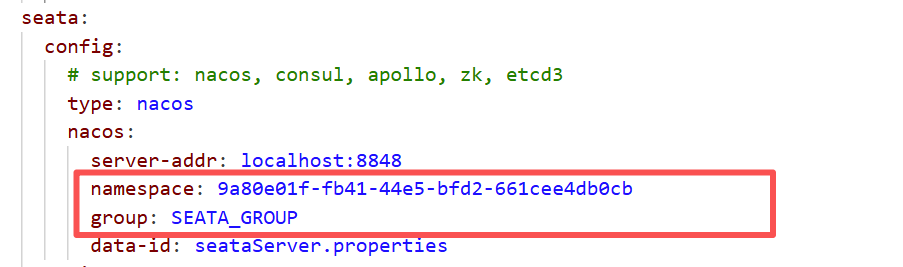
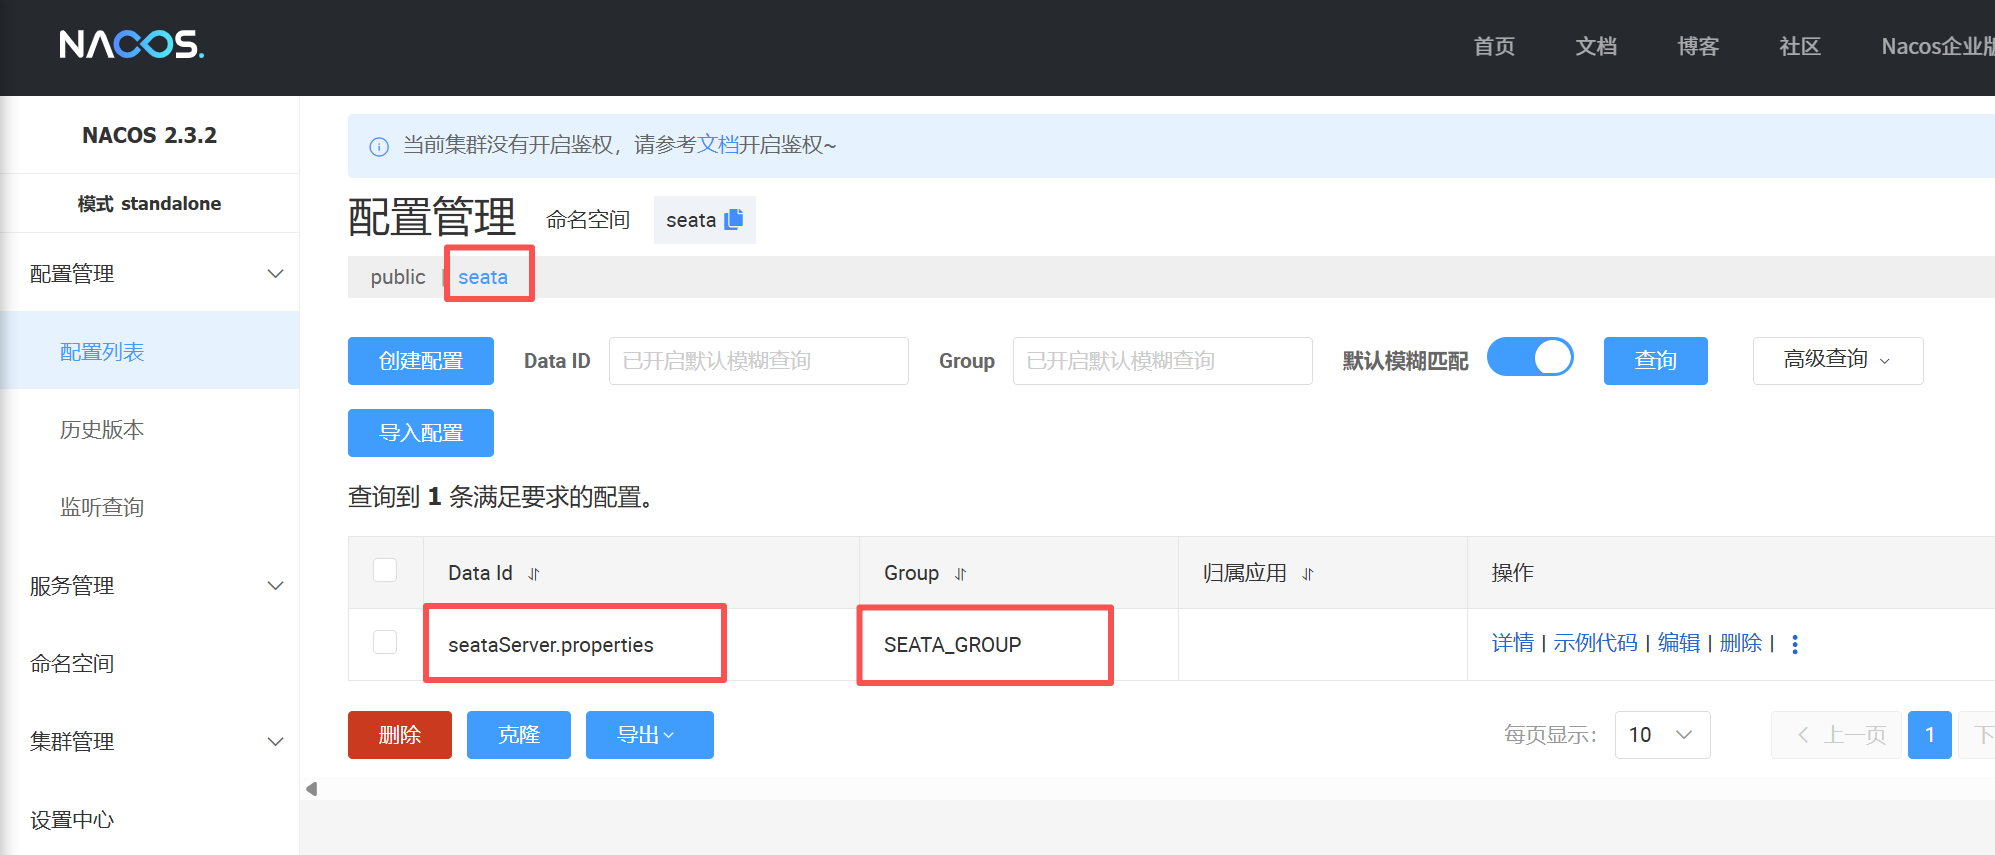
service.vgroupMapping.default_tx_group=default在Nacos的配置管理下面创建一个seataServer.properties,配置内容为修改后的config.txt信息
PS:需要再Nacos创建一个seata命名空间,这个命名空间需要和conf下的application.yml中的一致,并且seataServer.properties的group必须也和application.yml中的一致,为SEATA_GROUP
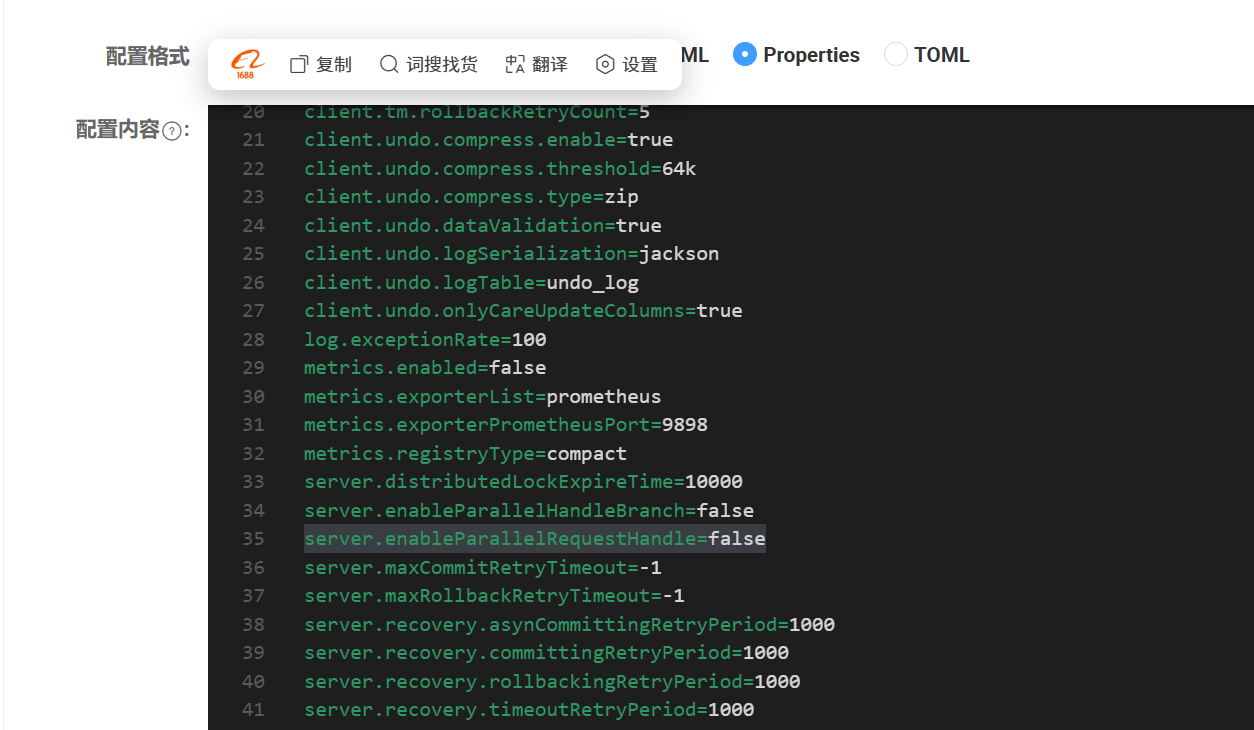
seataServer.properties配置内容如下(删除了一些暂时没用的配置):
client.metadataMaxAgeMs=30000
client.rm.asyncCommitBufferLimit=10000
client.rm.lock.retryInterval=10
client.rm.lock.retryPolicyBranchRollbackOnConflict=true
client.rm.lock.retryTimes=30
client.rm.reportRetryCount=5
client.rm.reportSuccessEnable=false
client.rm.sagaBranchRegisterEnable=false
client.rm.sagaJsonParser=fastjson
client.rm.sqlParserType=druid
client.rm.tableMetaCheckEnable=true
client.rm.tableMetaCheckerInterval=60000
client.rm.tccActionInterceptorOrder=-2147482648
client.tm.commitRetryCount=5
client.tm.defaultGlobalTransactionTimeout=60000
client.tm.degradeCheck=false
client.tm.degradeCheckAllowTimes=10
client.tm.degradeCheckPeriod=2000
client.tm.interceptorOrder=-2147482648
client.tm.rollbackRetryCount=5
client.undo.compress.enable=true
client.undo.compress.threshold=64k
client.undo.compress.type=zip
client.undo.dataValidation=true
client.undo.logSerialization=jackson
client.undo.logTable=undo_log
client.undo.onlyCareUpdateColumns=true
log.exceptionRate=100
metrics.enabled=false
metrics.exporterList=prometheus
metrics.exporterPrometheusPort=9898
metrics.registryType=compact
server.distributedLockExpireTime=10000
server.enableParallelHandleBranch=false
server.enableParallelRequestHandle=true
server.maxCommitRetryTimeout=-1
server.maxRollbackRetryTimeout=-1
server.recovery.asynCommittingRetryPeriod=1000
server.recovery.committingRetryPeriod=1000
server.recovery.rollbackingRetryPeriod=1000
server.recovery.timeoutRetryPeriod=1000
server.rollbackRetryTimeoutUnlockEnable=false
server.session.branchAsyncQueueSize=5000
server.session.enableBranchAsyncRemove=false
server.undo.logDeletePeriod=86400000
server.undo.logSaveDays=7
service.vgroupMapping.default_tx_group=default
store.db.branchTable=branch_table
store.db.datasource=druid
store.db.dbType=mysql
store.db.distributedLockTable=distributed_lock
store.db.driverClassName=com.mysql.cj.jdbc.Driver
store.db.globalTable=global_table
store.db.lockTable=lock_table
store.db.maxConn=30
store.db.maxWait=5000
store.db.minConn=5
store.db.password=123456
store.db.queryLimit=100
store.db.url=jdbc:mysql://localhost:3306/seata2.0.0?useUnicode=true&rewriteBatchedStatements=true&useSSL=false&characterEncoding=utf8&allowPublicKeyRetrieval=true
store.db.user=root
store.lock.mode=db
store.mode=db
store.publicKey=
store.session.mode=db
tcc.contextJsonParserType=fastjson
tcc.fence.cleanPeriod=1h
tcc.fence.logTableName=tcc_fence_log
transport.compressor=none
transport.enableRmClientBatchSendRequest=true
transport.enableTcServerBatchSendResponse=false
transport.enableTmClientBatchSendRequest=false
transport.heartbeat=true
transport.rpcRmRequestTimeout=30000
transport.rpcTcRequestTimeout=30000
transport.rpcTmRequestTimeout=30000
transport.serialization=seata
transport.server=NIO
transport.shutdown.wait=3
transport.threadFactory.bossThreadPrefix=NettyBoss
transport.threadFactory.bossThreadSize=1
transport.threadFactory.clientSelectorThreadPrefix=NettyClientSelector
transport.threadFactory.clientSelectorThreadSize=1
transport.threadFactory.clientWorkerThreadPrefix=NettyClientWorkerThread
transport.threadFactory.serverExecutorThreadPrefix=NettyServerBizHandler
transport.threadFactory.shareBossWorker=false
transport.threadFactory.workerThreadPrefix=NettyServerNIOWorker
transport.threadFactory.workerThreadSize=default
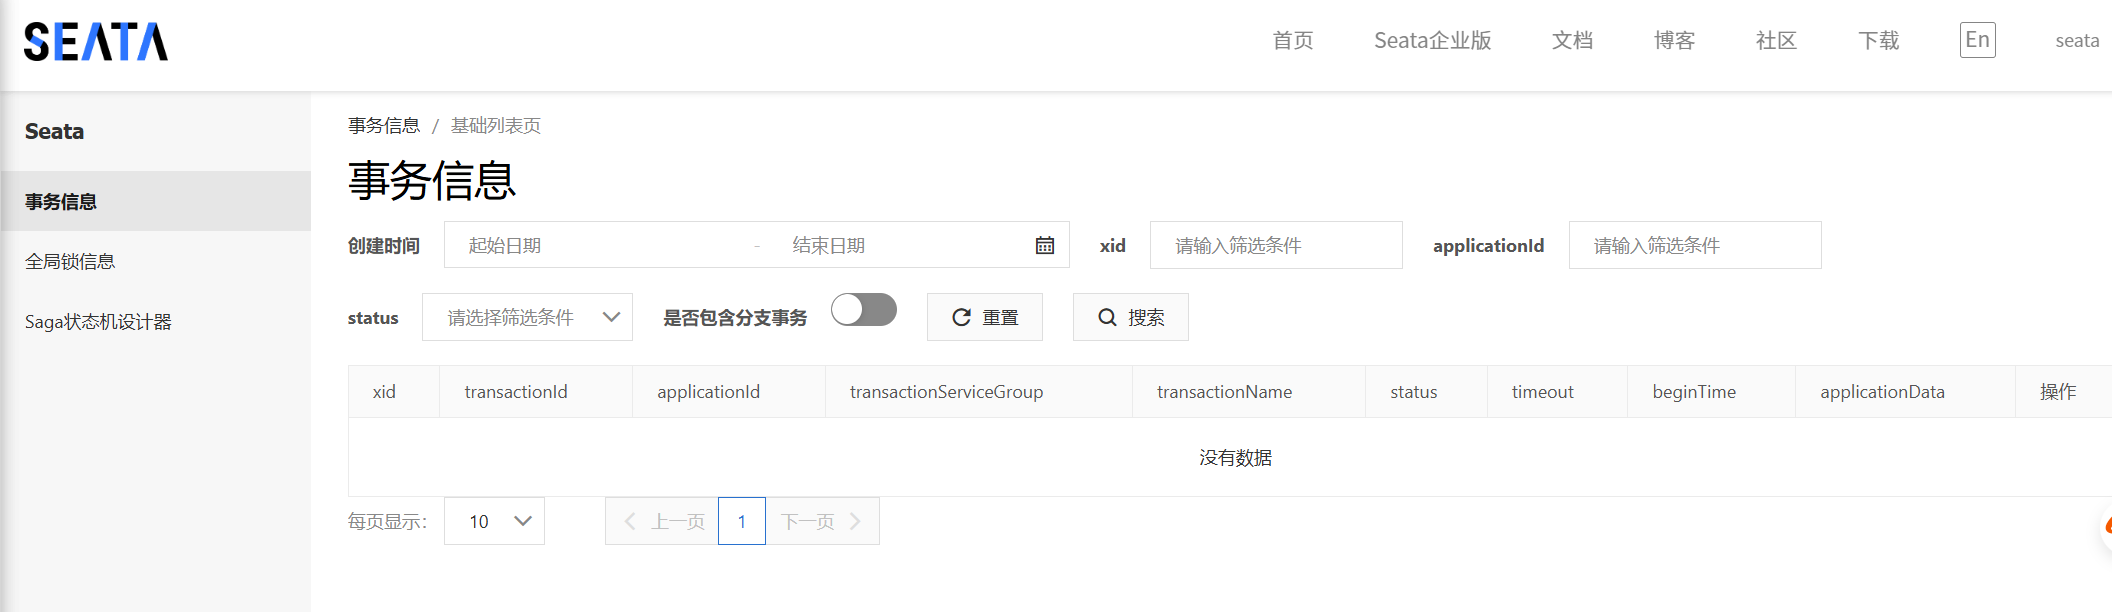
transport.type=TCP启动seata server
点击seata\bin下的seata-server.bat直接启动,访问http://127.0.0.1:7091/
账户和密码都是seata
微服务整合seata客户端
模拟场景:订单服务提交订单,会调用库存服务扣减库存和账户服务扣减余额。事务发起者为订单服务,事务参与者为库存服务和账户服务。
订单服务引入依赖
<!-- seata 依赖-->
<dependency>
<groupId>com.alibaba.cloud</groupId>
<artifactId>spring-cloud-starter-alibaba-seata</artifactId>
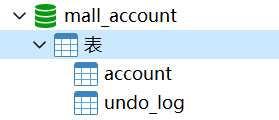
</dependency>订单服务对应数据库添加undo_log表(AT模式)
-- for AT mode you must to init this sql for you business database. the seata server not need it.
CREATE TABLE IF NOT EXISTS `undo_log`
(
    `branch_id`     BIGINT       NOT NULL COMMENT 'branch transaction id',
    `xid`           VARCHAR(128) NOT NULL COMMENT 'global transaction id',
    `context`       VARCHAR(128) NOT NULL COMMENT 'undo_log context,such as serialization',
    `rollback_info` LONGBLOB     NOT NULL COMMENT 'rollback info',
    `log_status`    INT(11)      NOT NULL COMMENT '0:normal status,1:defense status',
    `log_created`   DATETIME(6)  NOT NULL COMMENT 'create datetime',
    `log_modified`  DATETIME(6)  NOT NULL COMMENT 'modify datetime',
    UNIQUE KEY `ux_undo_log` (`xid`, `branch_id`)
) ENGINE = InnoDB AUTO_INCREMENT = 1 DEFAULT CHARSET = utf8mb4 COMMENT ='AT transaction mode undo table';
ALTER TABLE `undo_log` ADD INDEX `ix_log_created` (`log_created`);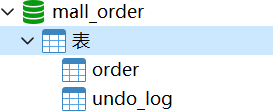
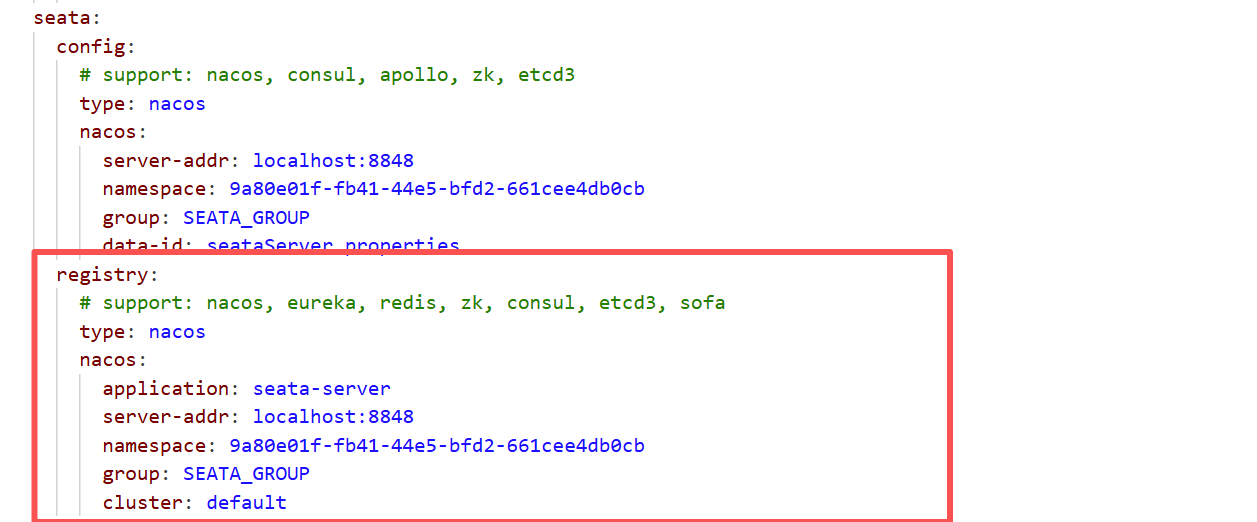
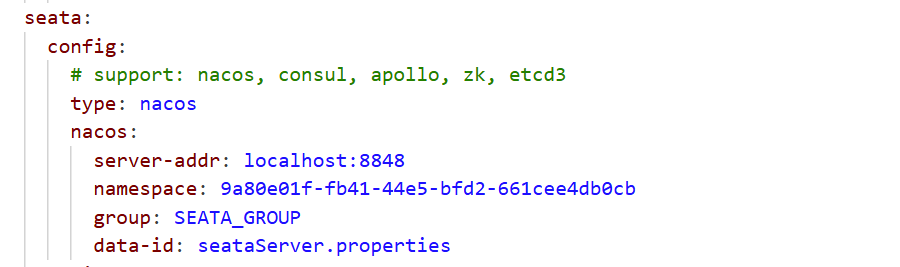
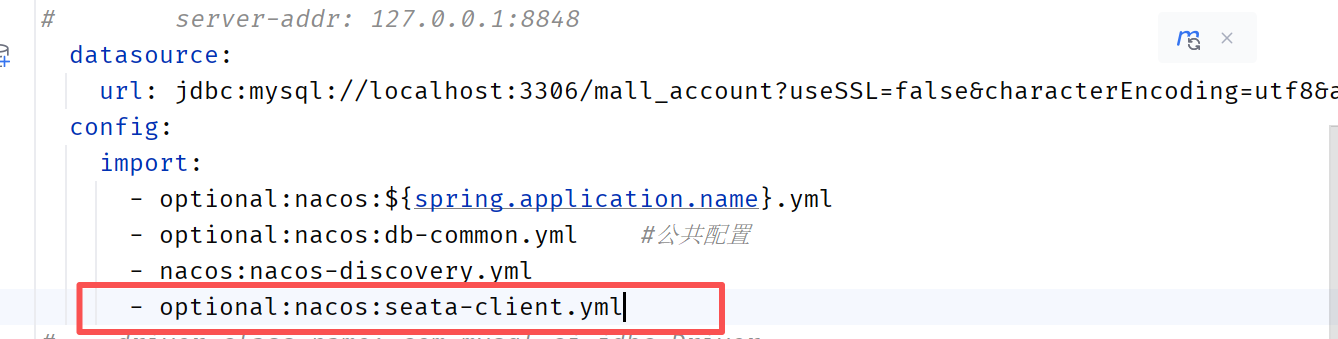
将客户端的seata配置放置到nacos中
在nacos配置中心下创建DATA ID为seata-client.yml,配置内容如下:
PS:里面的namespace用命名空间对应的id
seata:
  # seata 服务分组,要与服务端配置service.vgroup_mapping的后缀对应
  tx-service-group: default_tx_group
  registry:
    # 指定nacos作为注册中心
    type: nacos
    nacos:
      application: seata-server
      server-addr: localhost:8848
      namespace: 9a80e01f-fb41-44e5-bfd2-661cee4db0cb
      group: SEATA_GROUP

  config:
    # 指定nacos作为配置中心
    type: nacos
    nacos:
      server-addr: localhost:8848
      namespace: 9a80e01f-fb41-44e5-bfd2-661cee4db0cb
      group: SEATA_GROUP
      data-id: seataServer.properties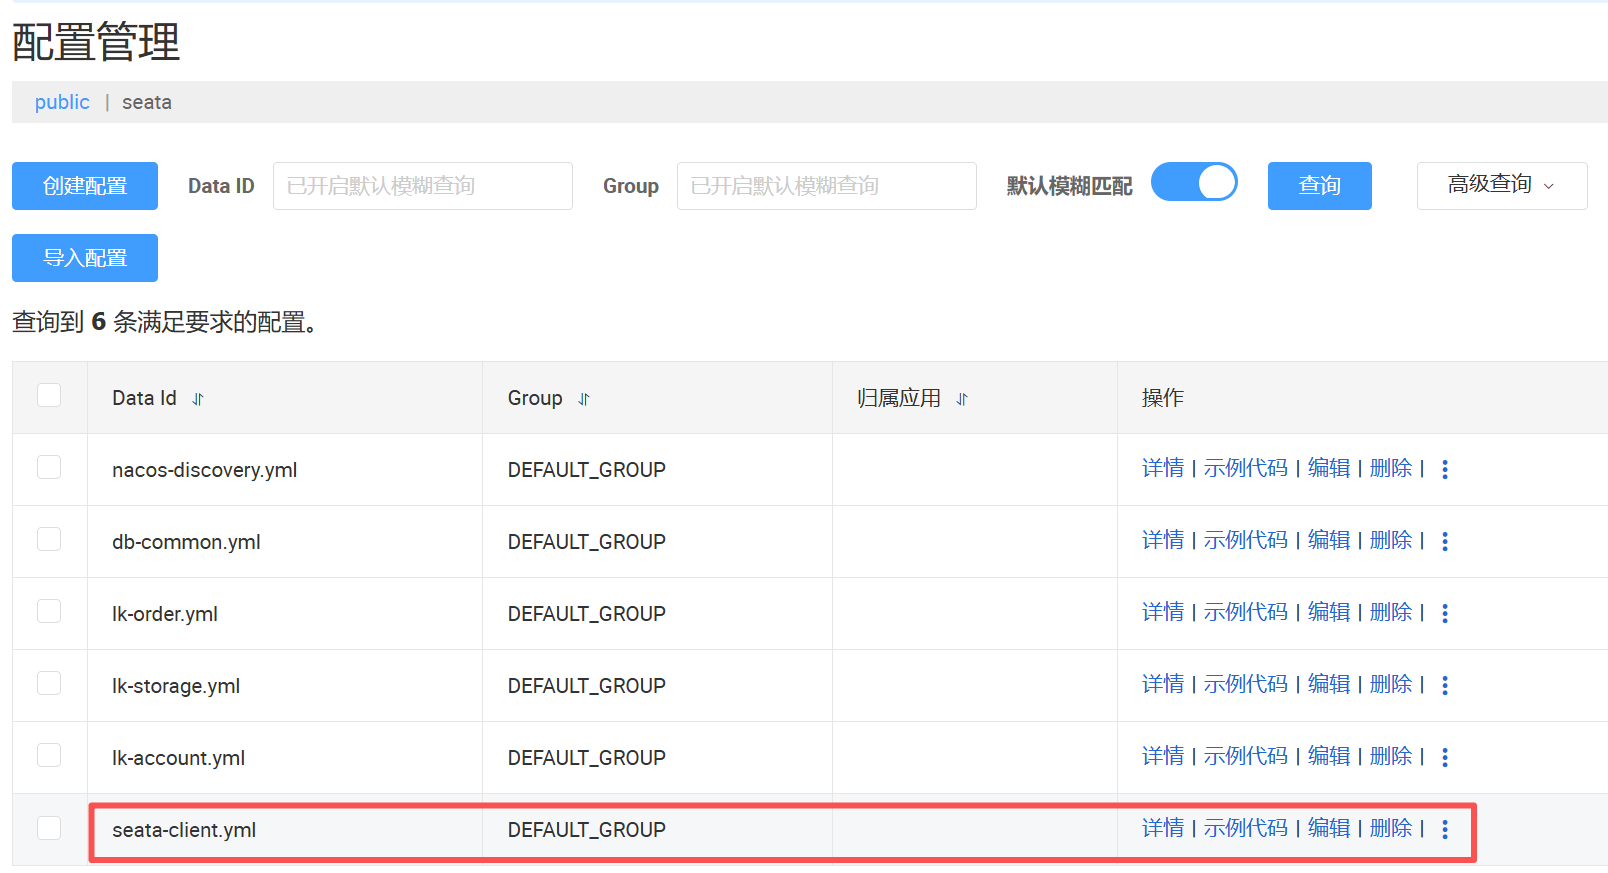
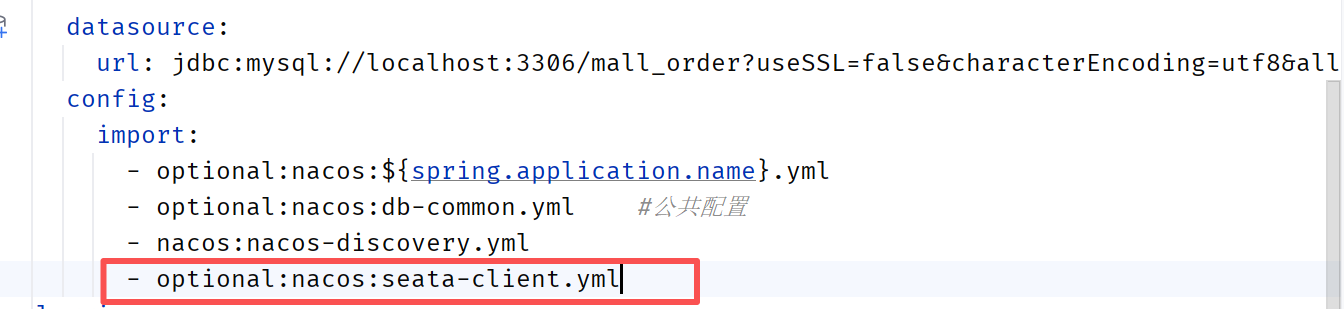
订单服务的application.yml引入
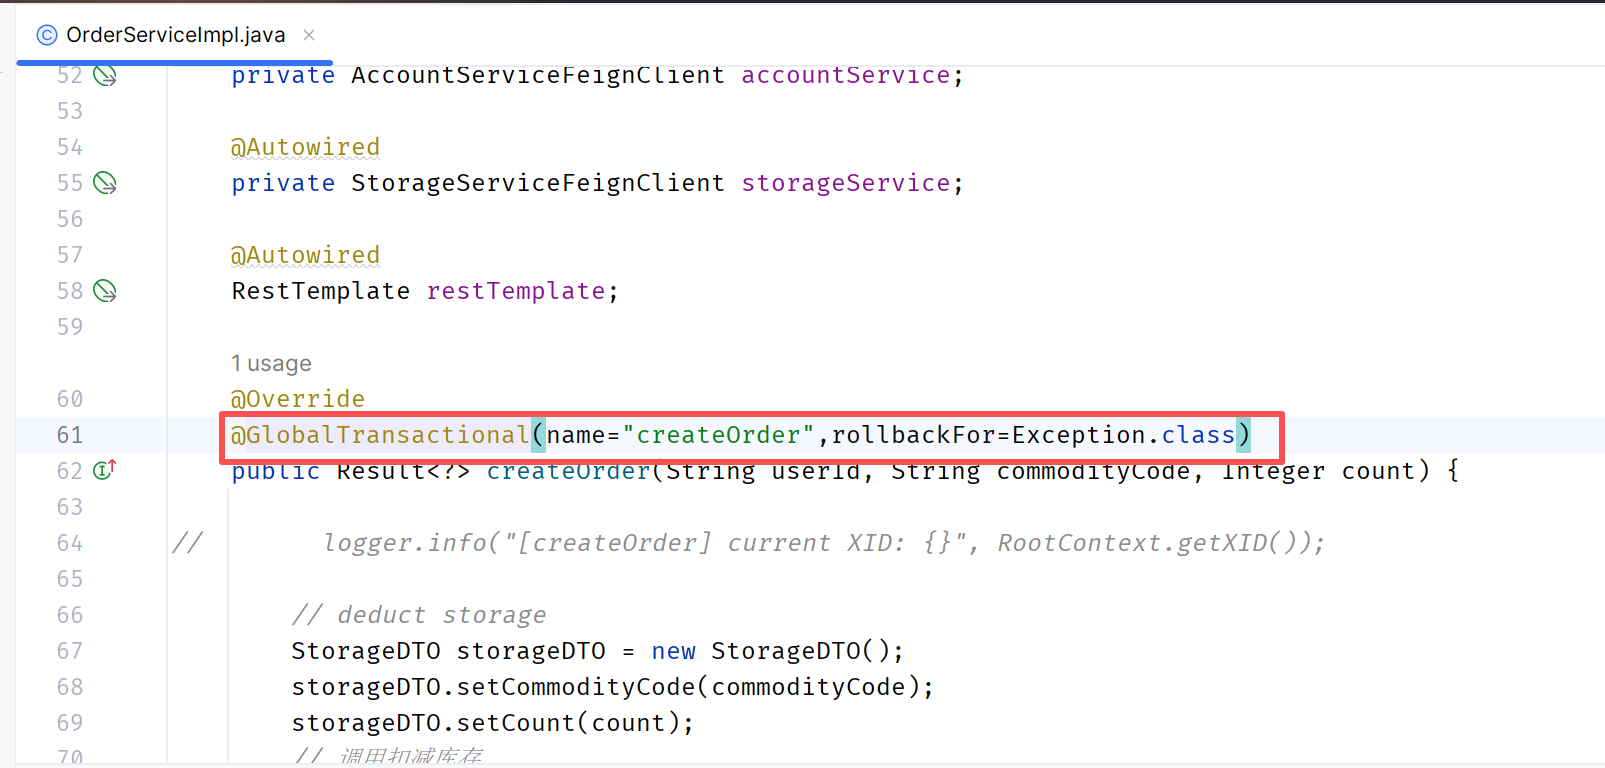
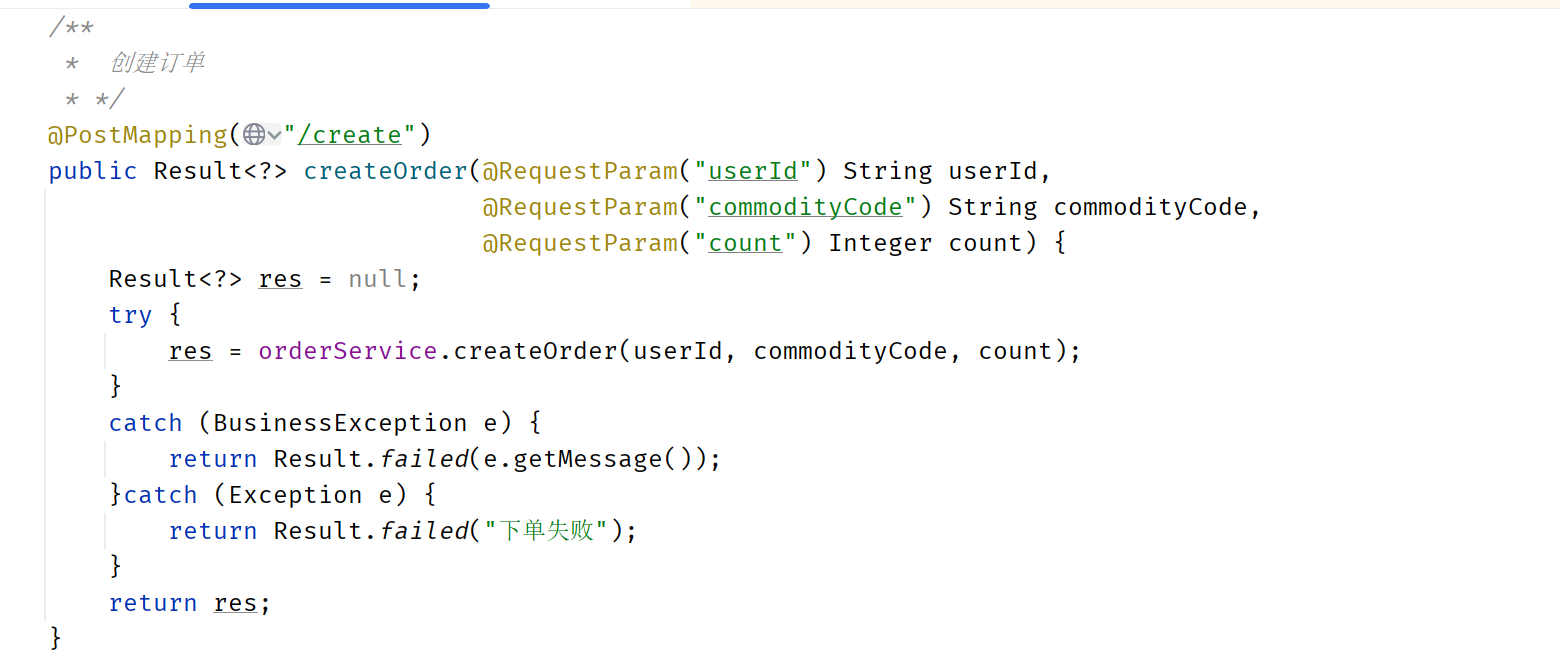
在订单服务(全局事务发起者)的createOrder方法上面添加注解
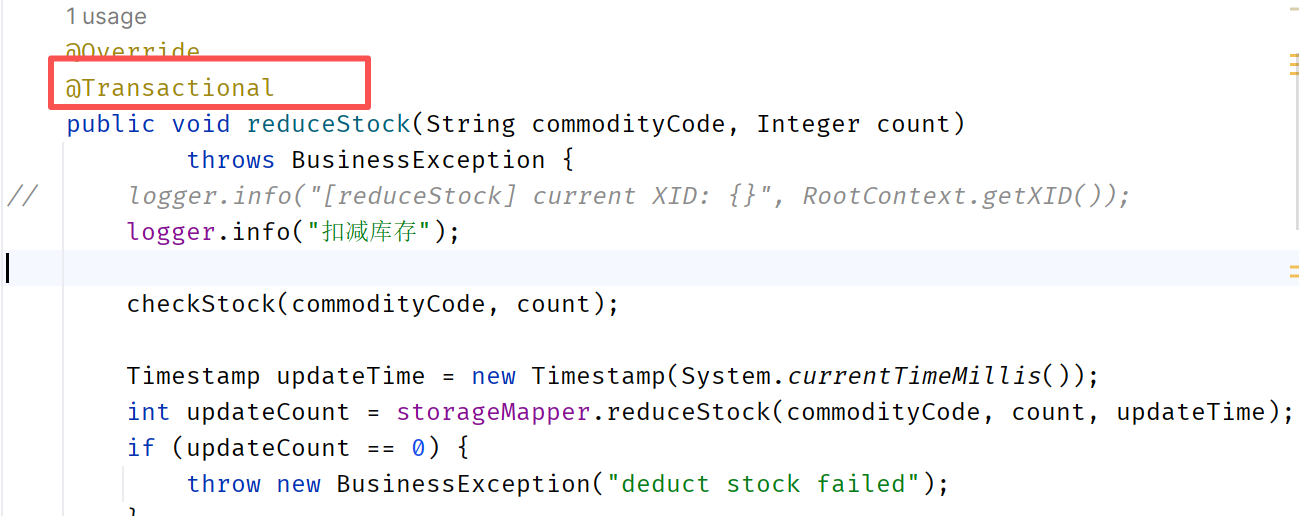
库存服务和账户服务也引入配置
引入seata依赖
<dependency>
    <groupId>com.alibaba.cloud</groupId>
    <artifactId>spring-cloud-starter-alibaba-seata</artifactId>
</dependency>
对应数据库添加undo_log表
application.yml引入seata配置
在对应的接口上面添加注解
完成seata的配置,测试即可
如果出现下面报错,将seata在nacos配置中的server.enableParallelRequestHandle修改为false

Sentinel限流
Sentinel是面向分布式、多语言异构化服务架构的流量治理组件,主要以流量为切入点,从流量路由、流量控制、流量整形、熔断降级、系统自适应过载保护、热点流量防护等多个维度来帮助开发者保障微服务的稳定性。
Sentinel包含两个部分:
(1)核心库(Java客户端):不依赖任何框架/库,能够运行于Java 8及以上的版本的运行时环境,同时对Dubbo/Spring Cloud等框架也有较好的支持
(2)控制台(Dashboard):Dashboard主要负责管理推送规则、监控、管理机器信息等。
微服务架构为什么要引入流控降级组件?
为了提高系统运行期间的稳定性和可用性。在微服务环境下,服务之间存在复杂的调用关系,单个服务的故障或过载可能会迅速影响到整个系统,导致服务雪崩效应。流控组件可以限制进入系统的流量,防止系统因超出处理能力而崩溃。降级组件则在服务不可用或响应过慢时,提供降级逻辑,如返回备用数据或执行降级操作,以保证核心业务的正常运行。
使用步骤
版本为1.8.6
下载jar包
下载地址:https://github.com/alibaba/Sentinel/releases/download/1.8.6/sentinel-dashboard-1.8.6.jar
启动控制台
如果端口冲突,可以把-Dserver.port改为其他端口
java -Dserver.port=8888 -Dcsp.sentinel.dashboard.server=localhost:8888 -Dproject.name=sentinel-dashboard -jar sentinel-dashboard-1.8.6.jar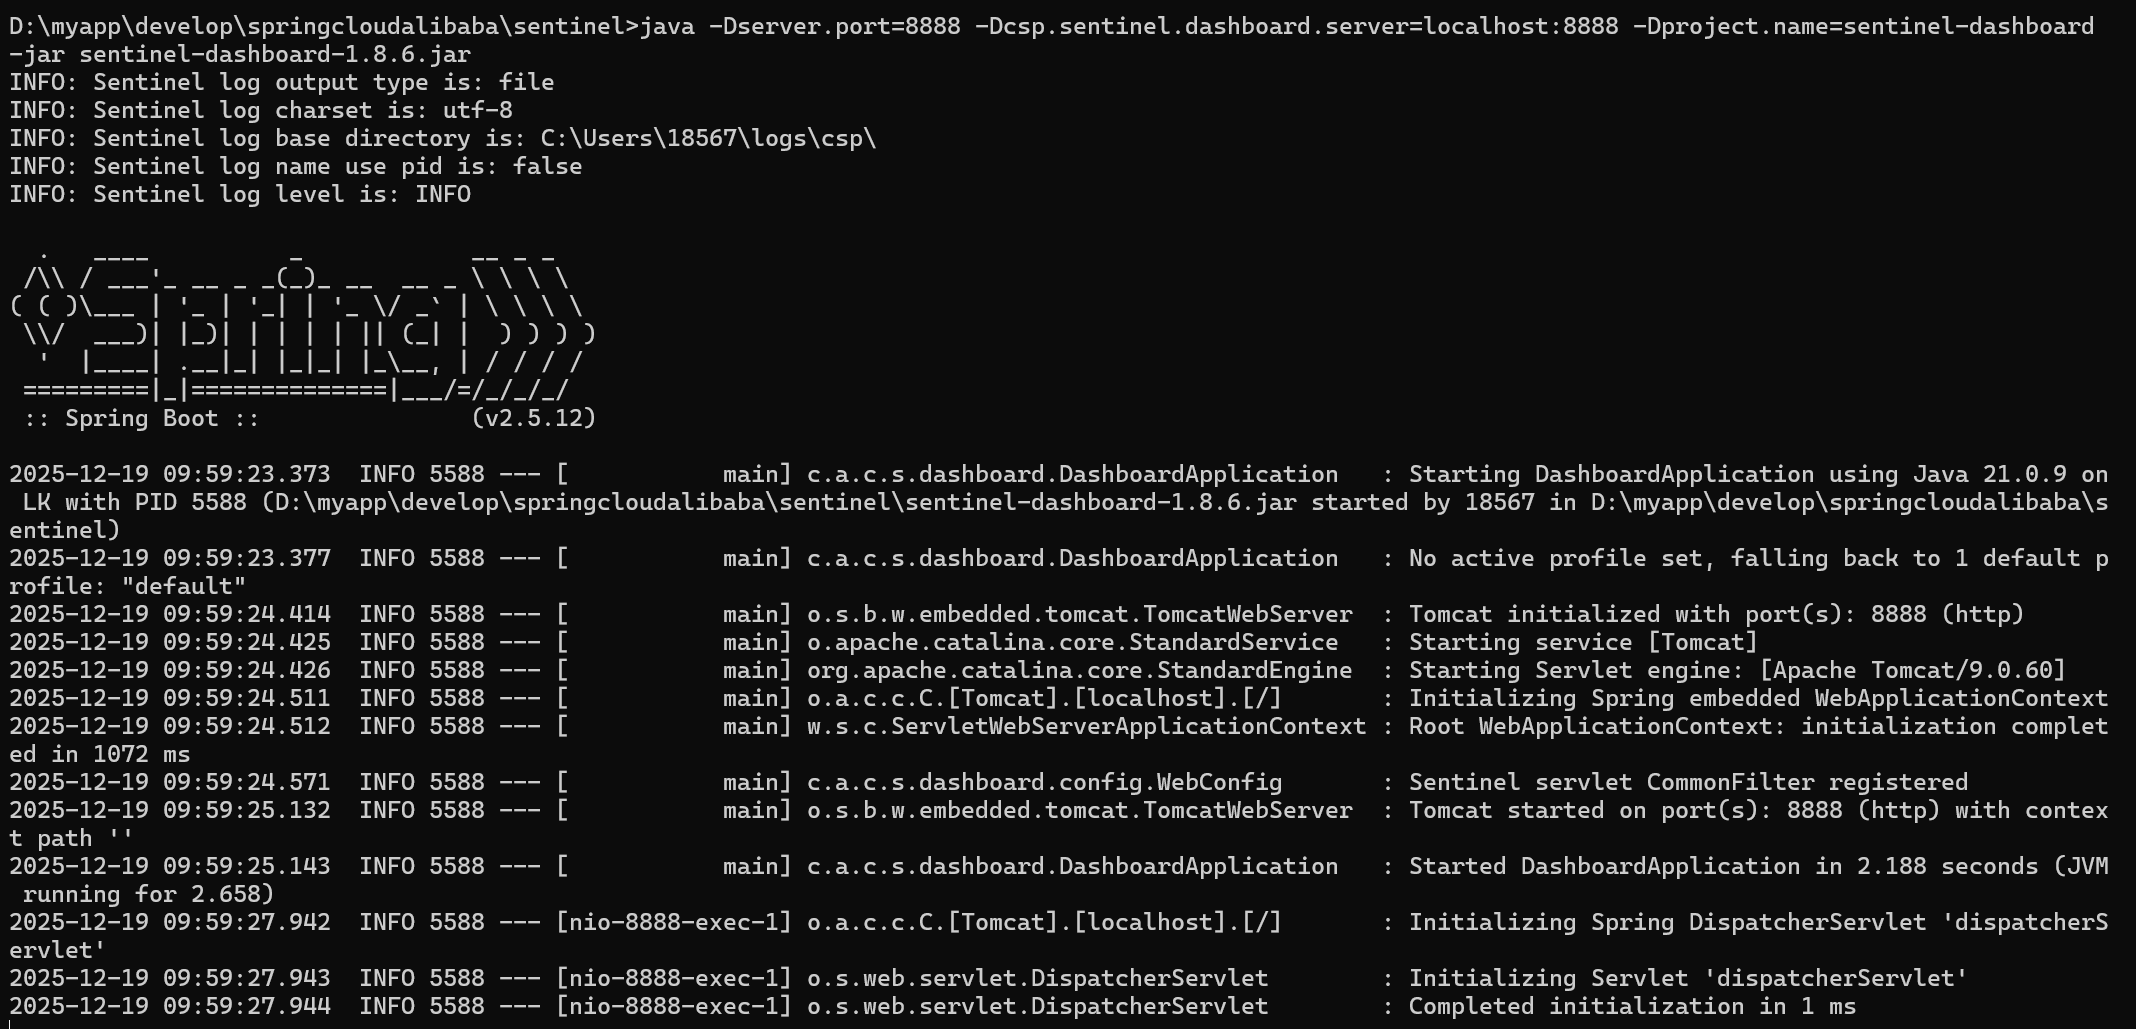
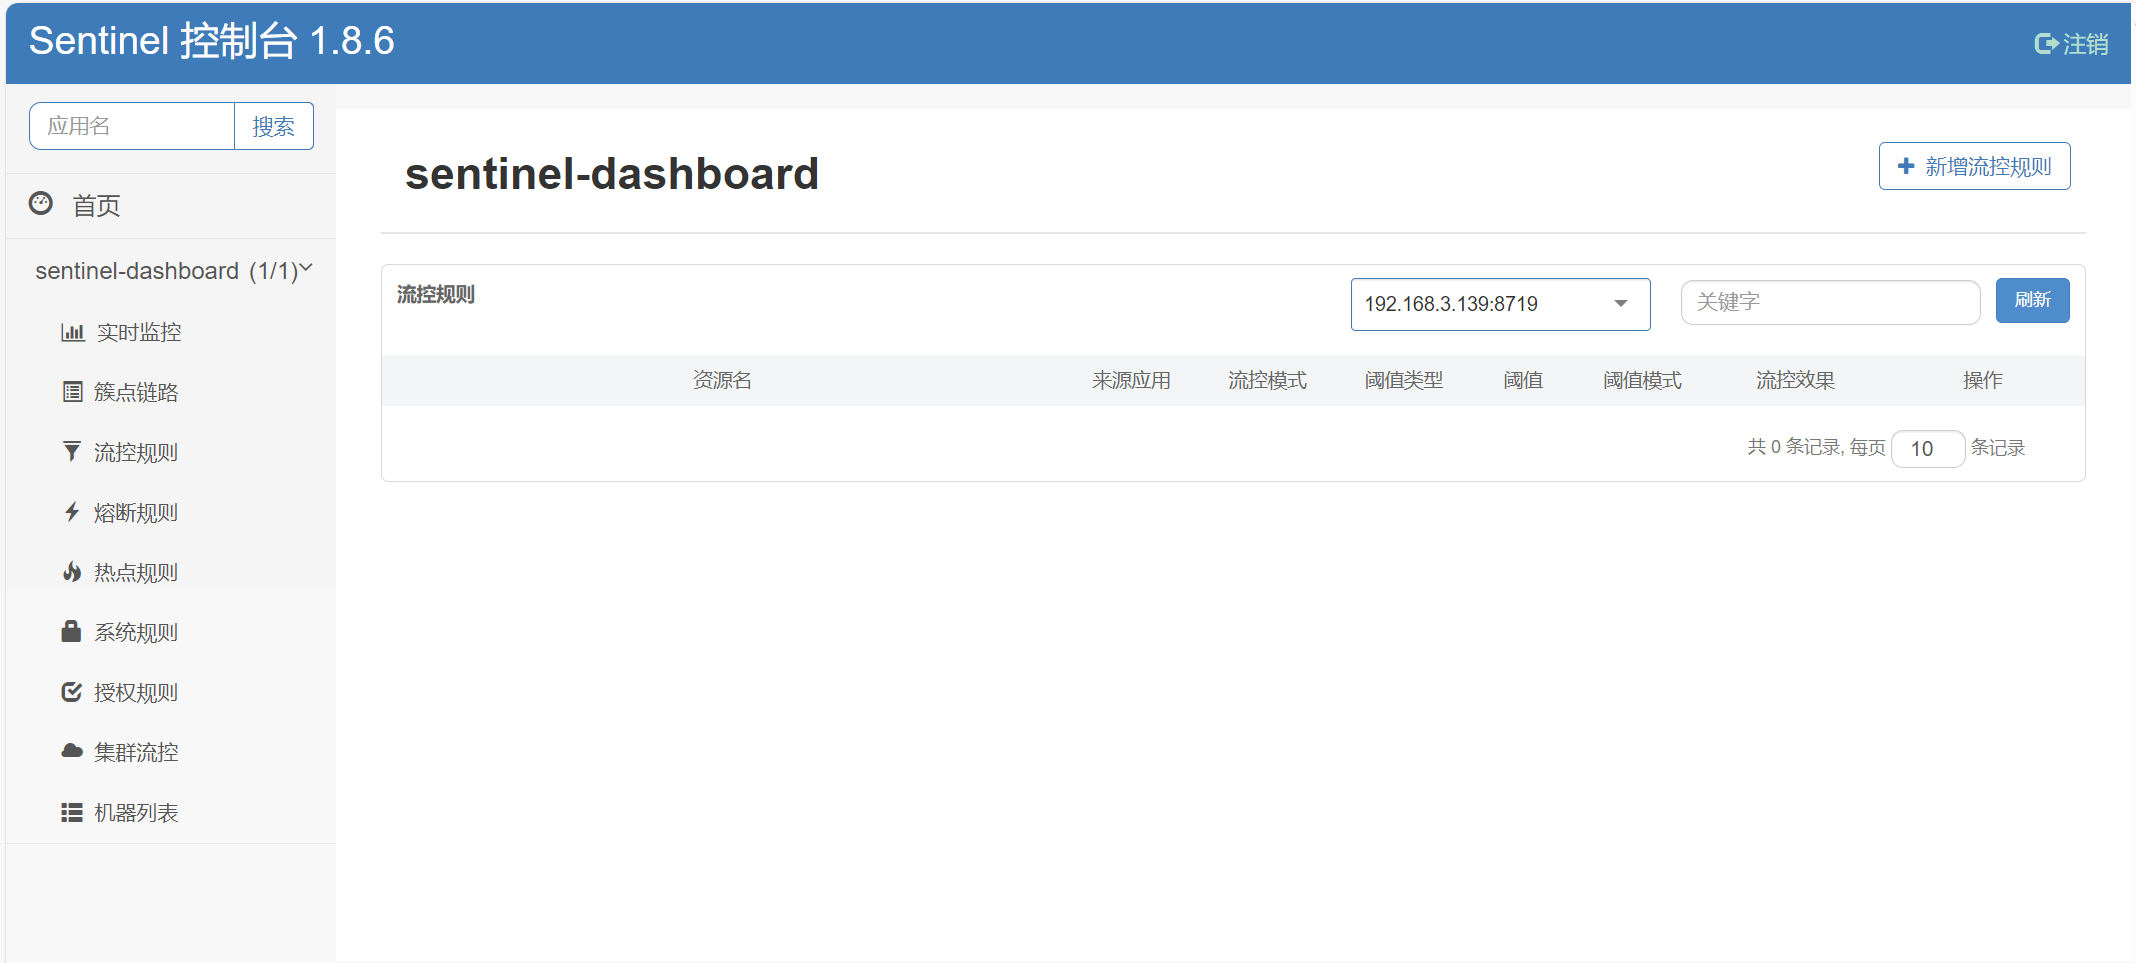
访问Sentinel控制台
访问地址:http://localhost:8888用户名和密码都是:sentinel
微服务整合sentinel
以订单服务为例,整合sentinel
引入依赖
<!-- sentinel 依赖-->
<dependency>
    <groupId>com.alibaba.cloud</groupId>
    <artifactId>spring-cloud-starter-alibaba-sentinel</artifactId>
</dependency>
业务代码中配置需要保护的资源
当 SpringBoot 应用接入 Sentinel starter 后,可以针对某个 URL 进行流控。所有的 URL 就自动成为 Sentinel 中的埋点资源,可以针对某个 URL 进行流控。或者使用@SentinelResource 注解用来标识资源是否被限流、降级。
(1)mvc接口方法会自动埋点,不需要配置。即:controller的接口方法如@PostMapping、GetMapping或者其他
(2)非mvc接口的方法使用@SentinelResource注解来标识资源是否被限流或降级
接下来我们对创建订单接口进行流控,因为是controller中的方法,所以不需要处理
Nacos配置中心添加配置
将sentinel的配置移到Nacos配置中心去,配置名称为sentinel-dashboard.yml。如果不移动过去就在订单服务的application.yml直接添加sentinel配置也行
sentinel-dashboard.yml配置如下:
spring:
  cloud:
    sentinel:
      transport:
        # 添加sentinel的控制台地址
        dashboard: localhost:8888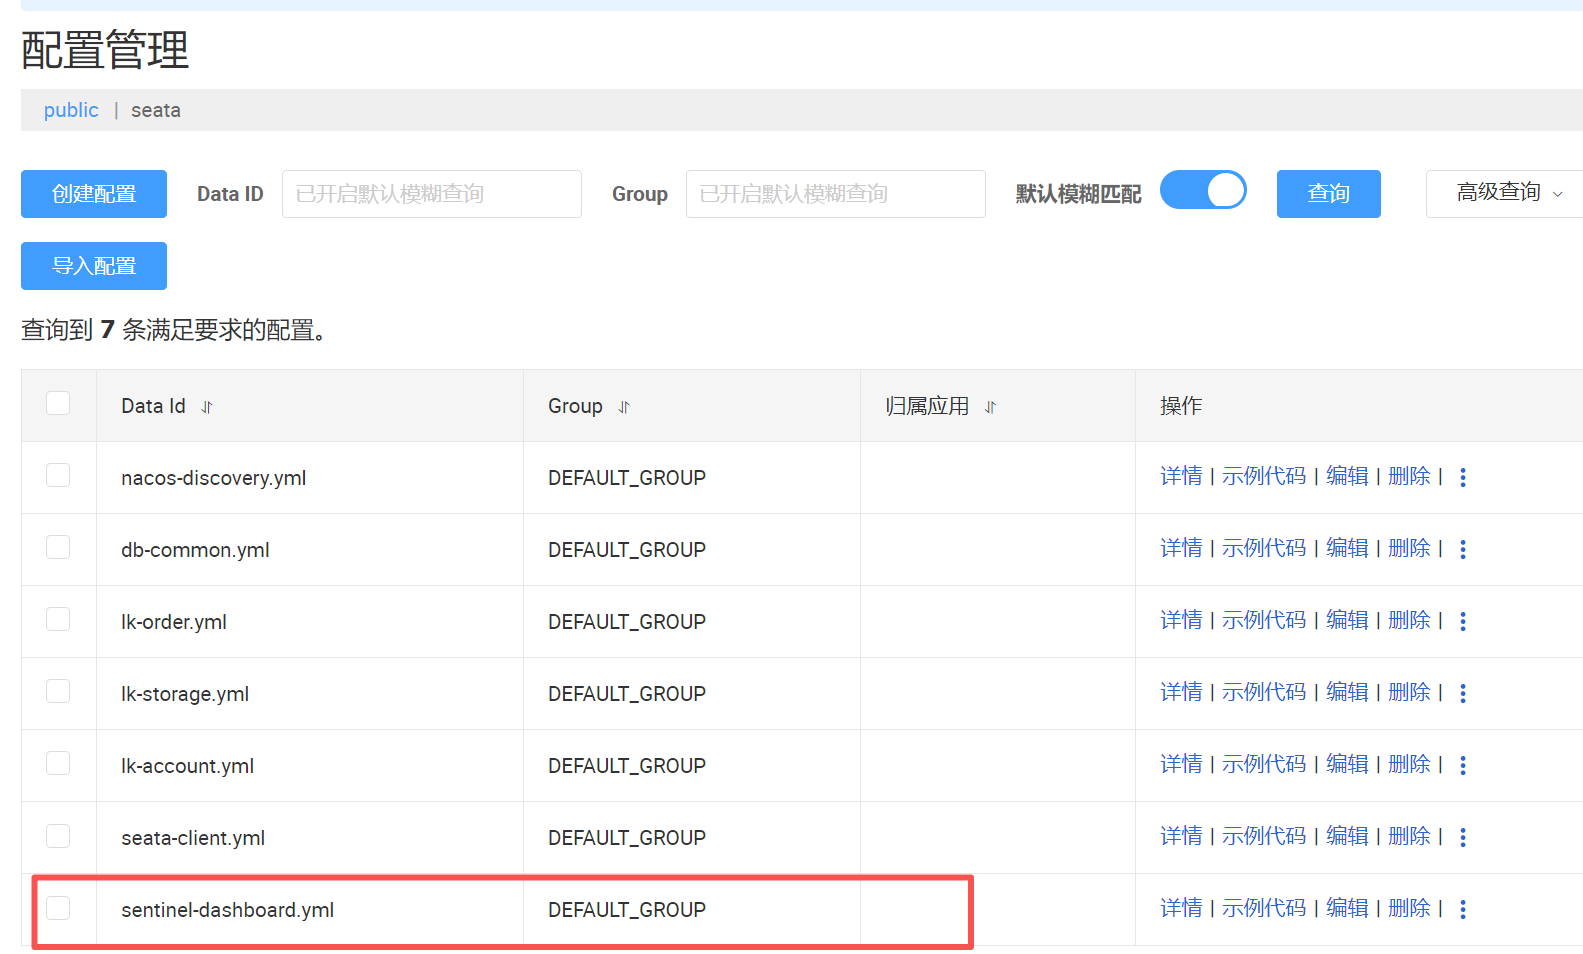
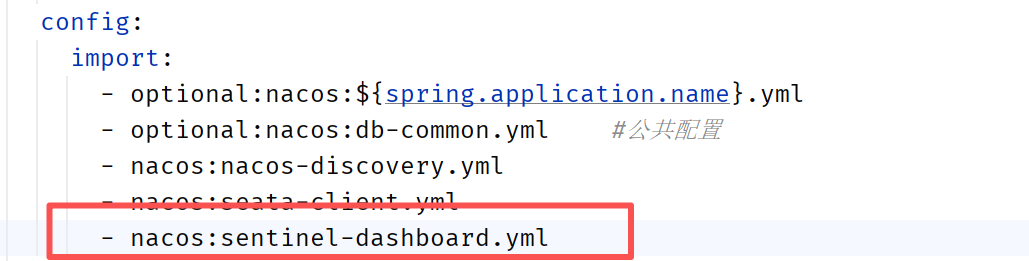
微服务中引入配置
在订单服务的application.yml中引入sentinel-dashboard.yml
重启微服务
重启订单服务
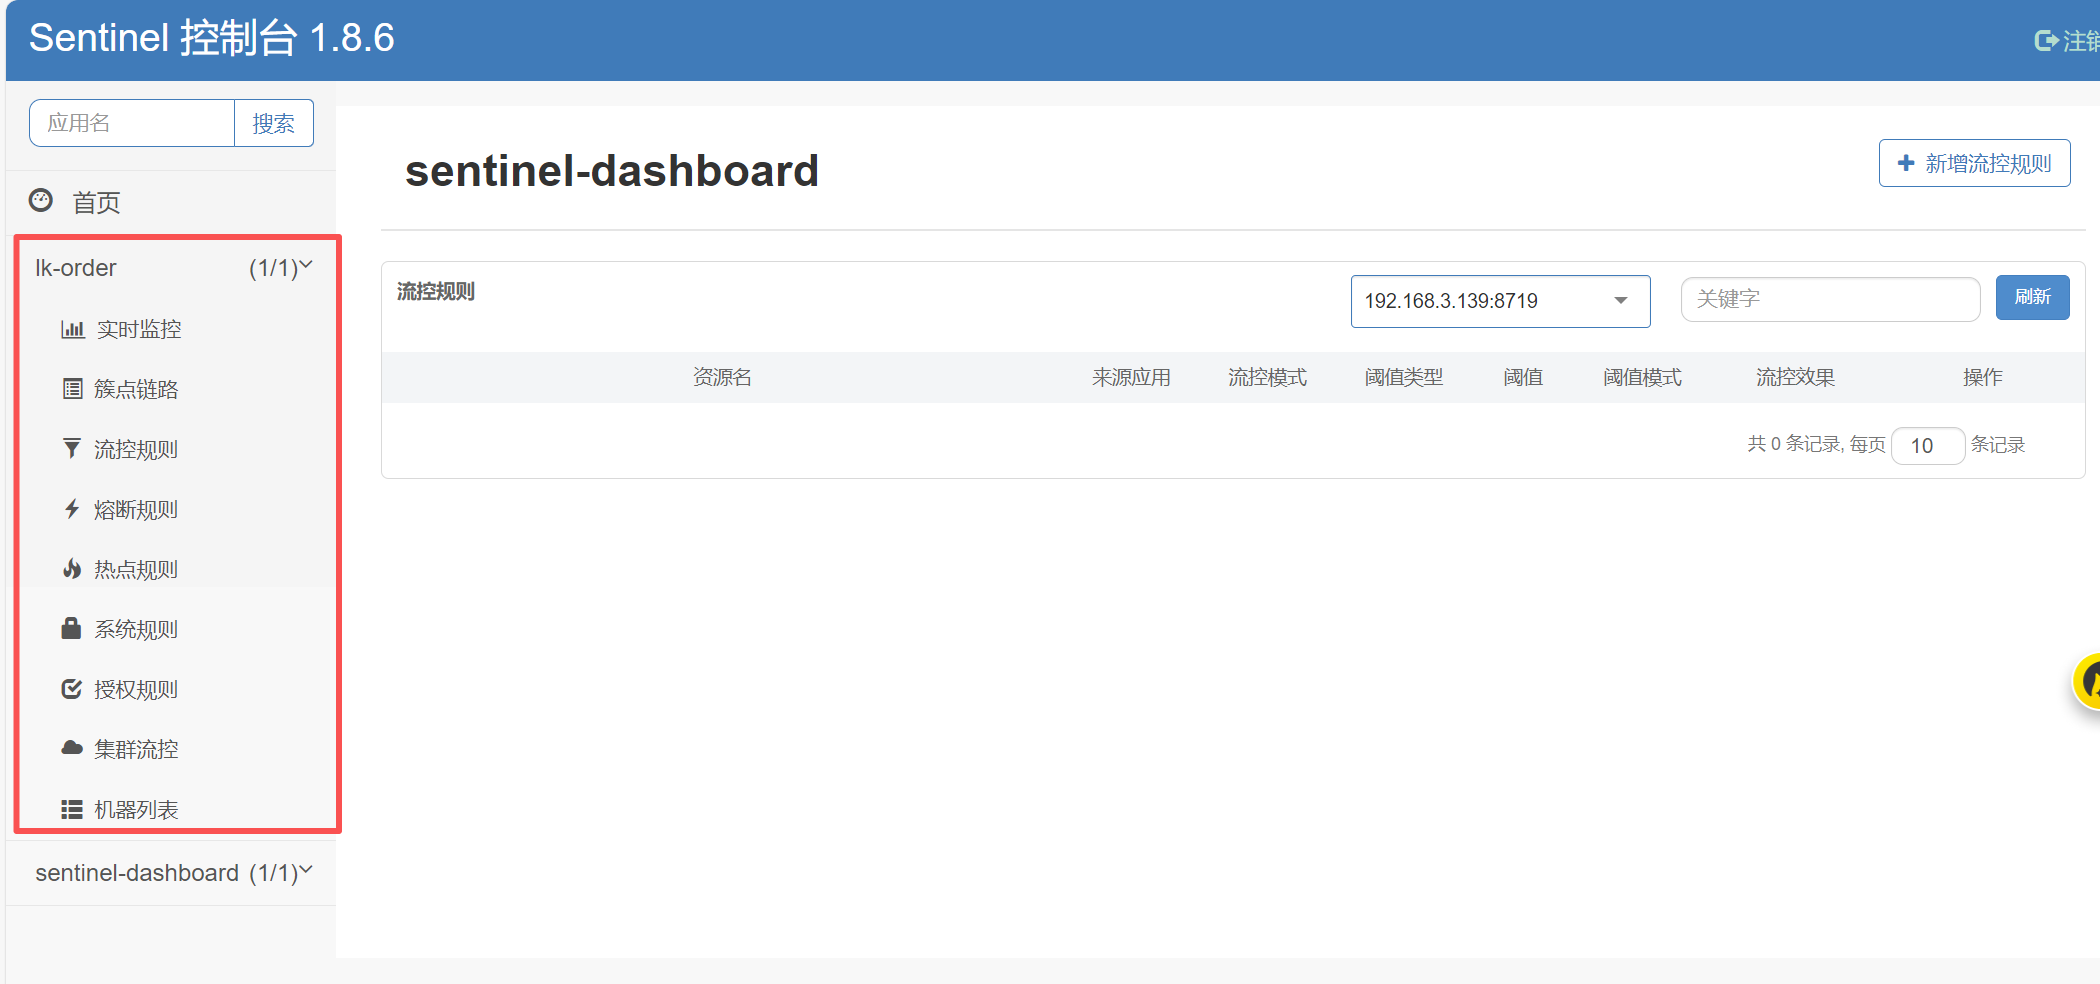
sentinel控制台设置流控
接口需要被访问过了之后,才会在sentinel控制台出现
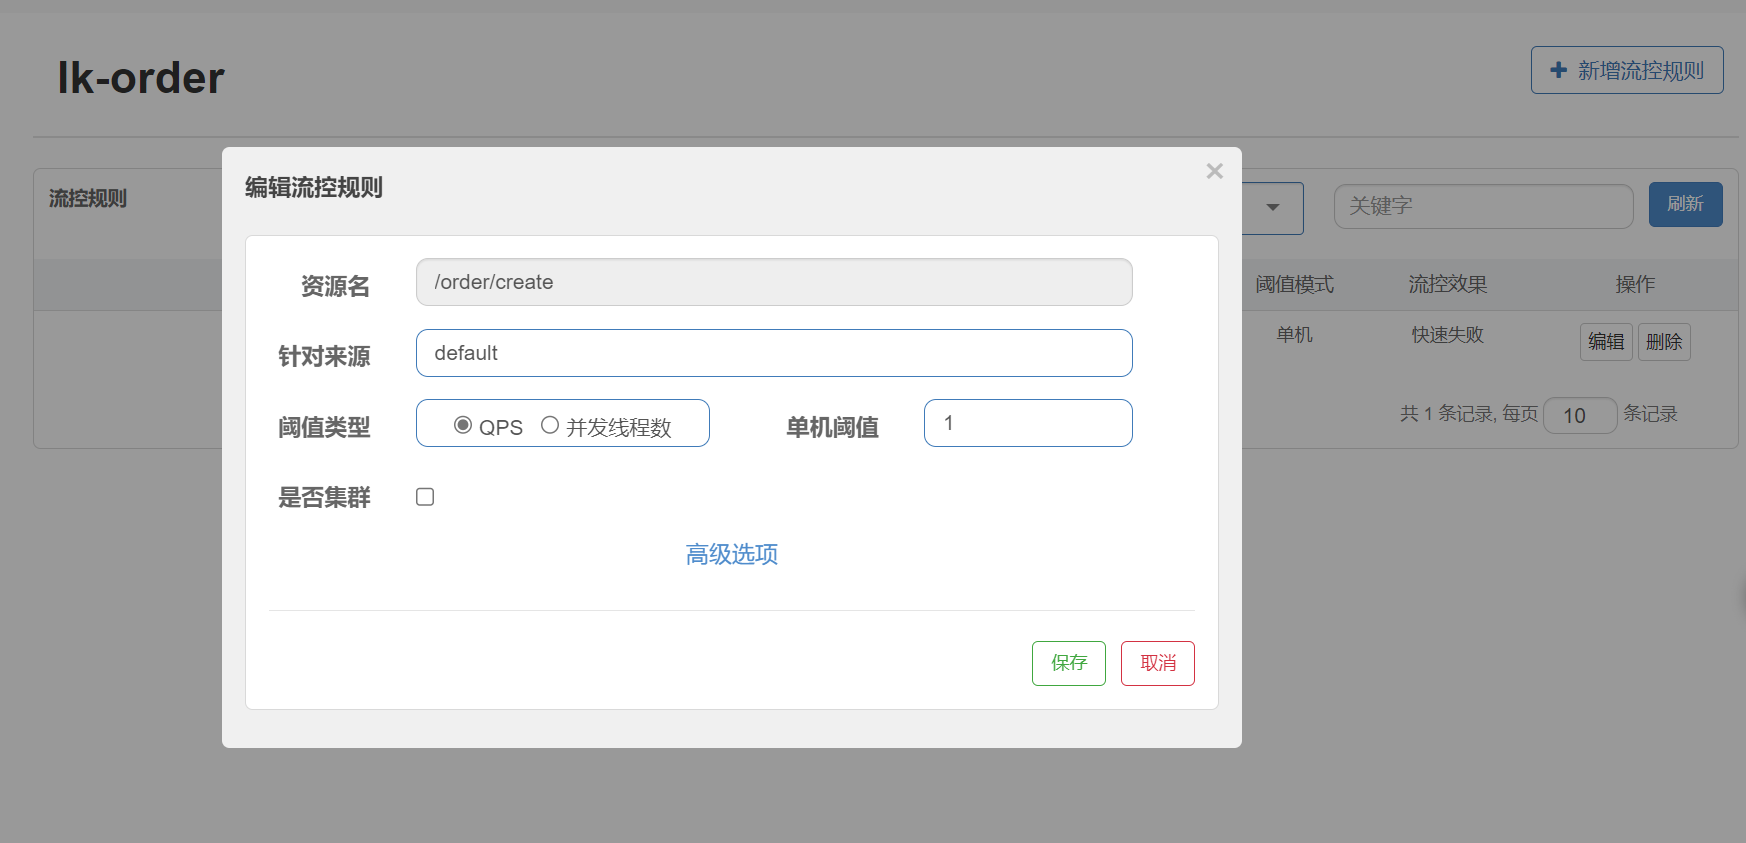
- 资源名: 接口的API
- 针对来源: 默认是default,当多个微服务都调用这个资源时,可以配置微服务名来对指定的微服务设置阈值
- 阈值类型: 分为QPS和线程数 假设阈值为10
- QPS类型: 只得是每秒访问接口的次数>10就进行限流
- 线程数: 为接受请求该资源分配的线程数>10就进行限流
测试流控效果
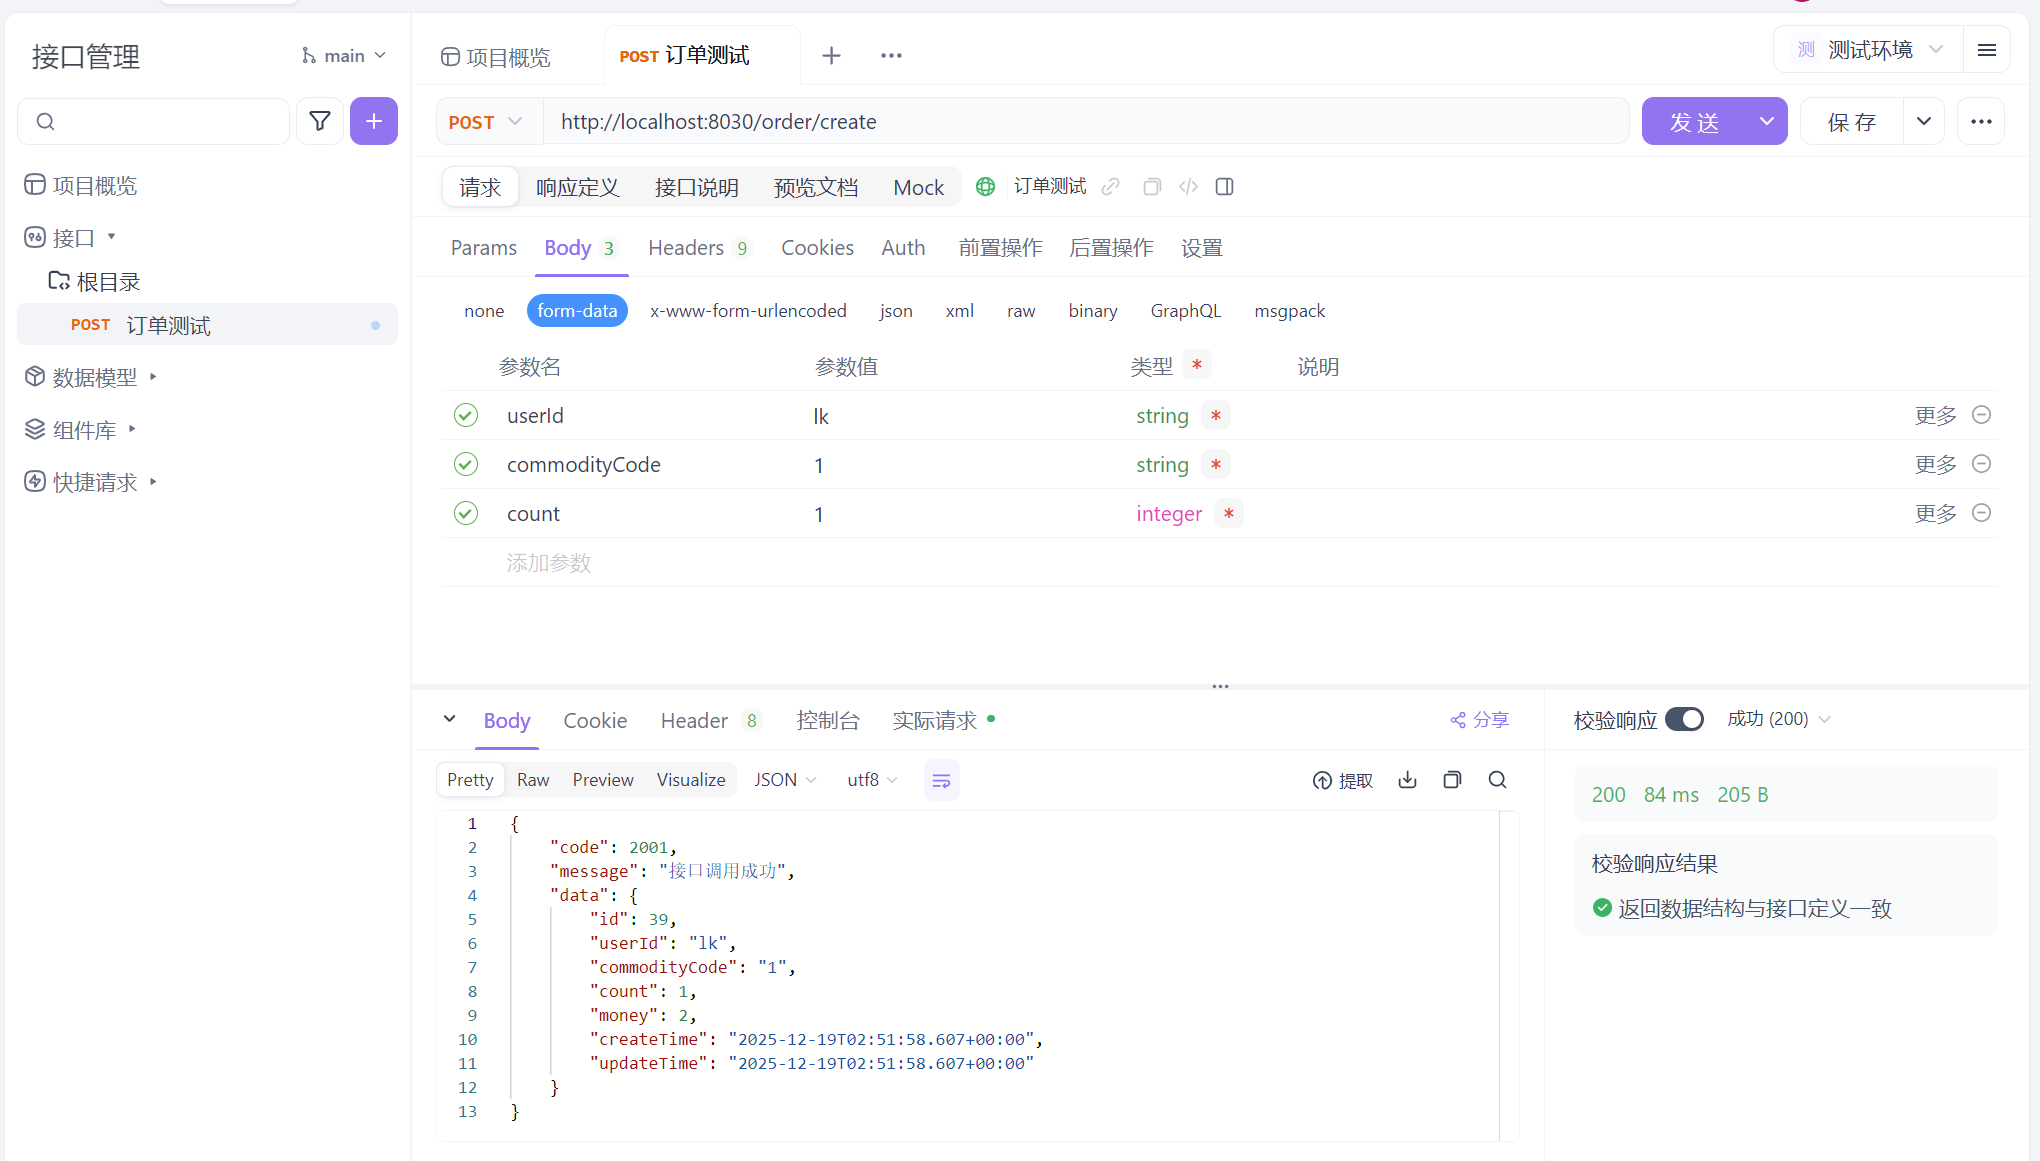
在sentinel添加流控规则,单机阈值设置为1,便于测试出现效果
在apifox中添加一个接口
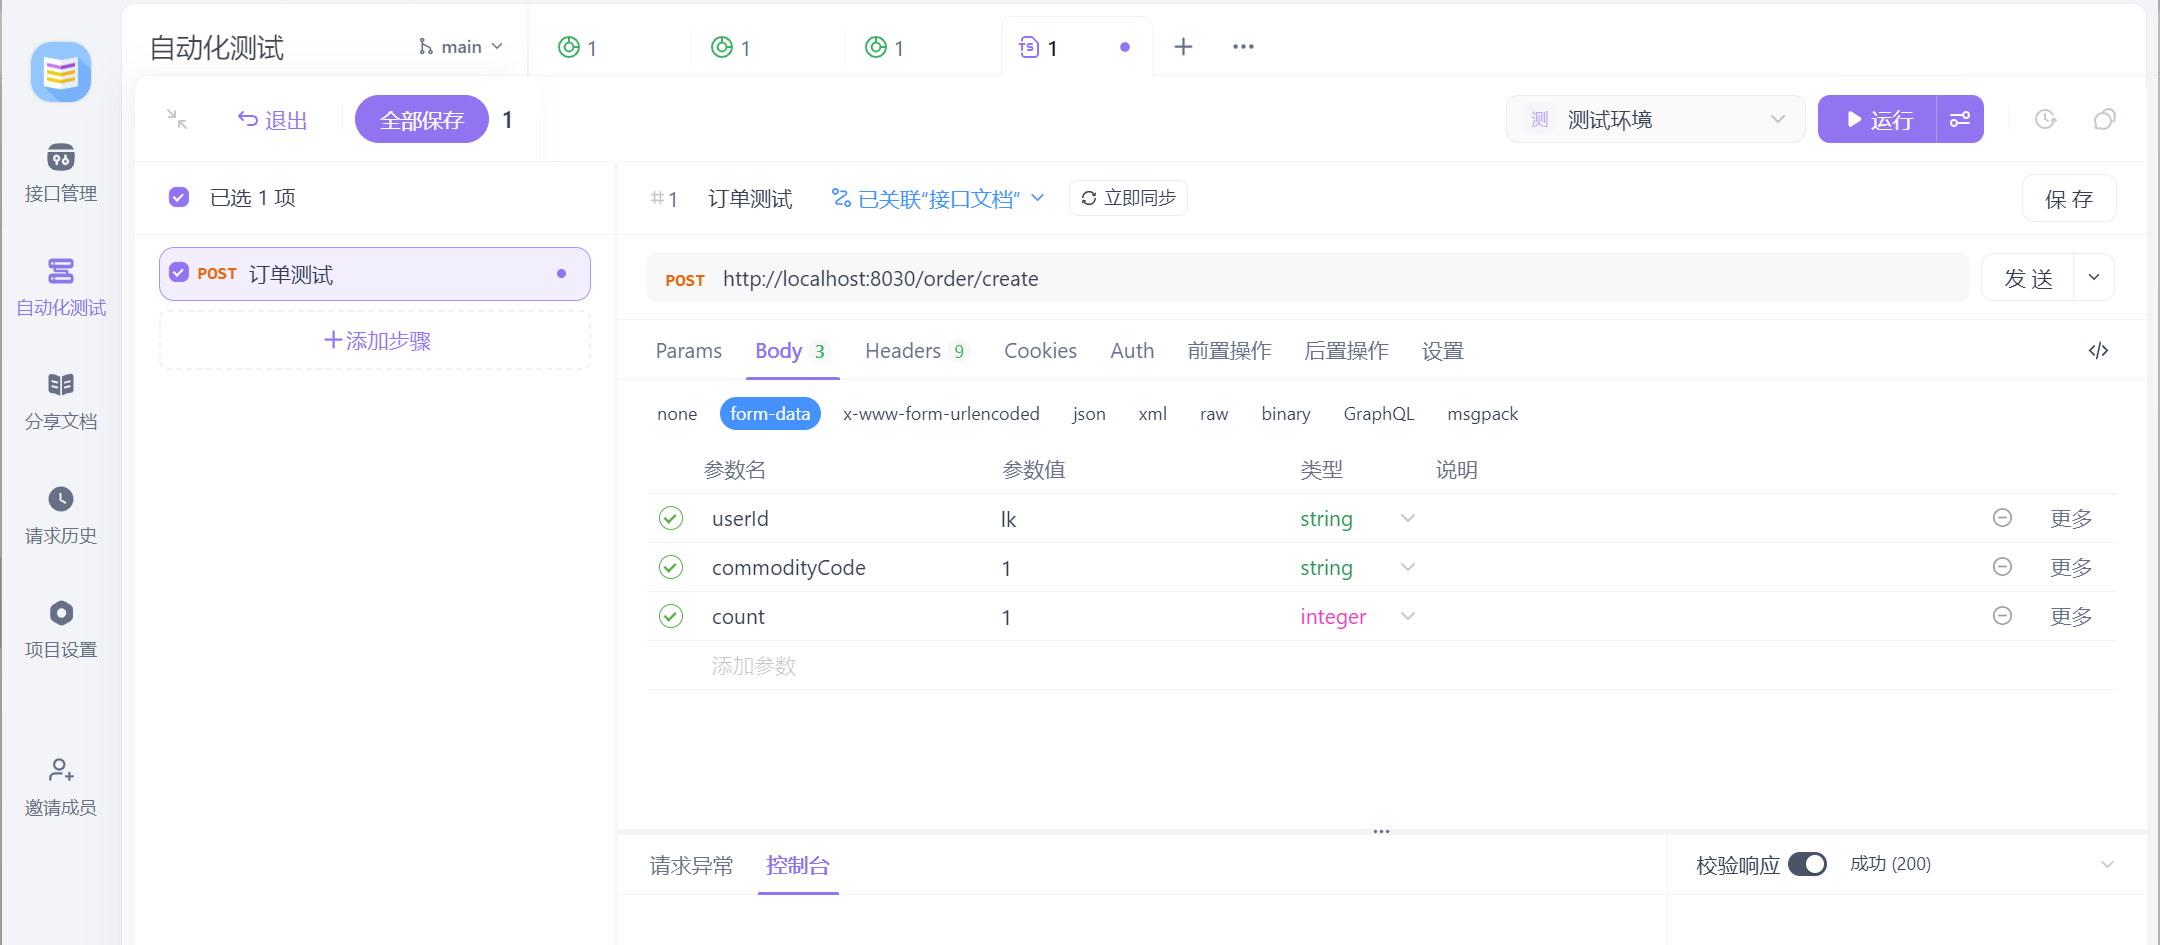
将接口添加到自动化测试中
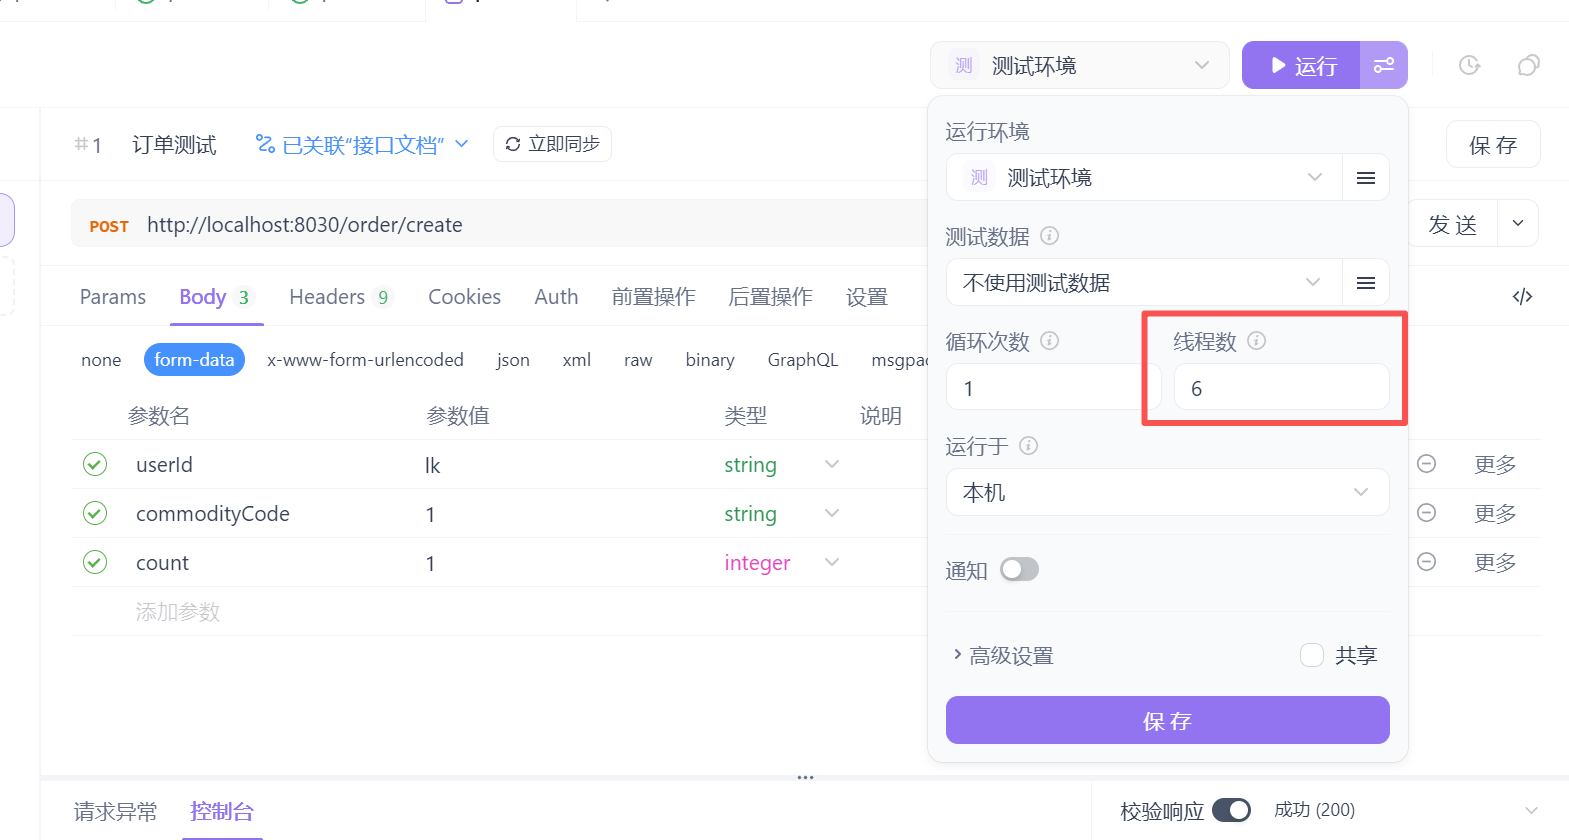
在运行处,多设置几条线程去跑,我这边设置6条
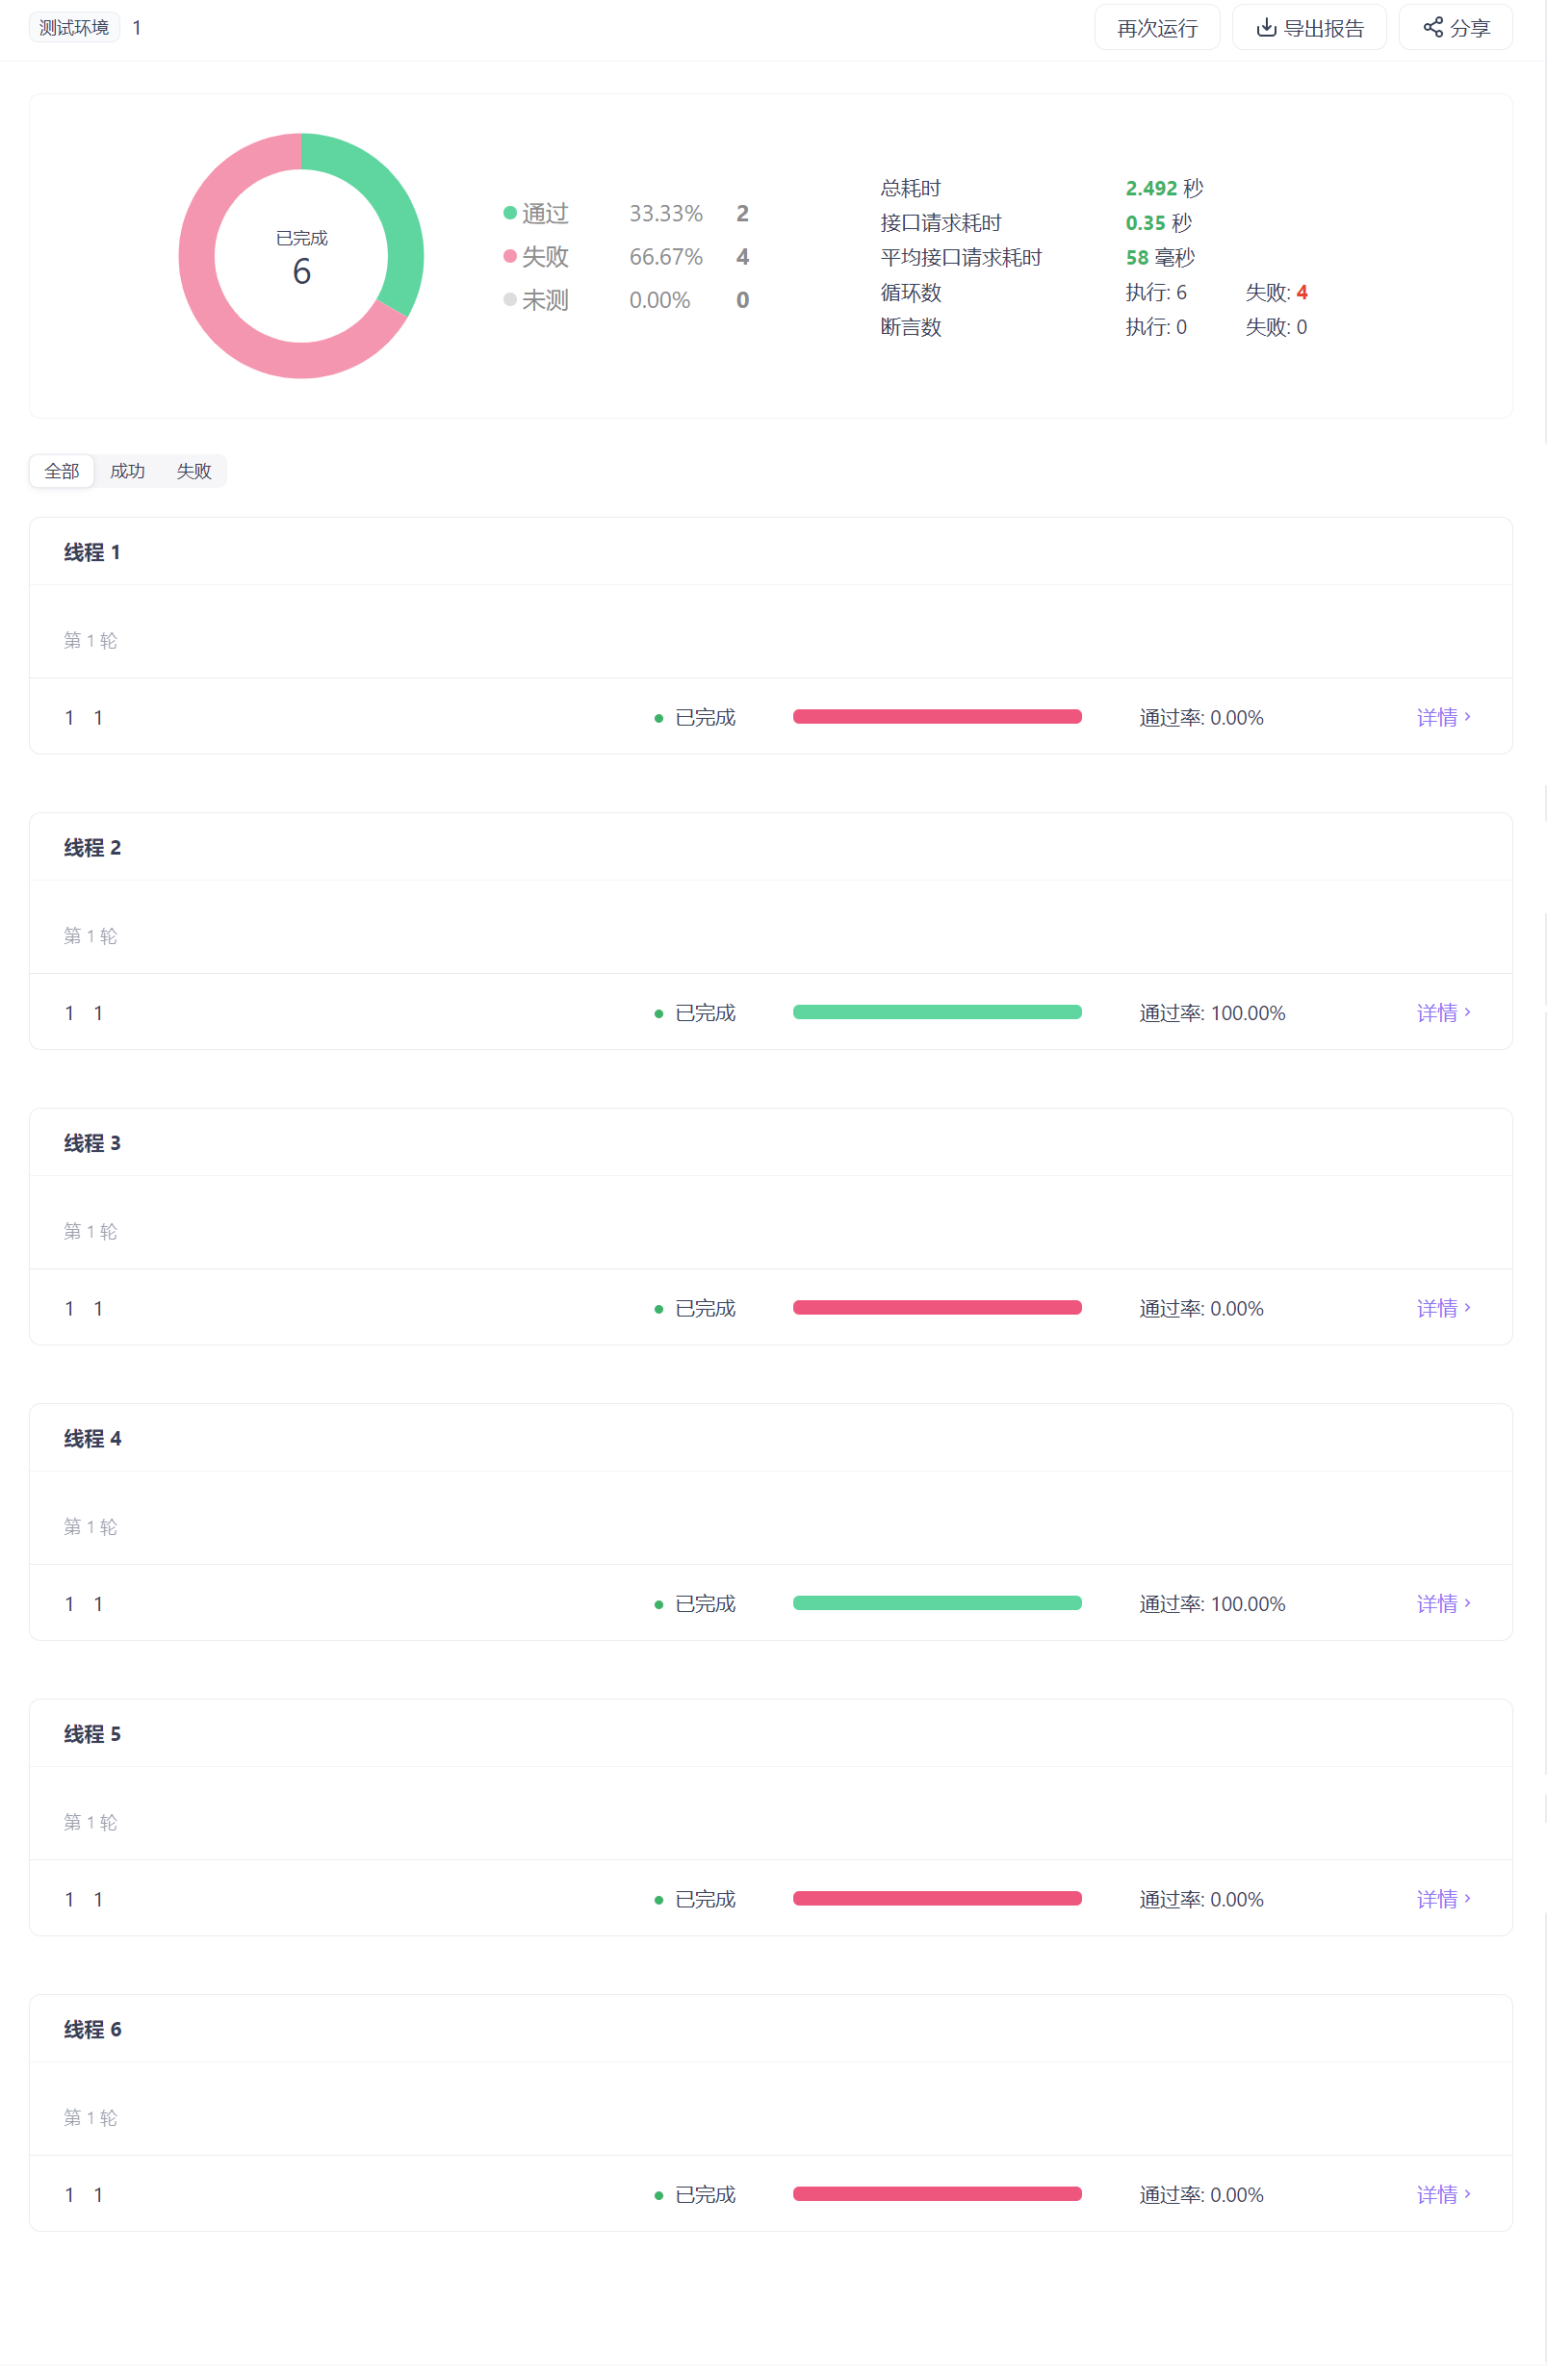
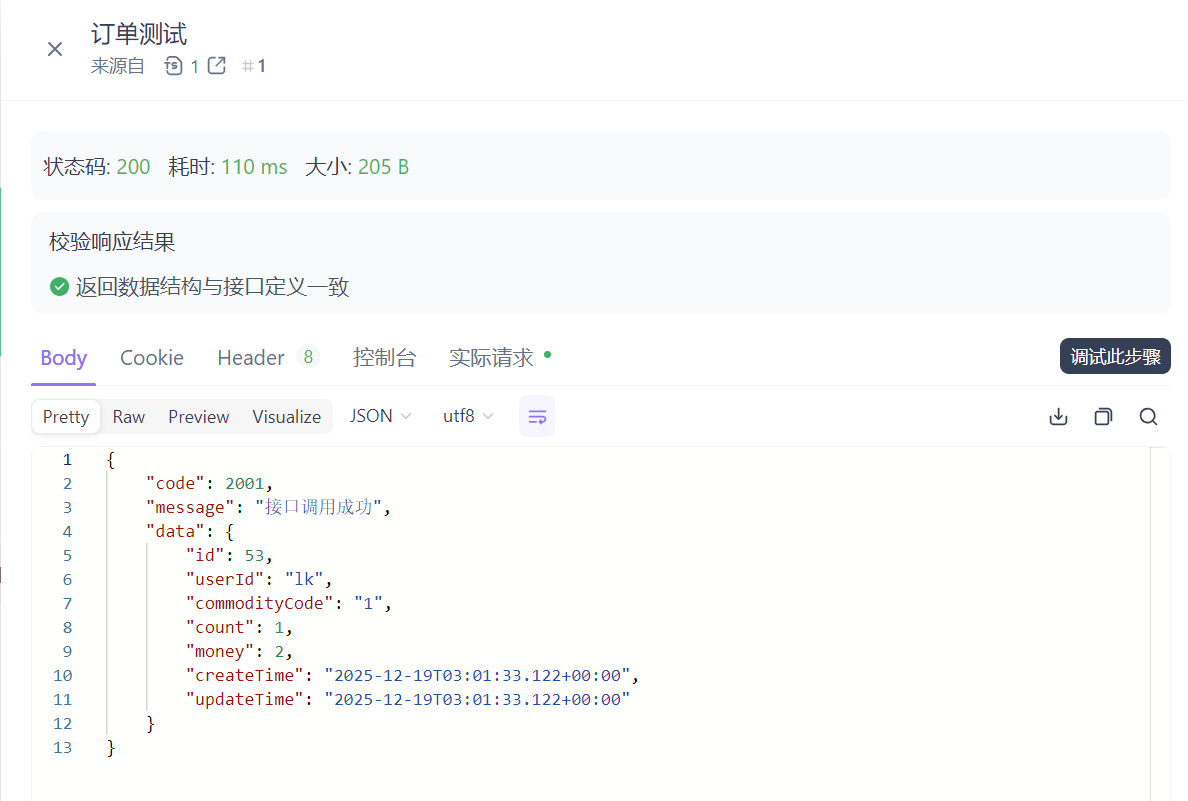
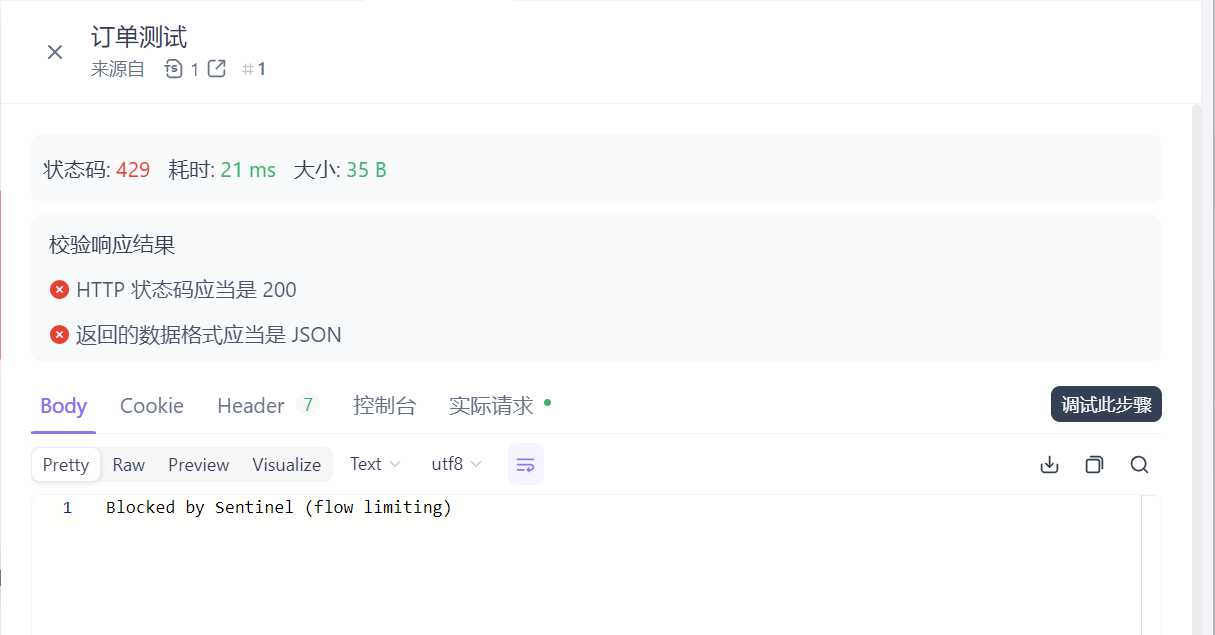
点击运行,发现有些是成功的,有些是被流控的
Gateway网关
微服务为什么需要API网关?
在微服务架构中,通常一个系统会被拆分为多个微服务,面对这么多微服务客户端,如果根据每个微服务的地址发起调用,存在如下问题:
- 客户端多次请求不同的微服务,会增加客户端代码和配置的复杂性,维护成本比价高
- 认证复杂,每个微服务可能存在不同的认证方式,客户端去调用,要去适配不同的认证
- 存在跨域的请求,调用链有一定的相对复杂性(防火墙 / 浏览器不友好的协议)
- 难以重构,随着项目的迭代,可能需要重新划分微服务
为了解决上面的问题,引入了API网关的概念。API网关为微服务架构的系统提供简单、有效且统一的API路由管理,作为系统的统一入口,提供内部服务的路由中转,给客户端提供统一的服务,可以实现一些和业务没有耦合的公用逻辑,主要功能包含认证、鉴权、路由转发、安全策略、防刷、流量控制、监控日志等。
SpringCloud Gateway是什么?
SpringCloud Gateway是SpringCloud官方推出的第二代网关框架,定位于取代Netflix Zuul。
Spring Cloud Gateway旨在为微服务架构提供一种简单且有效的API路由的管理方式,并基于Filter 的方式提供网关的基本功能,例如说安全认证、监控、限流等等。
Spring Cloud Gateway是由 WebFlux + Netty + Reactor 实现的响应式的 API网关。它不能在传统的 servlet容器中工作,也不能构建成 war包。
使用步骤
构建网关服务
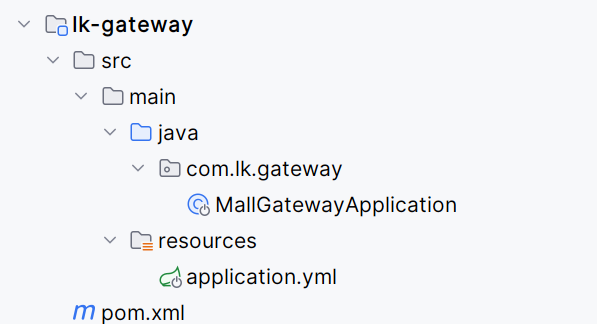
新建一个模块module,lk-gateway
引入依赖
<!-- gateway网关 -->
<dependency>
    <groupId>org.springframework.cloud</groupId>
    <artifactId>spring-cloud-starter-gateway</artifactId>
</dependency>

<!--nacos-discovery  注册中心依赖-->
<dependency>
    <groupId>com.alibaba.cloud</groupId>
    <artifactId>spring-cloud-starter-alibaba-nacos-discovery</artifactId>
</dependency>

<!-- loadbalancer 负载均衡器依赖-->
<dependency>
    <groupId>org.springframework.cloud</groupId>
    <artifactId>spring-cloud-loadbalancer</artifactId>
</dependency>

<!-- nacos-config 配置中心依赖 -->
<dependency>
    <groupId>com.alibaba.cloud</groupId>
    <artifactId>spring-cloud-starter-alibaba-nacos-config</artifactId>
</dependency>
创建springboot启动类
package com.lk.gateway;

import org.springframework.boot.SpringApplication;
import org.springframework.boot.autoconfigure.SpringBootApplication;

@SpringBootApplication
public class MallGatewayApplication {
    public static void main(String[] args) {
        SpringApplication.run(MallGatewayApplication.class, args);
    }
}
添加配置文件application.yml
spring:
  application:
    name: lk-gateway
  config:
    import:
      - optional:nacos:${spring.application.name}.yml
      - nacos:nacos-discovery.yml
logging:
  level:
    com.alibaba.cloud.nacos: debug
在nacos配置中心添加配置文件lk-gateway.yml
spring:
cloud:
nacos:
discovery:
server-addr: 127.0.0.1:8848
gateway:
#设置路由:路由id、路由到微服务的uri、断言
routes:
- id: order_route #路由ID,全局唯一,建议配置服务名
uri: lb://lk-order #lb 整合负载均衡器loadbalancer
predicates:
- Path=/order/** # 断言,路径相匹配的进行路由
- id: storage_route #路由ID,全局唯一,建议配置服务名
uri: lb://lk-storage #lb 整合负载均衡器loadbalancer
predicates:
- Path=/storage/** # 断言,路径相匹配的进行路由
- id: account_route #路由ID,全局唯一,建议配置服务名
uri: lb://lk-account #lb 整合负载均衡器loadbalancer
predicates:
- Path=/account/** # 断言,路径相匹配的进行路由
server:
port: 19888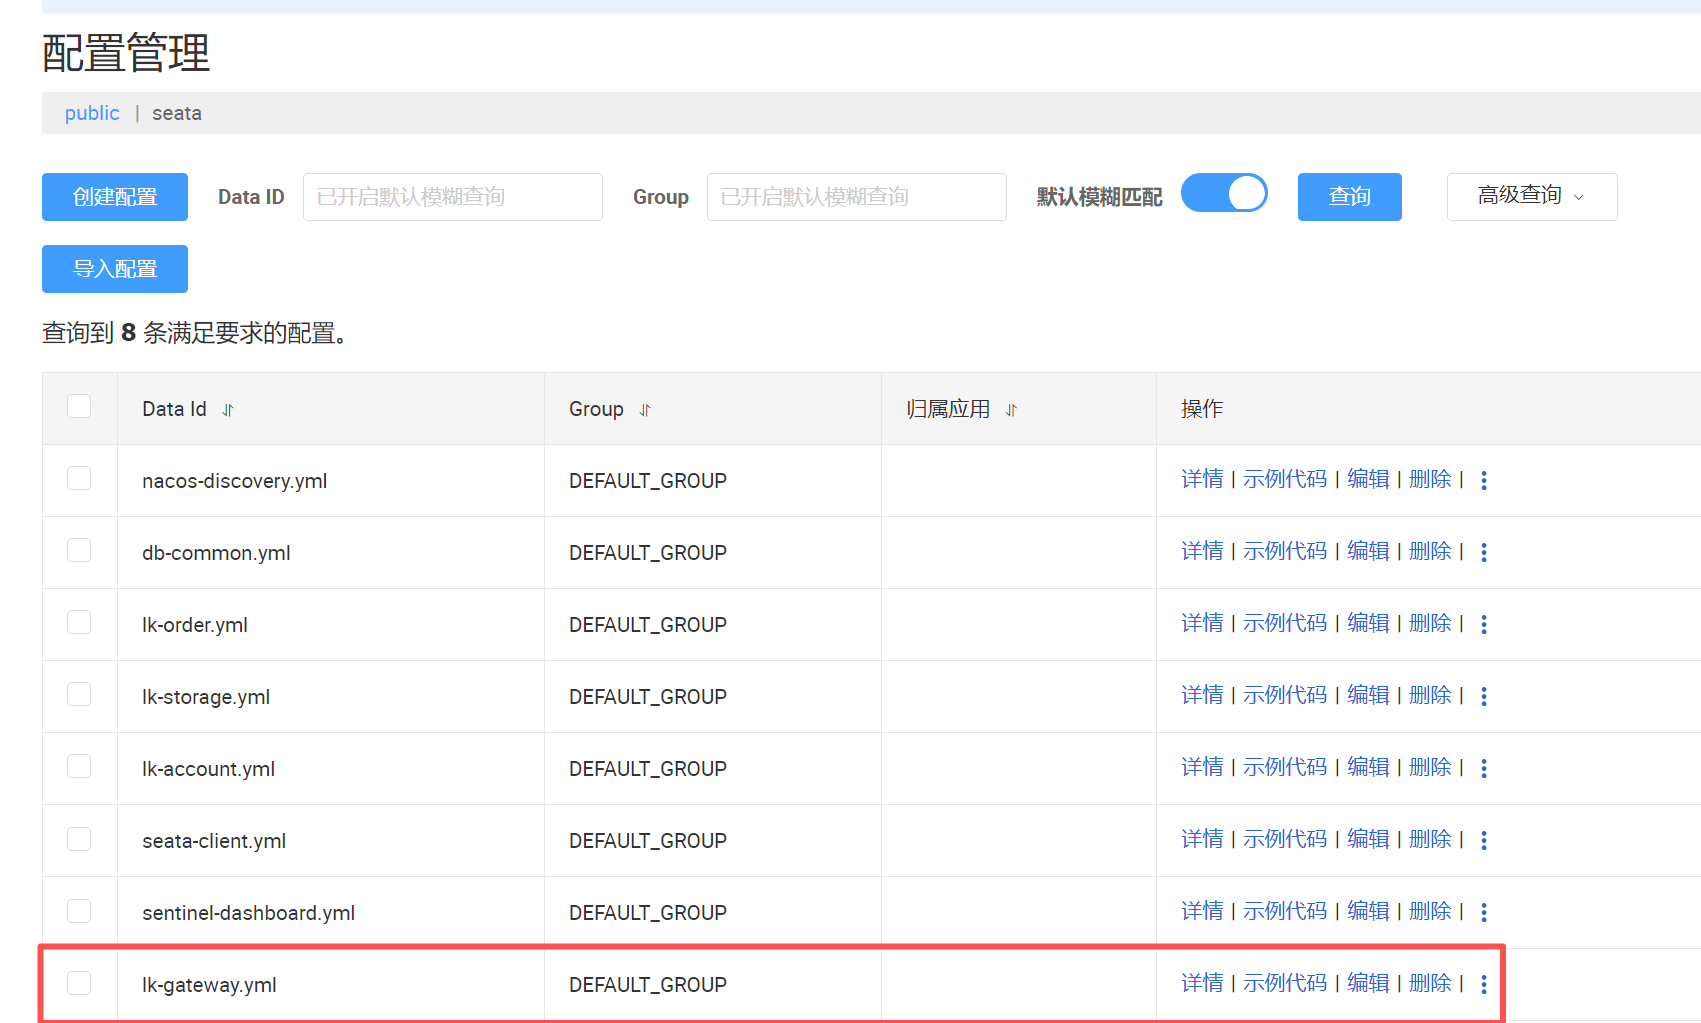 启动gateway服务
通过apifox测试
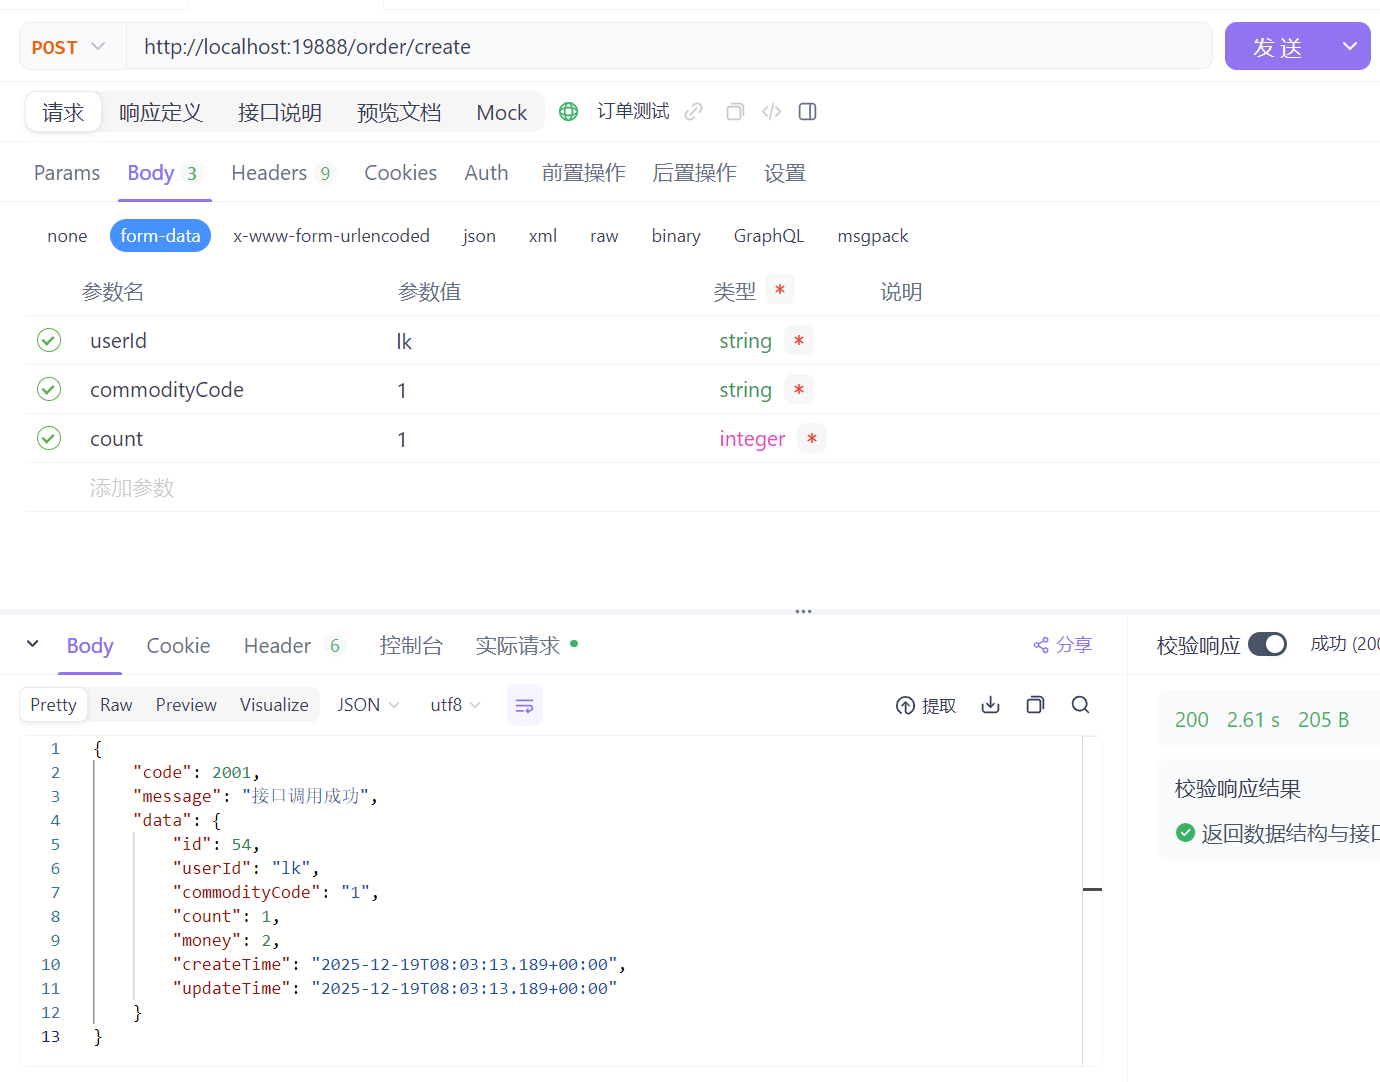
可以将order.html中的url调整为网关地址
$(".btnStart").click(function () {
        $('#orderResultSection').empty();
        var userId = $("#userId").val();
        var commodityCode = $("#commodityCode").val();
        $.ajax({
            // url: "http://localhost:8010/storage/",// 原始调用
            url: "http://localhost:19888/storage/",
            type: "get",
            dataType: "json",
            data: "commodityCode=" + commodityCode,
            async:false,
            success: function (res) {
                $('#orderResultSection').append(`<p> [${getDateTime()}] 执行分布式业务前商品库存: ${res.data} </p>`);
            }
        });
        $.ajax({
            // url: "http://localhost:8020/account/",// 原始调用
            url: "http://localhost:19888/account/",
            type: "get",
            dataType: "json",
            data: "userId=" + userId,
            async:false,
            success: function (res) {
                $('#orderResultSection').append(`<p> [${getDateTime()}] 执行分布式业务前账户余额: ${res.data}</p>`);
            }
        });
        $.ajax({
            type: "POST",
            // url: "http://localhost:8030/order/create",// 原始调用
            url: "http://localhost:19888/order/create",
            data: $('#orderForm').serialize(),
            dataType: 'json',
            async:false,
            success: function (res) {
                $('#orderResultSection').append(`<p> [${getDateTime()}] ${res.message} </p>`);
                $.ajax({
                    // url: "http://localhost:8010/storage/",// 原始调用
                    url: "http://localhost:19888/storage/",
                    type: "get",
                    dataType: "json",
                    data: "commodityCode=" + commodityCode,
                    async:false,
                    success: function (res) {
                        $('#orderResultSection').append(`<p> [${getDateTime()}] 执行分布式业务后商品库存: ${res.data}</p>`);
                    }
                });
                $.ajax({
                    // url: "http://localhost:8020/account/",// 原始调用
                    url: "http://localhost:19888/account/",
                    type: "get",
                    dataType: "json",
                    data: "userId=" + userId,
                    async:false,
                    success: function (res) {
                        $('#orderResultSection').append(`<p> [${getDateTime()}] 执行分布式业务后账户余额: ${res.data}</p>`);
                    }
                });
            }
        });
    });
Skywalking监控可视化,实时追踪服务链路
全链路追踪的作用:对请求源头到底层服务的调用链路中间的所有环节进行监控。
Skywalking是什么?
skywalking是分布式系统的应用程序性能监视工具,专为微服务、云原生架构和基于容器(Docker、K8s、Mesos)架构而设计。
SkyWalking是观察性分析平台和应用性能管理系统,提供分布式追踪、服务网格遥测分析、度量聚合和可视化一体化解决方案。
使用步骤
下载Skywalking
(1)skywalking的后端服务OAP+可视化UIhttps://www.apache.org/dyn/closer.cgi/skywalking/10.0.1/apache-skywalking-apm-10.0.1.tar.gzhttps://archive.apache.org/dist/skywalking/10.0.1/apache-skywalking-apm-10.0.1.tar.gzhttps://www.apache.org/dyn/closer.cgi/skywalking/10.0.1/apache-skywalking-apm-10.0.1.tar.gz
(2)用于从微服务采集数据的探针
https://www.apache.org/dyn/closer.cgi/skywalking/java-agent/9.3.0/apache-skywalking-java-agent-9.3.0.tgzhttps://archive.apache.org/dist/skywalking/java-agent/9.3.0/apache-skywalking-java-agent-9.3.0.tgz
修改配置
(1)先使用默认的H2数据库存储,不用修改config/application.yml配置
(2)skywalking-web-ui服务会占用8080端口,修改端口可以修改webapp/application.yml
windows下启动脚本bin/startup.bat
启动成功后会启动两个服务,一个是skywalking-oap-server,一个是skywalking-web-ui。skywalking-oap-server服务启动后会暴露11800 和 12800 两个端口,分别为收集监控数据的端口11800和接受前端请求的端口12800
访问Ul界面
如果端口改为了8999,访问:http://ocalhost:8999/
微服务接入探针
微服务配置jvm参数,接入skywalking
以订单服务为例
-javaagent:D:\myapp\develop\springcloudalibaba\skywalking\skywalking-agent\skywalking-agent.jar
-DSW_AGENT_NAME=lk-order
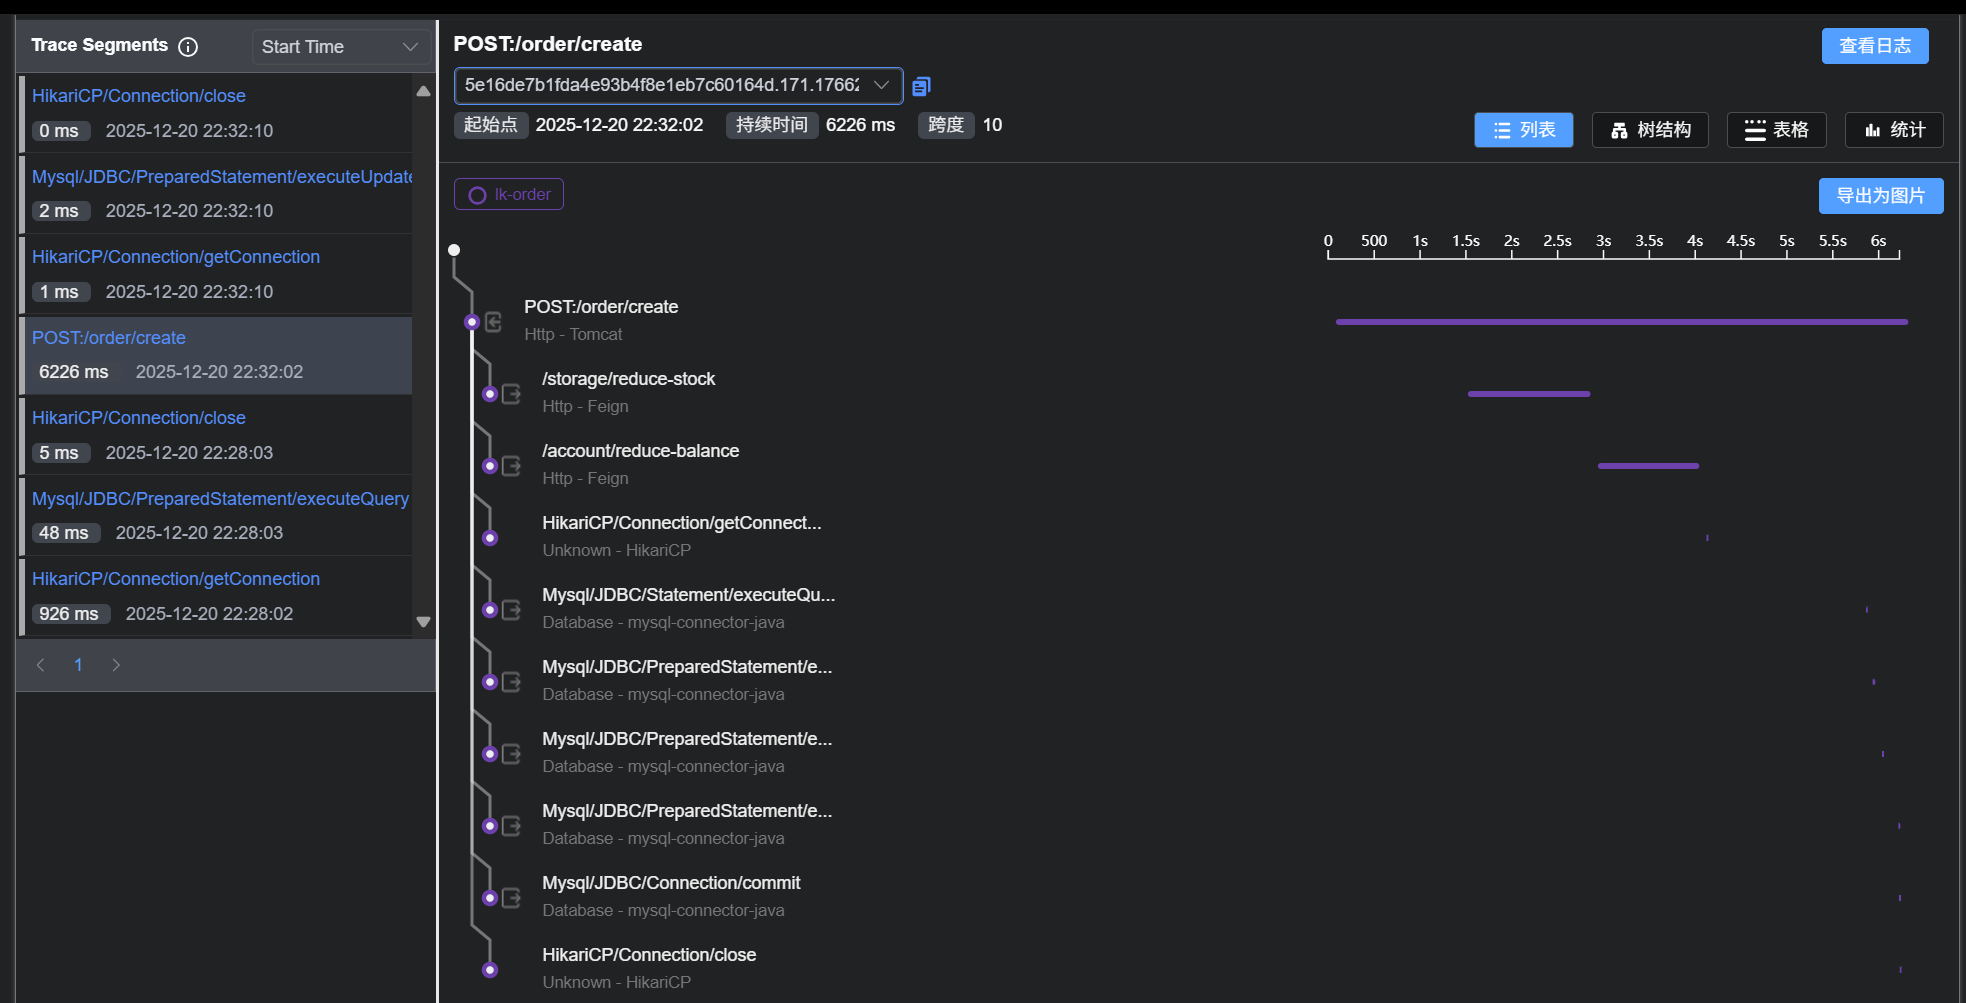
-DSW_AGENT_COLLECTOR_BACKEND_SERVICES=localhost:11800重启服务
订单服务重启,然后通过localhost:8080/order访问界面,调用订单接口,在查看Skywalking的UI界面是否有调用链路


 1243
1243

 被折叠的 条评论
为什么被折叠?
被折叠的 条评论
为什么被折叠?
 到【灌水乐园】发言


