


protobuf是由Google开发的一套对数据结构进行序列化的方法,可用做通信协议,数据存储格式,等等。其特点是不限语言、不限平台、扩展性强
Netty也提供了对Protobuf的天然支持,我们今天就写一个简单的示例,简单地了解一下Netty对Google的protoBuf的支持
我们的示例场景很简单的:客户端发送一个信息,这个信息用Protobuf来做序列化,然后服务器端接收这个信息,解码,读取信息
protobuf与xml,json这样的数据格式一样,都有自己的一套语法,且语法很简单,很容易掌握,xml文件的后缀名是xml,json的后缀名是json,以此类推,那么protobuf的后缀名就是proto
关于proto的基本语法与java的bean很像,详细可以参考官网,可以看下这篇博客:
http://blog.sina.com.cn/s/blog_9b0604b40101qm35.html
现在我们定义一个类似java bean的proto文件,我们定义一个“富人”类,他有多辆车,我们先按照语法,写一个RichMan.proto,如下面的代码清单所示:
package netty;

option java_package = "com.lyncc.netty.codec.protobuf.demo";
option java_outer_classname = "RichManProto";

message RichMan {

   required int32 id = 1;
   required string name = 2;
   optional string email = 3;

   enum CarType {
     AUDI = 0;
     BENZ = 1;
     LAMBORGHINI = 2;
     DASAUTO = 3;
   }

   message Car {
      required string name = 1;
      optional CarType type = 2 [default = BENZ];
   }

   repeated Car cars = 4;

}1)java_package值得是该文件生成的java文件的包路径
2)java_outer_classname值的是生成的class的名称
3)message和enum是它的基本类型,很类似于java的class和枚举
4)required表名这个字段是必须的,option表明这个字段可选,default表明这个字段有默认值
5)repeat表明这个字段可以重复,类似于java中的List,该例子中Car的声明中,就相当于java中的List<Car>
6)每个声明的后面的数字,例如1,2,3, 4等等,同级的声明不能重复
总而言之,这个“类”定义了一个富人,该富人有id,名称,邮箱,而且该富人有多个名车,这些名车的类型有奥迪,奔驰,兰博基尼,大众
好了,到目前为止,proto我们已经定义好了,Google提供了一个类似脚本的工具,可以使我们将proto文件转化成java文件
该文件叫做protoc-2.6.1-win32.zip,可以在很多地方下载到,下载地址:
http://download.csdn.net/detail/linuu/9515171
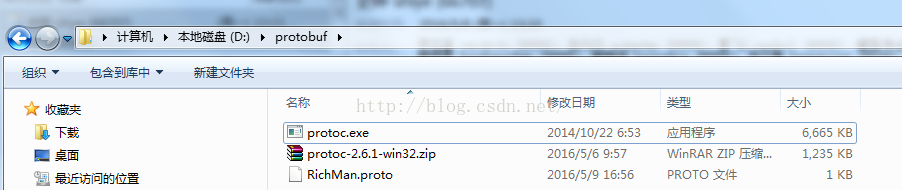
下载好,新建文件夹,且将加载的exe复制到该文件夹,且将我们刚才写的RichMan.proto复制到该文件夹下:
进入命令行,键入:

没有报错的情况下,会在同样的文件夹下生成如下的文件:
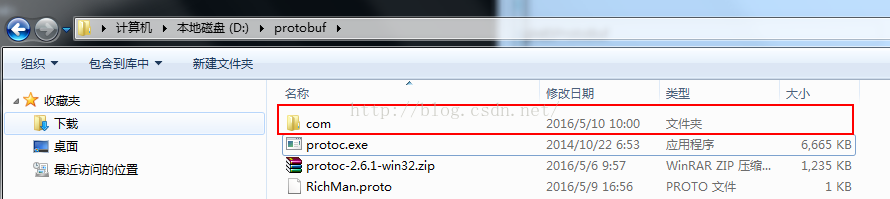
进入com的文件夹,你会发现生成的目录是与你proto中定义的java_package一样:

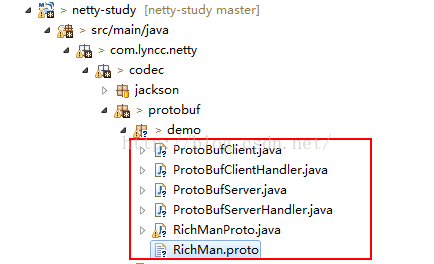
好了,到目前为止,我们已经生成了RichManProto文件了,将其复制到eclipse对应的目录下,整个项目代码的缩略图如下图所示:
添加maven的依赖:
<dependency>
	<groupId>com.google.protobuf</groupId>
	<artifactId>protobuf-java</artifactId>
	<version>2.6.1</version>
</dependency>
接下来就是一些大家耳熟能详的server,handler,client,bootstrap,废话多不说,上代码:
ProtoBufServer.java
package com.lyncc.netty.codec.protobuf.demo;

import io.netty.bootstrap.ServerBootstrap;
import io.netty.channel.ChannelFuture;
import io.netty.channel.ChannelInitializer;
import io.netty.channel.ChannelOption;
import io.netty.channel.EventLoopGroup;
import io.netty.channel.nio.NioEventLoopGroup;
import io.netty.channel.socket.SocketChannel;
import io.netty.channel.socket.nio.NioServerSocketChannel;
import io.netty.handler.codec.protobuf.ProtobufDecoder;
import io.netty.handler.codec.protobuf.ProtobufVarint32FrameDecoder;
import io.netty.handler.logging.LogLevel;
import io.netty.handler.logging.LoggingHandler;

public class ProtoBufServer {

    public void bind(int port) throws Exception {
        // 配置服务端的NIO线程组
        EventLoopGroup bossGroup = new NioEventLoopGroup();
        EventLoopGroup workerGroup = new NioEventLoopGroup();
        try {
            ServerBootstrap b = new ServerBootstrap();
            b.group(bossGroup, workerGroup).channel(NioServerSocketChannel.class).option(ChannelOption.SO_BACKLOG, 100)
                    .handler(new LoggingHandler(LogLevel.INFO)).childHandler(new ChannelInitializer<SocketChannel>() {
                        @Override
                        public void initChannel(SocketChannel ch) {
                            ch.pipeline().addLast(new ProtobufVarint32FrameDecoder());
                            ch.pipeline().addLast(new ProtobufDecoder(RichManProto.RichMan.getDefaultInstance()));
                            ch.pipeline().addLast(new ProtoBufServerHandler());
                        }
                    });

            // 绑定端口,同步等待成功
            ChannelFuture f = b.bind(port).sync();

            System.out.println("init start");
            // 等待服务端监听端口关闭
            f.channel().closeFuture().sync();
        } finally {
            // 优雅退出,释放线程池资源
            bossGroup.shutdownGracefully();
            workerGroup.shutdownGracefully();
        }
    }

    public static void main(String[] args) throws Exception {
        int port = 8080;
        if (args != null && args.length > 0) {
            try {
                port = Integer.valueOf(args[0]);
            } catch (NumberFormatException e) {
                // 采用默认值
            }
        }
        new ProtoBufServer().bind(port);
    }

}

我没有深究,看名字就知道第一个Decoder是将帧byte数据转化成message,第二步就是将message转化成我们自定义的Rimanproto
自定义的handler很简单,就是打印一下解析的内容:
ProtoBufServerHandler.java
package com.lyncc.netty.codec.protobuf.demo;

import io.netty.channel.ChannelHandlerContext;
import io.netty.channel.ChannelInboundHandlerAdapter;

import java.util.List;

import com.lyncc.netty.codec.protobuf.demo.RichManProto.RichMan.Car;

public class ProtoBufServerHandler extends ChannelInboundHandlerAdapter {

    @Override
    public void channelRead(ChannelHandlerContext ctx, Object msg) throws Exception {
        RichManProto.RichMan req = (RichManProto.RichMan) msg;
        System.out.println(req.getName()+"他有"+req.getCarsCount()+"量车");
        List<Car> lists = req.getCarsList();
        if(null != lists) {

            for(Car car : lists){
                System.out.println(car.getName());
            }
        }
    }


    @Override
    public void exceptionCaught(ChannelHandlerContext ctx, Throwable cause) {
        cause.printStackTrace();
        ctx.close();
    }

}
ProtoBufClient.java
package com.lyncc.netty.codec.protobuf.demo;

import io.netty.bootstrap.Bootstrap;
import io.netty.channel.ChannelFuture;
import io.netty.channel.ChannelInitializer;
import io.netty.channel.ChannelOption;
import io.netty.channel.EventLoopGroup;
import io.netty.channel.nio.NioEventLoopGroup;
import io.netty.channel.socket.SocketChannel;
import io.netty.channel.socket.nio.NioSocketChannel;
import io.netty.handler.codec.protobuf.ProtobufEncoder;
import io.netty.handler.codec.protobuf.ProtobufVarint32LengthFieldPrepender;

public class ProtoBufClient {

    public void connect(int port, String host) throws Exception {
        // 配置客户端NIO线程组
        EventLoopGroup group = new NioEventLoopGroup();
        try {
            Bootstrap b = new Bootstrap();
            b.group(group).channel(NioSocketChannel.class).option(ChannelOption.TCP_NODELAY, true)
                    .handler(new ChannelInitializer<SocketChannel>() {
                        @Override
                        public void initChannel(SocketChannel ch) throws Exception {
                            ch.pipeline().addLast(new ProtobufVarint32LengthFieldPrepender());
                            ch.pipeline().addLast(new ProtobufEncoder());
                            ch.pipeline().addLast(new ProtoBufClientHandler());
                        }
                    });

            // 发起异步连接操作
            ChannelFuture f = b.connect(host, port).sync();

            // 当代客户端链路关闭
            f.channel().closeFuture().sync();
        } finally {
            // 优雅退出,释放NIO线程组
            group.shutdownGracefully();
        }
    }

    /**
     * @param args
     * @throws Exception
     */
    public static void main(String[] args) throws Exception {
        int port = 8080;
        if (args != null && args.length > 0) {
            try {
                port = Integer.valueOf(args[0]);
            } catch (NumberFormatException e) {
                // 采用默认值
            }
        }
        new ProtoBufClient().connect(port, "127.0.0.1");
    }

}

在传输之前需要将你的类进行protobuf的序列化,这是两个序列化的编码器
接着看:
ProtoBufClientHandler.java
package com.lyncc.netty.codec.protobuf.demo;

import io.netty.channel.ChannelHandlerContext;
import io.netty.channel.ChannelInboundHandlerAdapter;

import java.util.ArrayList;
import java.util.List;

import com.lyncc.netty.codec.protobuf.demo.RichManProto.RichMan.Car;
import com.lyncc.netty.codec.protobuf.demo.RichManProto.RichMan.CarType;

public class ProtoBufClientHandler extends ChannelInboundHandlerAdapter {

    @Override
    public void channelActive(ChannelHandlerContext ctx) {
        System.out.println("=======================================");
        RichManProto.RichMan.Builder builder = RichManProto.RichMan.newBuilder();
        builder.setName("王思聪");
        builder.setId(1);
        builder.setEmail("wsc@163.com");

        List<RichManProto.RichMan.Car> cars = new ArrayList<RichManProto.RichMan.Car>();
        Car car1 = RichManProto.RichMan.Car.newBuilder().setName("上海大众超跑").setType(CarType.DASAUTO).build();
        Car car2 = RichManProto.RichMan.Car.newBuilder().setName("Aventador").setType(CarType.LAMBORGHINI).build();
        Car car3 = RichManProto.RichMan.Car.newBuilder().setName("奔驰SLS级AMG").setType(CarType.BENZ).build();

        cars.add(car1);
        cars.add(car2);
        cars.add(car3);

        builder.addAllCars(cars);
        ctx.writeAndFlush(builder.build());
    }


    @Override
    public void exceptionCaught(ChannelHandlerContext ctx, Throwable cause) {
        cause.printStackTrace();
        ctx.close();
    }

}
好了,到此为止,所有的代码已经写完毕了,我们运行测试一下:
服务器端启动:

启动客户端后,再看看服务器端的控制台:

好了,到此为止,最简单的demo已经搭建完毕了~


 736
736

 被折叠的 条评论
为什么被折叠?
被折叠的 条评论
为什么被折叠?
 到【灌水乐园】发言


