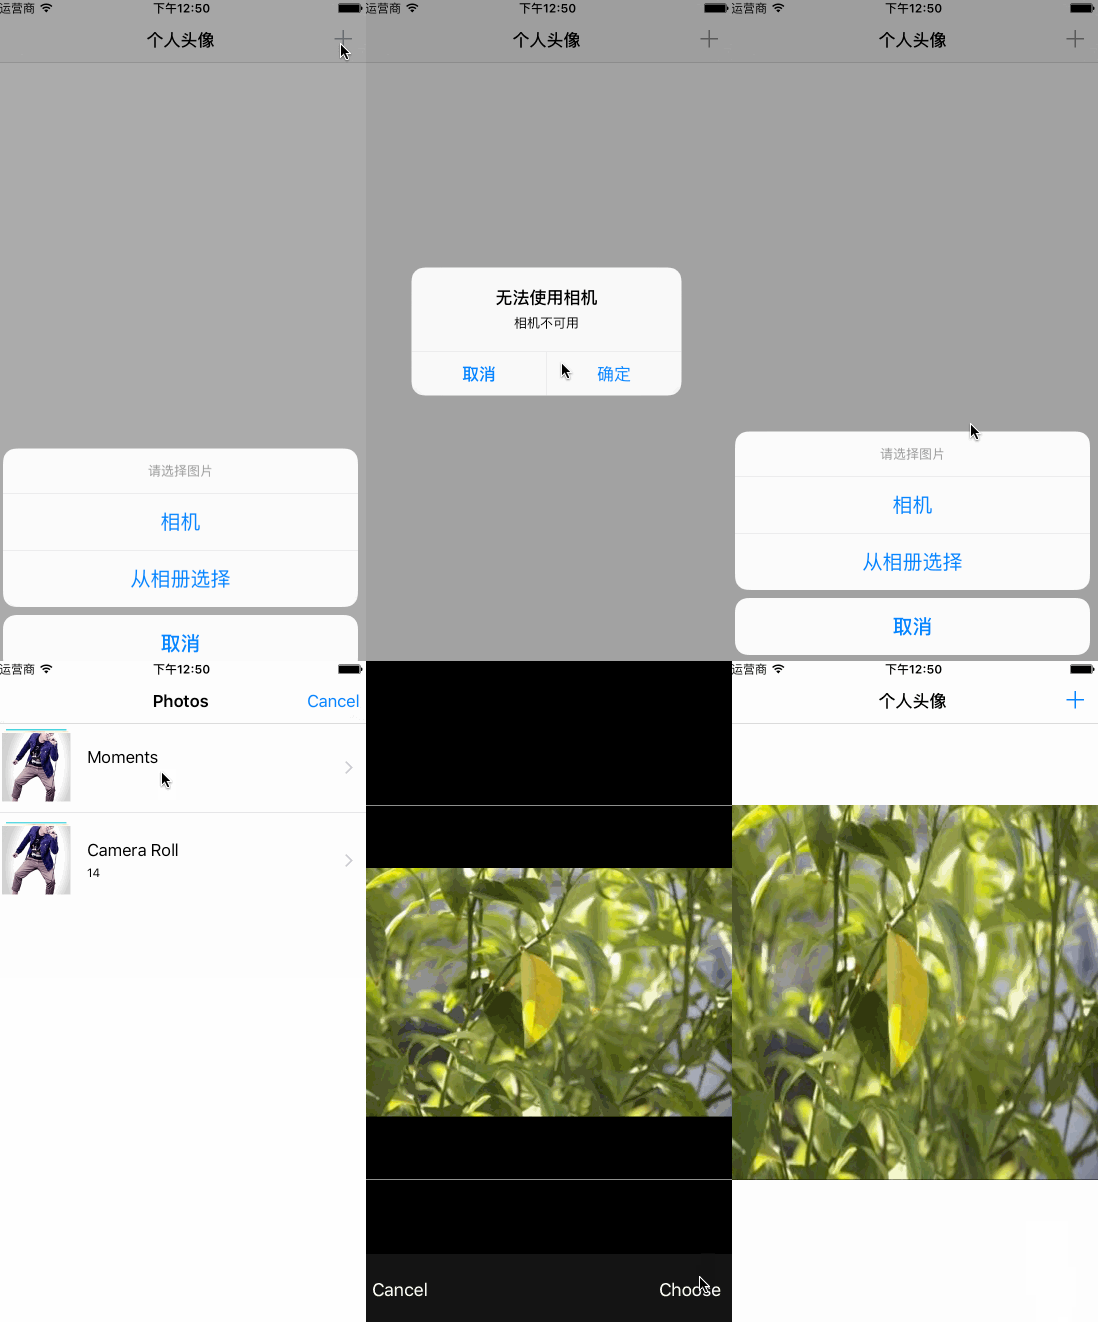
iOS8推出了一个新的“controller”,主要是把类似之前的UIAlertView变成了UIAlertController,把UIAlertView和UIActionSheet二合一。
按钮响应方法弃用了代理而绑定使用了block方式,使可读性更强,不必在两个地方写代码了,但也需要注意循环引用的问题:__block typeof (self) weak_self = self; 向UIAlertController里面添加UIAlertAction的方式实现之前的UIActionSheet控件的功能,把[alert show]的方法改成了controller的presentViewController形式。这里借着上传头像的demo介绍一下这个新的提示框的用法。
AlertView:
            NSString *tips = @"相机不可用";
            UIAlertController *alertController = [UIAlertController alertControllerWithTitle:@"无法使用相机" message:tips preferredStyle:UIAlertControllerStyleAlert];
            UIAlertAction *cancelAction = [UIAlertAction actionWithTitle:@"取消" style:UIAlertActionStyleCancel handler:^(UIAlertAction *action) {
                NSLog(@"取消");
            }];
            UIAlertAction *otherAction = [UIAlertAction actionWithTitle:@"确定" style:UIAlertActionStyleDefault handler:^(UIAlertAction *action) {
                NSLog(@"确定");
            }];
            [alertController addAction:cancelAction];
            [alertController addAction:otherAction];
            [self presentViewController:alertController animated:YES completion:nil];
Actionsheet:
 UIAlertController *alertController = [UIAlertController alertControllerWithTitle:@"请选择图片"
                                                                             message:nil
                                                                      preferredStyle:UIAlertControllerStyleActionSheet];
    UIAlertAction* cancelAction = [UIAlertAction actionWithTitle:@"取消" style:UIAlertActionStyleCancel handler:^(UIAlertAction * action) {}];
    UIAlertAction* fromPhotoAction = [UIAlertAction actionWithTitle:@"从相册选择" style:UIAlertActionStyleDefault                                                                 handler:^(UIAlertAction * action) {
              NSLog(@"从相册选择");
    }];
     UIAlertAction* fromCameraAction = [UIAlertAction actionWithTitle:@"相机" style:UIAlertActionStyleDefault                                                             handler:^(UIAlertAction * action) {
        NSLog(@"相机");
    }];
    [alertController addAction:cancelAction];
    [alertController addAction:fromCameraAction];
    [alertController addAction:fromPhotoAction];
    [self presentViewController:alertController animated:YES completion:nil];
此外上传头像访问相册和拍照的方法也很简单,UIImagePickerController很容易实现,但需要注意权限的问题。上传到服务器则直接调用AFN的post请求即可,具体代码可参考demo。
demo效果:


 642
642

 被折叠的 条评论
为什么被折叠?


