


1,thymeleaf 简介
thymeleaf 是一个spring boot中推荐使用的比较新的java模板引擎。其使用场景可以在html、javascript、css、xml、text当中。在官方文档中描述,thymeleaf是一款前后端分离的开发框架,所谓前后端分离则是前端设计人员在设计静态页面时不用考虑后端,直接页面写上假数据,后端开发人员在拿到静态页面后直接在器静态页面上标签中绑定上其后台不同域中数据,页面在服务器运行时则展示后台数据,当有样式修改时前端设计人员也可以直接打开后台人员添加绑定数据修改后的页面,在没有服务器环境下页面仍可以运行,而这点确实jsp所做不到的,故称前后端分离。个人认为后台开发时页面假数据太多看起来获取不是很整洁,实际中获取不会保留假数据 ^ _-
2、在Spring boot中引入Thymeleaf
仅需要在项目pom文件中引入Thymeleaf的stater即可,如果在项目src/main/resources 下没有生成templates文件夹则需要自己去创建一个。thymeleaf stater依赖如下:
<dependency>
    <groupId>org.springframework.boot</groupId>
    <artifactId>spring-boot-starter-thymeleaf</artifactId>
</dependency>
这里需要注意的是,在没有引入thymeleaf时,我们处理器Controller所返回的字符串视图将会默认在static目录下查找,在返回字符串视图结果时如果配置文件中有SpringMvc的返回视图后缀时则给加上没有则不加。比如我们的配置文件中配置了spring.mvc.view.suffix=.html,则controller返回“index”则会在static下查找index.html。
当我们引入了thymeleaf后在不修改任何改动下,继续之前的访问则会出现页面错误找不到页面,因为引入thymeleaf后controller所返回的视图不会去static下查找而去thymeleaf的目录下查找 这个变动是引入thymeleaf后直接变动的。所以我们需要在thymeleaf的默认目录templates目录下创建模板页面 index.html。thymeleaf的默认配置文件信息在org.springframework.boot.autoconfigure.thymeleaf.ThymeleafProperties 类中,该类在spring-boot-autoconfigure-2.0.0.RELEASE.jar 包中。
然后我们在Springboot的配置文件中对thymeleaf做一些明确的配置,此时我们的全部配置如下:
#servlet容器配置
server.port=8080
#server.context-path=/WebDemo 1.5配置
server.servlet.context-path=/WebDemo

#没有引入thymeleaf时的springmvc 视图后缀
spring.mvc.view.suffix=.html

#thymeleaf模板配置
spring.thymeleaf.mode=HTML5
spring.thymeleaf.encoding=UTF-8
spring.thymeleaf.content-type=text/html
spring.thymeleaf.cache=false
spring.thymeleaf.suffix=.html
引入pom依赖、配置application.properties 第三步创建我们的模板页面 /bootdemo/src/main/resources/templates/index.html。在我们的页面中html 开始标签中需要配置xmlns命名空间,不配置模板页面也可以使用,配置后页面中则不会提示h5不认识的thymeleaf th 标签
<!DOCTYPE html>
<html xmlns:th="http://www.thymeleaf.org">
<head>
</head>
//...
</html>
3、thymeleaf 语法使用
下面示例使用同一后台Controller如下:
@Controller
@RequestMapping(value="/")
public class PageController {

	@Autowired
	private ServletContext act;

	@RequestMapping(value="/index")
	public String index(ModelMap mp,HttpServletRequest httpServletRequest,HttpServletResponse resp, HttpSession session){

		User user = new User();
		user.setId("00001");
		user.setName("亚瑟");
		user.setAge(18);
		user.setIsAdmin(true);
		user.setChildren(new ArrayList<>());
		user.setRole("1");

		User user2 =  new User("0002","后裔",19,false,"男");
		user2.setRole("2");

		List<User> children = new ArrayList<>();
		children.add(user);
		children.add(user2);
		//条件判断时演示使用
		user2.setChildren(children);

		//迭代演示使用
		List<User> users = new ArrayList<User>();
		users.add(user);
		users.add(user2);

		//application 域
		act.setAttribute("appName", "webDemo");

		//session 域
		session.setAttribute("suser", user);

		//request 域
		mp.put("welcome", "hello thymeleaf");
		mp.put("welcome2", "hello <b>thymeleaf</b>");
		mp.put("users", users);
		mp.put("admin", "1");
		mp.put("user", user);
		httpServletRequest.setAttribute("today", new Date());
		httpServletRequest.setAttribute("req","httpServletRequestVal");
		return "index";
	}
}
3.1 读取后台application域、session域、request域中对象变量以及局部变量使用
- 在后台Controller中我们在 application、session、request域中分别存放不同对象如上,并在前台页面进行获取展示在标签之中,并将静态页面数据进行替换。前端代码以及生成的Html如下:
<span th:text="${application.appName}">Welcome to our grocery store!</span><br/>
<span th:text="${session.suser.name}">lisi</span><br/>
<span th:text="${welcome}">Welcome to our grocery store!</span><br/>
<span th:text="${req}">lisi</span><br/>
<span>webDemo</span><br>
<span>亚瑟</span><br>
<span>hello thymeleaf</span><br>
<span>httpServletRequestVal</span><br>注意:在request域中变量前不需要我们添加request域标识,因为系统会自动的给request域添加。如果指定则会报错。
- 局部变量使用 th:with 定义使用,演示代码以及生产代码:
<div th:with="firstPer=${users[0]},secondPer=${users[1]}">
  <p>The name of the first person is <span th:text="${firstPer.name}">Julius Caesar</span>.</p>
   <p>But the name of the second person is <span th:text="${secondPer.name}">Marcus Antonius</span>.</p>
</div>
<p>Today is: <span th:text="${#calendars.format(today,'dd MMMM yyyy')}">13 february 2011</span></p>
<p th:with="df='yyyy-MMMM-dd  '">
    Today is: <span th:text="${#calendars.format(today,df)}">13 February 2011</span>
</p>
<div>
<p>The name of the first person is <span>亚瑟</span>.</p>
<p>But the name of the second person is <span>后裔</span>.</p>
</div>
<p>Today is: <span>15 五月 2019</span></p>
<p>
Today is: <span>2019-五月-15 </span>
</p>3.2 选择表达式 * 号用法
*{...} 表达式 和 ${...} 表达式在没有父标签使用th:object 选择对象标签使用时效果一致,但我们在默认情况下都推荐使用${...}。在父标签有th:object 进行选择对象时 我们*{...}在标签内部使用方式将发生变化。如下 当选择了对象后,在th:object标签内部*{...}则默认从该对象开始引用
<div th:object="${session.suser}">
    <p>Name: <span th:text="*{name}">Sebastian</span>.</p>
    <p>age: <span th:text="*{age}">Pepper</span>.</p>
    <p>id: <span th:text="*{id}">Saturn</span>.</p>
</div>
 等效
<div>
    <p>Name: <span th:text="${session.suser.name}">Sebastian</span>.</p>
    <p>age: <span th:text="${session.suser.age}">Pepper</span>.</p>
    <p>id: <span th:text="${session.suser.id}">Saturn</span>.</p>
  </div>
  等效
<div th:object="${session.suser}">
    <p>Name: <span th:text="${#object.name}">Sebastian</span>.</p>
    <p>age: <span th:text="${#object.age}">Pepper</span>.</p>
    <p>id: <span th:text="${#object.id}">Saturn</span>.</p>
</div>
<div>
<p>Name: <span>亚瑟</span>.</p>
<p>age: <span>18</span>.</p>
<p>id: <span>00001</span>.</p>
</div>3.3 url处理
@{/path} 表示从当前上下文路径开始,即从当前应用路径开始 即 http://ip:port/appName/path 开始
@{~/path} 表示从 服务器域名ip根路径开始,即 http://ip:port/path
<a href="details.html" th:href="@{http://localhost:8080/WebDemo/order/details(orderId=${user.id})}">view</a><br/>
<a href="details.html" th:href="@{/order/details(orderId=${user.id})}">view</a><br/>
<a href="details.html" th:href="@{/order/{orderId}/details(orderId=${user.id})}">view</a><br/>
<a href="details.html" th:href="@{~/path/to/something}">view</a><br/>
<a href="http://localhost:8080/WebDemo/order/details?orderId=00001">view</a><br>
<a href="/WebDemo/order/details?orderId=00001">view</a><br>
<a href="/WebDemo/order/00001/details">view</a><br>
<a href="/path/to/something">view</a><br>3.4 字符串、数字、boolean类型操作与运算
- 字符串类型从下面代码我们可以看出 字符串类型在标签双引号里再用了单引号进行括起来。包括拼接操作。
字符串类型:
<p>
  Now you are looking at a <span th:text="'working web application'">template file</span>.
</p>
字符串拼接:|用法相比字符串加好拼接可以简洁一些|<br/>
<span th:text="|Welcome to our application, ${user.name}!|"></span><br/>相当于<br/>
<span th:text="'Welcome to our application, ' + ${user.name} + '!'"></span>
文字替换可以与其他类型的表达相结合:<br/>
<span th:text="${welcome} + ' ' + |${user.name}, ${user.id}|"></span><br/>
字符串类型:
<p>
Now you are looking at a <span>working web application</span>.
</p>
字符串拼接:|用法相比字符串加好拼接可以简洁一些|<br>
<span>Welcome to our application, 亚瑟!</span><br>相当于<br>
<span>Welcome to our application, 亚瑟!</span>
文字替换可以与其他类型的表达相结合:<br>
<span>hello thymeleaf 亚瑟, 00001</span><br>- 数字类型以运算:
数字类型
<p>The year is <span th:text="2013">1492</span>.</p>
<p>In two years, it will be <span th:text="2013 + 2">1494</span>.</p>
算数运算:<br/>
<div th:with="isEven=(${user.age} % 2 == 0)">
	<div th:if="${isEven}"> 偶数</div>
</div>
数字类型
<p>The year is <span>2013</span>.</p>
<p>In two years, it will be <span>2015</span>.</p>
算数运算:<br>
<div>
<div> 偶数</div>
</div>- Boolean类型 & null类型
下面代码可以看出 当th:if 不成立时本标签也不会出现。
<div th:if="${user.getIsAdmin()} == false"> isAdmin</div>
<div th:if="${user.getIsAdmin()} == true"> notAdmin</div>
<div th:if="${user.sex} == null">null</div>
<div> notAdmin</div>
<div>null</div>- 比较运算
由于标签中不能使用 ‘<’ 、‘>’ 所以这里的大小比较需要用转义后的。
th:text="${users[0].sex} ?: _" 表示,当${users[0].sex} 存在成立时,则展示${users[0].sex}内容,否则展示:后面信息,_ 表示什么都不操作。故本示例在表达式判断完成后 什么都不操作故展示了原本静态页面内容。
<div th:if="${user.age} > 17">成年了</div>
<span th:text="'Execution mode is ' + ( (${welcome} == 'dev')? 'Development' : 'Production')"></span>
<span th:text="${users[0].sex} ?: _">no user authenticated</span><div>成年了</div>
<span>Execution mode is Production</span>
<span>no user authenticated</span>3.5 html属性绑定值
使用 th:attr可以添加一些html之外的标签,大部分html5中的标签 thymeleaf中已经有相应的标签可以直接使用。在thymeleaf 3.0之后 th:xxxx 可以支持使用,故可以在th:后使用任何标签。
<form action="subscribe.html" th:attr="action=@{/subscribe}">
  <fieldset>
    <input type="text" name="email" />
    <input type="submit" value="Subscribe" th:attr="value=${user.name}"/>
  </fieldset>
</form>
<img src="images/thymeleaf.png" width="100" height="100"
     th:attr="src=@{https://www.thymeleaf.org/images/thymeleaf.png},title=${welcome},alt=${welcome}" /><br/>
 th:whatever 在thymeleaf 3.0可用
 <span th:whatever="${user.name}">th:whatever</span>
<form action="/WebDemo/subscribe">
<fieldset>
<input type="text" name="email">
<input type="submit" value="亚瑟">
</fieldset>
</form>
<img src="https://www.thymeleaf.org/images/thymeleaf.png" width="100" height="100" title="hello thymeleaf" alt="hello thymeleaf"><br>
th:whatever 在thymeleaf 3.0可用
<span whatever="亚瑟">th:whatever</span> 3.6 循环展示 each
th:each 表达式 th:each="p,iterStat : ${users}" 其中p 表示循环的每一个item,${users} 表示被循环迭代的对象 iterStat 可选参数,表示当前item的状态信息。如果没有显式设置状态变量,Thymeleaf将始终通过后缀 Stat为迭代变量的名称为您创建一个。
item状态变量包含如下信息:
index:当前item的索引 从0开始;count:当前item的次序 从1 开始;size:被迭代对象数组的大小;current:当前迭代item的另一个引用;even/odd:当前item是否是 奇数或偶数条记录;first/last :当前item 是否是 第一个或者是最后一条记录;
<table>
	<tr><th>NAME</th><th>age</th><th>sex</th></tr>
	<tr th:each="p,iterStat : ${users}" th:class="${iterStat.odd}? 'odd'" th:index="${iterStat.index}"  th:count ="${iterStat.count}" th:isFirst="${iterStat.first}"  th:isLast="${iterStat.Last}">
		<td th:text="${p.name}">Onions</td>
		<td th:text="${p.age}">2.41</td>
		<td th:text="${p.sex=='男'}? '男' : '女'">yes</td>
	</tr>
</table>
如果您没有显式设置状态变量,Thymeleaf将始终通过后缀Stat为迭代变量的名称为您创建一个:
<table>
	<tr><th>NAME</th><th>age</th><th>sex</th></tr>
	<tr th:each="p: ${users}" th:class="${pStat.odd}? 'odd'" th:index="${pStat.index}"  th:count ="${pStat.count}" th:isFirst="${pStat.first}"  th:isLast="${pStat.Last}">
		<td th:text="${p.name}">Onions</td>
		<td th:text="${p.age}">2.41</td>
		<td th:text="${p.sex=='男'}? '男' : '女'">yes</td>
	</tr>
</table>
<table>
<tbody><tr><th>NAME</th><th>age</th><th>sex</th></tr>
<tr class="odd" index="0" count="1" isfirst="true" islast="false">
<td>亚瑟</td>
<td>18</td>
<td>女</td>
</tr>
<tr index="1" count="2" isfirst="false" islast="true">
<td>后裔</td>
<td>19</td>
<td>男</td>
</tr>
</tbody></table>
如果您没有显式设置状态变量,Thymeleaf将始终通过后缀Stat为迭代变量的名称为您创建一个:
<table>
<tbody><tr><th>NAME</th><th>age</th><th>sex</th></tr>
<tr class="odd" index="0" count="1" isfirst="true" islast="false">
<td>亚瑟</td>
<td>18</td>
<td>女</td>
</tr>
<tr index="1" count="2" isfirst="false" islast="true">
<td>后裔</td>
<td>19</td>
<td>男</td>
</tr>
</tbody></table>3.7 条件分支:if unless & switch
if 中 结果值为真的场景:
当结果非空(null)时:是boolean类型切位true、是一个数字 并不为0、是一个字符 并不为‘0’、当时一个字符串 不是“false” 或 “off” 或 “no”、当不是Boolean 、数字、字符、字符串时 都为真。
当结果值为null是 则为false。
下面例子我们循环一个用户列表,并显示用户的孩子个数,如果有孩子则给展示一个连接。
<table>
  <tr><th>NAME</th><th>id</th><th>isAdmin</th><th>children</th></tr>
  <tr th:each="user : ${users}" th:class="${userStat.odd}? 'odd'">
    <td th:text="${user.name}">Onions</td>
    <td th:text="${user.id}">2.41</td>
    <td th:text="${user.isAdmin}? '是' : '否'">yes</td>
    <td>
     <span th:text="${#lists.size(user.children)}">2</span> children/s
     <a href="children.html"
         th:href="@{/useruct/comments(userId=${user.id})}"
         th:if="${not #lists.isEmpty(user.children)}">view</a>
         等同
     <a href="children.html"
         th:href="@{/useruct/comments(userId=${user.id})}"
         th:unless="${#lists.isEmpty(user.children)}">view</a>
  </tr>
</table>
<table>
<tbody><tr><th>NAME</th><th>id</th><th>isAdmin</th><th>children</th></tr>
<tr class="odd"><td>亚瑟</td><td>00001</td><td>是</td><td><span>0</span> children/s等同</td></tr>
<tr>
<td>后裔</td><td>0002</td><td>否</td><td>
<span>2</span> children/s
<a href="/WebDemo/useruct/comments?userId=0002">view</a>
等同
<a href="/WebDemo/useruct/comments?userId=0002">view</a>
</td>
</tr>
</tbody></table>switch:
<div th:switch="${user.role}">
  <p th:case="1">User is an administrator</p>
  <p th:case="2">User is a manager</p>
</div>
或<br/>
<div th:switch="${user.role}">
  <p th:case="${admin}">User is an administrator</p>
  <p th:case="2">User is a manager</p>
</div>
<div>
<p>User is an administrator</p>
</div>
或<br>
<div>
<p>User is an administrator</p>
</div>3.8 页面布局
页面布局中主要的标签有 th:insert,th:replace;th:include(thymeleaf 3.0后不再推荐使用)。
th:insert:表示在该标签内部插入所指定的片段,本标签保留,目标片段自身标签保留;
th:replace:表示将该标签直接进行替换成目标标签,本标签不保留,替换成目标标签。
th:include:表示将目标标签内内容替换到到当前标签内部,本标签保留,目标标签不保留。
我们在index.html 同目录下创建一个模板html文件 将主页面需要引入的模板片段放在该文件中如下:
/bootdemo/src/main/resources/templates/header.html
<!DOCTYPE html>
<html xmlns:th="http://www.thymeleaf.org">
<head>
<meta charset="UTF-8" />
<title>Insert title here</title>
</head>
<body>
	<div th:fragment="header" style="background: #ccc;">
		这是头部div,th:fragment="header"
	</div>
	<div id="headerid" style="background: #ccc;">
		这是头部div,id="headerid"
	</div>

	<div th:fragment="footter" style="background: #eee;">
		Copyright © The Thymeleaf Team
	</div>
</body>
</html>
我们的主页面代码如下:
:: 双冒号前面变量名为同目录下的模板文件名称,双冒号后面的为选择器,当使用th:fragment 标记模板片段时,则在双冒号后直接使用th:fragment 的值。当片段用id标记时则用 #idname 进行引用。
<div th:insert="~{header :: header}" flag="me"></div>
<div th:replace="~{header :: #headerid}" flag="me"></div>
<div>这是身子</div>
<div  th:replace="header :: footter" flag="me" >这是底部</div>
生成后的主页面如下:
<div flag="me">
    <div style="background: #ccc;">
		这是头部div,th:fragment="header"
	</div>
</div>
<div id="headerid" style="background: #ccc;">
		这是头部div,id="headerid"
</div>
<div>这是身子</div>
<div style="background: #eee;">
		Copyright © The Thymeleaf Team
</div>
3.9 内联(Inlining)
内联表示在在标签内部获取展示,不借助 th:text 、th:utext 属性标签,比如我们要页面展示一个:Hello,张三 按上面的写法就需要将张三使用span 标签包裹起来。如之前这种:<p>The year is <span>2013</span>.</p> 动态数据都外部有标签包裹。使用 内联后我们则可以直接在标签内部内容中需要的地方直接获取展示。另我们如果在有的地方不需要内联,单我们的写法和内联的写法缺一致时,应如何避免禁用模板内联处理呢 thymeleaf也有相应的处理机制th:inline="none" ,以及如何避免thymeleaf为我们转义后台字符串中html标签 。示例如下:
<p>Hello, [[${user.name}]]!</p>
之前可能需要这么写 <br/>
<p>Hello, <span th:text="${user.name}">Sebastian</span>!</p>
<p>Hello, [[${welcome2}]]!</p>
<p>Hello, [(${welcome2})]!</p>
禁用内联:
<div th:inline="none">
	[[${user.name}]] 和 [(${user.name})] 区别和  th:text 和 th:utext 区别效果一样 前者会将htl一些标签如 尖括号等转义,后者则不会。
</div>
<p>Hello, 亚瑟!</p>
之前可能需要这么写 <p>Hello, <span>亚瑟</span>!</p>
<p>Hello, hello <b>thymeleaf</b>!</p>
<p>Hello, hello <b>thymeleaf</b>!</p>
禁用内联:
<div>
[[${user.name}]] 和 [(${user.name})] 区别和 th:text 和 th:utext 区别效果一样 前者会将htl一些标签如 尖括号等转义,后者则不会。
</div>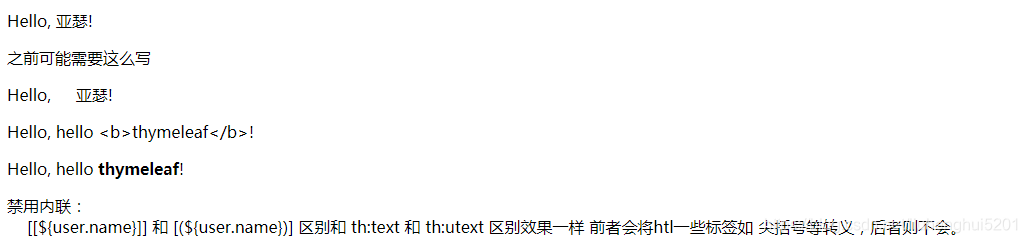
代码变更:https://github.com/liuhenghui/SpringBootDemo/commit/0655ef0b6178ea4c30c4f2762577584e4898de75


 6265
6265


 被折叠的 条评论
为什么被折叠?
被折叠的 条评论
为什么被折叠?
 到【灌水乐园】发言


