


大家肯能注意到,最近一直都是各种数据库的灾难恢复的复盘, 本身作为一个TEAM 的LEADER 我想到的是在紧急情况下,我们应该有一个应对的措施,对每一个 TEAM 的 DBA 都应该在那个时候沉着冷静,并且知道那些是应该做的, 那些是不该做的.
今天轮到了POSTGRESQL ,目前我们采用的是 REPMGR 的方式做的高可用集群,为什么. POSTGRESQL 的高可用,有以下几种 P+C , REPMGR, Patroni + ETCD 的方式, 那为什么我们最终选择了 REPMGR ,原因如下
1 REPMGR 是这三种里面最简单的高可用的方式,这里的意思是结构节点,搭建简单,处理简单
2 在网络有波动的情况下,比较好控制,如果遇到网络上的短暂的问题,REPMGR通过一系列的方式可以避免某些切换. 调整的参数明显
3 资料多,并且有2象限(现在是EDB)这样的公司作为后盾, 并且国内的瀚高也是用这个作为他们商业的高可用方式的二次开发对象.
4 更适合我们公司目前的现状,包含硬件,软件环境,人员的情况
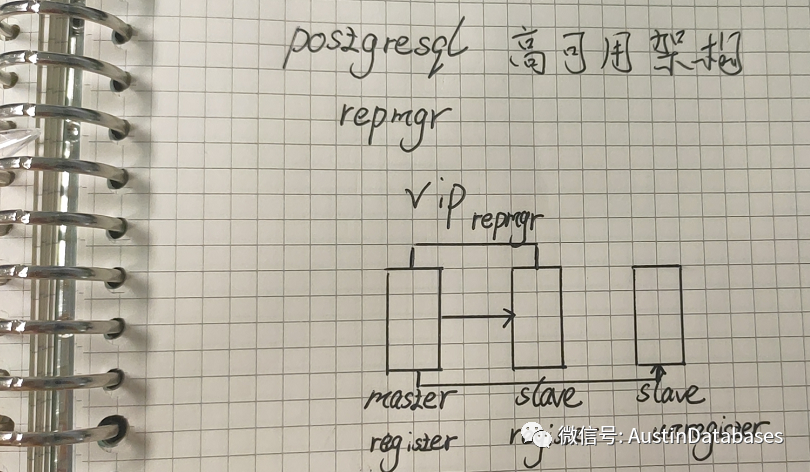
目前我们采用的一个主+两个从的方式 一个注册 一个不注册 (一个从可能是延迟库,也可能为BIG DATA 提供抽取数据使用)
我们以POSTGRESQL 12.2 REPMGR 5.2.1 版本为例
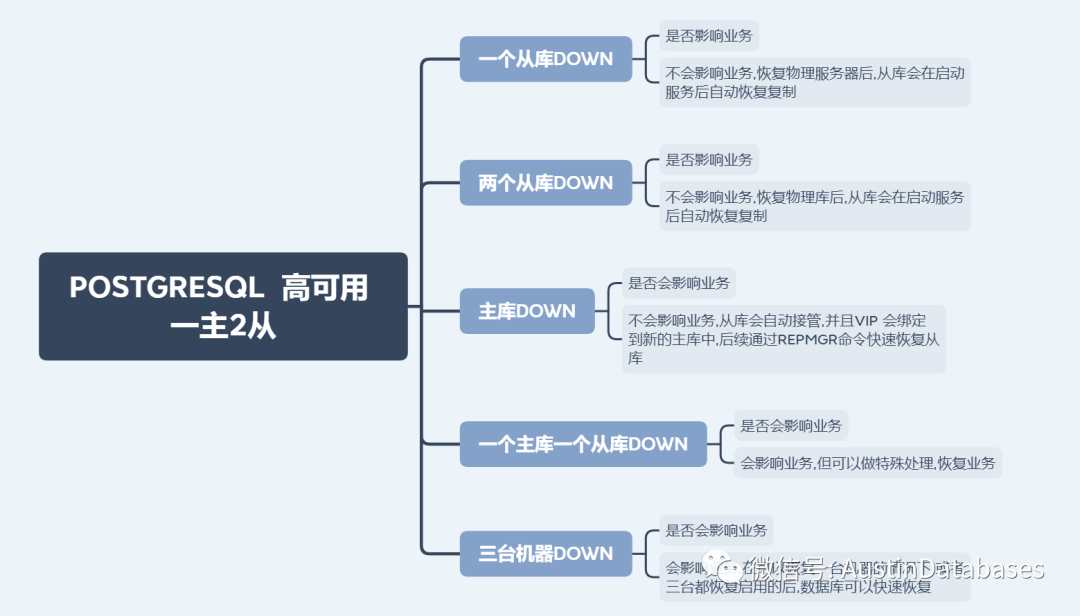
1 从库DOWN
2 两个从库DOWN
3 主库DOWN
4 一主一从DOWN
5 全部DOWN
1 安装依赖包
安装依赖包
yum -y install readline-devel
yum -y install gcc* --skip-broken
yum -y install zlib*
yum -y install openssl openssl-devel
yum -y install pam pam-devel
yum -y install libxml2 libxml2-devel
yum -y install libxslt libxslt-devel
yum -y install gcc, bison, gcc-c++, readline, readline-devel, zlib, zlib-devel
yum -y install libssl*
yum -y install systemd*
yum -y install e2fsprogs-devel uuid-devel libuuid-devel
2 设置用户名密码
useradd postgres
passwd postgres
visudo
3 操作ssh 互信
ssh-keygen -t rsa
ssh-copy-id -i /home/postgres/.ssh/id_rsa.pub postgres@10.50.132.145
ssh-copy-id -i /home/postgres/.ssh/id_rsa.pub postgres@10.50.132.146
ssh-copy-id -i /home/postgres/.ssh/id_rsa.pub postgres@10.50.132.147
4 解压文件编译文件
tar -zxvf postgresql-12.2.tar.gz
./configure --prefix=/usr/local/postgres --bindir=/usr/local/postgres/bin --sysconfdir=/etc --libdir=/usr/local/postgres/libs --includedir=/usr/local/postgres/includes --datadir=/pgdata --datarootdir=/pgdata/root --with-pgport=5432 --with-openssl --with-pam --with-systemd --with-libxml --with-segsize=4 --with-ossp-uuid
gmake & gmake install
5 初始化数据库
sudo chown -R postgres:postgres /pgdata/
/usr/local/postgres/bin/initdb -D /pgdata/data --wal-segsize=64
添加.bash_profile配置文件

6 调整主库的postgresql配置文件 postgresql.conf 此处略过
新建用户 ,密码略过
repmgr
repl
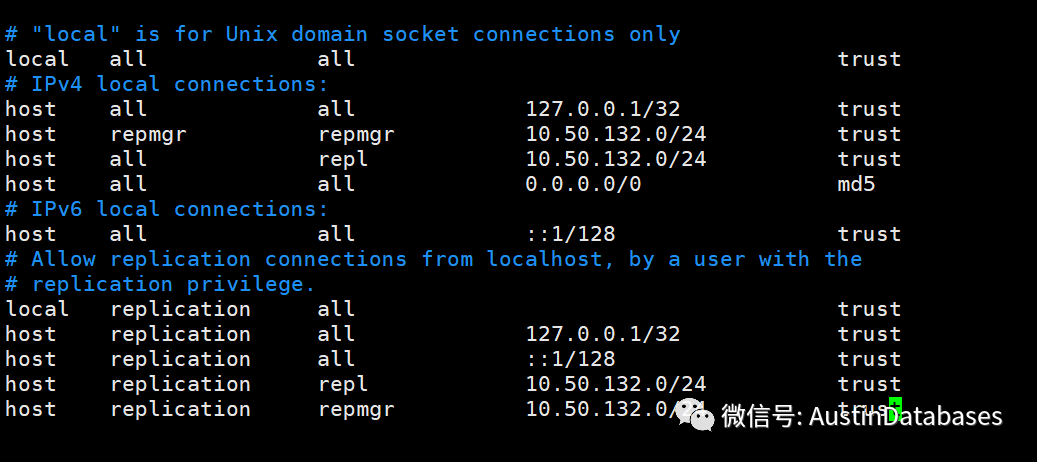
调整主库的pg_hba.conf 配置文件
7 将.bash-profile 拷贝到其他的两个数据库上
scp -r /home/postgres/.bash_profile postgres@10.50.132.146
scp -r /home/postgres/.bash_profile postgres@10.50.132.147
8 安装repmgr
yum -y install flex
tar -zxvf repmgr-5.2.1.tar.gz
./configure
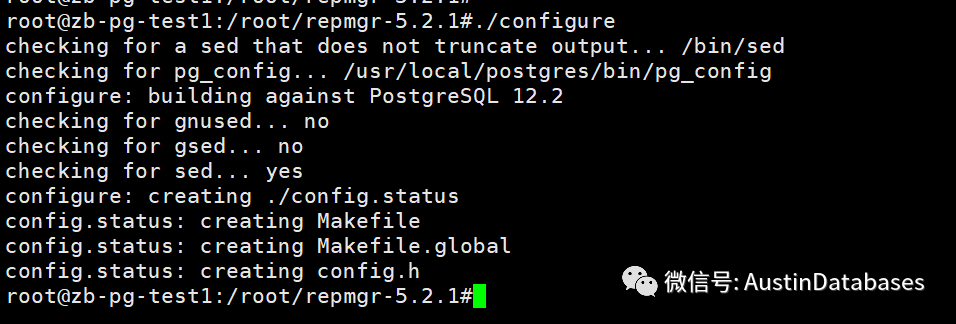
make
make install

并且需要在postgresql.conf 添加 repmgr 在 shared_perload_libraries

9 配置REPMGR 数据库
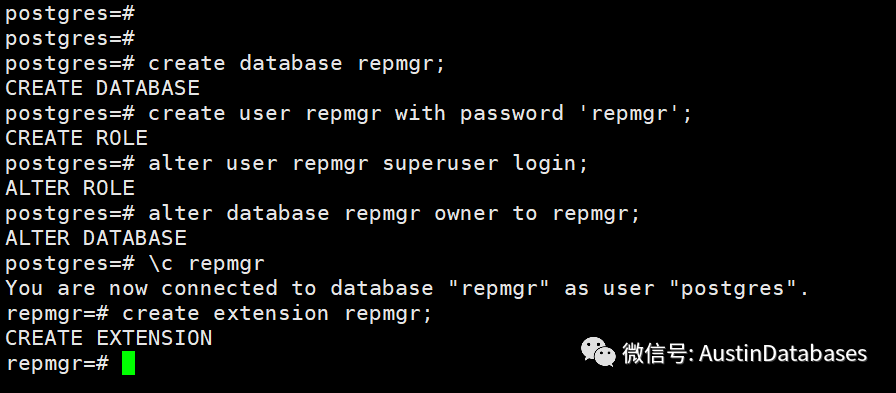
启动主库 并且在主库中运行如下命令
create database repmgr;
create user repmgr with password 'repmgr';
alter user repmgr superuser login;
alter database repmgr owner to repmgr;
create user repl with superuser password 'repl';
\c repmgr
create extension repmgr;
10 需要配置 .pgpass 免密功能
10.50.132.145:5432:repmgr:repmgr:repmgr
10.50.132.145:postgres:repl:repl
10.50.132.146:5432:repmgr:repmgr:repmgr
10.50.132.146:5432:postgres:repl:repl
10.50.132.147:5432:repmgr:repmgr:repmgr
10.50.132.147:5432:postgres:repl:repl
然后改变文件属性
chmod 600 .pgpass
将文件传送到其他两台机器

11 配置repmgr 文件模板
配置文件模板
https://github.com/EnterpriseDB/repmgr/blob/master/repmgr.conf.sample
node_id=1
node_name='10.50.132.145'
conninfo='host=10.50.132.145 dbname=repmgr user=repmgr connect_timeout=10'
data_directory='/pgdata/data'
replication_user='repl'
replication_type='physical'
log_level='INFO'
log_facility='STDERR'
log_file='/pgdata/errorlog/repmgr.log'
log_status_interval=300
repmgr_bindir='/usr/local/postgres/bin'
passfile='/home/postgres/.pgpass'
failover='automatic'
promote_command='repmgr standby promote -f /etc/repmgr.conf'
follow_command='repmgr standby follow -f /etc/repmgr.conf -W --upstream-node-id=%n'
repmgrd_pid_file=/pgdata/repmgr.pid

12 注册主库
repmgr -f /etc/repmgr.conf primary register
 开始克隆从库

克隆后在注册从库
repmgr -f /etc/repmgr.conf standby register

注:此时我们仅仅注册一台从库.另一台不进行注册,也不进行切换.
13
配置KEEPALIVE , 备库与主库类似不在写了
! Configuration File for keepalived
vrrp_script chk_pg {
script "/etc/keepalived/pg_check.sh"
interval 2
fall 2
rise 1
}
vrrp_instance VI_1 {
state BACKUP
interface ens192
virtual_router_id 51
mcast_src_ip 10.50.132.145
priority 100
advert_int 1
nopreempt
authentication {
auth_type PASS
auth_pass 1111
}
track_script {
chk_pg
}
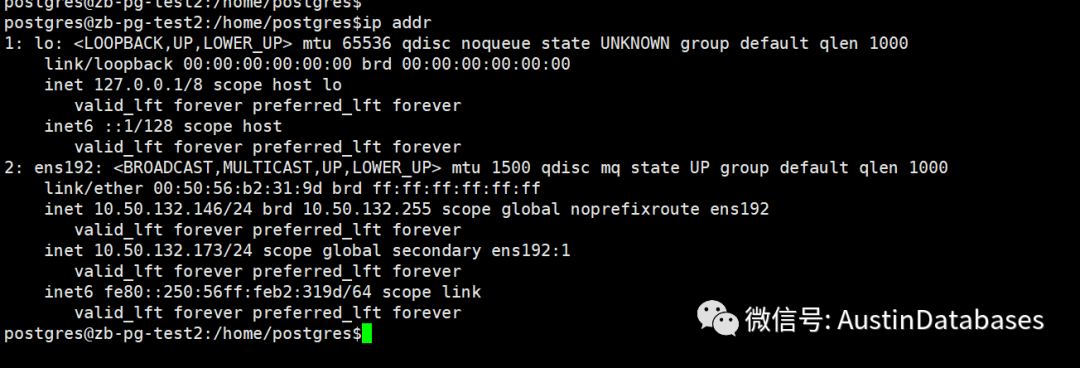
virtual_ipaddress {
10.50.132.173/24 label ens192:1
}
}
/pg_check.sh
#!/bin/bash
source /etc/profile
N=`ps -C postgres --no-header | wc -l`
if [ $N -eq 0 ];then
echo '0'
exit 1
else
echo '1'
exit 0
fi
14 启动repmgrd -f /etc/repmgr.conf
(在注册的REPMGR的 两台主机上启动)
安装和启动就完成了
1 从库DOWN 分为 注册的和没注册的
1.1 注册的从库 将10.50.132.146 关闭, 通过查询并且连接VIP ,系统可以继续工作,不会影响到整体的业务
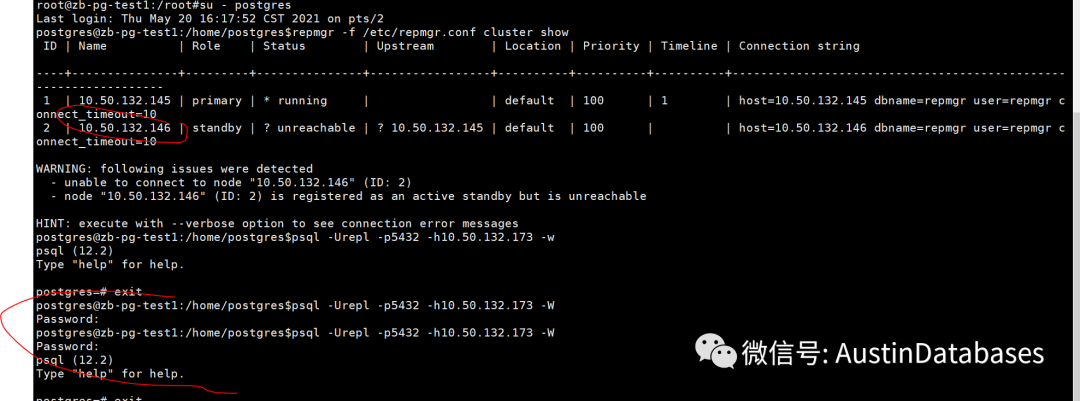
待 10.50.132.146 恢复后,我们启动 repmgrd -f /etc/repmgr.conf
并查看系统状态.

1.2 关闭10.50.132.147
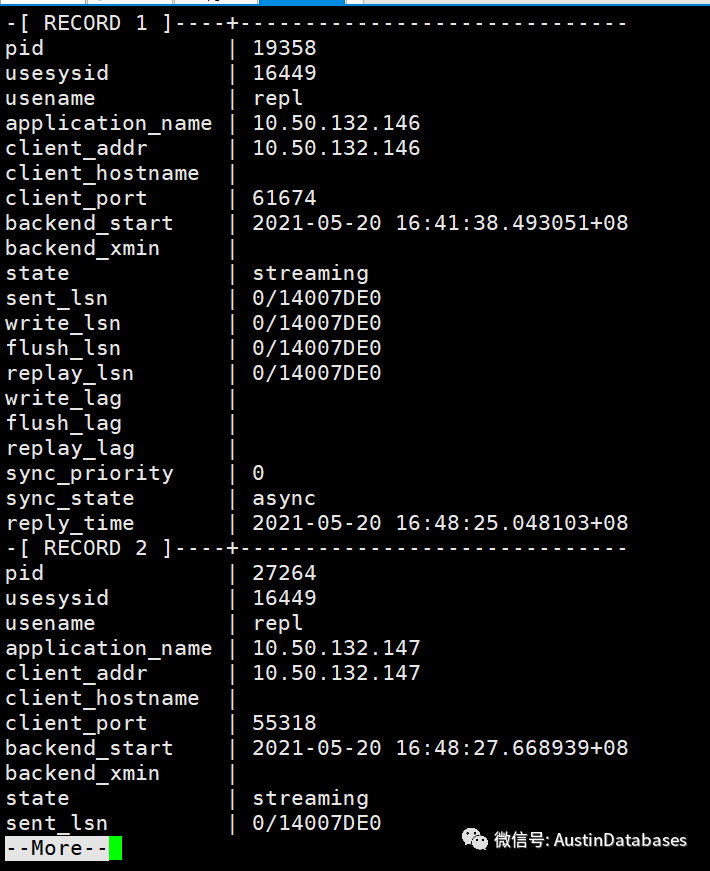
应用系统不会受到影响, 并且在短时间PG_WAL 日志可以追溯的情况下,从库启动后会立即开始追数据. 从主库查看从库 147 已经连接
2 2个主库DOWN
10.50.132.146 10.50.132.147, 状态与上一样.
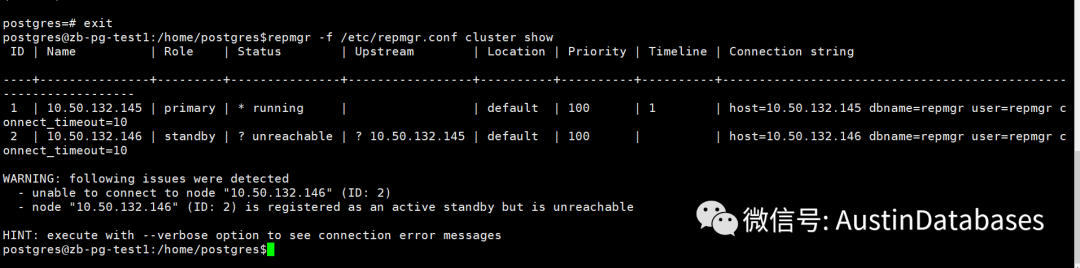
恢复就是启动数据库服务,并且在10.50.132.146上启动 repmgrd -f /etc/repmgr.conf


两个从库DOWN ,结论不会影响业务
3 主库DOWN
在第一时间从库开启判断机制,进行主从切换的准备

在预设1分钟后,还无响应,则自动开始切换
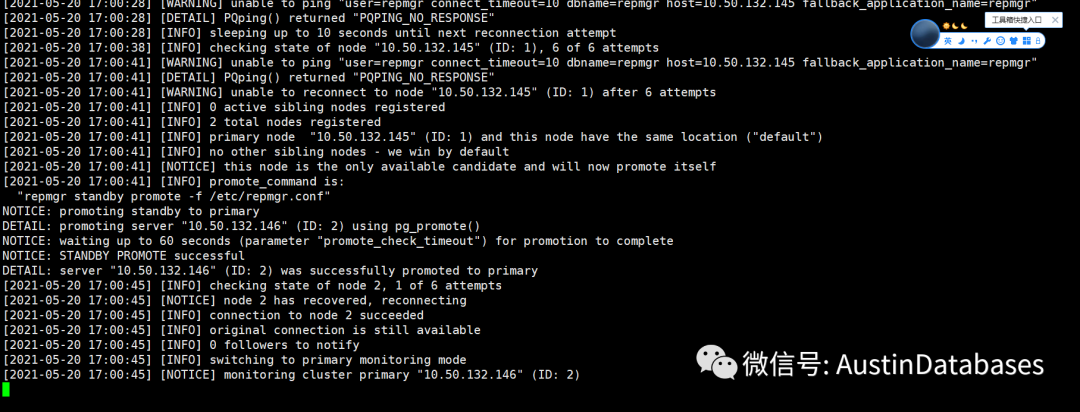
IP 漂移到从库
业务访问从库是可以进行操作的

下面进行失败的主库,从新连接会集群并作为从库
1 主库服务器启动
2 确认关闭keepalived
3 确认原主库关闭的状态下,执行 node rejoin命令
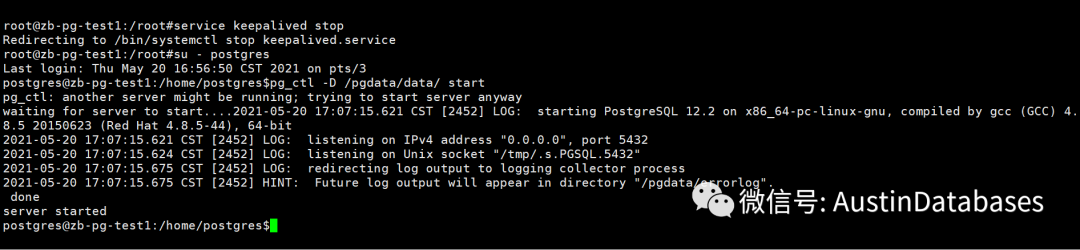
repmgr node rejoin -f /etc/repmgr.conf -d 'host=10.50.132.146 dbname=repmgr user=repmgr' --force-rewind --config-files=postgresql.conf,postgresql.conf --verbose
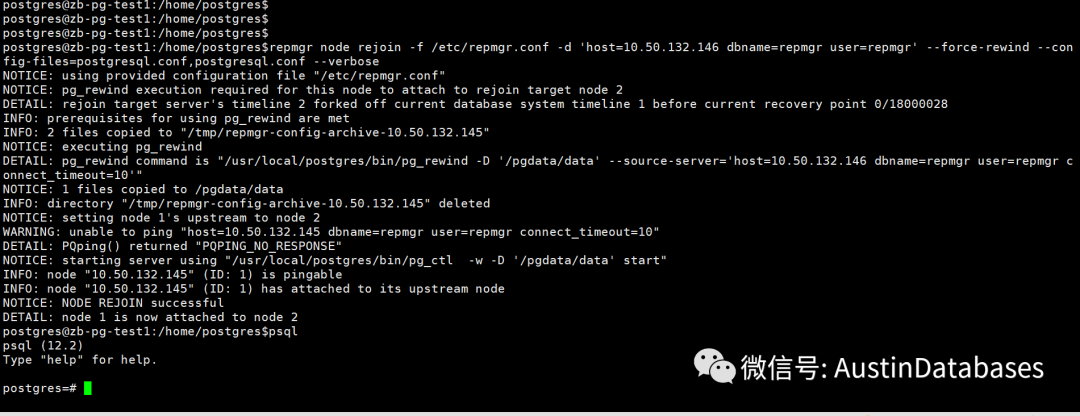
主库在恢复与新主库连接后,自动拉起工作,此时145 已经成为146 的从库并且相关的注册信息也一并更改

此时需要修复 10.50.132.147 ,在关闭147 并清理/pgdata/data的数据后,我们直接运行如下命令
repmgr -h 10.50.132.146 -U repmgr -d repmgr -f /etc/repmgr.conf standby clone

整体系统恢复
4 一主一从 down
如果是主库和 147 库DOWN 则和主库DOWN 没有区别.如果是 145 146 DOWN 则和全部DOWN 一致.
此时物理机启动, 恢复流程如下
1 启动源主库 10.50.132.146
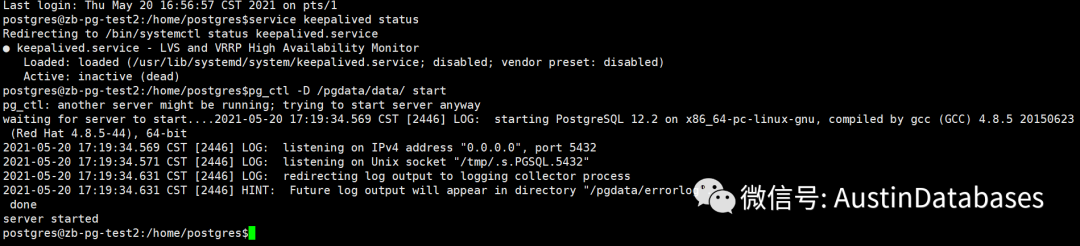
2 启动KEEPALIVED

业务恢复
3 启动从库
4 启动 repmgrd -f /etc/repmgr.conf 主库的
5 启动 repmgrd -f /etc/repmgr.conf 从库的
6 在主库运行 repmgr -f /etc/repmgr.conf cluster show

7 在从库运行 keepalived 服务

整体系统恢复.
如果是全部DOWN 机的情况下,和上面的恢复方式类似 147 库直接开启即可.


 2985
2985


 被折叠的 条评论
为什么被折叠?
被折叠的 条评论
为什么被折叠?
 到【灌水乐园】发言


