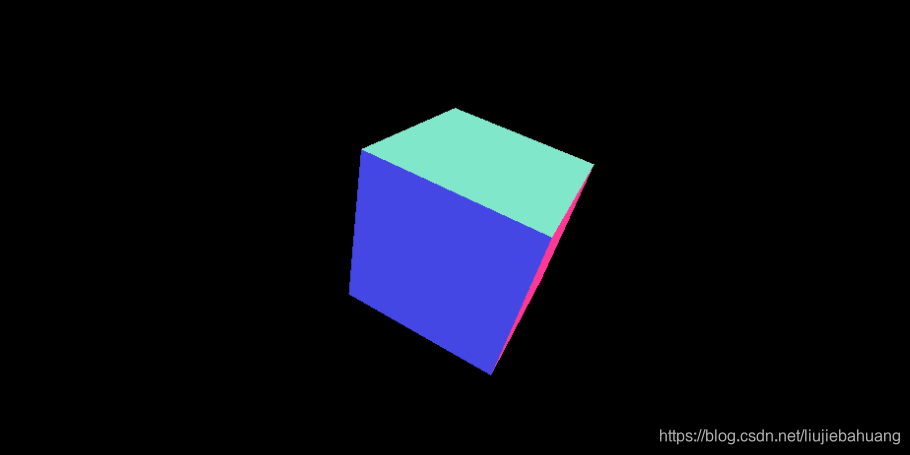
three.js是对webGL的封装。
小白不必看底层代码,底层是一个需要积累量变的过程。
参考文献:webGL Three.js教程
官网链接
(名字带了)官网上有相应的一手资料及课程,各取所需。
一、webGL: http://www.hewebgl.com/
二、规范(小白不必):openGL | ES https://www.opengl.org/
三、gitHub下载地址:https://github.com/mrdoob/three.js
引入three.js
<!DOCTYPE html>
<html lang="en">
<head>
  <meta charset="UTF-8">
  <meta name="viewport" content="width=device-width, initial-scale=1.0">
  <title>Document</title>
  <script src="./common/js/three.js"></script>
</head>
<body>

</body>
</html>
在浏览器中查看相应的加载信息以及API


查看版本信息

组件
场景(scene)、相机(camera)和渲染器(renderer)
var scene = new THREE.Scene();  // 初始化场景
var camera = new THREE.PerspectiveCamera(75, window.innerWidth/window.innerHeight, 0.1, 1000);// 透视相机
var renderer = new THREE.WebGLRenderer();   // 渲染器
renderer.setSize(window.innerWidth, window.innerHeight);    // 设置渲染器的大小为窗口的内宽度,也就是内容区的宽度
document.body.appendChild(renderer.domElement);
场景
一个页面中可以放多个场景;
相机
相机:透视相机(近大远小)&&正投影相机(远近一样大)
以下内容引用自:三维空间的观察(点击查看教程)
相机构造函数
//这里有四个参数fov,aspect,near,far
var camera = new THREE.PerspectiveCamera(fov,aspect,near,far)
fov:视角
肉眼所能及的画面。
near: 近平面
物体距离你眼睛的距离。
far: 远平面
物体背后远处裁面。
aspect: 纵横比
宽度除以高度。值越大,宽度越大。
渲染器
THREE.WebGLRenderer()
几何体
长方体/正方体
THREE.CubeGeometry(width, height, depth, widthSegments, heightSegments, depthSegments)
//一般传入长宽高即可
举个栗子
requestAnimationFrame()点击查看帧循环
长方体/正方体
<script>
var scene = new THREE.Scene();// 场景
var camera = new THREE.PerspectiveCamera(75, window.innerWidth/window.innerHeight, 0.1, 1000);// 透视相机
var renderer = new THREE.WebGLRenderer();// 渲染器
renderer.setSize(window.innerWidth, window.innerHeight);// 设置渲染器的大小为窗口的内宽度,也就是内容区的宽度
document.body.appendChild(renderer.domElement);// 渲染至body中
var geometry = new THREE.CubeGeometry(2,2,2);// 定义一个长方体/正方体,这里的数值理论上必须在0.1和1000之间,即透视相机设置的参数范围内
var material = new THREE.MeshNormalMaterial();// 16进制颜色
// var material = new THREE.MeshBasicMaterial({color:0x00ff00});// 16进制颜色
var cube = new THREE.Mesh(geometry,material);// 建立网格模型
scene.add(cube);
camera.position.z = 5;// z轴偏移
function animate(){// 定义一个渲染函数
  // 告诉浏览器——你希望执行一个动画,并且要求浏览器在下次重绘之前调用指定的回调函数更新动画。
  // 该方法需要传入一个回调函数作为参数,该回调函数会在浏览器下一次重绘之前执行.
  requestAnimationFrame(animate);
  cube.rotation.x += 0.01;// 沿x轴旋转
  cube.rotation.y += 0.01;// 沿x轴旋转
  cube.rotation.z += 0.01;// 沿x轴旋转
  renderer.render(scene,camera);
}
animate();// 调用
</script>

vue中应用
基于以上把body换成其他dom试试。
npm install three --save
或者直接vue ui直接搜索three.js进行安装
<template>
  <div class="threeBox">
    <div id="container"></div>
  </div>
</template>
<script>
import * as THREE from 'three'
export default {
  name: 'Home',
  data(){
    return {
      camera: null,
      scene: null,
      renderer: null,
      cube: null,
    }
  },
  mounted () {
    this.init()
    this.animate()
  },
  methods:{
    init(){
      let container = document.getElementById('container')
      // 初始化组件相关
      this.scene = new THREE.Scene()//初始化场景
      this.camera = new THREE.PerspectiveCamera(75, container.clientWidth/container.clientHeight, 0.1, 1000)//初始化相机
      this.renderer = new THREE.WebGLRenderer()//初始化渲染器
      this.renderer.setSize(container.clientWidth, container.clientHeight)//设置试图尺寸
      container.appendChild(this.renderer.domElement);//渲染至dom
      let geometry = new THREE.CubeGeometry(2,2,2);//初始化一个几何体--长方体/正方体
      let material = new THREE.MeshNormalMaterial();//材质
      this.cube = new THREE.Mesh(geometry,material);//建立网格模型
      this.scene.add(this.cube);//网格模型添加至场景中
      this.camera.position.z = 5;// z轴偏移
    },
    animate(){
      //告诉浏览器——你希望执行一个动画,并且要求浏览器在下次重绘之前调用指定的回调函数更新动画。
      //该方法需要传入一个回调函数作为参数,该回调函数会在浏览器下一次重绘之前执行.
      requestAnimationFrame(this.animate);
      this.cube.rotation.x += 0.01;// 沿x轴旋转
      this.cube.rotation.y += 0.01;// 沿y轴旋转
      this.cube.rotation.z += 0.01;// 沿z轴旋转
      this.renderer.render(this.scene,this.camera);
    },
  }
}
</script>
<style>
#container {
  height: 400px;
}
</style>
以上,会渲染出一样的效果。
点线面
定义一个点
THREE.Vector3 = function(x,y,z){
	this.x = x || 0;
	this.y = y || 0;
	this.z = z || 0;
}
var dot = new THREE.Vector3(1,1,1);
几何体THREE.Geometry()
三维数据:
点:this.vertices = [];
颜色:this.colors = [];
面: this.faces = [];
var geometry = new THREE.Geometry();
geometry.vertices.push(//符合线性函数
	new THREE.Vector3(-100,100,0);
	new THREE.Vector3(-100,-100,0);
	new THREE.Vector3(100,-100,0);
)
线材质
THREE.LineBasicMaterial() = function(parameters);
color:线的颜色,默认白色
Linewidth:线条的宽度,默认1
Linecap:线条两端点样式,默认圆角
Linejoin:两线条连接处外观,默认圆角
VertexColors:线条材质是否使用顶点颜色,布尔属性


 6736
6736


 被折叠的 条评论
为什么被折叠?


