


在系统登录中,为了防止恶意攻击,通常都会采用验证码登录方式。
不过,随着科技的进度,验证码也容易被人破解,那么也就催生除了更为高级的验证方式,如指定图片内容选择、人机交互等复杂的验证方式。
不过,这些都不是本次我们要讨论的对象,本次我们只针对普通的验证码方式,来对用户名密码登录方式进行改造。
添加依赖
首先,我们添加一下本次改造需要使用的第三方依赖,即 hutool 工具包。
<dependency>
    <groupId>cn.hutool</groupId>
    <artifactId>hutool-all</artifactId>
    <version>5.4.2</version>
</dependency>
hutool 中有我们本次需要使用的一个验证码算法类,集成后,可以直接使用,比较方便。
验证码生成
添加完hutool依赖以后,接下来,就需要使用其中的验证码算法类生成验证码,并将具体的验证码存储起来,方便Spring Security 框架相关Filter后续验证。
@GetMapping("/captcha/generate")
public void captchaGenerate(HttpSession session, HttpServletResponse response) {
response.setHeader("Pragma", "No-cache");
response.setHeader("Cache-Control", "no-cache");
response.setDateHeader("Expires", 0);
response.setContentType("image/jpeg");
CircleCaptcha captcha = CaptchaUtil.createCircleCaptcha(80, 40, 4, 25);
try {
ServletOutputStream outputStream = response.getOutputStream();
// 图形验证码写出既输出到流,当然也可以输出到文件,如captcha.write("d:/circle_captcha.jpeg");
captcha.write(outputStream);
// 从带有圆圈类型的图形验证码图片中获取其中的字符串验证码
// 注意,获取字符串验证码要在图形验证码write后,不然得到的值为null
String captchaCode = captcha.getCode();
// 将字符串验证码保存到session中
session.setAttribute("captcha", captchaCode);
logger.info("session id {}, 生成的验证码 {}", session.getId(), captchaCode);
//关闭流
outputStream.close();
} catch (IOException e) {
logger.error(e.getMessage(), e);
}
}这里直接使用 hutool 的 CircleCaptcha 类生成验证码图片,生成完成后,把验证码存入Session,供后续Spring Security Filter 获取并验证。
注意,获取字符串验证码要在图形验证码write后,不然得到的值为null。
登录页面改造
根据前面已经完成的验证码生成逻辑,相应的改造一下登录页面,添加验证码表单项。
<div class="login-form">
  <form th:action="@{/login}" method="post" th:method="post" class="mt-1">
    <div class="form-group">
      <input type="text" class="form-control" name="username" placeholder="用户名">
    </div>
    <div class="form-group">
      <input type="password" class="form-control" name="password" placeholder="密码">
    </div>
    <div class="form-row">
      <div class="form-group col-md-10">
        <input type="text" class="form-control" name="captcha" placeholder="验证码">
      </div>
      <div class="form-group col-md-2">
        <a href="####" id="captcha_link">
          <img id="captcha_img" src="../static/img/captcha.jpg" th:src="@{/captcha/generate}" /></a>
      </div>
    </div>
    <div class="checkbox">
      <label><input type="checkbox"> 记住我</label>
    </div>
    <button type="submit" class="btn btn-primary btn-block mb-1 mt-1">登录</button>
    <p class="text-muted text-center"> <a href="login.html#">
      <small>忘记密码了?</small></a> | <a href="#">注册一个新账号</a>
    </p>
  </form>
</div>
注意,此处的验证码是可以点击的,在点击之后,会刷新验证码,也就是重新生成一次,防止看不清楚的情况发生。
自定义Filter
Spring Security 框架默认的 UsernamePasswordAuthenticationFilter 中并没有针对验证码的处理,只有用户名和密码。因此,我们需要自定义一个包含验证码验证的Filter。
public class UsernamePasswordCaptchaAuthenticationFilter extends AbstractCaptchaAuthenticationProcessingFilter {
......
@Override
public void captchaAuthentication(HttpServletRequest request) throws AuthenticationException, IOException, ServletException {
if (postOnly && !request.getMethod().equals("POST")) {
throw new AuthenticationServiceException(
"Authentication method not supported: " + request.getMethod());
}
String captcha = obtainCaptcha(request);
String captchaFromRequest = (String) request.getSession(false).getAttribute("captcha");
if (captcha == null) {
throw new EmptyCaptchaAuthenticationException("the captcha is null.");
}
if (captchaFromRequest == null) {
throw new InternalAuthenticationServiceException("the captcha generator occurred error.");
}
boolean captchaMatched = captchaCaseSensitive ? Objects.equals(captcha, captchaFromRequest)
: Objects.equals(captcha.toLowerCase(), captchaFromRequest.toLowerCase());
if (!captchaMatched) {
throw new BadCaptchaAuthenticationException("the captcha is not matched.");
}
}
......
}在此 Filter 中,绝大部分逻辑,都与 Spring Security 框架默认的 UsernamePasswordAuthenticationFilter 相同,只添加了验证码相关验证逻辑。
注意,关于验证码的验证逻辑,此处使用抛出异常的方式来实现,而不是单纯的返回 true/false。抛出异常后,在基类的 doFilter 方法中,即可捕获,并做进一步处理。
public void doFilter(ServletRequest req, ServletResponse res, FilterChain chain)
throws IOException, ServletException {
......
try {
captchaAuthentication(request);
}
catch (InternalAuthenticationServiceException failed) {
logger.error(
"An internal error occurred while trying to authenticate the captcha.",
failed);
unsuccessfulAuthentication(request, response, failed);
return;
}
catch (AuthenticationException failed) {
// Authentication failed
unsuccessfulAuthentication(request, response, failed);
return;
}
......
}
Spring Security 配置改造
既然自定义了 UsernamePasswordCaptchaAuthenticationFilter,那么势必要配置到 Spring Security 中,下面,就针对原有的 Spring Security 配置进行改造。
@EnableWebSecurity
@Configuration
public class SpringSecurityConfiguration extends WebSecurityConfigurerAdapter {
......
@Override
protected void configure(HttpSecurity http) throws Exception {
......
http.addFilterAt(usernamePasswordAuthenticationFilter(), UsernamePasswordAuthenticationFilter.class);
http.addFilterAfter(customFilterSecurityInterceptor(), FilterSecurityInterceptor.class);
}
private UsernamePasswordCaptchaAuthenticationFilter usernamePasswordAuthenticationFilter() throws Exception {
UsernamePasswordCaptchaAuthenticationFilter authenticationFilter = new UsernamePasswordCaptchaAuthenticationFilter();
authenticationFilter.setAuthenticationSuccessHandler(authenticationSuccessHandler());
authenticationFilter.setAuthenticationFailureHandler(authenticationFailureHandler());
authenticationFilter.setAuthenticationManager(authenticationManager());
return authenticationFilter;
}
private AuthenticationProvider daoAuthenticationProvider() {
DaoAuthenticationProvider daoAuthenticationProvider = new DaoAuthenticationProvider();
daoAuthenticationProvider.setUserDetailsService(customJdbcUserDetailsService());
daoAuthenticationProvider.setPasswordEncoder(new BCryptPasswordEncoder());
return daoAuthenticationProvider;
}
private AuthenticationSuccessHandler authenticationSuccessHandler() {
SavedRequestAwareAuthenticationSuccessHandler authenticationSuccessHandler = new SavedRequestAwareAuthenticationSuccessHandler();
authenticationSuccessHandler.setDefaultTargetUrl("/index");
return authenticationSuccessHandler;
}
private AuthenticationFailureHandler authenticationFailureHandler() {
SimpleUrlAuthenticationFailureHandler authenticationFailureHandler = new SimpleUrlAuthenticationFailureHandler();
authenticationFailureHandler.setDefaultFailureUrl("/login_fail");
return authenticationFailureHandler;
}
......
}可以看到,无论是前面讲过的 CA登录 方式,还是既有的 用户名密码登录 方式改造,都需要配置一整套的逻辑,如 Filter、AuthenticationProvider、AuthenticationSuccessHandler、AuthenticationFailureHandler,当然,如果是全新的登录方式(如CA登录),还需要自定义相应的 Authentication 实现,即 token 等。
演示
一切已准备就绪,那么我们就一起来尝试一下,访问登录页面,输入用户名、密码、验证码(如果看不起,可以点击验证码刷新)。
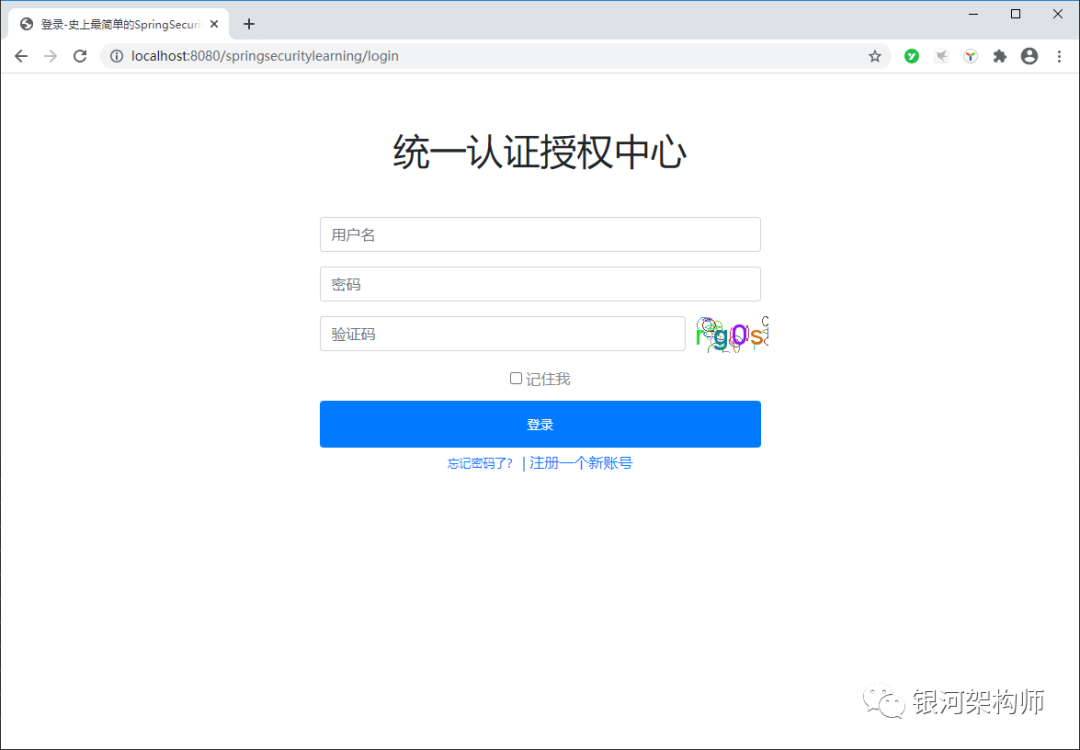
输入正确的用户名、密码、验证码之后,即可以正常登录系统。

验证码登录方式改造完成。
其它详细源码,请参考文末源码链接,可自行下载后阅读。
我是银河架构师,十年饮冰,难凉热血,愿历尽千帆,归来仍是少年!
如果文章对您有帮助,请举起您的小手,轻轻【三连】,这将是笔者持续创作的动力源泉。当然,如果文章有错误,或者您有任何的意见或建议,请留言。感谢您的阅读!
源码
github
https://github.com/liuminglei/SpringSecurityLearning/tree/master/29
gitee
https://gitee.com/xbd521/SpringSecurityLearning/tree/master/29


 729
729


 被折叠的 条评论
为什么被折叠?
被折叠的 条评论
为什么被折叠?
 到【灌水乐园】发言


