


本文记录根据卫星仰角和方位角使用html5绘制天空图(投影图)。
也就是根据这两个角度绘制坐标点在圆形上的投影。
术语:
方位角:从标准方向的北端起,顺时针方向到直线的水平角称为该直线的方位角。方位角的取值范围为0°~360°。
仰角:视线在水平线以上时,在视线所在的垂直平面内,视线与水平线所成的角叫做仰角.
步骤:
1.绘制天空图背景。
2.根据仰角和方位角计算在canvas画布上的坐标。从而绘制图标以及文字。
原始数据:
type:数据类型、 num:卫星号 、 elevation:仰角 、(0-90)azimuth:方位角(0-360)
		//elevation仰角 azimuth方位角
		var drawData = [
		{"type":"1","num":81, "elevation":0, "azimuth":0 },
		{"type":"2", "num":2, "elevation":50, "azimuth":66 },
		{"type":"3", "num":3, "elevation":44, "azimuth":149 },
		{"type":"4", "num":33, "elevation":20, "azimuth":270 },
		{"type":"5", "num":45, "elevation":80, "azimuth":33},
		{"type":"6", "num":9, "elevation":60, "azimuth":270 },
		{"type":"4", "num":35, "elevation":80, "azimuth":333},
		{"type":"2", "num":77, "elevation":10, "azimuth":222 },
		{"type":"1", "num":64, "elevation":55, "azimuth":111 }
		];
效果图:

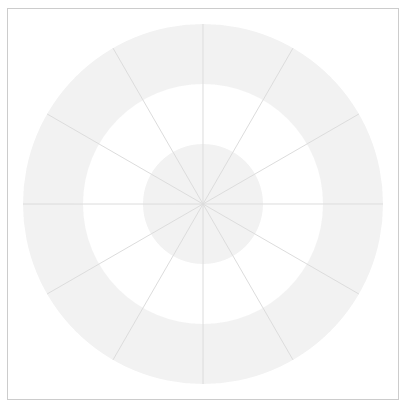
第一步,绘制背景。依次画三个圈,实现同心圆。 然后通过旋转画布的方式来绘制切割圆的线条。切割圆的线条之间角度为30度。
背景绘制代码:
		// 绘制背景
		function drawBaseSky(){

			var cxt = document.getElementById('skyPic').getContext("2d");
			var radius = 180;//半径

			cxt.translate(15,15);//坐标原点移动,留出边界值,让可能出现在最外层的信息能显示

			//绘制背景
			cxt.beginPath();
			cxt.fillStyle = 'rgb(242,242,242)';
			cxt.arc(radius, radius, radius, 0, Math.PI*2, false);
			cxt.fill();

			cxt.beginPath();
			cxt.fillStyle ='white';
			cxt.arc(radius, radius, radius*2/3, 0, Math.PI*2, false);
			cxt.fill();

			cxt.beginPath();
			cxt.fillStyle = 'rgb(242,242,242)';
			cxt.arc(radius, radius, radius/3, 0, Math.PI*2, false);
			cxt.fill();

			cxt.save();	//保存状态

			//通过旋转的方式画圆中的分割线
			cxt.beginPath();
			cxt.strokeStyle = 'rgb(220,220,220)';
			cxt.translate(radius,radius);
			for(var i=0;i<12;i++){
				cxt.rotate(Math.PI/180*30);
				cxt.moveTo(0,0);
				cxt.lineTo(0,radius);
			}
			cxt.stroke();

			cxt.restore();
		}
		//绘制数据分布
		function drawSkyPosition(drawData){
			var color ={
				"1":"rgb(173,152,12)",
				"2":"rgb(75,164,259)",
				"3":"rgb(226,120,228)",
				"4":"rgb(117,173,61)",
				"5":"rgb(230,139,55)",
				"6":"rgb(61,168,161)"
			};
			var cxt = document.getElementById('skyPic').getContext("2d");
			var radius = 180;//半径
			var cosLen,x,y;

			cxt.save();

			cxt.translate(radius,radius);

			cxt.font = "bold 14px Arial";
			cxt.textAlign = "center";
			cxt.textBaseline = "middle";

			for(var i=0,dataLen = drawData.length;i<dataLen;i++){
				cxt.beginPath();
				cxt.fillStyle = color[drawData[i].type];

				//关键代码。求圆心坐标。coslen是求出来的该点到圆心的距离。
				var cosLen = Math.cos(drawData[i].elevation*Math.PI/180)*radius;
				y = Math.cos(drawData[i].azimuth*Math.PI/180)* cosLen;
				x = Math.sin(drawData[i].azimuth*Math.PI/180)* cosLen;

				cxt.arc(x,-y , 14, 0, Math.PI*2, false);//在坐标点绘制圆
				cxt.fill();

				cxt.beginPath();
				cxt.fillStyle ='white';
				cxt.fillText(drawData[i].num, x, -y);//在坐标点写文字卫星号
			}
			cxt.restore();
		}
ok,大功告成。
根据卫星方位角和仰角绘制天空图(投影图)介绍到这里。
演示地址:http://runningls.com/demos/2015/position/sky.html


 845
845

 被折叠的 条评论
为什么被折叠?
被折叠的 条评论
为什么被折叠?
 到【灌水乐园】发言


