


 本文介绍了如何在SpringBoot项目中利用FreeMarker处理邮件模板,包括创建项目、配置邮件和FreeMarker,以及编写Service和Controller实现邮件发送。示例详细展示了从模板解析到邮件发送的完整流程,并提供了测试接口和可能出现的问题排查提示。
FreeMarker处理邮件
在日常开发中,我们可以使用FreeMarker来进行邮件、word、excel等文档的处理,大多数时候这些文档会制作成标准范文,然后使用FTL语言进行模板制作,在需要进行替换内容的地方使用FTL制作成FreeMarker模板,可以非常简单并且方便的实现文档标准化处理。
以下示例讲一下邮件模板的制作和生成。
1.创建项目
我们仍然创建一个springboot项目,但是这次我们的项目是后台服务,因此不使用spring-boot-starter-freemarker,而是直接引入freemarker的java包,直接使用freemarker的api来处理模板;同时我们引入spring-boot-starter-mail的邮件starter,用来发送邮件
项目:
<?xml version="1.0" encoding="UTF-8"?>
<project xmlns="http://maven.apache.org/POM/4.0.0" xmlns:xsi="http://www.w3.org/2001/XMLSchema-instance"
         xsi:schemaLocation="http://maven.apache.org/POM/4.0.0 https://maven.apache.org/xsd/maven-4.0.0.xsd">
    <modelVersion>4.0.0</modelVersion>
    <parent>
        <groupId>org.springframework.boot</groupId>
        <artifactId>spring-boot-starter-parent</artifactId>
        <version>2.3.11.RELEASE</version>
<!--        <version>2.7.8</version>-->
        <relativePath/> <!-- lookup parent from repository -->
    </parent>
    <groupId>com.lwf</groupId>
    <artifactId>demo-freemarker-mail</artifactId>
    <version>0.0.1-SNAPSHOT</version>
    <name>demo-freemarker-mail</name>
    <description>Demo project for Spring Boot</description>
    <properties>
        <java.version>11</java.version>
    </properties>
    <dependencies>
        <dependency>
            <groupId>org.springframework.boot</groupId>
            <artifactId>spring-boot-starter-mail</artifactId>
        </dependency>
        <dependency>
            <groupId>org.springframework.boot</groupId>
            <artifactId>spring-boot-starter-web</artifactId>
        </dependency>
        <dependency>
            <groupId>org.freemarker</groupId>
            <artifactId>freemarker</artifactId>
            <version>2.3.31</version>
        </dependency>
        <dependency>
            <groupId>org.projectlombok</groupId>
            <artifactId>lombok</artifactId>
            <optional>true</optional>
        </dependency>
        <dependency>
            <groupId>org.springframework.boot</groupId>
            <artifactId>spring-boot-starter-test</artifactId>
            <scope>test</scope>
        </dependency>
    </dependencies>

    <build>
        <plugins>
            <plugin>
                <groupId>org.springframework.boot</groupId>
                <artifactId>spring-boot-maven-plugin</artifactId>
                <configuration>
                    <excludes>
                        <exclude>
                            <groupId>org.projectlombok</groupId>
                            <artifactId>lombok</artifactId>
                        </exclude>
                    </excludes>
                </configuration>
            </plugin>
        </plugins>
    </build>

</project>
然后进行邮件的必要配置:
spring:
  mail:
    default-encoding: utf-8
    username: #这里配置邮箱
    password: #这里配置邮箱的第三方授权码
    host: smtp.163.com
    port: 25
2.配置FreeMarker以及使用
FreeMarker的核心api是freemarker.template.Configuration,该类中包含了很多静态字段,用来保存我们对FreeMarker的配置以及缓存信息,因此我们应该在应用中尽量保证单例模式使用,我们可以从类的apidoc中获取到对应的说明信息。
单独使用FreeMarker的流程一般是:
- 创建
freemarker.template.Configuration,并进行初始化配置,主要是TemplateLoader的相关信息。 - 使用Configuration.getTemplate()方法获取FreeMarker模板实例
freemarker.template.Template freemarker.template.Template#process(java.lang.Object, java.io.Writer)方法接收进行FTL模板中信息输入的data,以及一个Writer来进行文档输出。
下面我们按照流程进行操作:
- 我们在springboot中简单配置
freemarker.template.Configuration,把configuration注入为Bean
@SpringBootApplication
public class DemoFreemarkerMailApplication {
    public static void main(String[] args) {
        SpringApplication.run(DemoFreemarkerMailApplication.class, args);
    }
    @Bean
    public  Configuration fmConfiguration(){
        Configuration configuration = new Configuration(Configuration.VERSION_2_3_31);
        configuration.setClassLoaderForTemplateLoading(this.getClass().getClassLoader(),"templates");
        return configuration;
    }
}
- 我们在templates文件夹下创建一个html的邮件模板:
<html>
<head>
    <title>${title}</title>
</head>
<body>
dear hello:
<p>${content}</p>
</body>
</html>
- 编写Service 服务:
/**
 * @author liuwenfei
 * @date 2023/2/14 17:02
 */
@Service
@Slf4j
public class MailServiceImpl implements MailService {
    @Autowired
    Configuration fmConfiguration;
    @Autowired
    JavaMailSender javaMailSender;
    @Override
    public String dealMailTemplate(String mailTemplatePath, Map<String,Object> data){
        try {
            Template template = fmConfiguration.getTemplate(mailTemplatePath);
            StringWriter stringWriter = new StringWriter();
            template.process(data,stringWriter);
            return stringWriter.toString();
        } catch (IOException | TemplateException e) {
           log.error("getTemplate error",e);
           throw new RuntimeException(e.getMessage());
        }
    }

    @Override
    public boolean sendMail(String mailTemplatePath, Map<String, Object> data) {
        String content = dealMailTemplate(mailTemplatePath, data);
        MimeMessage mimeMessage = javaMailSender.createMimeMessage();
        MimeMessageHelper helper = new MimeMessageHelper(mimeMessage);
        try {
            helper.setFrom("liuwulive@163.com");
            helper.setCc("liuwulive@163.com");
            helper.setTo("liuwulive@163.com");
            helper.setSubject("测试");
            helper.setText(content,true);
           javaMailSender.send( helper.getMimeMessage());
           return true;
        } catch (MessagingException e) {
            log.error("senmail error",e);
            return false;
        }
    }
}
- 创建controller:
/**
 * @author liuwenfei
 * @date 2023/2/14 17:01
 */
@RestController
public class MailController {
    @Autowired
    MailService mailService;
    @RequestMapping("/mail/{template}")
    public String getMailContent(@PathVariable("template")String template, @RequestBody Map<String,Object> data){
        return mailService.dealMailTemplate(template,data);
    }

    @RequestMapping("/sendmail/{template}")
    public String sendMailContent(@PathVariable("template")String template, @RequestBody Map<String,Object> data){

        mailService.sendMail(template,data);
        return "ok";
    }
}
3.运行并测试
我们运行应用,并调用接口进行测试:
- 测试模板解析,我们可以使用curl 调用:
curl --location --request POST 'http://localhost:8080/mail/mail_hello.html' \
--header 'Content-Type: application/json' \
--data-raw '{
    "title":"hello",
    "content":"这是一个测试邮件"
}'
获取返回的模板文字结果:
<html>
<head>
    <title>hello</title>
</head>
<body>
dear hello:
<p>这是一个测试邮件</p>
</body>
</html>
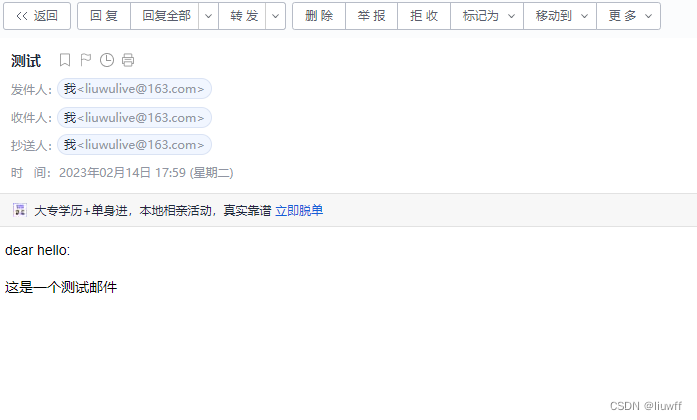
- 测试邮件发送:
curl --location --request POST 'http://localhost:8080/sendmail/mail_hello.html' \
--header 'Content-Type: application/json' \
--data-raw '{
    "title":"hello",
    "content":"这是一个测试邮件"
}'
获取“ok”的结果表示发送成功,检查邮箱,收到对应的邮件信息
注意如果发送后一直没有收到回复,一般是因为邮件服务配置的问题,注意修改调试即可。


 717
717


 被折叠的 条评论
为什么被折叠?
被折叠的 条评论
为什么被折叠?
 到【灌水乐园】发言


