


一、介绍
导读:
好奇是最好的发现者,兴趣是最好的导师,当你对大千代码世界很好奇的时候,你就会主动去发现这个世界的奇妙,当你对程序感兴趣的时候,你才能有能力去驾驭它。
大家的疑问
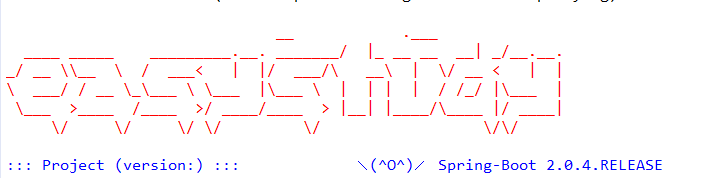
对于使用SpringBoot或使用SpringCloud项目开发的人来说,我们经常在启动的时候,在控制台打印如下横幅广告:

是不是很熟悉!是不是很亲切!!那么,各位是否思考过这个看不起眼的小问题?这个广告横幅是如何打印出来的?
示例展示
示例一
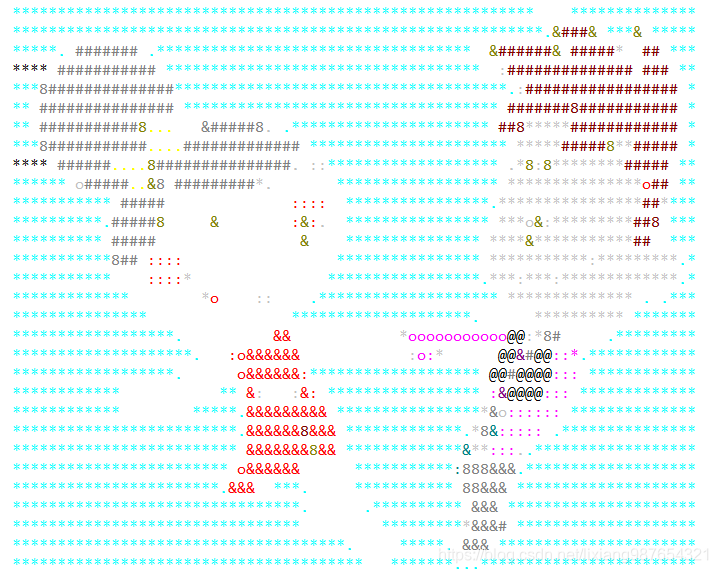
如下我展示了一幅比较可爱的图片,将一张gif动图打印到控制台中:


如果连续看一下,有没有看到一男一女到热舞?
示例二
自己创建banner文本"easystudy":
  ____ _____    _________.__. _______/  |_ __ __  __| _/__.__.
_/ __ \\__  \  /  ___<   |  |/  ___/\   __\  |  \/ __ <   |  |
\  ___/ / __ \_\___ \ \___  |\___ \  |  | |  |  / /_/ |\___  |
 \___  >____  /____  >/ ____/____  > |__| |____/\____ |/ ____|
     \/     \/     \/ \/         \/                  \/\/
这是我自己定制的一个logo,可以有多种多样的样式:
 .----------------.  .----------------.  .----------------.  .----------------.  .----------------.  .----------------.  .----------------.  .----------------.  .----------------.
| .--------------. || .--------------. || .--------------. || .--------------. || .--------------. || .--------------. || .--------------. || .--------------. || .--------------. |
| |  _________   | || |      __      | || |    _______   | || |  ____  ____  | || |    _______   | || |  _________   | || | _____  _____ | || |  ________    | || |  ____  ____  | |
| | |_   ___  |  | || |     /  \     | || |   /  ___  |  | || | |_  _||_  _| | || |   /  ___  |  | || | |  _   _  |  | || ||_   _||_   _|| || | |_   ___ `.  | || | |_  _||_  _| | |
| |   | |_  \_|  | || |    / /\ \    | || |  |  (__ \_|  | || |   \ \  / /   | || |  |  (__ \_|  | || | |_/ | | \_|  | || |  | |    | |  | || |   | |   `. \ | || |   \ \  / /   | |
| |   |  _|  _   | || |   / ____ \   | || |   '.___`-.   | || |    \ \/ /    | || |   '.___`-.   | || |     | |      | || |  | '    ' |  | || |   | |    | | | || |    \ \/ /    | |
| |  _| |___/ |  | || | _/ /    \ \_ | || |  |`\____) |  | || |    _|  |_    | || |  |`\____) |  | || |    _| |_     | || |   \ `--' /   | || |  _| |___.' / | || |    _|  |_    | |
| | |_________|  | || ||____|  |____|| || |  |_______.'  | || |   |______|   | || |  |_______.'  | || |   |_____|    | || |    `.__.'    | || | |________.'  | || |   |______|   | |
| |              | || |              | || |              | || |              | || |              | || |              | || |              | || |              | || |              | |
| '--------------' || '--------------' || '--------------' || '--------------' || '--------------' || '--------------' || '--------------' || '--------------' || '--------------' |
 '----------------'  '----------------'  '----------------'  '----------------'  '----------------'  '----------------'  '----------------'  '----------------'  '----------------'
 ____    __    ___  _  _  ___  ____  __  __  ____  _  _
( ___)  /__\  / __)( \/ )/ __)(_  _)(  )(  )(  _ \( \/ )
 )__)  /(__)\ \__ \ \  / \__ \  )(   )(__)(  )(_) )\  /
(____)(__)(__)(___/ (__) (___/ (__) (______)(____/ (__)
                          _             _
                         | |           | |
  ___  __ _ ___ _   _ ___| |_ _   _  __| |_   _
 / _ \/ _` / __| | | / __| __| | | |/ _` | | | |
|  __/ (_| \__ \ |_| \__ \ |_| |_| | (_| | |_| |
 \___|\__,_|___/\__, |___/\__|\__,_|\__,_|\__, |
                 __/ |                     __/ |
                |___/                     |___/
                                                          ___
                                                        ,--.'|_                     ,---,
                                                        |  | :,'          ,--,    ,---.'|
                         .--.--.              .--.--.   :  : ' :        ,'_ /|    |   | :
   ,---.     ,--.--.    /  /    '       .--, /  /    '.;__,'  /    .--. |  | :    |   | |     .--,
  /     \   /       \  |  :  /`./     /_ ./||  :  /`./|  |   |   ,'_ /| :  . |  ,--.__| |   /_ ./|
 /    /  | .--.  .-. | |  :  ;_    , ' , ' :|  :  ;_  :__,'| :   |  ' | |  . . /   ,'   |, ' , ' :
.    ' / |  \__\/: . .  \  \    `./___/ \: | \  \    `. '  : |__ |  | ' |  | |.   '  /  /___/ \: |
'   ;   /|  ," .--.; |   `----.   \.  \  ' |  `----.   \|  | '.'|:  | : ;  ; |'   ; |:  |.  \  ' |
'   |  / | /  /  ,.  |  /  /`--'  / \  ;   : /  /`--'  /;  :    ;'  :  `--'   \   | '/  ' \  ;   :
|   :    |;  :   .'   \'--'.     /   \  \  ;'--'.     / |  ,   / :  ,      .-./   :    :|  \  \  ;
 \   \  / |  ,     .-./  `--'---'     :  \  \ `--'---'   ---`-'   `--`----'    \   \  /     :  \  \
  `----'   `--`---'                    \  ' ;                                   `----'       \  ' ;
                                        `--`                                                  `--`
以下有两个常用制作banner的网站(字符画生成的网站),地址如下:
http://www.network-science.de/ascii/
http://patorjk.com/software/taag/
示例三
打印带有颜色的字符画
以上就是相关的介绍和示例。
二、配置与使用
在介绍了banner的示例之后,大家是不是有点心动,那么如何在自己的项目中配置自己的字符画横幅呢?接下来我就带大家去介绍对应的配置。
首先呢,我们需要了解的是SpringBoot项目启动会加载banner配置,它查找banner的顺序是如下的:
- 在classPath下查找banner图片,该图片格式包括.gif、jpg、png格式的图片(1-n帧) ,将这n帧图片转变为文字图画打印到控制台
- 在第一步classpath下未找到banner图片,此时会在classpath下查找banner.txt文件,将文件中的文本打印出来
- 如果classpath下都没有找到,则使用SpringBoot默认的banner,该默认实现为SpringBootBanner类
1、使用配置方式打印横幅
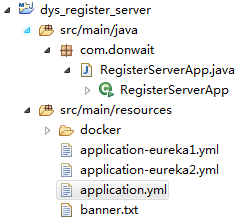
图片文件配置
根据以上说的原理,我们将banner.gif|png|jpg图片放到classpath下,然后启动

然后启动应用程序:
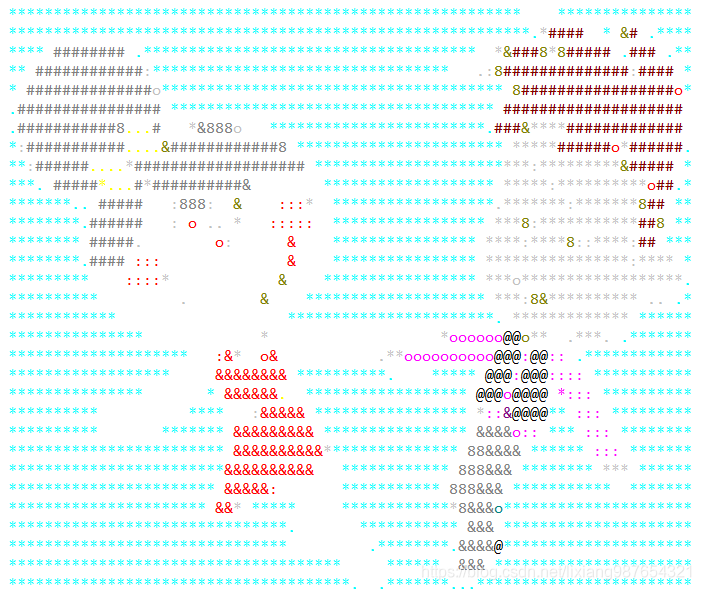
可以看到类路径下的banner已经被识别并转化为图片打印,更有趣的是打印的文字图有颜色(其实是将其像素解析转换成assii编码之后打印)!其实颜色是可以通过控制台启用的,如果不设置,默认是不启用颜色的,配置如下:
spring:
  output:
    ansi:
      enabled: ALWAYS
注意如果是gif图片,它有n帧,这n帧都会被解析成文件图按一帧一帧打印出来!耗费时间可能较长,所以不建议使用,如果你非要进行这个骚操作,也不是不行!
文本文件配置
如果banner下没有图片文件,那么就会搜索classpath下的名字为banner.txt文件,然后将banner的内容打印出来,所以我们可以将banner.txt文件放到类路径下,banner.txt打印的文字图可以使用如下两个网站生成并粘贴到文件中,这里不再赘述:
http://www.network-science.de/ascii/
http://patorjk.com/software/taag/
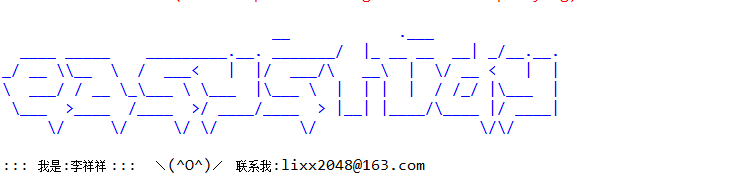
我制作的内容为easystudy,文件内容如下:
${AnsiColor.BRIGHT_RED}
                              __            .___
  ____ _____    _________.__. _______/  |_ __ __  __| _/__.__.
_/ __ \\__  \  /  ___<   |  |/  ___/\   __\  |  \/ __ <   |  |
\  ___/ / __ \_\___ \ \___  |\___ \  |  | |  |  / /_/ |\___  |
 \___  >____  /____  >/ ____/____  > |__| |____/\____ |/ ____|
     \/     \/     \/ \/         \/                  \/\/
${AnsiColor.BRIGHT_BLUE}
::: 注册服务 (版本号: ${application.version}) :::  \(^O^)/    Spring-Boot版本: ${spring-boot.version}
如下所示:
启动结果如下:

可以看到文本中的内容被打印出来的同时具有如下特点:
- 可以指定打印的颜色
- 也可以打印对应的环境变量(使用${}括起来),这里我们打印的是版本号
springboot为了打印的横幅广告看起来更美观,还启动了一个枚举类AnsiColor,这个枚举类可以控制banner.txt中文字的颜色,而且非常容易使用。 如可以 A n s i C o l o r . B R I G H T Y E L L O W 、 {AnsiColor.BRIGHT_YELLOW}、 AnsiColor.BRIGHTYELLOW、{AnsiColor.BRIGHT_RED}、${AnsiColor.BRIGHT_BLUE},可以打印环境变量,如我在yml文件中配置如下变量:
my:
  name: 李祥祥
  email: lixx2048@163.com
然后启动控制台打印:
                              __            .___
  ____ _____    _________.__. _______/  |_ __ __  __| _/__.__.
_/ __ \\__  \  /  ___<   |  |/  ___/\   __\  |  \/ __ <   |  |
\  ___/ / __ \_\___ \ \___  |\___ \  |  | |  |  / /_/ |\___  |
 \___  >____  /____  >/ ____/____  > |__| |____/\____ |/ ____|
     \/     \/     \/ \/         \/                  \/\/

::: 我是:李祥祥 :::  \(^O^)/    联系我:lixx2048@163.com
注意:
颜色枚举类只能控制其后的文本的颜色,如果其后再次遇到其他颜色则从遇到的开始变为另外配置的颜色
环境变量打印支持系统自定义的,也支持自己配置的(如properties文件或yaml文件配置)
系统常用变量如下所示,各个变量含义如下:
| 变量 | 描述 |
|---|---|
${application.version} | MANIFEST.MF 中定义的版本。如:1.0 |
${application.formatted-version} | MANIFEST.MF 中定义的版本,并添加一个 v 前缀。如:v1.0 |
${spring-boot.version} | Spring Boot 版本。如:2.1.1.RELEASE. |
${spring-boot.formatted-version} | Spring Boot 版本,并添加一个 v 前缀。如:v2.1.1.RELEASE |
${Ansi.NAME} (or ${AnsiColor.NAME}, ${AnsiBackground.NAME}, ${AnsiStyle.NAME}) | ANSI 颜色、字体。更多细节,参考:AnsiPropertySource。 |
${application.title} | MANIFEST.MF 中定义的应用名。 |
默认配置
如果classpath下既不能找到对应图片,也不能找到banner.txt配置文件。那么系统将自动使用springboot默认的配置,默认的配置是代码实现的,默认使用SpringBootBanner类,它实现了Banner接口类,具体代码如下:
class SpringBootBanner implements Banner {

	private static final String[] BANNER = { "",
			"  .   ____          _            __ _ _",
			" /\\\\ / ___'_ __ _ _(_)_ __  __ _ \\ \\ \\ \\",
			"( ( )\\___ | '_ | '_| | '_ \\/ _` | \\ \\ \\ \\",
			" \\\\/  ___)| |_)| | | | | || (_| |  ) ) ) )",
			"  '  |____| .__|_| |_|_| |_\\__, | / / / /",
			" =========|_|==============|___/=/_/_/_/" };

	private static final String SPRING_BOOT = " :: Spring Boot :: ";
	private static final int STRAP_LINE_SIZE = 42;

	@Override
	public void printBanner(Environment environment, Class<?> sourceClass,
			PrintStream printStream) {
		for (String line : BANNER) {
			printStream.println(line);
		}
		String version = SpringBootVersion.getVersion();
		version = (version != null) ? " (v" + version + ")" : "";
		StringBuilder padding = new StringBuilder();
		while (padding.length() < STRAP_LINE_SIZE
				- (version.length() + SPRING_BOOT.length())) {
			padding.append(" ");
		}

		printStream.println(AnsiOutput.toString(AnsiColor.GREEN, SPRING_BOOT,
				AnsiColor.DEFAULT, padding.toString(), AnsiStyle.FAINT, version));
		printStream.println();
	}
}
通过代码我们看到:
- SpringBootBanner打印了自己的logo文字图案
- 获取了SpringBoot的version并打印出来
- 设置了打印的颜色等信息
使用配置修改默认配置
通过以上了解,我们知道我们只需要将我们的banner.jpg|png|gif|txt放到classpath下即可,但是如果我们防止的路径不在类路径下或者目录结构不是根目录,那么我们就需要默认修改对应的banner配置了,可以在yaml中的spring.banner下进行配置。配置参数包括如下配置:
# banner 模式。有三种模式:console/log/off
# console 打印到控制台(通过 System.out)
# log - 打印到日志中
# off - 关闭打印
spring.main.banner-mode = off
# banner 文件编码
spring.banner.charset = UTF-8
# banner 文本文件路径
spring.banner.location = classpath:banner.txt
# banner 图像文件路径(可以选择 png,jpg,gif 文件)
spring.banner.image.location = classpath:banner.gif
used).
# 图像 banner 的宽度(字符数)
spring.banner.image.width = 76
# 图像 banner 的高度(字符数)
spring.banner.image.height =
# 图像 banner 的左边界(字符数)
spring.banner.image.margin = 2
# 是否将图像转为黑色控制台主题
spring.banner.image.invert = false
注意:
如果需要关闭banner的打印,老版本中关闭使用"spring.main.show-banner=false"来关闭,新版本的SpringBoot配置不能使用以上配置,而是使用"spring.main.banner-mode=off"来关闭!
2、使用编码方式配置
使用代码关闭
除了使用配置文件配置是否展示Banner,方式如下:
spring:
  main:
    #老版本控制方式
    #show-banner: false
    #新版本控制方式:off|console|log
    banner-mode: OFF
我们还可以使用代码对Banner显示进行控制,我们直接在SpringApplication实例中配置即可。
@EnableEurekaServer					// 开启eureka服务
@SpringBootApplication
public class RegisterServerApp {

	public static void main(String[] args) {
		//SpringApplication.run(RegisterServerApp.class, args);

		SpringApplication application = new SpringApplication(RegisterServerApp.class);
		application.setBannerMode(Banner.Mode.OFF);
		application.run(args);
	}

}
使用代码实现
通过以上配置,我们也知道了SpringBoot会注册一个默认的SpringBootBanner的单利Bean,用来在没有找到banner的时候负责打印Banner信息。如果想完全定制自己的Banner,那么就需要通过代码实现。通过SpringBootBanner实现类,我们知道SpringBoot提供了一个接口org.springframework.boot.Banner,我们只需要实现该接口的printBanner方法即可!实现完成之后,我们只需通过SpringApplication.setBanner方法注入到SpringBoot即可。 例如,我的实现如下:
package com.donwait;

import java.io.PrintStream;

import org.springframework.boot.Banner;
import org.springframework.boot.SpringBootVersion;
import org.springframework.boot.ansi.AnsiColor;
import org.springframework.boot.ansi.AnsiOutput;
import org.springframework.boot.ansi.AnsiStyle;
import org.springframework.core.env.Environment;

/**
 * @文件名称: MyBanner.java
 * @功能描述: 自定义Banner实现
 * @版权信息: www.dondown.com
 * @编写作者: lixx2048@163.com
 * @开发日期: 2020年7月17日
 * @历史版本: V1.0
 */
public class MyBanner implements Banner {

	private static final String[] BANNER = { "",
			  "| |  | |    | | |       \\ \\        / /       | |   | |",
			  "| |__| | ___| | | ___    \\ \\  /\\  / /__  _ __| | __| |",
			  "|  __  |/ _ \\ | |/ _ \\    \\ \\/  \\/ / _ \\| '__| |/ _` |",
			  "| |  | |  __/ | | (_) |    \\  /\\  / (_) | |  | | (_| |",
			  "|_|  |_|\\___|_|_|\\___/      \\/  \\/ \\___/|_|  |_|\\__,_|" };

	private static final String SPRING_BOOT = " :: Spring Boot :: ";
	private static final int STRAP_LINE_SIZE = 42;

	@Override
	public void printBanner(Environment environment, Class<?> sourceClass, PrintStream out) {
		for (String line : BANNER) {
			out.println(line);
		}

		String version = SpringBootVersion.getVersion();
		version = (version != null) ? " (v" + version + ")" : "";
		StringBuilder padding = new StringBuilder();
		while (padding.length() < STRAP_LINE_SIZE
				- (version.length() + SPRING_BOOT.length())) {
			padding.append(" ");
		}

		out.println(AnsiOutput.toString(AnsiColor.GREEN, SPRING_BOOT,
				AnsiColor.DEFAULT, padding.toString(), AnsiStyle.FAINT, version));
	}
}
然后,我们在我们的启动类中设置自己的Banner类:
| |  | |    | | |       \ \        / /       | |   | |
| |__| | ___| | | ___    \ \  /\  / /__  _ __| | __| |
|  __  |/ _ \ | |/ _ \    \ \/  \/ / _ \| '__| |/ _` |
| |  | |  __/ | | (_) |    \  /\  / (_) | |  | | (_| |
|_|  |_|\___|_|_|\___/      \/  \/ \___/|_|  |_|\__,_|
 :: Spring Boot ::        (v2.0.4.RELEASE)
可以看到,我们打印了一个“Hello World”出来。
如果我们仅仅是控制SpringBoot对应的Banner,也可以使用自带的ImageBanner和TextBanner创建,然后设置到SpringBoot中。
package com.donwait;

import org.springframework.boot.Banner;
import org.springframework.boot.ImageBanner;
import org.springframework.boot.SpringApplication;
import org.springframework.boot.autoconfigure.SpringBootApplication;
import org.springframework.cloud.netflix.eureka.server.EnableEurekaServer;
import org.springframework.core.io.ClassPathResource;

@EnableEurekaServer					// 开启eureka服务
@SpringBootApplication
public class RegisterServerApp {

	public static void main(String[] args) {
		//SpringApplication.run(RegisterServerApp.class, args);

		SpringApplication application = new SpringApplication(RegisterServerApp.class);
		application.setBannerMode(Banner.Mode.CONSOLE);
		application.setBanner(new ImageBanner(new ClassPathResource("banner1.jpg")));
		application.run(args);
	}

}
效果也是一样的:
如使用文本文件Banner类:
import org.springframework.boot.ResourceBanner;
import org.springframework.boot.SpringApplication;
import org.springframework.boot.autoconfigure.SpringBootApplication;
import org.springframework.cloud.netflix.eureka.server.EnableEurekaServer;
import org.springframework.core.io.ClassPathResource;

@EnableEurekaServer					// 开启eureka服务
@SpringBootApplication
public class RegisterServerApp {

	public static void main(String[] args) {
		//SpringApplication.run(RegisterServerApp.class, args);

		SpringApplication application = new SpringApplication(RegisterServerApp.class);
		application.setBannerMode(Banner.Mode.CONSOLE);
		//application.setBanner(new ImageBanner(new ClassPathResource("banner1.jpg")));
		application.setBanner(new ResourceBanner(new ClassPathResource("banner1.txt")));
		application.run(args);
	}

}
另外,我要说明重点提一下,如果在classpath下同时存在图片和文本banner,那么会优先加载banner图片打印,然后在加载文本文件banne.txt内容并打印。
通过工具我们可以看到Banner的实现类有5个:
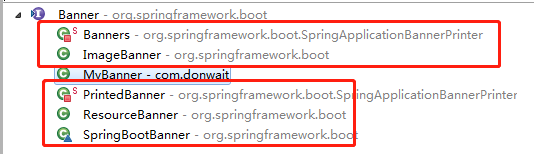
- Banners
- ImageBanner
- PrintedBanner
- ResourceBanner
- SpringBootBanner
各个Banner的含义和使用感兴趣的可以自己去研究一下,我这里不再叨扰!以上就是SpringBoot使用的全部内容,自己的总结,有问题的可以一起交流一下。
源码获取、合作、技术交流请获取如下联系方式:
QQ交流群:961179337

微信账号:lixiang6153
公众号:IT技术快餐
电子邮箱:lixx2048@163.com


 4395
4395

 被折叠的 条评论
为什么被折叠?
被折叠的 条评论
为什么被折叠?
 到【灌水乐园】发言


