


02spring IOC基本使用
文章目录
通过前面的介绍我们已经知道了Spring中非常重要的一个特性就是IOC,下面我们将要来看一下如何使用IOC容器,帮助大家更好的体会spring的优势。
绿色具体独立模块
黑色框为需要依赖得jar包
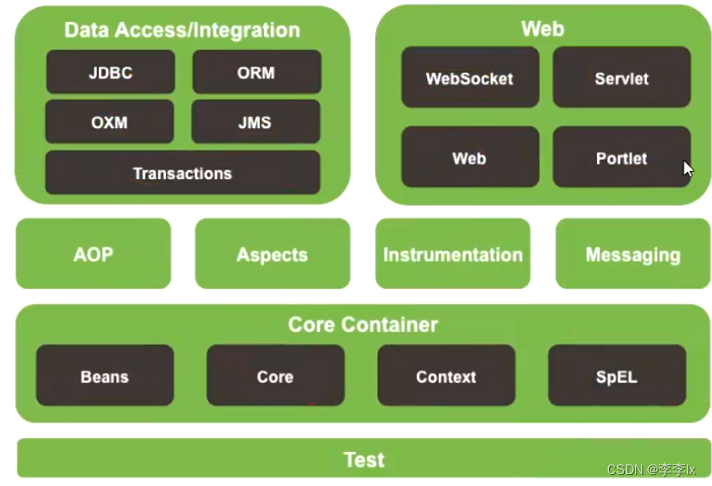
IOC包(Core Container):Beans + Core + Context + expression
1、spring_helloworld
(1)使用手动加载jar包的方式实现,分为三个步骤,现在几乎不用
-
导包:导入这五个包即可
commons-logging-1.2.jar
spring-beans-5.2.3.RELEASE.jar
spring-context-5.2.3.RELEASE.jar
spring-core-5.2.3.RELEASE.jar
spring-expression-5.2.3.RELEASE.jar -
写配置
Person.java
package com.mashibing.bean;

public class Person {
    private int id;
    private String name;
    private int age;
    private String gender;

    public int getId() {
        return id;
    }

    public void setId(int id) {
        this.id = id;
    }

    public String getName() {
        return name;
    }

    public void setName(String name) {
        this.name = name;
    }

    public int getAge() {
        return age;
    }

    public void setAge(int age) {
        this.age = age;
    }

    public String getGender() {
        return gender;
    }

    public void setGender(String gender) {
        this.gender = gender;
    }

    @Override
    public String toString() {
        return "Person{" +
                "id=" + id +
                ", name='" + name + '\'' +
                ", age=" + age +
                ", gender='" + gender + '\'' +
                '}';
    }
}
ioc.xml
<?xml version="1.0" encoding="UTF-8"?> <beans xmlns="http://www.springframework.org/schema/beans" xmlns:xsi="http://www.w3.org/2001/XMLSchema-instance" xsi:schemaLocation="http://www.springframework.org/schema/beans http://www.springframework.org/schema/beans/spring-beans.xsd"> <!--注册一个对象,spring回自动创建这个对象--> <!-- 一个bean标签就表示一个对象 id:这个对象的唯一标识 class:注册对象的完全限定名 --> <bean id="person" class="com.mashibing.bean.Person"> <!--使用property标签给对象的属性赋值 name:表示属性的名称 value:表示属性的值 --> <property name="id" value="1"></property> <property name="name" value="zhangsan"></property> <property name="age" value="18"></property> <property name="gender" value="男"></property> </bean> </beans> -
测试
SpringDemoTest.java
package com.mashibing.test;

import com.mashibing.bean.Person;
import org.springframework.context.ApplicationContext;
import org.springframework.context.support.ClassPathXmlApplicationContext;

public class SpringDemoTest {
    public static void main(String[] args) {
        //ApplicationContext:表示ioc容器
        //ClassPathXmlApplicationContext:表示从当前classpath路径中获取xml文件的配置
        //根据spring的配置文件来获取ioc容器对象
        ApplicationContext context = new ClassPathXmlApplicationContext("ioc.xml");
        Person person = (Person) context.getBean("person");
        System.out.println(person);
    }
}
(2)使用maven的方式来构建项目
-
创建maven项目
定义项目的groupId、artifactId
-
添加对应的pom依赖
pom.xml
<?xml version="1.0" encoding="UTF-8"?> <project xmlns="http://maven.apache.org/POM/4.0.0" xmlns:xsi="http://www.w3.org/2001/XMLSchema-instance" xsi:schemaLocation="http://maven.apache.org/POM/4.0.0 http://maven.apache.org/xsd/maven-4.0.0.xsd"> <modelVersion>4.0.0</modelVersion> <groupId>com.mashibing</groupId> <artifactId>spring_demo</artifactId> <version>1.0-SNAPSHOT</version> <dependencies> <!-- https://mvnrepository.com/artifact/org.springframework/spring-context --> <dependency> <groupId>org.springframework</groupId> <artifactId>spring-context</artifactId> <version>5.2.3.RELEASE</version> </dependency> </dependencies> </project> -
编写代码
Person.java
package com.mashibing.bean; public class Person { private int id; private String name; private int age; private String gender; public int getId() { return id; } public void setId(int id) { this.id = id; } public String getName() { return name; } public void setName(String name) { this.name = name; } public int getAge() { return age; } public void setAge(int age) { this.age = age; } public String getGender() { return gender; } public void setGender(String gender) { this.gender = gender; } @Override public String toString() { return "Person{" + "id=" + id + ", name='" + name + '\'' + ", age=" + age + ", gender='" + gender + '\'' + '}'; } } -
测试
MyTest.java
import com.mashibing.bean.Person;
import org.springframework.context.ApplicationContext;
import org.springframework.context.support.ClassPathXmlApplicationContext;

public class MyTest {
    public static void main(String[] args) {
        ApplicationContext context = new ClassPathXmlApplicationContext("ioc.xml");
        Person person = (Person) context.getBean("person");
        System.out.println(person);
    }
}
总结:
以上两种方式创建spring的项目都是可以的,但是在现在的企业开发环境中使用更多的还是maven这样的方式,无须自己处理jar之间的依赖关系,也无须提前下载jar包,只需要配置相关的pom即可,因此推荐大家使用maven的方式,具体的maven操作大家可以看maven的详细操作文档。
搭建spring项目需要注意的点:
1、一定要将配置文件添加到类路径中,使用idea创建项目的时候要放在resource目录下
2、导包的时候别忘了commons-logging-1.2.jar包
细节点:
1、ApplicationContext就是IOC容器的接口,可以通过此对象获取容器中创建的对象
2、对象在Spring容器创建完成的时候就已经创建完成,不是需要用的时候才创建
3、对象在IOC容器中存储的时候都是单例的,如果需要多例需要修改属性
4、创建对象给属性赋值的时候是通过setter方法实现的
5、对象的属性是由setter/getter方法决定的,而不是定义的成员属性
2、spring对象的获取及属性赋值方式
1、通过bean的id获取IOC容器中的对象(上面已经用过)
2、通过bean的类型获取对象
MyTest.java
import com.mashibing.bean.Person;
import org.springframework.context.ApplicationContext;
import org.springframework.context.support.ClassPathXmlApplicationContext;

public class MyTest {
    public static void main(String[] args) {
        ApplicationContext context = new ClassPathXmlApplicationContext("ioc.xml");
        Person bean = context.getBean(Person.class);
        System.out.println(bean);
    }
}
注意:通过bean的类型在查找对象的时候,在配置文件中不能存在两个类型一致的bean对象,如果有的话,可以通过如下方法
MyTest.java
import com.mashibing.bean.Person;
import org.springframework.context.ApplicationContext;
import org.springframework.context.support.ClassPathXmlApplicationContext;

public class MyTest {
    public static void main(String[] args) {
        ApplicationContext context = new ClassPathXmlApplicationContext("ioc.xml");
        Person person = context.getBean("person", Person.class);
        System.out.println(person);
    }
}
3、通过构造器给bean对象赋值
ioc.xml
	<!--给person类添加构造方法-->
	<bean id="person2" class="com.mashibing.bean.Person">
        <constructor-arg name="id" value="1"></constructor-arg>
        <constructor-arg name="name" value="lisi"></constructor-arg>
        <constructor-arg name="age" value="20"></constructor-arg>
        <constructor-arg name="gender" value="女"></constructor-arg>
    </bean>

	<!--在使用构造器赋值的时候可以省略name属性,但是此时就要求必须严格按照构造器参数的顺序来填写了-->
	<bean id="person3" class="com.mashibing.bean.Person">
        <constructor-arg value="1"></constructor-arg>
        <constructor-arg value="lisi"></constructor-arg>
        <constructor-arg value="20"></constructor-arg>
        <constructor-arg value="女"></constructor-arg>
    </bean>

	<!--如果想不按照顺序来添加参数值,那么可以搭配index属性来使用-->
    <bean id="person4" class="com.mashibing.bean.Person">
        <constructor-arg value="lisi" index="1"></constructor-arg>
        <constructor-arg value="1" index="0"></constructor-arg>
        <constructor-arg value="女" index="3"></constructor-arg>
        <constructor-arg value="20" index="2"></constructor-arg>
    </bean>
	<!--当有多个参数个数相同,不同类型的构造器的时候,可以通过type来强制类型-->
	将person的age类型设置为Integer类型
	public Person(int id, String name, Integer age) {
        this.id = id;
        this.name = name;
        this.age = age;
        System.out.println("Age");
    }

    public Person(int id, String name, String gender) {
        this.id = id;
        this.name = name;
        this.gender = gender;
        System.out.println("gender");
    }
	<bean id="person5" class="com.mashibing.bean.Person">
        <constructor-arg value="1"></constructor-arg>
        <constructor-arg value="lisi"></constructor-arg>
        <constructor-arg value="20" type="java.lang.Integer"></constructor-arg>
    </bean>
	<!--如果不修改为integer类型,那么需要type跟index组合使用-->
	 <bean id="person5" class="com.mashibing.bean.Person">
        <constructor-arg value="1"></constructor-arg>
        <constructor-arg value="lisi"></constructor-arg>
        <constructor-arg value="20" type="int" index="2"></constructor-arg>
    </bean>
4、通过命名空间为bean赋值,简化配置文件中属性声明的写法
1、导入命名空间
<?xml version="1.0" encoding="UTF-8"?>
<beans xmlns="http://www.springframework.org/schema/beans"
       xmlns:xsi="http://www.w3.org/2001/XMLSchema-instance"
       xmlns:p="http://www.springframework.org/schema/p"
       xsi:schemaLocation="http://www.springframework.org/schema/beans http://www.springframework.org/schema/beans/spring-beans.xsd">
2、添加配置
<bean id="person6" class="com.mashibing.bean.Person" p:id="3" p:name="wangwu" p:age="22" p:gender="男"></bean>
5、为复杂类型进行赋值操作
在之前的测试代码中,我们都是给最基本的属性进行赋值操作,在正常的企业级开发中还会遇到给各种复杂类型赋值,如集合、数组、其他对象等。
Person.java
package com.mashibing.bean;

import java.util.*;

public class Person {
    private int id;
    private String name="dahuang";
    private int age;
    private String gender;
    private Address address;
    private String[] hobbies;
    private List<Book> books;
    private Set<Integer> sets;
    private Map<String,Object> maps;
    private Properties properties;

    public Person(int id, String name, int age, String gender) {
        this.id = id;
        this.name = name;
        this.age = age;
        this.gender = gender;
        System.out.println("有参构造器");
    }

    public Person(int id, String name, int age) {
        this.id = id;
        this.name = name;
        this.age = age;
        System.out.println("Age");
    }

    public Person(int id, String name, String gender) {
        this.id = id;
        this.name = name;
        this.gender = gender;
        System.out.println("gender");
    }

    public Person() {
    }

    public int getId() {
        return id;
    }

    public void setId(int id) {
        this.id = id;
    }

    public String getName() {
        return name;
    }

    public void setName(String name) {
        this.name = name;
    }

    public int getAge() {
        return age;
    }

    public void setAge(int age) {
        this.age = age;
    }

    public String getGender() {
        return gender;
    }

    public void setGender(String gender) {
        this.gender = gender;
    }

    public Address getAddress() {
        return address;
    }

    public void setAddress(Address address) {
        this.address = address;
    }

    public List<Book> getBooks() {
        return books;
    }

    public void setBooks(List<Book> books) {
        this.books = books;
    }

    public Map<String, Object> getMaps() {
        return maps;
    }

    public void setMaps(Map<String, Object> maps) {
        this.maps = maps;
    }

    public Properties getProperties() {
        return properties;
    }

    public void setProperties(Properties properties) {
        this.properties = properties;
    }

    public String[] getHobbies() {
        return hobbies;
    }

    public void setHobbies(String[] hobbies) {
        this.hobbies = hobbies;
    }

    public Set<Integer> getSets() {
        return sets;
    }

    public void setSets(Set<Integer> sets) {
        this.sets = sets;
    }

    @Override
    public String toString() {
        return "Person{" +
                "id=" + id +
                ", name='" + name + '\'' +
                ", age=" + age +
                ", gender='" + gender + '\'' +
                ", address=" + address +
                ", hobbies=" + Arrays.toString(hobbies) +
                ", books=" + books +
                ", sets=" + sets +
                ", maps=" + maps +
                ", properties=" + properties +
                '}';
    }
}
Book.java
package com.mashibing.bean;

public class Book {
    private String name;
    private String author;
    private double price;

    public Book() {
    }

    public Book(String name, String author, double price) {
        this.name = name;
        this.author = author;
        this.price = price;
    }

    public String getName() {
        return name;
    }

    public void setName(String name) {
        this.name = name;
    }

    public String getAuthor() {
        return author;
    }

    public void setAuthor(String author) {
        this.author = author;
    }

    public double getPrice() {
        return price;
    }

    public void setPrice(double price) {
        this.price = price;
    }

    @Override
    public String toString() {
        return "Book{" +
                "name='" + name + '\'' +
                ", author='" + author + '\'' +
                ", price=" + price +
                '}';
    }
}
Address.java
package com.mashibing.bean;

public class Address {
    private String province;
    private String city;
    private String town;

    public Address() {
    }

    public Address(String province, String city, String town) {
        this.province = province;
        this.city = city;
        this.town = town;
    }

    public String getProvince() {
        return province;
    }

    public void setProvince(String province) {
        this.province = province;
    }

    public String getCity() {
        return city;
    }

    public void setCity(String city) {
        this.city = city;
    }

    public String getTown() {
        return town;
    }

    public void setTown(String town) {
        this.town = town;
    }

    @Override
    public String toString() {
        return "Address{" +
                "province='" + province + '\'' +
                ", city='" + city + '\'' +
                ", town='" + town + '\'' +
                '}';
    }
}
ioc.xml
<?xml version="1.0" encoding="UTF-8"?>
<beans xmlns="http://www.springframework.org/schema/beans"
       xmlns:xsi="http://www.w3.org/2001/XMLSchema-instance"
       xmlns:p="http://www.springframework.org/schema/p"
       xmlns:util="http://www.springframework.org/schema/util"
       xsi:schemaLocation="http://www.springframework.org/schema/beans http://www.springframework.org/schema/beans/spring-beans.xsd
       http://www.springframework.org/schema/util https://www.springframework.org/schema/util/spring-util.xsd"
>

    <!--给复杂类型的赋值都在property标签内进行-->
    <bean id="person" class="com.mashibing.bean.Person">
        <property name="name">
            <!--赋空值-->
            <null></null>
        </property>
        <!--通过ref引用其他对象,引用外部bean-->
        <property name="address" ref="address"></property>
        <!--引用内部bean-->
       <!-- <property name="address">
            <bean class="com.mashibing.bean.Address">
                <property name="province" value="北京"></property>
                <property name="city" value="北京"></property>
                <property name="town" value="西城区"></property>
            </bean>
        </property>-->
        <!--为list赋值-->
        <property name="books">
            <list>
                <!--内部bean-->
                <bean id="book1" class="com.mashibing.bean.Book">
                    <property name="name" value="多线程与高并发"></property>
                    <property name="author" value="马士兵"></property>
                    <property name="price" value="1000"></property>
                </bean>
                <!--外部bean-->
                <ref bean="book2"></ref>
            </list>
        </property>
        <!--给map赋值-->
        <property name="maps" ref="myMap"></property>
        <!--给property赋值-->
        <property name="properties">
            <props>
                <prop key="aaa">aaa</prop>
                <prop key="bbb">222</prop>
            </props>
        </property>
        <!--给数组赋值-->
        <property name="hobbies">
            <array>
                <value>book</value>
                <value>movie</value>
                <value>game</value>
            </array>
        </property>
        <!--给set赋值-->
        <property name="sets">
            <set>
                <value>111</value>
                <value>222</value>
                <value>222</value>
            </set>
        </property>
    </bean>
    <bean id="address" class="com.mashibing.bean.Address">
        <property name="province" value="河北"></property>
        <property name="city" value="邯郸"></property>
        <property name="town" value="武安"></property>
    </bean>
    <bean id="book2" class="com.mashibing.bean.Book">
        <property name="name" value="JVM"></property>
        <property name="author" value="马士兵"></property>
        <property name="price" value="1200"></property>
    </bean>
    <!--级联属性-->
    <bean id="person2" class="com.mashibing.bean.Person">
        <property name="address" ref="address"></property>
        <property name="address.province" value="北京"></property>
    </bean>
    <!--util名称空间创建集合类型的bean-->
    <util:map id="myMap">
            <entry key="key1" value="value1"></entry>
            <entry key="key2" value-ref="book2"></entry>
            <entry key="key03">
                <bean class="com.mashibing.bean.Book">
                    <property name="name" value="西游记" ></property>
                    <property name="author" value="吴承恩" ></property>
                    <property name="price" value="100" ></property>
                </bean>
            </entry>
    </util:map>
</beans>
6、继承关系bean的配置
ioc.xml
    <bean id="person" class="com.mashibing.bean.Person">
        <property name="id" value="1"></property>
        <property name="name" value="zhangsan"></property>
        <property name="age" value="21"></property>
        <property name="gender" value="男"></property>
    </bean>
    <!--parent:指定bean的配置信息继承于哪个bean-->
    <bean id="person2" class="com.mashibing.bean.Person" parent="person">
        <property name="name" value="lisi"></property>
    </bean>
如果想实现Java文件的抽象类,不需要将当前bean实例化的话,可以使用abstract属性
 	<bean id="person" class="com.mashibing.bean.Person" abstract="true">
        <property name="id" value="1"></property>
        <property name="name" value="zhangsan"></property>
        <property name="age" value="21"></property>
        <property name="gender" value="男"></property>
    </bean>
    <!--parent:指定bean的配置信息继承于哪个bean-->
    <bean id="person2" class="com.mashibing.bean.Person" parent="person">
        <property name="name" value="lisi"></property>
    </bean>
7、bean对象创建的依赖关系
bean对象在创建的时候是按照bean在配置文件的顺序决定的,也可以使用depend-on标签来决定顺序
ioc.xml
	<bean id="book" class="com.mashibing.bean.Book" depends-on="person,address"></bean>
    <bean id="address" class="com.mashibing.bean.Address"></bean>
    <bean id="person" class="com.mashibing.bean.Person"></bean>
8、bean的作用域控制,是否是单例
ioc.xml
    <!--
    bean的作用域:singleton、prototype、request、session
    默认情况下是单例的
    prototype:多实例的
        容器启动的时候不会创建多实例bean,只有在获取对象的时候才会创建该对象
        每次创建都是一个新的对象
    singleton:默认的单例对象
        在容器启动完成之前就已经创建好对象
        获取的所有对象都是同一个
    -->
    <bean id="person4" class="com.mashibing.bean.Person" scope="prototype"></bean>
9、利用工厂模式创建bean对象
在之前的案例中,所有bean对象的创建都是通过反射得到对应的bean实例,其实在spring中还包含另外一种创建bean实例的方式,就是通过工厂模式进行对象的创建
在利用工厂模式创建bean实例的时候有两种方式,分别是静态工厂和实例工厂。
静态工厂:工厂本身不需要创建对象,但是可以通过静态方法调用,对象=工厂类.静态工厂方法名();
实例工厂:工厂本身需要创建对象,工厂类 工厂对象=new 工厂类;工厂对象.get对象名();
PersonStaticFactory.java
package com.mashibing.factory;

import com.mashibing.bean.Person;

public class PersonStaticFactory {

    public static Person getPerson(String name){
        Person person = new Person();
        person.setId(1);
        person.setName(name);
        return person;
    }
}
ioc.xml
<!--
静态工厂的使用:
class:指定静态工厂类
factory-method:指定哪个方法是工厂方法
-->
<bean id="person5" class="com.mashibing.factory.PersonStaticFactory" factory-method="getPerson">
        <!--constructor-arg:可以为方法指定参数-->
        <constructor-arg value="lisi"></constructor-arg>
    </bean>
PersonInstanceFactory.java
package com.mashibing.factory;

import com.mashibing.bean.Person;

public class PersonInstanceFactory {
    public Person getPerson(String name){
        Person person = new Person();
        person.setId(1);
        person.setName(name);
        return person;
    }
}
ioc.xml
    <!--实例工厂使用-->
    <!--创建实例工厂类-->
    <bean id="personInstanceFactory" class="com.mashibing.factory.PersonInstanceFactory"></bean>
    <!--
    factory-bean:指定使用哪个工厂实例
    factory-method:指定使用哪个工厂实例的方法
    -->
    <bean id="person6" class="com.mashibing.bean.Person" factory-bean="personInstanceFactory" factory-method="getPerson">
        <constructor-arg value="wangwu"></constructor-arg>
    </bean>
10、继承FactoryBean来创建对象
FactoryBean是Spring规定的一个接口,当前接口的实现类,Spring都会将其作为一个工厂,但是在ioc容器启动的时候不会创建实例,只有在使用的时候才会创建对象
MyFactoryBean.java
package com.mashibing.factory;

import com.mashibing.bean.Person;
import org.springframework.beans.factory.FactoryBean;

/**
 * 实现了FactoryBean接口的类是Spring中可以识别的工厂类,spring会自动调用工厂方法创建实例
 */
public class MyFactoryBean implements FactoryBean<Person> {

    /**
     * 工厂方法,返回需要创建的对象
     * @return
     * @throws Exception
     */
    @Override
    public Person getObject() throws Exception {
        Person person = new Person();
        person.setName("maliu");
        return person;
    }

    /**
     * 返回创建对象的类型,spring会自动调用该方法返回对象的类型
     * @return
     */
    @Override
    public Class<?> getObjectType() {
        return Person.class;
    }

    /**
     * 创建的对象是否是单例对象
     * @return
     */
    @Override
    public boolean isSingleton() {
        return false;
    }
}
ioc.xml
<bean id="myfactorybean" class="com.mashibing.factory.MyFactoryBean"></bean>
11、bean对象的初始化和销毁方法
在创建对象的时候,我们可以根据需要调用初始化和销毁的方法
Address.java
package com.mashibing.bean;

public class Address {
    private String province;
    private String city;
    private String town;

    public Address() {
        System.out.println("address被创建了");
    }

    public Address(String province, String city, String town) {
        this.province = province;
        this.city = city;
        this.town = town;
    }

    public String getProvince() {
        return province;
    }

    public void setProvince(String province) {
        this.province = province;
    }

    public String getCity() {
        return city;
    }

    public void setCity(String city) {
        this.city = city;
    }

    public String getTown() {
        return town;
    }

    public void setTown(String town) {
        this.town = town;
    }

    public void init(){
        System.out.println("对象被初始化");
    }

    public void destory(){
        System.out.println("对象被销毁");
    }

    @Override
    public String toString() {
        return "Address{" +
                "province='" + province + '\'' +
                ", city='" + city + '\'' +
                ", town='" + town + '\'' +
                '}';
    }
}
ioc.xml
<!--bean生命周期表示bean的创建到销毁
        如果bean是单例,容器在启动的时候会创建好,关闭的时候会销毁创建的bean
        如果bean是多礼,获取的时候创建对象,销毁的时候不会有任何的调用
    -->
    <bean id="address" class="com.mashibing.bean.Address" init-method="init" destroy-method="destory"></bean>
MyTest.java
import com.mashibing.bean.Address;
import org.springframework.context.ApplicationContext;
import org.springframework.context.support.ClassPathXmlApplicationContext;

public class MyTest {
    public static void main(String[] args) {
        ApplicationContext context = new ClassPathXmlApplicationContext("ioc2.xml");
        Address address = context.getBean("address", Address.class);
        System.out.println(address);
        //applicationContext没有close方法,需要使用具体的子类
        ((ClassPathXmlApplicationContext)context).close();

    }
}
12、配置bean对象初始化方法的前后处理方法
spring中包含一个BeanPostProcessor的接口,可以在bean的初始化方法的前后调用该方法,如果配置了初始化方法的前置和后置处理器,无论是否包含初始化方法,都会进行调用
MyBeanPostProcessor.java
package com.mashibing.bean;

import org.springframework.beans.BeansException;
import org.springframework.beans.factory.config.BeanPostProcessor;

public class MyBeanPostProcessor implements BeanPostProcessor {
    /**
     * 在初始化方法调用之前执行
     * @param bean  初始化的bean对象
     * @param beanName  xml配置文件中的bean的id属性
     * @return
     * @throws BeansException
     */
    @Override
    public Object postProcessBeforeInitialization(Object bean, String beanName) throws BeansException {
        System.out.println("postProcessBeforeInitialization:"+beanName+"调用初始化前置方法");
        return bean;
    }

    /**
     * 在初始化方法调用之后执行
     * @param bean
     * @param beanName
     * @return
     * @throws BeansException
     */
    @Override
    public Object postProcessAfterInitialization(Object bean, String beanName) throws BeansException {
        System.out.println("postProcessAfterInitialization:"+beanName+"调用初始化后缀方法");
        return bean;
    }
}
ioc.xml
<bean id="myBeanPostProcessor" class="com.mashibing.bean.MyBeanPostProcessor"></bean>
3、spring创建第三方bean对象
在Spring中,很多对象都是单实例的,在日常的开发中,我们经常需要使用某些外部的单实例对象,例如数据库连接池,下面我们来讲解下如何在spring中创建第三方bean实例。
1、导入数据库连接池的pom文件
<!-- https://mvnrepository.com/artifact/com.alibaba/druid -->
<dependency>
    <groupId>com.alibaba</groupId>
    <artifactId>druid</artifactId>
    <version>1.1.21</version>
</dependency>
<!-- https://mvnrepository.com/artifact/mysql/mysql-connector-java -->
<dependency>
    <groupId>mysql</groupId>
    <artifactId>mysql-connector-java</artifactId>
    <version>5.1.47</version>
</dependency>
2、编写配置文件
ioc.xml
<?xml version="1.0" encoding="UTF-8"?>
<beans xmlns="http://www.springframework.org/schema/beans"
       xmlns:xsi="http://www.w3.org/2001/XMLSchema-instance"
       xsi:schemaLocation="http://www.springframework.org/schema/beans http://www.springframework.org/schema/beans/spring-beans.xsd">

    <bean id="dataSource" class="com.alibaba.druid.pool.DruidDataSource">
        <property name="username" value="root"></property>
        <property name="password" value="123456"></property>
        <property name="url" value="jdbc:mysql://localhost:3306/demo"></property>
        <property name="driverClassName" value="com.mysql.jdbc.Driver"></property>
    </bean>
</beans>
3、编写测试文件
MyTest.java
import com.alibaba.druid.pool.DruidDataSource;
import com.mashibing.bean.Address;
import com.mashibing.bean.Person;
import org.springframework.context.ApplicationContext;
import org.springframework.context.support.ClassPathXmlApplicationContext;
import java.sql.SQLException;

public class MyTest {
    public static void main(String[] args) throws SQLException {
        ApplicationContext context = new ClassPathXmlApplicationContext("ioc3.xml");
        DruidDataSource dataSource = context.getBean("dataSource", DruidDataSource.class);
        System.out.println(dataSource);
        System.out.println(dataSource.getConnection());
    }
}
4、spring引用外部配置文件
在resource中添加dbconfig.properties
username=root
password=123456
url=jdbc:mysql://localhost:3306/demo
driverClassName=com.mysql.jdbc.Driver
编写配置文件
<?xml version="1.0" encoding="UTF-8"?>
<beans xmlns="http://www.springframework.org/schema/beans"
       xmlns:xsi="http://www.w3.org/2001/XMLSchema-instance"
       xmlns:context="http://www.springframework.org/schema/context"
       xsi:schemaLocation="http://www.springframework.org/schema/beans
       http://www.springframework.org/schema/beans/spring-beans.xsd
        http://www.springframework.org/schema/context
        http://www.springframework.org/schema/context/spring-context.xsd">
	<!--加载外部配置文件
		在加载外部依赖文件的时候需要context命名空间
	-->
    <context:property-placeholder location="classpath:dbconfig.properties"/>
    <bean id="dataSource" class="com.alibaba.druid.pool.DruidDataSource">
        <property name="username" value="${username}"></property>
        <property name="password" value="${password}"></property>
        <property name="url" value="${url}"></property>
        <property name="driverClassName" value="${driverClassName}"></property>
    </bean>
</beans>
5、spring基于xml文件的自动装配
当一个对象中需要引用另外一个对象的时候,在之前的配置中我们都是通过property标签来进行手动配置的,其实在spring中还提供了一个非常强大的功能就是自动装配,可以按照我们指定的规则进行配置,配置的方式有以下几种:
default/no:不自动装配
byName:按照名字进行装配,以属性名作为id去容器中查找组件,进行赋值,如果找不到则装配null
byType:按照类型进行装配,以属性的类型作为查找依据去容器中找到这个组件,如果有多个类型相同的bean对象,那么会报异常,如果找不到则装配null
constructor:按照构造器进行装配,先按照有参构造器参数的类型进行装配,没有就直接装配null;如果按照类型找到了多个,那么就使用参数名作为id继续匹配,找到就装配,找不到就装配null
ioc.xml
<?xml version="1.0" encoding="UTF-8"?>
<beans xmlns="http://www.springframework.org/schema/beans"
       xmlns:xsi="http://www.w3.org/2001/XMLSchema-instance"
       xsi:schemaLocation="http://www.springframework.org/schema/beans http://www.springframework.org/schema/beans/spring-beans.xsd">

    <bean id="address" class="com.mashibing.bean.Address">
        <property name="province" value="河北"></property>
        <property name="city" value="邯郸"></property>
        <property name="town" value="武安"></property>
    </bean>
    <bean id="person" class="com.mashibing.bean.Person" autowire="byName"></bean>
    <bean id="person2" class="com.mashibing.bean.Person" autowire="byType"></bean>
    <bean id="person3" class="com.mashibing.bean.Person" autowire="constructor"></bean>
</beans>
6、SpEL的使用
SpEL:Spring Expression Language,spring的表达式语言,支持运行时查询操作对象
使用#{…}作为语法规则,所有的大括号中的字符都认为是SpEL.
ioc.xml
    <bean id="person4" class="com.mashibing.bean.Person">
        <!--支持任何运算符-->
        <property name="age" value="#{12*2}"></property>
        <!--可以引用其他bean的某个属性值-->
        <property name="name" value="#{address.province}"></property>
        <!--引用其他bean-->
        <property name="address" value="#{address}"></property>
        <!--调用静态方法-->
        <property name="hobbies" value="#{T(java.util.UUID).randomUUID().toString().substring(0,4)}"></property>
        <!--调用非静态方法-->
        <property name="gender" value="#{address.getCity()}"></property>
    </bean>


 1030
1030


 被折叠的 条评论
为什么被折叠?
被折叠的 条评论
为什么被折叠?
 到【灌水乐园】发言


