


SSM整合
- 一、SSM的XML的实现
- 二、SSM的Anno的实现
一、SSM的XML的实现
1.1 项目的结构搭建
1.1.1 创建项目,组织项目结构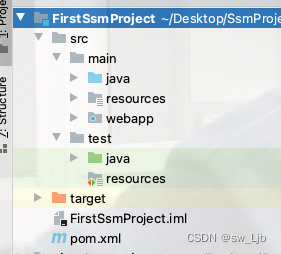
1.1.2 实体类与创建表
User的实体类
package com.ssm.entity;

import java.io.Serializable;
import java.sql.Date;

/**
 * @description:User表的实体类
 * @author: Sw_Ljb
 * @PACKAGE_NAME:com.ssm.entity
 * @time: 2022/6/24 下午12:15
 * @version: 1.0
 */

public class User implements Serializable {
    private Integer uuid;
    private String username;
    private String password;
    private String realName;
    private Integer gender;
    private Date birthday;

    public User() {
    }

    public User(Integer uuid, String username, String password, String realName, Integer gender, Date birthday) {
        this.uuid = uuid;
        this.username = username;
        this.password = password;
        this.realName = realName;
        this.gender = gender;
        this.birthday = birthday;
    }

    @Override
    public String toString() {
        return "User{" +
                "uuid=" + uuid +
                ", username='" + username + '\'' +
                ", password='" + password + '\'' +
                ", realName='" + realName + '\'' +
                ", gender=" + gender +
                ", birthday=" + birthday +
                '}';
    }

    public Integer getUuid() {
        return uuid;
    }

    public void setUuid(Integer uuid) {
        this.uuid = uuid;
    }

    public String getUsername() {
        return username;
    }

    public void setUsername(String username) {
        this.username = username;
    }

    public String getPassword() {
        return password;
    }

    public void setPassword(String password) {
        this.password = password;
    }

    public String getRealName() {
        return realName;
    }

    public void setRealName(String realName) {
        this.realName = realName;
    }

    public Integer getGender() {
        return gender;
    }

    public void setGender(Integer gender) {
        this.gender = gender;
    }

    public Date getBirthday() {
        return birthday;
    }

    public void setBirthday(Date birthday) {
        this.birthday = birthday;
    }
}
database中的sql
create table User(
	uuid int(10) primate key not null,
	username varchar(100),
	password varchar(100),
	realName varchar(100),
	gender int(3),
	birthday date
);
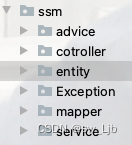
1.1.3 创建三层架构对应的包、接口与实体类,建立关联关系
1.1.4 创建相关对应的配置文件
1.1.4.1 有关spring的配置文件applicationContext.xml编写
<?xml version="1.0" encoding="UTF-8"?>
<beans xmlns="http://www.springframework.org/schema/beans"
       xmlns:xsi="http://www.w3.org/2001/XMLSchema-instance"
       xmlns:context="http://www.springframework.org/schema/context"
       xmlns:tx="http://www.springframework.org/schema/tx"
       xsi:schemaLocation="
       http://www.springframework.org/schema/beans http://www.springframework.org/schema/beans/spring-beans.xsd
       http://www.springframework.org/schema/context http://www.springframework.org/schema/context/spring-context.xsd
       http://www.springframework.org/schema/tx http://www.springframework.org/schema/tx/spring-tx.xsd
">

    <!--开启bean扫描-->
    <context:component-scan base-package="com.ssm"/>

    <!--mybatis的配置-->
    <!--导入外部配置-->
    <context:property-placeholder location="classpath:jdbc.properties"/>

    <!--配置数据源-->
    <bean id="dataSource" class="com.alibaba.druid.pool.DruidDataSource">
        <property name="driverClassName" value="${driverClassName}"></property>
        <property name="url" value="${url}"></property>
        <property name="username" value="${username}"></property>
        <property name="password" value="${password}"></property>
    </bean>
    <!--首先配置sqlSessionFactory-->
        <!--整合mybatis到spring中-->
        <bean class="org.mybatis.spring.SqlSessionFactoryBean">
            <property name="dataSource" ref="dataSource"></property>
            <!--重命名的包-->
            <property name="typeAliasesPackage" value="com.ssm.entity"/>
            <!--分页插件的配置-->
            <property name="plugins">
                <array>
                    <bean class="com.github.pagehelper.PageInterceptor">
                        <property name="properties">
                            <props>
                                <prop key="helperDialect">mysql</prop>
                                <prop key="reasonable">true</prop>
                            </props>
                        </property>
                    </bean>
                </array>
            </property>
        </bean>
        <!--mybatis的映射的扫描-->
        <bean class="org.mybatis.spring.mapper.MapperScannerConfigurer">
            <property name="basePackage" value="com.ssm.mapper"/>
        </bean>
    <!--开始注解的事务扫描-->
    <tx:annotation-driven transaction-manager="txManager"/>

    <!--spring事务管理器-->
    <bean id="txManager" class="org.springframework.jdbc.datasource.DataSourceTransactionManager">
        <property name="dataSource" ref="dataSource"/>
    </bean>
</beans>
1.1.4.2 有关springMVC的配置文件spring-mvc.xml
<?xml version="1.0" encoding="UTF-8"?>
<beans
       xmlns="http://www.springframework.org/schema/beans"
       xmlns:mvc="http://www.springframework.org/schema/mvc"
       xmlns:context="http://www.springframework.org/schema/context"
       xmlns:xsi="http://www.w3.org/2001/XMLSchema-instance"
       xsi:schemaLocation="
       http://www.springframework.org/schema/beans http://www.springframework.org/schema/beans/spring-beans.xsd
       http://www.springframework.org/schema/mvc http://www.springframework.org/schema/mvc/spring-mvc.xsd
       http://www.springframework.org/schema/context http://www.springframework.org/schema/context/spring-context.xsd
">

    <!--开启spring-mvc的注解驱动-->
    <mvc:annotation-driven/>

    <!--开启spring-mvc的有关类的扫描-->
    <context:component-scan base-package="com.ssm.cotroller"/>

</beans>
1.1.4.3 有关web工程的配置文件web.xml
<!DOCTYPE web-app PUBLIC
 "-//Sun Microsystems, Inc.//DTD Web Application 2.3//EN"
 "http://java.sun.com/dtd/web-app_2_3.dtd" >
<web-app>
  <display-name>Archetype Created Web Application</display-name>
  <!--创建spring容器的时机-->
  <context-param>
    <param-name>contextConfigLocation</param-name>
    <param-value>classpath:applicationContext.xml</param-value>
  </context-param>
  <!--处理post乱码问题,通过过滤器-->
  <filter>
    <filter-name>CharacterEncodingFilter</filter-name>
    <filter-class>org.springframework.web.filter.CharacterEncodingFilter</filter-class>
    <!--设置编码格式-->
    <init-param>
      <param-name>encoding</param-name>
      <param-value>UTF-8</param-value>
    </init-param>
  </filter>
  <filter-mapping>
    <filter-name>CharacterEncodingFilter</filter-name>
    <url-pattern>/*</url-pattern>
  </filter-mapping>
  <!--springmvc与spring的结合,通过监听器-->
  <listener>
    <listener-class>org.springframework.web.context.ContextLoaderListener</listener-class>
  </listener>
  <!--配置核心控制器-->
  <servlet>
    <servlet-name>DispatcherServlet</servlet-name>
    <servlet-class>org.springframework.web.servlet.DispatcherServlet</servlet-class>
    <!--引入spring-mvc的配置文件-->
    <init-param>
      <param-name>contextConfigLocation</param-name>
      <param-value>classpath:spring-mvc.xml</param-value>
    </init-param>
  </servlet>
  <servlet-mapping>
    <servlet-name>DispatcherServlet</servlet-name>
    <url-pattern>/</url-pattern>
  </servlet-mapping>
</web-app>
1.1.4.3 有关mybatis的映射配置文件userMapper.xml
<?xml version="1.0" encoding="UTF-8" ?>
<!DOCTYPE mapper PUBLIC "-//mybatis.org//DTD Mapper 3.0//EN" "http://mybatis.org/dtd/mybatis-3-mapper.dtd">

<mapper namespace="com.ssm.mapper.UserMapper">
    <!--增加一个用户-->
    <insert id="save" parameterType="user">
        insert into User values (#{uuid},#{username},#{password},#{realName},#{gender},#{birthday})
    </insert>
    <!--删除一个用户-->
    <delete id="delete" parameterType="int">
        delete from User where uuid = #{id}
    </delete>
    <!--修改一个用户-->
    <update id="update" parameterType="user">
        update User set username = #{username},password=#{password},realName=#{realName},gender=#{gender},birthday=#{birthday} where uuid=#{uuid}
    </update>
    <!--分页查询所有的用户-->
    <select id="getAll" resultType="user">
        select * from User
    </select>
    <!--查询一个用户-->
    <select id="get" parameterType="int" resultType="user">
        select * from User where uuid = #{uuid}
    </select>
    <!--根据password,username查询一个的用户-->
    <select id="checkLoginByParam" resultType="User">
        select * from User where username = #{username} and password = #{password}
    </select>
</mapper>
1.1.5 maven工程pom依赖导入
<?xml version="1.0" encoding="UTF-8"?>

<project xmlns="http://maven.apache.org/POM/4.0.0" xmlns:xsi="http://www.w3.org/2001/XMLSchema-instance"
  xsi:schemaLocation="http://maven.apache.org/POM/4.0.0 http://maven.apache.org/xsd/maven-4.0.0.xsd">
  <modelVersion>4.0.0</modelVersion>

  <groupId>org.example</groupId>
  <artifactId>FirstSsmProject</artifactId>
  <version>1.0-SNAPSHOT</version>
  <packaging>war</packaging>

  <name>FirstSsmProject Maven Webapp</name>
  <!-- FIXME change it to the project's website -->
  <url>http://www.example.com</url>

  <properties>
    <project.build.sourceEncoding>UTF-8</project.build.sourceEncoding>
    <maven.compiler.source>1.7</maven.compiler.source>
    <maven.compiler.target>1.7</maven.compiler.target>
  </properties>
  <dependencies>
    <!--spring环境-->
    <!--spring环境-->
    <!--spring环境-->
    <!--<dependency>
        <groupId>org.springframework</groupId>
        <artifactId>spring-context</artifactId>
        <version>5.1.9.RELEASE</version>
    </dependency>-->


    <!--mybatis环境-->
    <!--mybatis环境-->
    <!--mybatis环境-->
    <dependency>
      <groupId>org.mybatis</groupId>
      <artifactId>mybatis</artifactId>
      <version>3.5.2</version>
    </dependency>
    <!--mysql环境-->
    <dependency>
      <groupId>mysql</groupId>
      <artifactId>mysql-connector-java</artifactId>
      <version>8.0.27</version>
    </dependency>
    <!--spring整合jdbc-->
    <dependency>
      <groupId>org.springframework</groupId>
      <artifactId>spring-jdbc</artifactId>
      <version>5.1.9.RELEASE</version>
    </dependency>
    <!--spring整合mybatis-->
    <dependency>
      <groupId>org.mybatis</groupId>
      <artifactId>mybatis-spring</artifactId>
      <version>2.0.2</version>
    </dependency>
    <!--druid连接池-->
    <dependency>
      <groupId>com.alibaba</groupId>
      <artifactId>druid</artifactId>
      <version>1.1.10</version>
    </dependency>
    <!--分页插件坐标-->
    <dependency>
      <groupId>com.github.pagehelper</groupId>
      <artifactId>pagehelper</artifactId>
      <version>5.1.2</version>
    </dependency>


    <!--springmvc环境-->
    <!--springmvc环境-->
    <!--springmvc环境-->
    <dependency>
      <groupId>org.springframework</groupId>
      <artifactId>spring-webmvc</artifactId>
      <version>5.1.9.RELEASE</version>
    </dependency>
    <!--jackson相关坐标3个-->
    <dependency>
      <groupId>com.fasterxml.jackson.core</groupId>
      <artifactId>jackson-databind</artifactId>
      <version>2.9.0</version>
    </dependency>
    <!--<dependency>
        <groupId>com.fasterxml.jackson.core</groupId>
        <artifactId>jackson-core</artifactId>
        <version>2.9.0</version>
    </dependency>
    <dependency>
        <groupId>com.fasterxml.jackson.core</groupId>
        <artifactId>jackson-annotations</artifactId>
        <version>2.9.0</version>
    </dependency>-->
    <!--servlet环境-->
    <dependency>
      <groupId>javax.servlet</groupId>
      <artifactId>javax.servlet-api</artifactId>
      <version>3.1.0</version>
      <scope>provided</scope>
    </dependency>


    <!--其他组件-->
    <!--其他组件-->
    <!--其他组件-->
    <!--junit单元测试-->
    <dependency>
      <groupId>junit</groupId>
      <artifactId>junit</artifactId>
      <version>4.12</version>
    </dependency>
    <!--spring整合junit-->
    <dependency>
      <groupId>org.springframework</groupId>
      <artifactId>spring-test</artifactId>
      <version>5.1.9.RELEASE</version>
    </dependency>

  </dependencies>

  <build>
    <!--设置插件-->
    <plugins>
      <!--具体的插件配置-->
      <plugin>
        <groupId>org.apache.tomcat.maven</groupId>
        <artifactId>tomcat7-maven-plugin</artifactId>
        <version>2.1</version>
        <configuration>
          <port>80</port>
          <path>/</path>
        </configuration>
      </plugin>
    </plugins>
  </build>
</project>
1.2 Spring整合Mybatis
1.2.1 Spring整合Mybatis
<!--整合mybatis到spring中-->
        <bean class="org.mybatis.spring.SqlSessionFactoryBean">
            <property name="dataSource" ref="dataSource"></property>
            <!--重命名的包-->
            <property name="typeAliasesPackage" value="com.ssm.entity"/>
            <!--分页插件的配置-->
            <property name="plugins">
                <array>
                    <bean class="com.github.pagehelper.PageInterceptor">
                        <property name="properties">
                            <props>
                                <prop key="helperDialect">mysql</prop>
                                <prop key="reasonable">true</prop>
                            </props>
                        </property>
                    </bean>
                </array>
            </property>
        </bean>
        <!--mybatis的映射的扫描-->
        <bean class="org.mybatis.spring.mapper.MapperScannerConfigurer">
            <property name="basePackage" value="com.ssm.mapper"/>
        </bean>
1.2.2 Mybatis的JDBC配置
!--导入外部配置-->
    <context:property-placeholder location="classpath:jdbc.properties"/>

    <!--配置数据源-->
    <bean id="dataSource" class="com.alibaba.druid.pool.DruidDataSource">
        <property name="driverClassName" value="${driverClassName}"></property>
        <property name="url" value="${url}"></property>
        <property name="username" value="${username}"></property>
        <property name="password" value="${password}"></property>
    </bean>
1.3 Spring整合junit对service的测试
package com.ssm.proTest;

import com.github.pagehelper.PageHelper;
import com.github.pagehelper.PageInfo;
import com.ssm.entity.User;
import com.ssm.service.UserService;
import org.junit.Test;
import org.junit.runner.RunWith;
import org.springframework.beans.factory.annotation.Autowired;
import org.springframework.test.context.ContextConfiguration;
import org.springframework.test.context.junit4.SpringJUnit4ClassRunner;

import java.util.Date;
import java.util.List;

/**
 * @description:spring+mybatis整合的测试
 * @author: Sw_Ljb
 * @PACKAGE_NAME:com.ssm.proTest
 * @time: 2022/6/24 下午1:16
 * @version: 1.0
 */

//指定运行环境
@RunWith(SpringJUnit4ClassRunner.class)
//指定配置文件
@ContextConfiguration(locations = "classpath:applicationContext.xml")
public class UserServiceTest {

    @Autowired
    private UserService userService;


    /*=====================测试查询操作===========================*/
    @Test
    public void testget(){
        User user = userService.get(1);
        System.out.println(user);
    }

    @Test
    public void testgetAll(){
        PageHelper.startPage(1,2);
        List<User> userList = userService.getAll();
        PageInfo<User> pageInfo = new PageInfo<User>(userList,1);
        //第一页 只用两条数据 如果操作这个限制 就会包IndexOutOfBoundsException 越界错误
        //System.out.println(pageInfo.getList().get(0));
        //System.out.println(pageInfo.getList().get(1));
        List<User> list = pageInfo.getList();
        for (User user : list) {
            System.out.println(user);
        }
        System.out.println(pageInfo.getList());
    }

    @Test
    public void testLogin(){
        User user1 = userService.login("lisi", "123");
        System.out.println(user1);
    }

    /*=====================测试更新操作===========================*/
    @Test
    public void testSave(){
        Date date = new Date();
        java.sql.Date date1 = new java.sql.Date(date.getTime());
        User user = new User(6, "demo", "123", "save", 0, date1);
        System.out.println(userService.save(user));
    }

    @Test
    public void testDelete(){
        System.out.println(userService.delete(6));
    }

    @Test
    public void testUpdate(){
        Date date = new Date();
        java.sql.Date date1 = new java.sql.Date(date.getTime());
        User user = new User(3, "demotest", "123456", "ceshi", 0, date1);
        System.out.println(userService.update(user));
    }
}
1.4 Spring整合SpringMVC
1.4.1 web.xml的配置
<!DOCTYPE web-app PUBLIC
 "-//Sun Microsystems, Inc.//DTD Web Application 2.3//EN"
 "http://java.sun.com/dtd/web-app_2_3.dtd" >

<web-app>
  <display-name>Archetype Created Web Application</display-name>

  <!--创建spring容器的时机-->
  <context-param>
    <param-name>contextConfigLocation</param-name>
    <param-value>classpath:applicationContext.xml</param-value>
  </context-param>

  <!--处理post乱码问题,通过过滤器-->
  <filter>
    <filter-name>CharacterEncodingFilter</filter-name>
    <filter-class>org.springframework.web.filter.CharacterEncodingFilter</filter-class>
    <!--设置编码格式-->
    <init-param>
      <param-name>encoding</param-name>
      <param-value>UTF-8</param-value>
    </init-param>
  </filter>
  <filter-mapping>
    <filter-name>CharacterEncodingFilter</filter-name>
    <url-pattern>/*</url-pattern>
  </filter-mapping>

  <!--springmvc与spring的结合,通过监听器-->
  <listener>
    <listener-class>org.springframework.web.context.ContextLoaderListener</listener-class>
  </listener>

  <!--配置核心控制器-->
  <servlet>
    <servlet-name>DispatcherServlet</servlet-name>
    <servlet-class>org.springframework.web.servlet.DispatcherServlet</servlet-class>
    <!--引入spring-mvc的配置文件-->
    <init-param>
      <param-name>contextConfigLocation</param-name>
      <param-value>classpath:spring-mvc.xml</param-value>
    </init-param>
  </servlet>
  <servlet-mapping>
    <servlet-name>DispatcherServlet</servlet-name>
    <url-pattern>/</url-pattern>
  </servlet-mapping>


</web-app>
1.4.2 spring-mvc的配置
<?xml version="1.0" encoding="UTF-8"?>
<beans
       xmlns="http://www.springframework.org/schema/beans"
       xmlns:mvc="http://www.springframework.org/schema/mvc"
       xmlns:context="http://www.springframework.org/schema/context"
       xmlns:xsi="http://www.w3.org/2001/XMLSchema-instance"
       xsi:schemaLocation="
       http://www.springframework.org/schema/beans http://www.springframework.org/schema/beans/spring-beans.xsd
       http://www.springframework.org/schema/mvc http://www.springframework.org/schema/mvc/spring-mvc.xsd
       http://www.springframework.org/schema/context http://www.springframework.org/schema/context/spring-context.xsd
">

    <!--开启spring-mvc的注解驱动-->
    <mvc:annotation-driven/>

    <!--开启spring-mvc的有关类的扫描-->
    <context:component-scan base-package="com.ssm.cotroller"/>

</beans>
1.5 其他(数据格式的统一、自定义异常)
1.5.1 数据格式的统一
1、分析
之所以要实现返回给前端的数据格式要进行统一操作,是因为这样操作方便前台去更好的了解这条数据是个啥,该在哪里被使用,也是由于后台返回的数据格式,多种多样,如果不进行统一操作,前台很难理解数据是干啥,例如当莫一单个数据,或者对象操作成功,返回的都是true,前台就不会知道那个是那个了
2、操作
		1、首先确定该如何统一数据格式
		 java中对统一数据常用的是,将需要的数据封装为一个实体类,分别给予getter(),setter()方法;
		 2、然后确定实体类应该有的属性
		 在本次demo中,实体类中应该具有的属性应该包括有返回操作给果编码,操作给果数据,操作后响应的消息
		 实体类的实现:
package com.ssm.cotroller.dealData;

/**
 * @description:
 * @author: Sw_Ljb
 * @PACKAGE_NAME:com.ssm.cotroller.dealData
 * @time: 2022/6/24 下午3:59
 * @version: 1.0
 */

public class Result {

    //结果编码
    private Integer code;
    //结果数据
    private Object object;
    //结果相依消息
    private String message;

    public Result(Integer code) {
        this.code = code;
    }

    public Result(Integer code, Object object) {
        this.code = code;
        this.object = object;
    }

    public Result(Integer code, Object object, String message) {
        this.code = code;
        this.object = object;
        this.message = message;
    }

    public Integer getCode() {
        return code;
    }

    public void setCode(Integer code) {
        this.code = code;
    }

    public Object getObject() {
        return object;
    }

    public void setObject(Object object) {
        this.object = object;
    }

    public String getMessage() {
        return message;
    }

    public void setMessage(String message) {
        this.message = message;
    }
}
		 3、	操作给果编码的再封装,方便后期运维
		 code再封装
package com.ssm.entity;

/**
 * @description:
 * @author: Sw_Ljb
 * @PACKAGE_NAME:com.ssm.entity
 * @time: 2022/6/24 下午4:03
 * @version: 1.0
 */

public class Code {
    //操作结果的编码
    //成功
    public static final Integer SAVE_OK=20011;
    public static final Integer DELETE_OK=20021;
    public static final Integer MODIFY_OK=20031;
    public static final Integer QUERY_OK=20041;

    public static final Integer SAVE_ERR=20010;
    public static final Integer DELETE_ERR=20020;
    public static final Integer MODIFY_ERR=20030;
    public static final Integer QUERY_ERR=20040;


    //系统错误的编码

    //操作权限的编码

    //检验结果的编码
}
1.5.2 自定义异常的实现
1.5.2.1 业务层异常的事项与优化
package com.ssm.Exception;

/**
 * @description:
 * @author: Sw_Ljb
 * @PACKAGE_NAME:com.ssm.Exception
 * @time: 2022/6/24 下午4:20
 * @version: 1.0
 */

public class BusinessException extends RuntimeException{

    private Integer code;

    public Integer getCode() {
        return code;
    }

    public void setCode(Integer code) {
        this.code = code;
    }

    public BusinessException(Integer code) {
        this.code = code;
    }

    public BusinessException(Integer code,String message) {
        super(message);
        this.code = code;
    }

    public BusinessException(Integer code,String message, Throwable cause) {
        super(message, cause);
        this.code = code;
    }

    public BusinessException(Integer code,Throwable cause) {
        super(cause);
        this.code = code;
    }

    public BusinessException(Integer code,String message, Throwable cause, boolean enableSuppression, boolean writableStackTrace) {
        super(message, cause, enableSuppression, writableStackTrace);
        this.code = code;
    }
}
	首先让该异常继承RuntimeException然后重写之中的方法,并进行对应的优化,在这个做的优化是,在异常的之中定义一个code属性,然后在每个方法参数中加上一个code,然后进行赋值操作,
	实现使用:
@GetMapping("/query/{uuid}")
    public Result get(@PathVariable("uuid") Integer uuid){
        User user = userService.get(uuid);
        if (uuid>=10)throw new BusinessException(QUERY_ERR,"查询出错啦,请重试!!");
        if (null!=user){
            return new Result(QUERY_OK,user);
        }
        return new Result(QUERY_ERR);
    }
二、SSM的Anno的实现
分析:所谓的注解实现,就是对在原有的基于XML配置文件的实现,将有关spring的xml配置文件用spring的配置类代替,而关于web.xml也由一个servlet初始化容器配置类代替;
1、对applicationContext.xml的替换
1、1 该配置文件的JDBC配置
package com.ssm.config;

import com.alibaba.druid.pool.DruidDataSource;
import org.springframework.beans.factory.annotation.Value;
import org.springframework.context.annotation.Bean;
import org.springframework.context.annotation.Configuration;

import javax.sql.DataSource;

/**
 * @description:jdbc的配置类
 * @author: Sw_Ljb
 * @PACKAGE_NAME:com.ssm.config
 * @time: 2022/6/24 下午5:37
 * @version: 1.0
 */

public class springContextJDBCConfig {

    @Value("${driverClassName}")
    private String driver;

    @Value("${url}")
    private String url;

    @Value("${username}")
    private String username;

    @Value("${password}")
    private String password;

    //得到一个datasource
    定义dataSource的bean,等同于<bean id="dataSource" class="com.alibaba.druid.pool.DruidDataSource">
    //    @Bean("dataSource")
    @Bean(value = "dataSource")
    public DataSource getDataSourceTransactionManager(){
        DruidDataSource druidDataSource = new DruidDataSource();
        System.out.println(driver);
        druidDataSource.setDriverClassName(driver);
        druidDataSource.setUrl(url);
        druidDataSource.setUsername(username);
        druidDataSource.setPassword(password);
        return druidDataSource;
    }
}
1、2 该配置文件的Mybatis配置
package com.ssm.config;

import com.github.pagehelper.PageInterceptor;
import org.apache.ibatis.plugin.Interceptor;
import org.mybatis.spring.SqlSessionFactoryBean;
import org.mybatis.spring.mapper.MapperScannerConfigurer;
import org.springframework.beans.factory.annotation.Autowired;
import org.springframework.context.annotation.Bean;
import org.springframework.context.annotation.Configuration;

import javax.sql.DataSource;
import java.util.Properties;

/**
 * @description:springmybatis的配置类
 * @author: Sw_Ljb
 * @PACKAGE_NAME:com.ssm.config
 * @time: 2022/6/24 下午6:57
 * @version: 1.0
 */


public class springContextMybatisConfig {

    /**
     * 自动注入数据源 拦截器(分页需要)给spring ==》SqlSessionFactoryBean的创建权
     * @param dataSource
     * @param interceptor
     * @return
     */
    @Bean
    public SqlSessionFactoryBean getSqlSessionFactoryBean(@Autowired DataSource dataSource, @Autowired Interceptor interceptor){
        SqlSessionFactoryBean sessionFactoryBean = new SqlSessionFactoryBean();
        sessionFactoryBean.setDataSource(dataSource);
        sessionFactoryBean.setPlugins(interceptor);
        return sessionFactoryBean;
    }


    /**
     *  配置mybatis扫描包mybatis的映射的扫描
     * @return
     */
    @Bean
    public MapperScannerConfigurer getMapperScannerConfigurer(){
        MapperScannerConfigurer mapperScannerConfigurer = new MapperScannerConfigurer();
        mapperScannerConfigurer.setBasePackage("com.ssm.mapper");
        return mapperScannerConfigurer;
    }


    /**
     * 分页插件的分离配置,并作为bean给spring管理
     * @return
     */
    @Bean
    public Interceptor getInterceptor(){
        Interceptor interceptor = new PageInterceptor();
        Properties prop = new Properties();
        prop.setProperty("helperDialect","mysql");
        prop.setProperty("reasonable","true");
        interceptor.setProperties(prop);
        return interceptor;
    }
}
1、3 整合
package com.ssm.config;


import org.springframework.beans.factory.annotation.Autowired;
import org.springframework.context.annotation.*;
import org.springframework.jdbc.datasource.DataSourceTransactionManager;
import org.springframework.stereotype.Controller;
import org.springframework.transaction.annotation.EnableTransactionManagement;

import javax.sql.DataSource;

/**
 * @description:spring的配置类
 * @author: Sw_Ljb
 * @PACKAGE_NAME:com.ssm.cotroller
 * @time: 2022/6/24 下午5:35
 * @version: 1.0
 */

@Configuration
//等同于<context:exclude-filter type="annotation" expression="org.springframework.stereotype.Controller"/>
@ComponentScan(value = "com.ssm",excludeFilters = @ComponentScan.Filter(type = FilterType.ANNOTATION,classes = {Controller.class}))
//加载外部文件
//@PropertySource("classpath:jdbc.properties")
@PropertySource("classpath:jdbc.properties")

//开始注解的事务扫描 如果名为transactionManager 则默认id为transactionManager
@EnableTransactionManagement
@Import({springContextJDBCConfig.class,springContextMybatisConfig.class})
public class springContextConfig {


    @Bean(value = "transactionManager")
    public DataSourceTransactionManager getDataSourceTransactionManager(@Autowired DataSource dataSource){
        DataSourceTransactionManager dstm = new DataSourceTransactionManager();
        dstm.setDataSource(dataSource);
        return dstm;
    }


}
2、对spring-mvc.xml的替换
package com.ssm.config;

import org.springframework.context.annotation.ComponentScan;
import org.springframework.context.annotation.Configuration;
import org.springframework.web.servlet.config.annotation.EnableWebMvc;

/**
 * @description:
 * @author: Sw_Ljb
 * @PACKAGE_NAME:com.ssm.config
 * @time: 2022/6/24 下午7:24
 * @version: 1.0
 */

@Configuration
@ComponentScan(basePackages = "com.ssm.cotroller")
@EnableWebMvc
public class springMVCConfig {
}
3、对web.xml的替换
package com.ssm.config;

import org.springframework.web.context.WebApplicationContext;
import org.springframework.web.context.support.AnnotationConfigWebApplicationContext;
import org.springframework.web.filter.CharacterEncodingFilter;
import org.springframework.web.servlet.support.AbstractDispatcherServletInitializer;

import javax.servlet.DispatcherType;
import javax.servlet.FilterRegistration;
import javax.servlet.ServletContext;
import javax.servlet.ServletException;
import java.util.EnumSet;

/**
 * @description:
 * @author: Sw_Ljb
 * @PACKAGE_NAME:com.ssm.config
 * @time: 2022/6/24 下午7:27
 * @version: 1.0
 */

public class ServletContainsInitConfig extends AbstractDispatcherServletInitializer {

    /**
     * 子容器
     * 创建Servlet容器时,使用注解的方式加载SPRINGMVC配置类中的信息,
     * 并加载成WEB专用的ApplicationContext对象
     * 该对象放入了ServletContext范围,后期在整个WEB容器中可以随时获取调用
     * @return
     */
    @Override
    protected WebApplicationContext createServletApplicationContext() {
        AnnotationConfigWebApplicationContext acwac = new AnnotationConfigWebApplicationContext();
        acwac.register(springMVCConfig.class);
        return acwac;
    }

    /**
     * 注解配置映射地址方式 服务于SpringMVC的核心控制器DispatcherServlet
     * @return
     */
    @Override
    protected String[] getServletMappings() {
        return new String[]{"/"};
    }

    /**
     * 设置夫容器
     * @return
     */
    @Override
    protected WebApplicationContext createRootApplicationContext() {
        AnnotationConfigWebApplicationContext acwac = new AnnotationConfigWebApplicationContext();
        acwac.register(springContextConfig.class);
        return acwac;
    }

    /**
     * 乱码处理作为过滤器,在servlet容器启动时进行配置,相关内容参看Servlet零配置相关课程
     * @param servletContext
     * @throws ServletException
     */
    @Override
    public void onStartup(ServletContext servletContext) throws ServletException {
        super.onStartup(servletContext);
        //1、创建一个过滤字符集的过滤器
        CharacterEncodingFilter cef = new CharacterEncodingFilter();
        //2、设置编码格式
        cef.setEncoding("UTF-8");
        //3、添加到容器(添加到域对象中)
        FilterRegistration.Dynamic registration = servletContext.addFilter("characterEncodingFilter", cef);
        //4、添加映射
        registration.addMappingForUrlPatterns(EnumSet.of(DispatcherType.REQUEST,DispatcherType.FORWARD,DispatcherType.INCLUDE),false,"/*");
    }
}


 11万+
11万+


 被折叠的 条评论
为什么被折叠?
被折叠的 条评论
为什么被折叠?
 到【灌水乐园】发言


