


统一配置中心设置
config server端,新建config项目


git新建SpringCloud-Config项目和client1-dev.yml文件,并将client1项目的配置复制到文件中

启动类添加注解

@EnableDiscoveryClient
@EnableConfigServer
yml文件添加配置git配置,url项目路径,并添加用户名密码,以及配置basedir用于存储查看文件

启动项目测试

config server端大功告成。
client1,client2项目改造统一配置中心
pom添加配置中心客户端依赖
<dependency>
    <groupId>org.springframework.cloud</groupId>
    <artifactId>spring-cloud-config-client</artifactId>
    <version>2.1.4.RELEASE</version>
</dependency>
修改application.yml文件名为bootstrap.yml文件名,并改相应配置内容

spring:
  application:
    name: client1
  cloud:
    config:
      discovery:
        enabled: true
        service-id: CONFIG
      profile: dev
通过name和profile对应git文件名client1-dev,以及service-id对应注册中心的config的名称,即可。
测试结果

正常访问
springcloud bus实现配置自动刷新
rabbitMQ下载安装
Rabblit官网地址:http://www.rabbitmq.com/
Erlang地址:https://www.erlang-solutions.com/resources/download.html
安装成功后,cmd进入rabbitMQ安装目录下执行 rabbitmq-plugins enable rabbitmq_management

页面请求http://localhost:15672/#/ 账密都是guest

github上的client1-dev.yml文件添加 env属性做测试

配置中心和客户端添加bus依赖
<dependency>
    <groupId>org.springframework.cloud</groupId>
    <artifactId>spring-cloud-starter-bus-amqp</artifactId>
</dependency>
配置中心和客户端的pom文件添加配置暴露所有接口
management:
  endpoints:
    web:
      exposure:
        include: "*"
新建一个ConfigBusController类,测试配置是否刷新,添加RefreshScope注解
import org.springframework.beans.factory.annotation.Value;
import org.springframework.cloud.context.config.annotation.RefreshScope;
import org.springframework.web.bind.annotation.RequestMapping;
import org.springframework.web.bind.annotation.RequestMethod;
import org.springframework.web.bind.annotation.RestController;

@RestController
@RequestMapping("env")
@RefreshScope
public class ConfigBusController {

    @Value("${env}")
    private String env;

    @RequestMapping(value = "print", method = RequestMethod.GET)
    public String getEnv(){
        return env;
    }
}
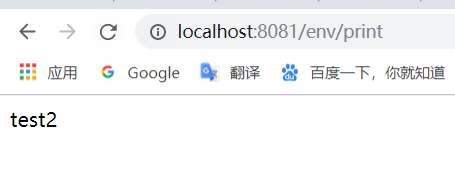
页面测试
每次修改git上的配置,要通过触发/actuator/bus-refresh接口进行刷新,这里我使用的是postMan

发送后MQ变化

此时,git更新的配置已经更新了。
使用webHooks自动更新

Payload URL地址为:项目地址+monitor
Content type选择application/json
SpringCloud+vue+element-ui+docker前后端项目实践到部署(六)
SpringCloud+vue+element-ui+docker前后端项目实践到部署(五)
SpringCloud+vue+element-ui+docker前后端项目实践到部署(四)


 1135
1135


 被折叠的 条评论
为什么被折叠?
被折叠的 条评论
为什么被折叠?
 到【灌水乐园】发言


