


目录
6,在consumer-ribbon中使用断路器Hystrix
7,在consumer-feign中使用断路器Hystrix
1,创建父工程
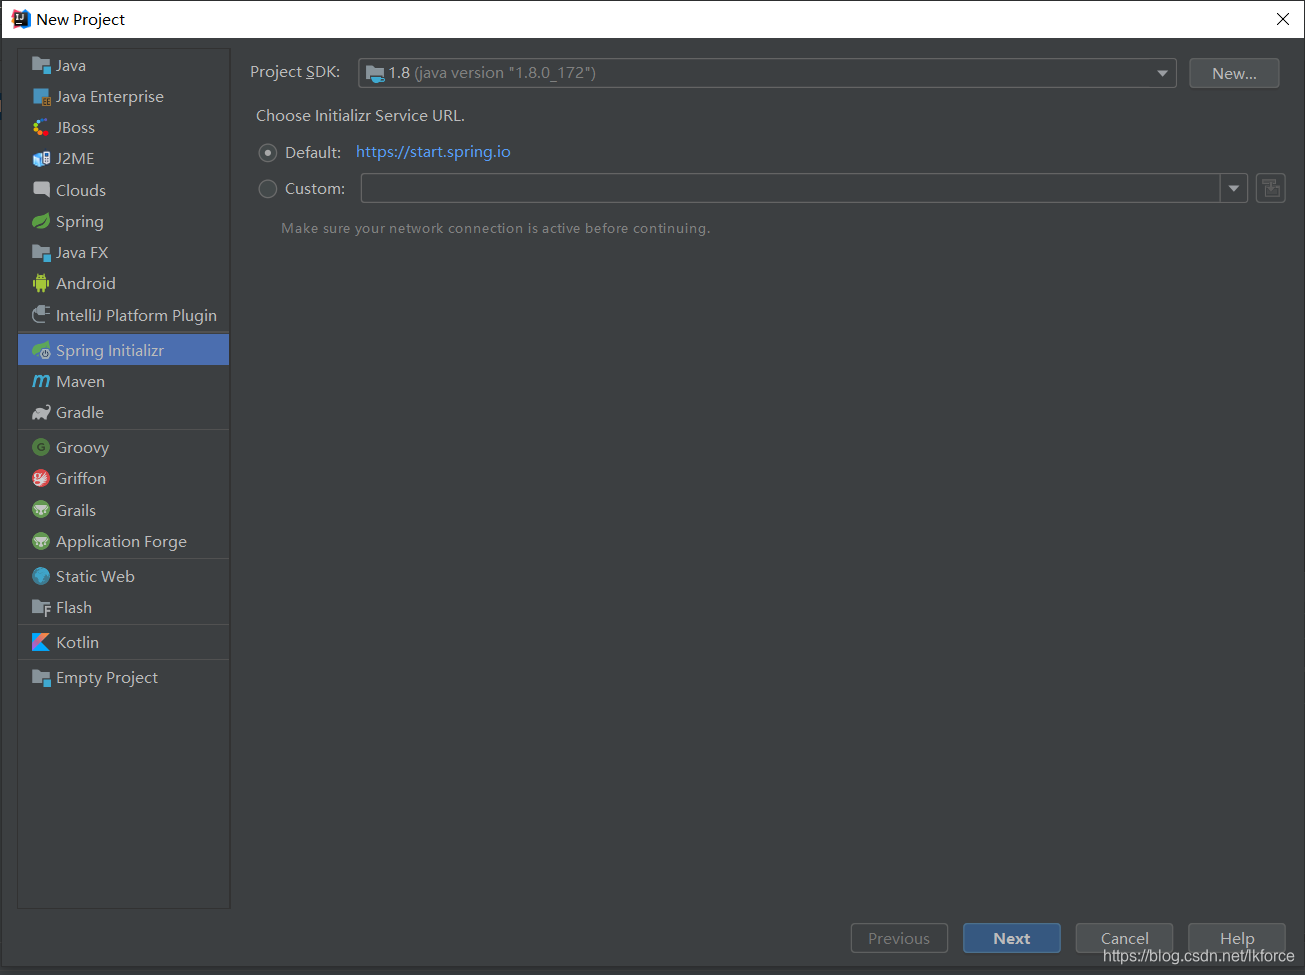
菜单栏File->new->project,选择Java就可以。
一路next,填好工程名字,选好地址,最后finish。
2,创建euraka-server
Euraka是SpringCloud的注册中心,生产者和消费者都要在注册中心注册。
在工程上右键,新建module,选择Srping Initializr。
右侧Choose Initializr Service URL选择Default就可以,next。
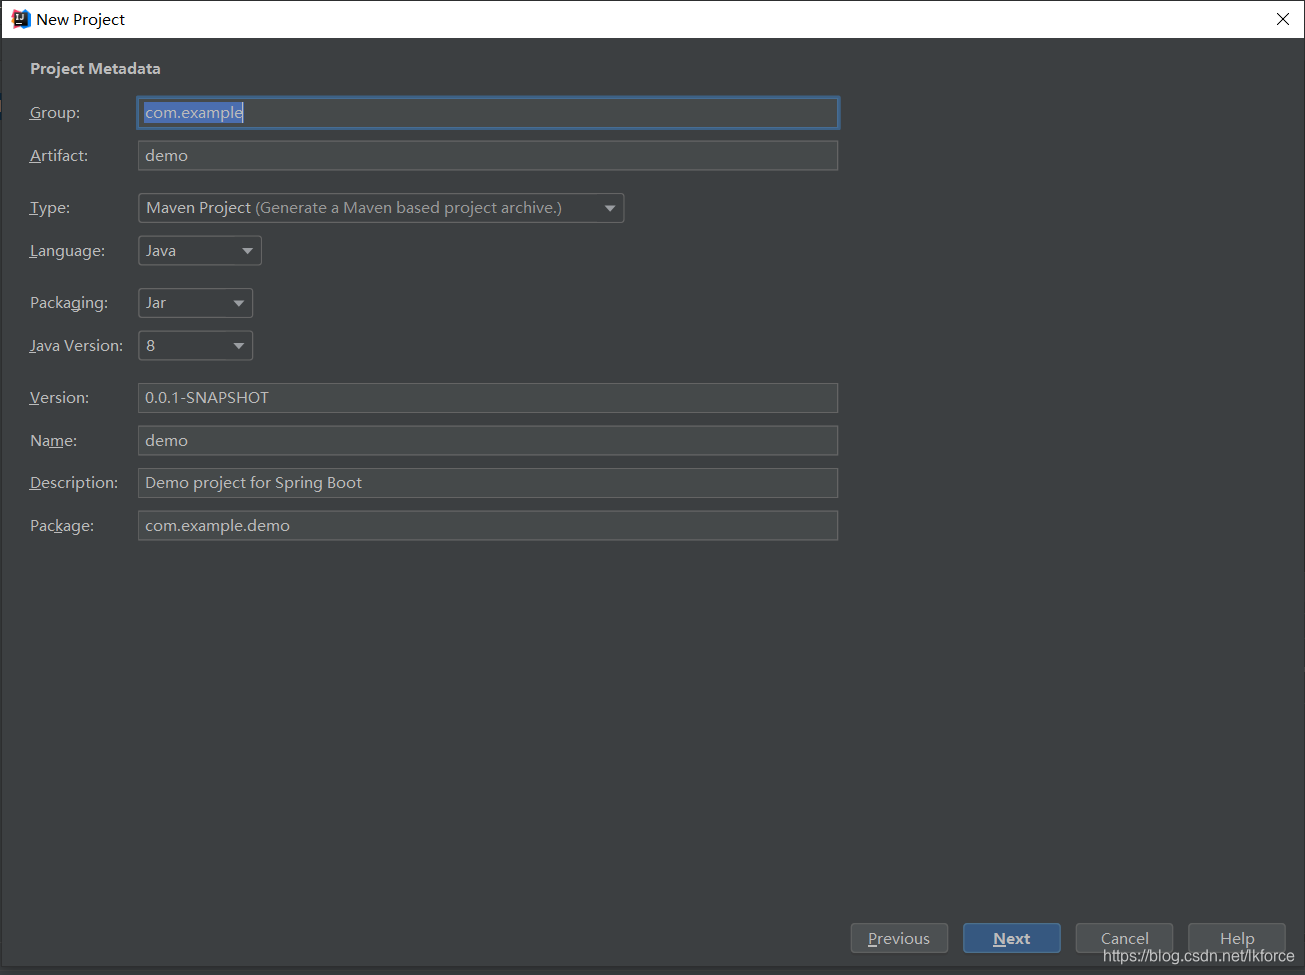
填好Project信息,我填的:
Group:com.lkforce.cloud
Artifact:eureka-server
Description:spring cloud学习
Package:eureka.server
其他的都默认。
next,左侧选择Spring Cloud Discovery,中间选择Eureka Server。
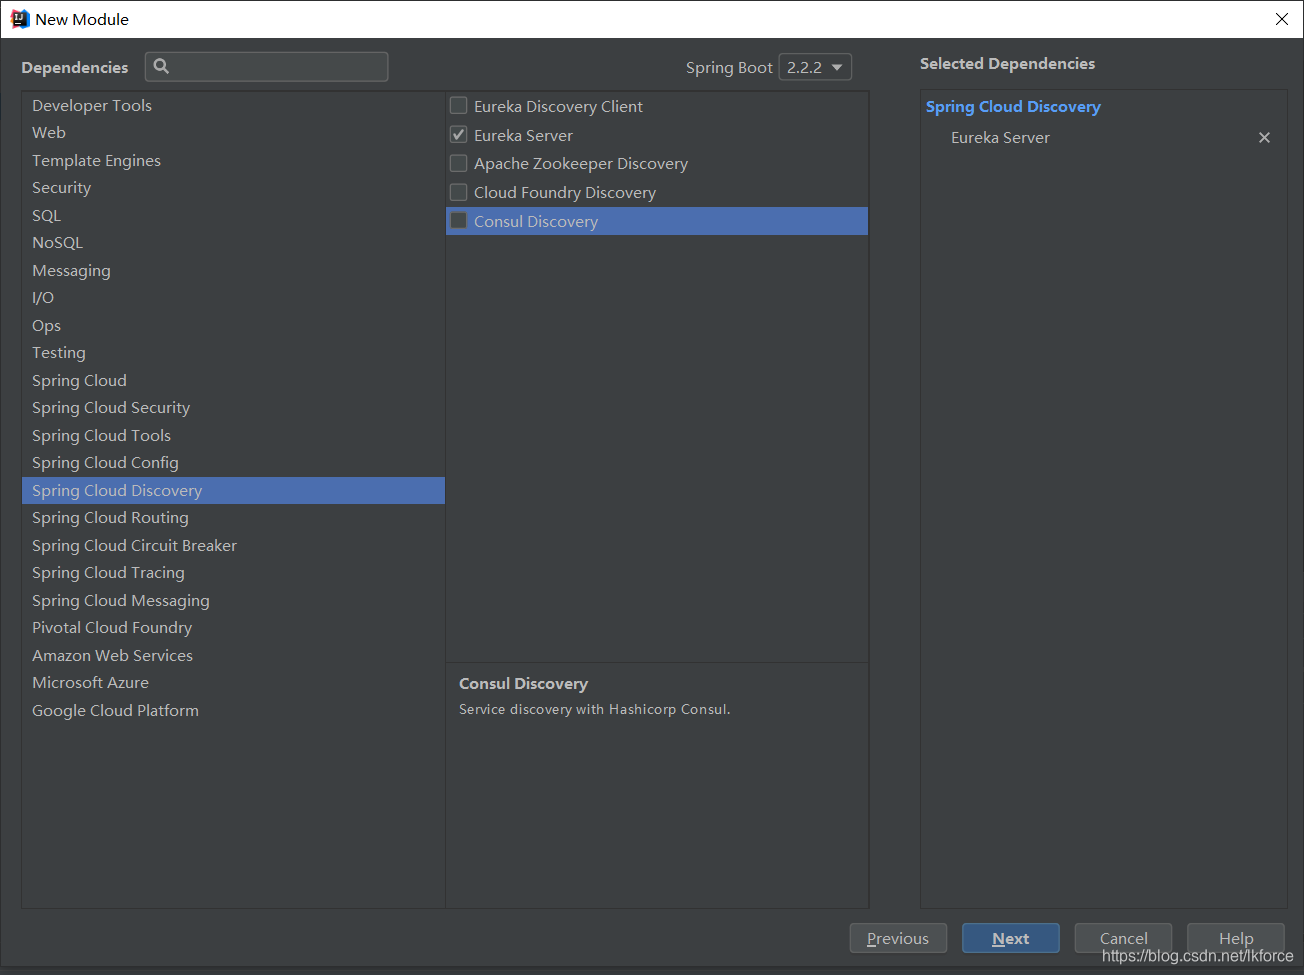
next,填个module名字,finish。
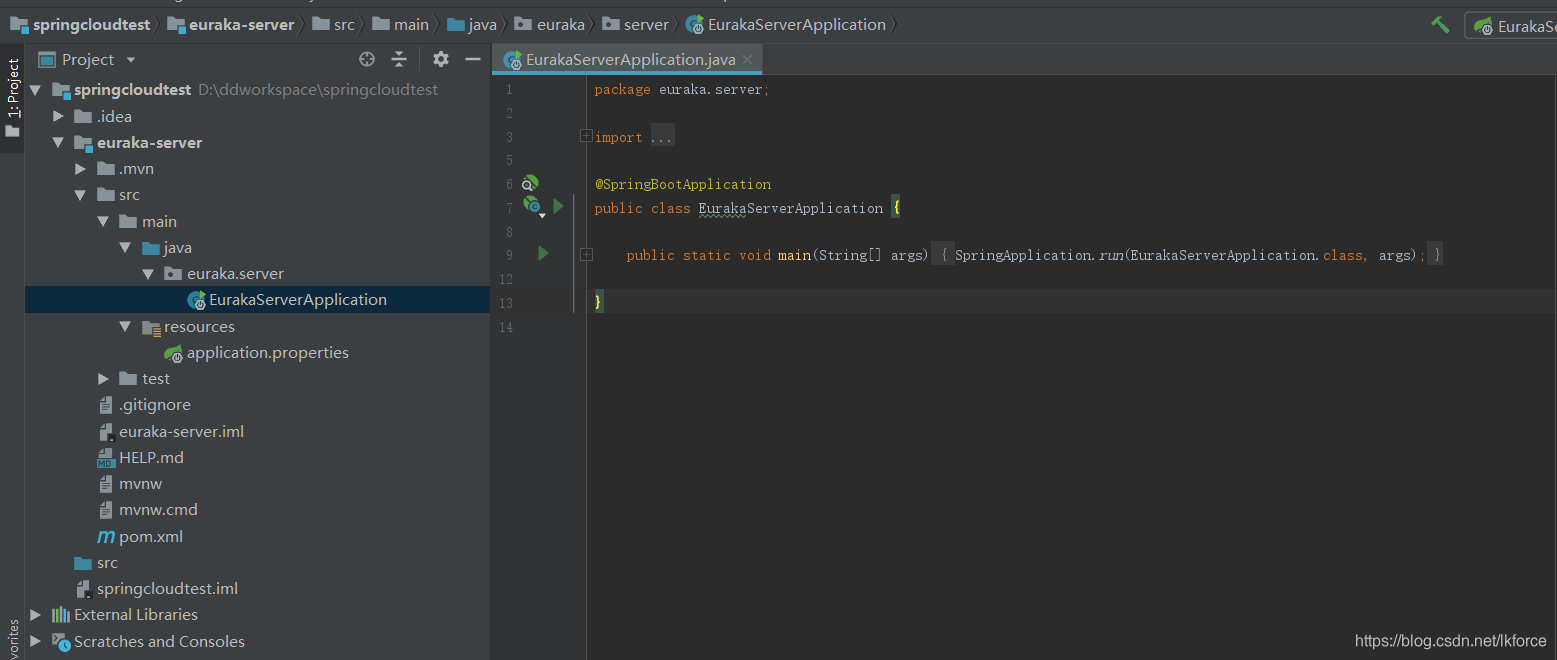
然后就是漫长的创建module和下载jar包的过程,然后我们得到了这样一个module:
改一下配置文件,在application.property里:
server.port: 8761

spring.application.name: eurka-server

eureka.instance.hostname: localhost
eureka.client.registerWithEureka: false
eureka.client.fetchRegistry: false
eureka.client.service-url.defaultZone: http://${eureka.instance.hostname}:${server.port}/eureka/
在启动类前面加上注解@EnableEurekaServer,否则服务启动后无法访问Euraka:
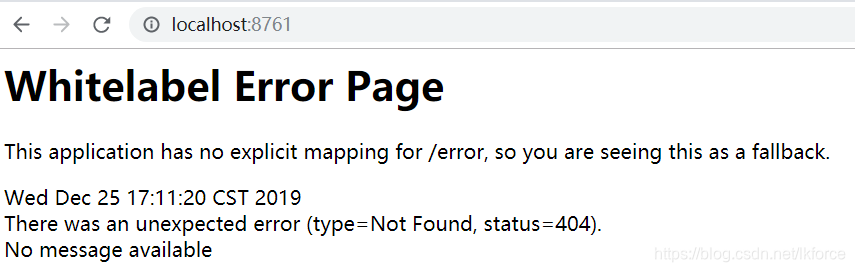
加好注解,启动服务,在地址栏输入http://localhost:8761/,可以看到Eureka服务的界面:
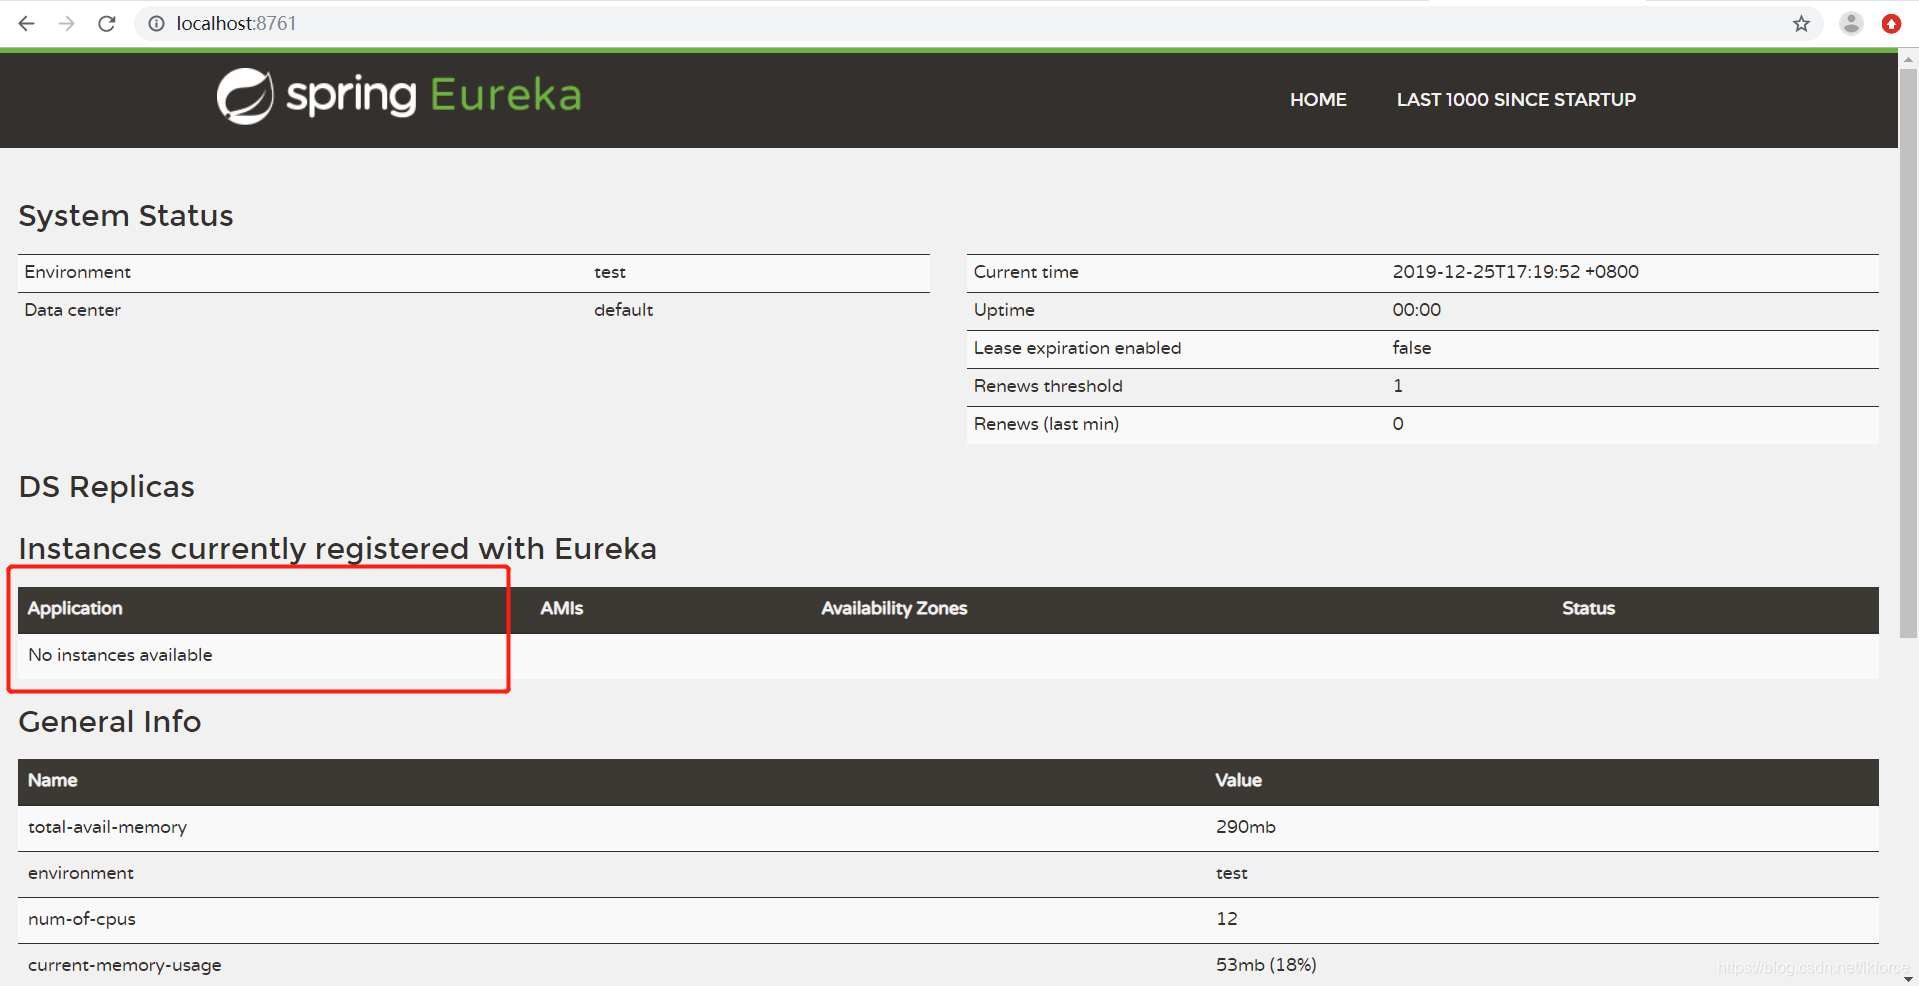
其中红框的部分就是已经注册在Eureka的服务,现在还没有。虽然Eureka本身也是一个服务,但因为之前的配置:
eureka.client.registerWithEureka: false
使得Eureka自己不会把自己注册上去。
3,创建provider
provider是服务的提供者。
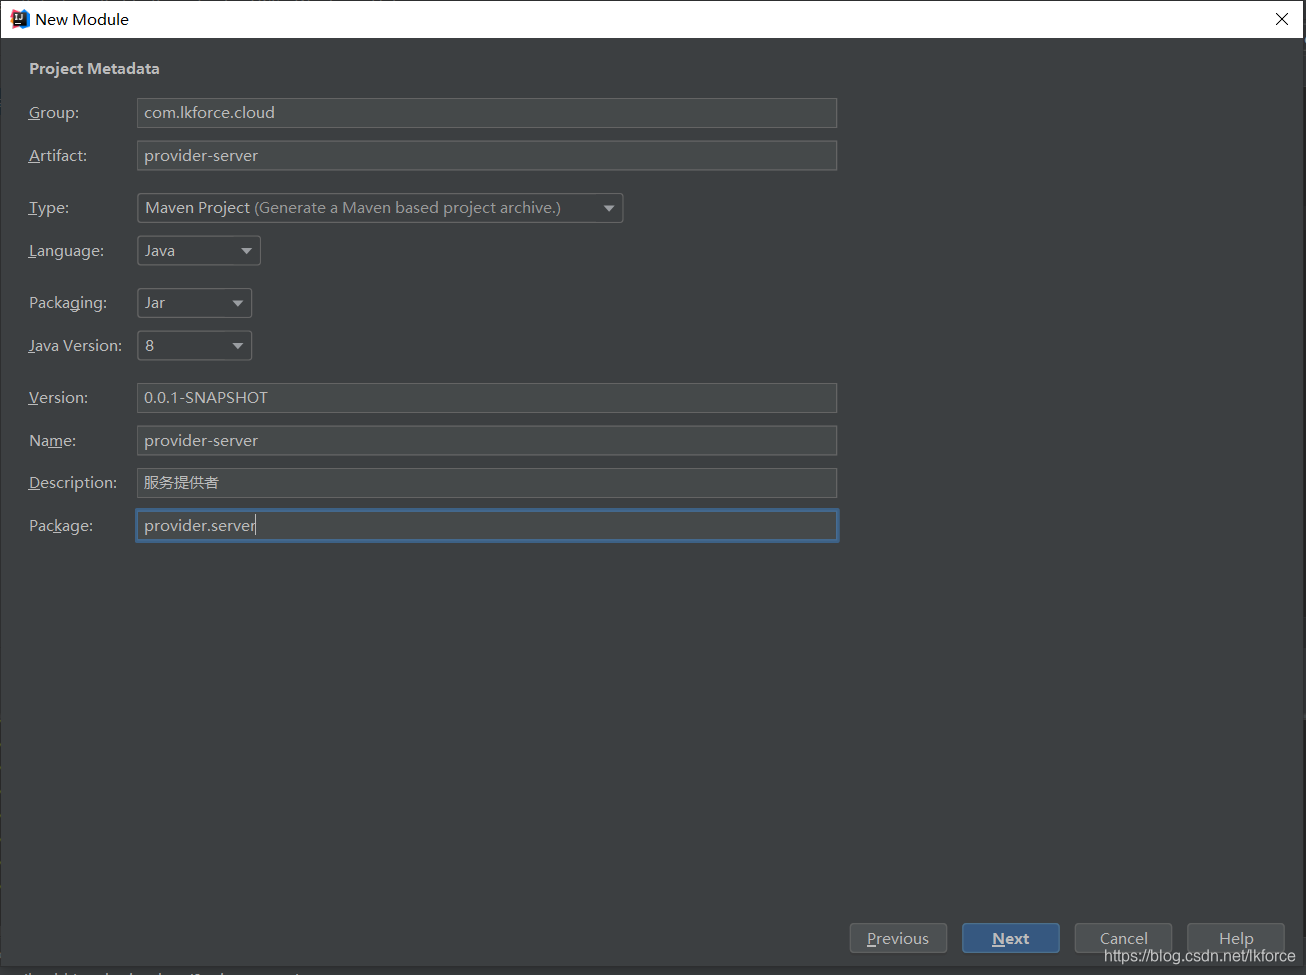
创建一个新的module,还是选择Spring Initializr,Group和前面的eureka-server写成一样的com.lkforce.cloud,Artifact和Name就叫provider-server吧:
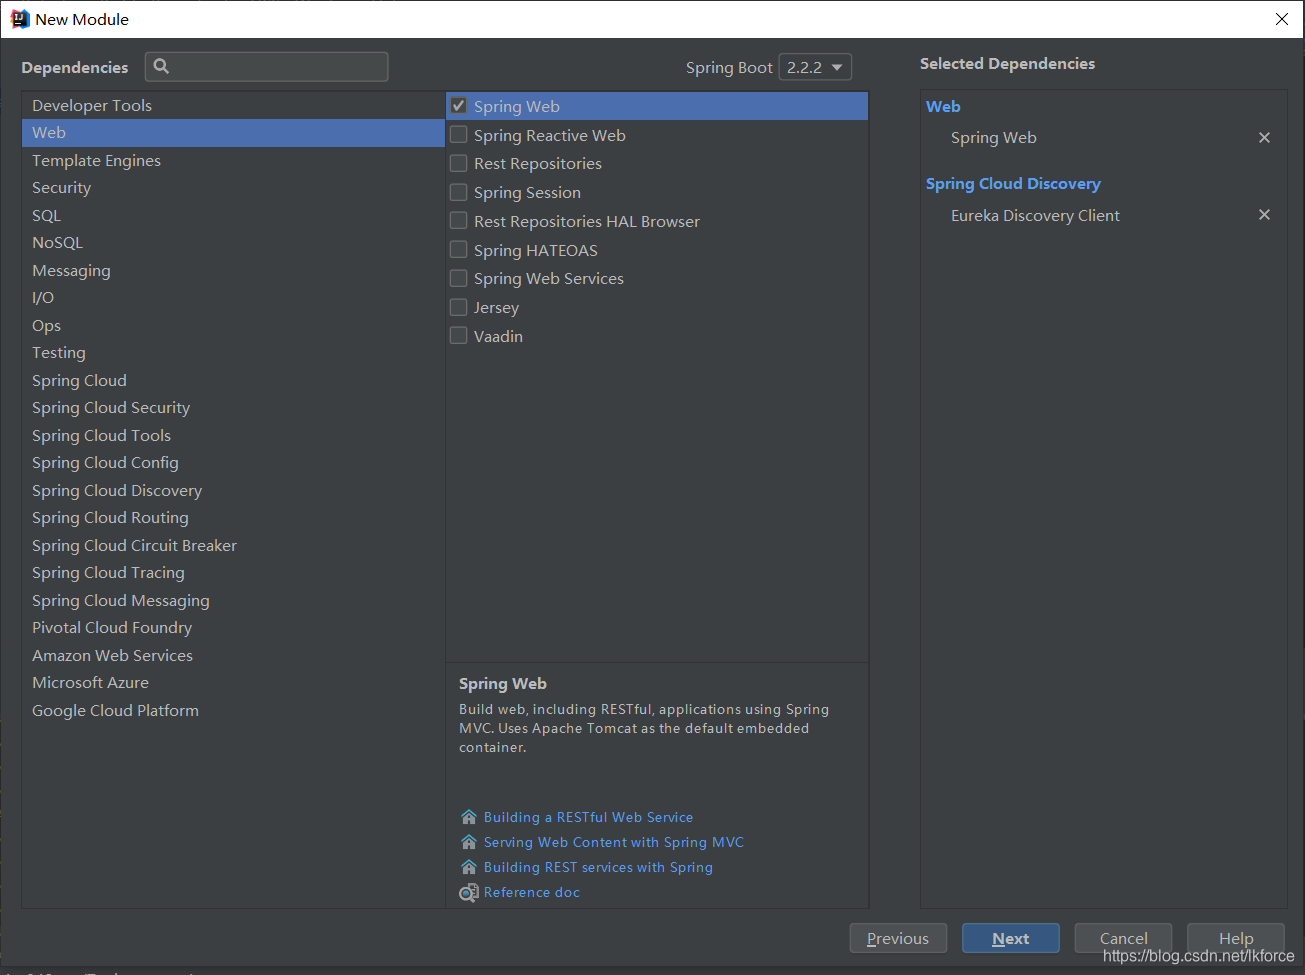
next,左侧还是选择Spring Cloud Discovery,中间选择Eureka Discovery Client,另外,为了提供对外服务,我们还要加上Web中的Spring Web选项:
next直到完成,我们得到了这样的module:
然后依然是改application.properties配置文件:
server.port: 8762

spring.application.name: provider-a

eureka.client.service-url.defaultZone: http://localhost:8761/eureka/
还要记得在启动类前面加注解,这次是@EnableEurekaClient,表示这个其实是一个Eureka的客户端。
这个时候,此客户端中不提供服务,也不会请求其他服务,启动起来之后会立刻关闭。
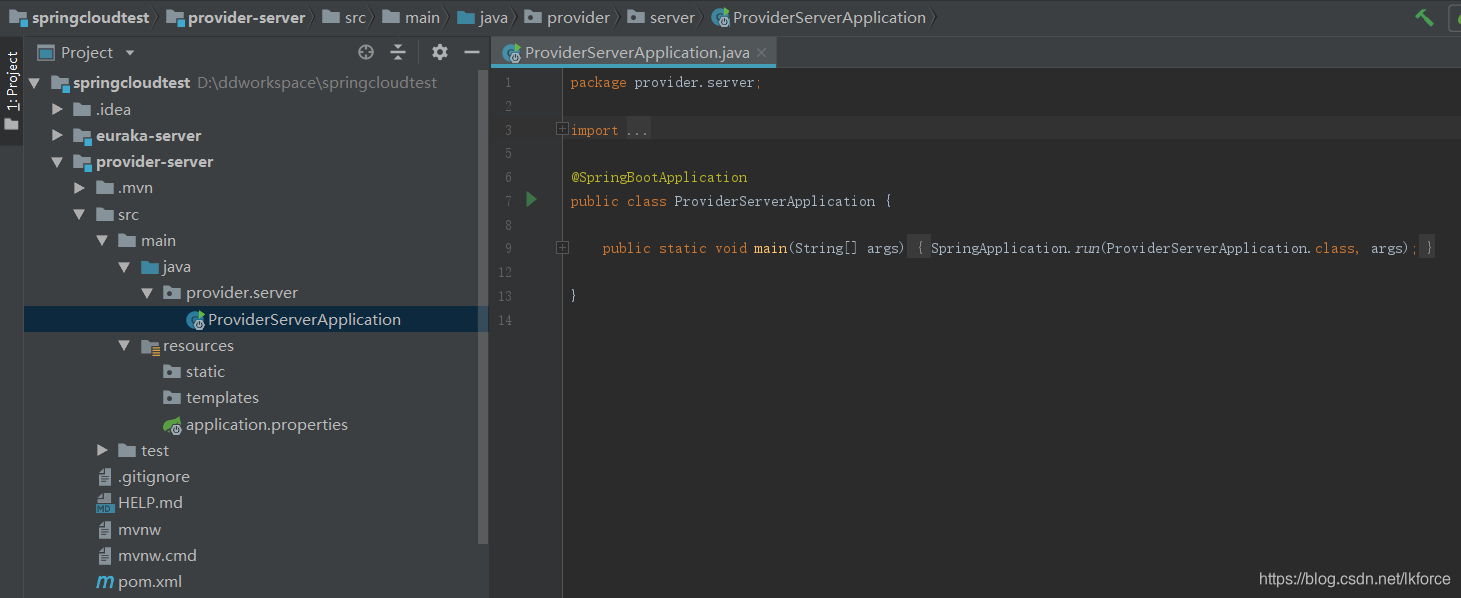
下面创建一个Spring Cloud的Rest接口,然后启动类就成了这样:
package provider.server;

import org.springframework.beans.factory.annotation.Value;
import org.springframework.boot.SpringApplication;
import org.springframework.boot.autoconfigure.SpringBootApplication;
import org.springframework.cloud.netflix.eureka.EnableEurekaClient;
import org.springframework.web.bind.annotation.RequestMapping;
import org.springframework.web.bind.annotation.RequestParam;
import org.springframework.web.bind.annotation.RestController;

@SpringBootApplication
@EnableEurekaClient
@RestController
public class ProviderServerApplication {

    public static void main(String[] args) {
        SpringApplication.run(ProviderServerApplication.class, args);
    }

    @Value("${server.port}")
    String port;

    @RequestMapping("/hi")
    public String home(@RequestParam(value = "name", defaultValue = "this is default value") String name) {
        return "hi " + name + " ,i am from port:" + port;
    }
}注意,要让Rest接口生效,需要添加注解@RestController。
启动服务,再次访问http://localhost:8761/:

出现了刚刚启动的provider服务,Application的名字是配置文件中的:
spring.application.name: provider-a
不过给转成了大写,看起来这个配置大小写不敏感。
4,创建consumer,Ribbon模式
consumer是服务的消费者。
consumer调用provider有两种模式,Ribbon模式和Feign模式,先创建一个Ribbon模式的consumer。
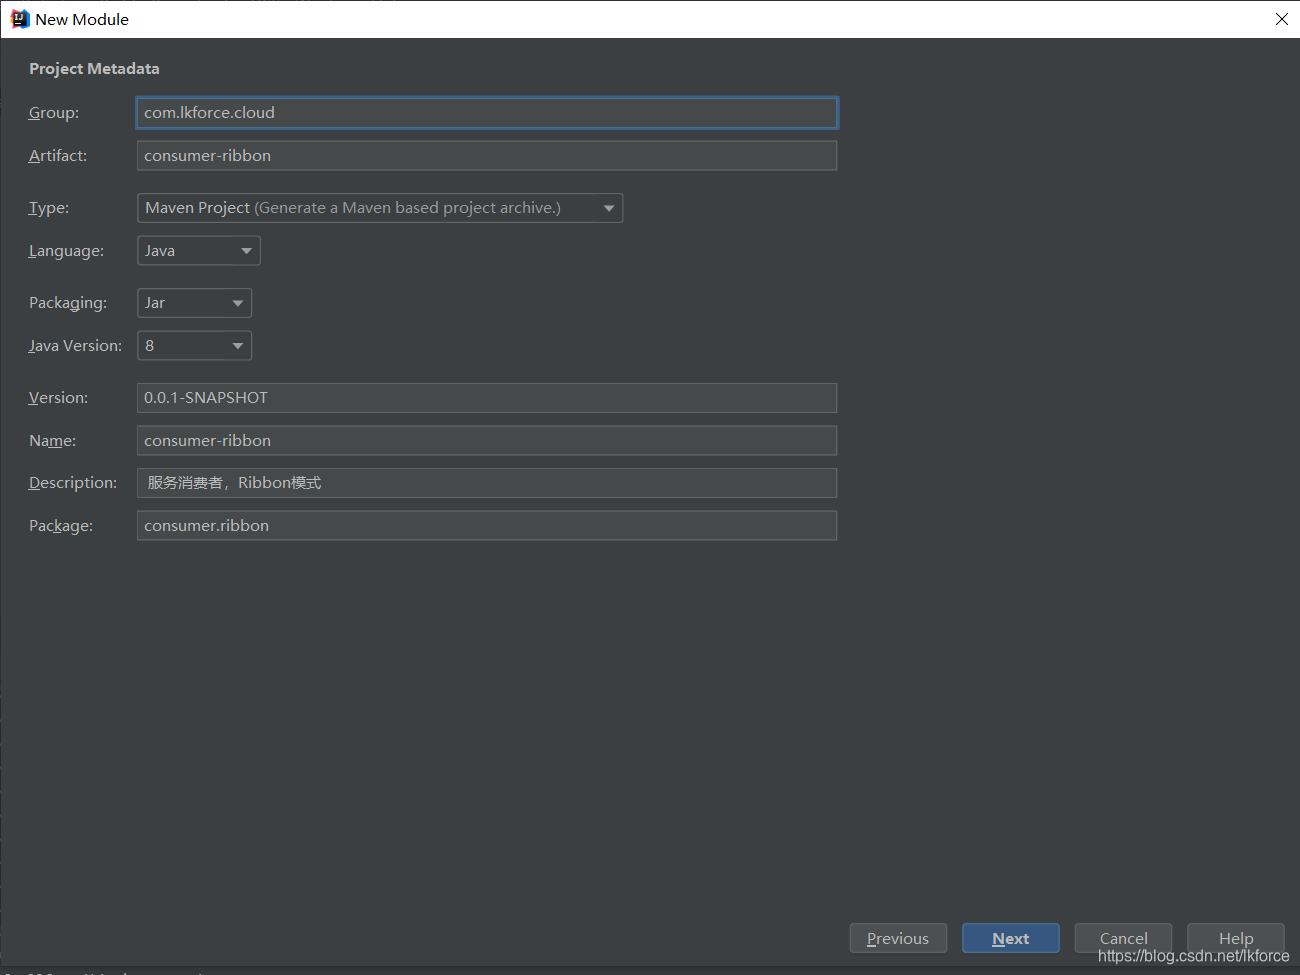
依然是创建module,还是选择Spring Initializr,Group和前面的eureka-server写成一样的com.lkforce.cloud,Artifact和Name就叫consumer-ribbon吧:
next,和provider一样选择Spring Cloud Discovery->Eureka Discovery Client,还有Web->SpringWeb,然后我们得到了这样的module:
照例修改配置文件:
server.port: 8764

spring.application.name: consumer-ribbon

eureka.client.service-url.defaultZone: http://localhost:8761/eureka/
照例在启动类前添加注解:@EnableEurekaClient。
下面创建一个对外接口,并在接口中调用上面provider的接口。
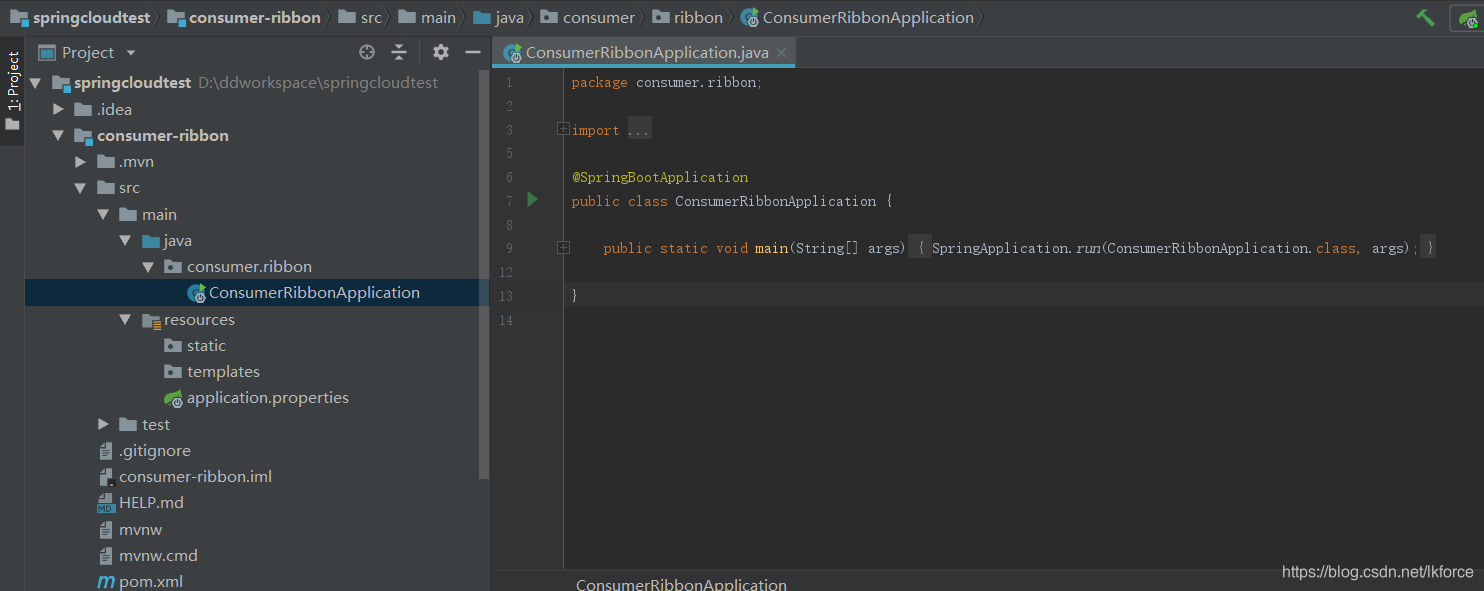
首先我们要有一个RestTemplate的对象,如果写在启动类里,我们的启动类就会变成这样:
package consumer.ribbon;

import org.springframework.boot.SpringApplication;
import org.springframework.boot.autoconfigure.SpringBootApplication;
import org.springframework.cloud.client.loadbalancer.LoadBalanced;
import org.springframework.cloud.netflix.eureka.EnableEurekaClient;
import org.springframework.context.annotation.Bean;
import org.springframework.web.client.RestTemplate;

@SpringBootApplication
@EnableEurekaClient
public class ConsumerRibbonApplication {

    public static void main(String[] args) {
        SpringApplication.run(ConsumerRibbonApplication.class, args);
    }

    @Bean
    @LoadBalanced
    RestTemplate restTemplate() {
        return new RestTemplate();
    }
}
其中@LoadBalanced注解代表开启负载均衡。
创建Service,用来调用provider接口:
package consumer.ribbon;

import org.springframework.beans.factory.annotation.Autowired;
import org.springframework.stereotype.Service;
import org.springframework.web.client.RestTemplate;

@Service
public class RibbonService {

    @Autowired
    RestTemplate restTemplate;

    public String hiService(String name) {
        return restTemplate.getForObject("http://provider-a/hi?name="+name,String.class);
    }
}
注意,这里http后面直接写Application的名字,不是项目名字,别写错了。
创建一个controller,使用这个RibbonService:
package consumer.ribbon;

import org.springframework.beans.factory.annotation.Autowired;
import org.springframework.web.bind.annotation.RequestMapping;
import org.springframework.web.bind.annotation.RequestParam;
import org.springframework.web.bind.annotation.RestController;

@RestController
public class HiController {

    @Autowired
    RibbonService ribbonService;

    @RequestMapping(value = "/hi")
    public String hi(@RequestParam String name) {
        return ribbonService.hiService(name);
    }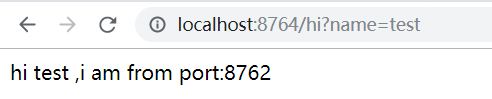
}启动服务,在地址栏输入:http://localhost:8764/hi?name=test,可以看到结果:
5,创建consumer,Feign模式
Feign模式包含Ribbon和Hystrix。
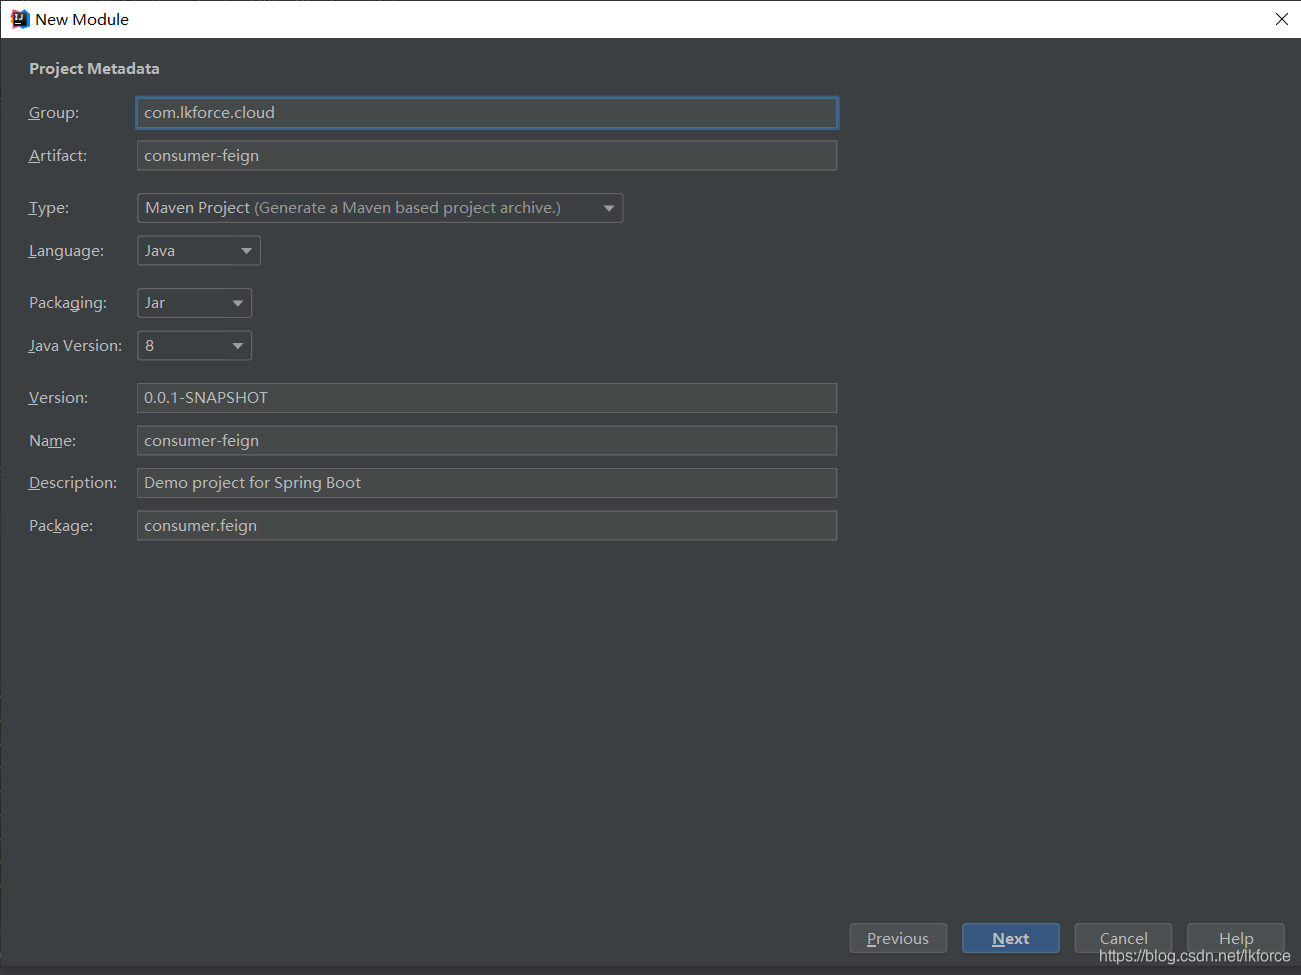
照例创建module,还是选择Spring Initializr,Group和前面的eureka-server写成一样的com.lkforce.cloud,Artifact和Name就叫consumer-feign:
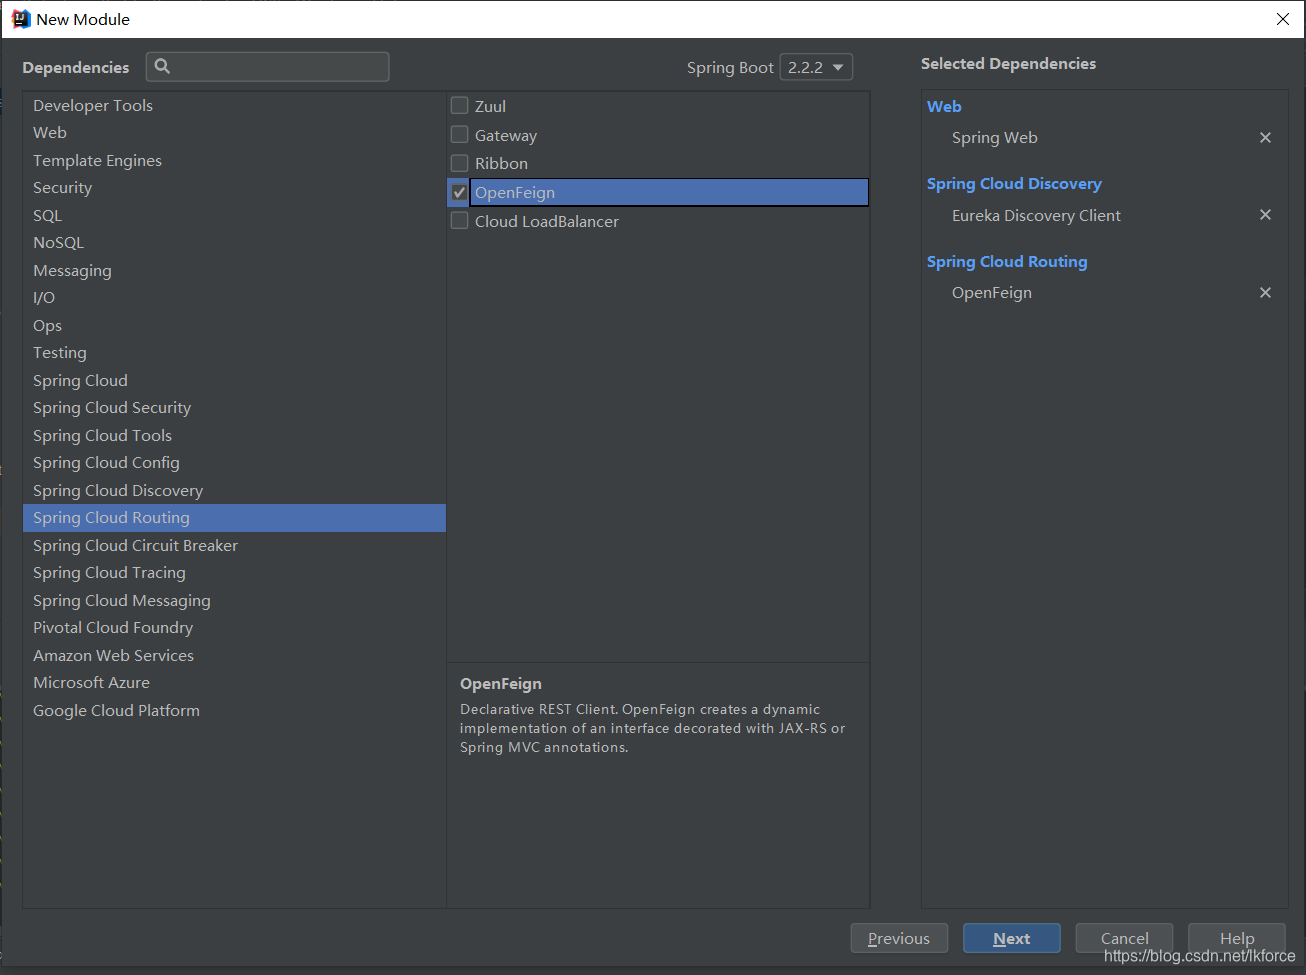
next,除了选择Spring Cloud Discovery->Eureka Discovery Client,还有Web->SpringWeb之外,还需要Spring Cloud Routing下的OpenFeign:
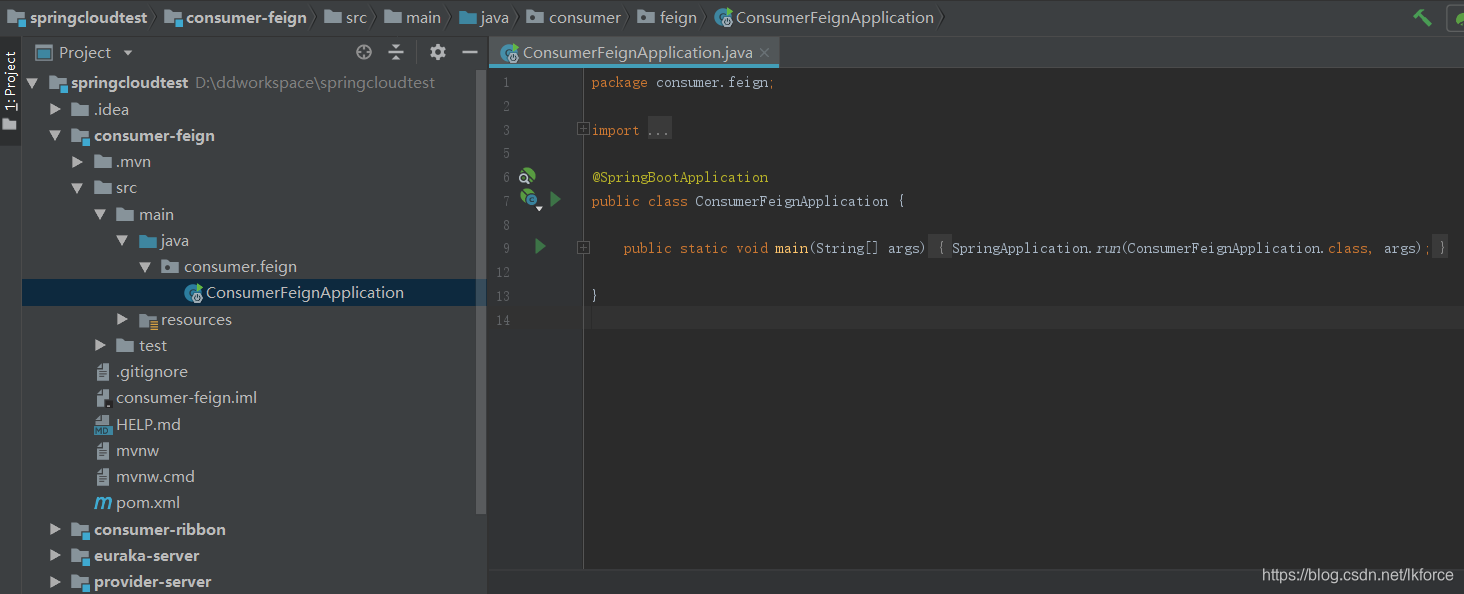
然后我们得到了这样的module:
修改application.property:
server.port: 8765

spring.application.name: consumer-feign

eureka.client.service-url.defaultZone: http://localhost:8761/eureka/
在启动类上加上注解:@EnableEurekaClient和@EnableFeignClients。
下面写一个Service,用来调用provider:
package consumer.feign;

import org.springframework.cloud.openfeign.FeignClient;
import org.springframework.web.bind.annotation.GetMapping;
import org.springframework.web.bind.annotation.RequestParam;

@FeignClient(value = "provider-a")
public interface FeignService {

    @GetMapping("/hi")
    String sayHiFromClientOne(@RequestParam(value = "name") String name);

}
再写一个controller,提供对外接口并调用上面的service:
package consumer.feign;

import org.springframework.beans.factory.annotation.Autowired;
import org.springframework.web.bind.annotation.GetMapping;
import org.springframework.web.bind.annotation.RequestParam;
import org.springframework.web.bind.annotation.RestController;

@RestController
public class HiController {

    @Autowired
    FeignService feignService;

    @GetMapping(value = "/hi")
    public String sayHi(@RequestParam String name) {
        return feignService.hiService( name );
    }

}
不知道为什么IDEA提示我feignService无法被Autowired,但是实际上并不影响编译和运行。
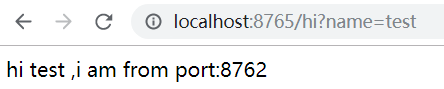
启动服务,在地址栏输入http://localhost:8765/hi?name=test,可以看到结果:
6,在consumer-ribbon中使用断路器Hystrix
断路器Hystrix,作用是在provider被调用失败多次后,断路器打开,consumer再次调用该provider时,执行指定的断路处理方法,可以防止雪崩。
在Ribbon模式使用断路器时,首先向consumer-ribbon的pom文件中加入:
<dependency>
    <groupId>org.springframework.cloud</groupId>
    <artifactId>spring-cloud-starter-netflix-hystrix</artifactId>
</dependency>第二步,启动类添加@EnableHystrix注解。
第三步,给RibbonService的方法前添加@HystrixCommand注解,用来设置断路方法名,并写好断路方法,于是RibbonServiceService变成了这样:
package consumer.ribbon;

import com.netflix.hystrix.contrib.javanica.annotation.HystrixCommand;
import org.springframework.beans.factory.annotation.Autowired;
import org.springframework.stereotype.Service;
import org.springframework.web.client.RestTemplate;

@Service
public class RibbonService {

    @Autowired
    RestTemplate restTemplate;

    @HystrixCommand(fallbackMethod = "hiServiceError")
    public String hiService(String name) {
        return restTemplate.getForObject("http://provider-a/hi?name=" + name, String.class);
    }

    public String hiServiceError(String name) {
        return "hi," + name + ",断路机制启动,hiServiceError";
    }
}创建的注解@HystrixCommand(fallbackMethod = "hiServiceError")代表断路后要执行的方法是hiServiceError方法。
下面启动服务,启动euraka-server,provider-server,consumer-ribbon,在地址栏输入:
http://localhost:8764/hi?name=test
显示的是:
hi test ,i am from port:8762
然后关闭provider-server,再次在地址栏输入:
http://localhost:8764/hi?name=test
显示的是:
hi,test,断路机制启动,hiServiceError
7,在consumer-feign中使用断路器Hystrix
feign模式使用断路器,不用引入其他的jar包。
首先,要在consumer-feign的配置文件中加入:
feign.hystrix.enabled: true
打开断路器。
第二,和consumer-ribbon中配置断路的方式不同,consumer-feign中把断路处理配置在Service类上,在此之前,我们要有一个断路处理类:
package consumer.feign;

import org.springframework.stereotype.Component;

@Component
public class FeignServiceHystric implements FeignService {
    @Override
    public String hiService(String name) {
        return "hi," + name + ",断路机制启动,hiServiceError";
    }
}
这个断路处理类实现了原Service接口,所以要实现原Service中的所有方法,而这些实现的方法就会成为原Service的断路处理方法。
@Component注解别忘了加。
第三,有了断路处理类,下面在原Service上添加配置,于是原Service变成了这样:
package consumer.feign;

import org.springframework.cloud.openfeign.FeignClient;
import org.springframework.web.bind.annotation.GetMapping;
import org.springframework.web.bind.annotation.RequestParam;

@FeignClient(value = "provider-a",fallback = FeignServiceHystric.class)
public interface FeignService {

    @GetMapping("/hi")
    String hiService(@RequestParam(value = "name") String name);

}
在@FeignClient注解里添加的fallback = FeignServiceHystric.class参数,就是指定断路处理类的参数。
下面启动服务,启动euraka-server,provider-server,consumer-feign,在地址栏输入:
http://localhost:8765/hi?name=test
显示的是:
hi test ,i am from port:8762
然后关闭provider-server,再次在地址栏输入:
http://localhost:8765/hi?name=test
显示的是:
hi,test,断路机制启动,hiServiceError
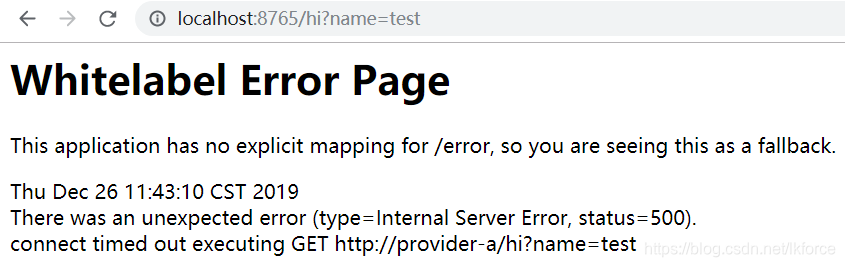
另外,如果配置文件中没有加入feign.hystrix.enabled: true,那么断路器的配置不会生效,请求provider时不会执行断路器处理类的方法,而是会抛出异常:
java.net.SocketTimeoutException: connect timed out
页面呈现的效果则会是这样:
8,创建路由网关 ZUUL
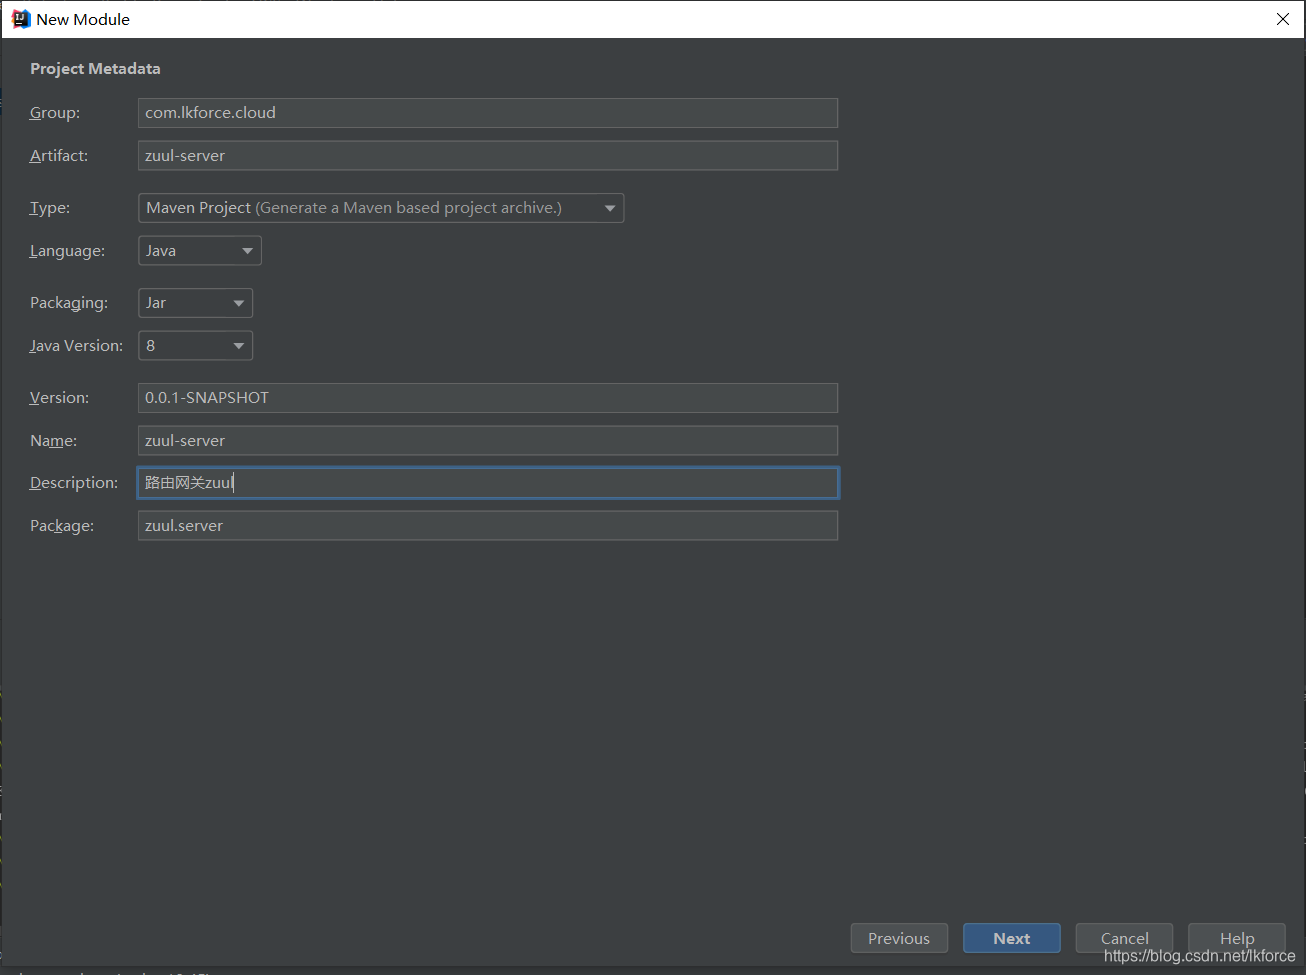
照例创建module,还是选择Spring Initializr,Group和前面的eureka-server写成一样的com.lkforce.cloud,Artifact和Name就叫zuul-server:
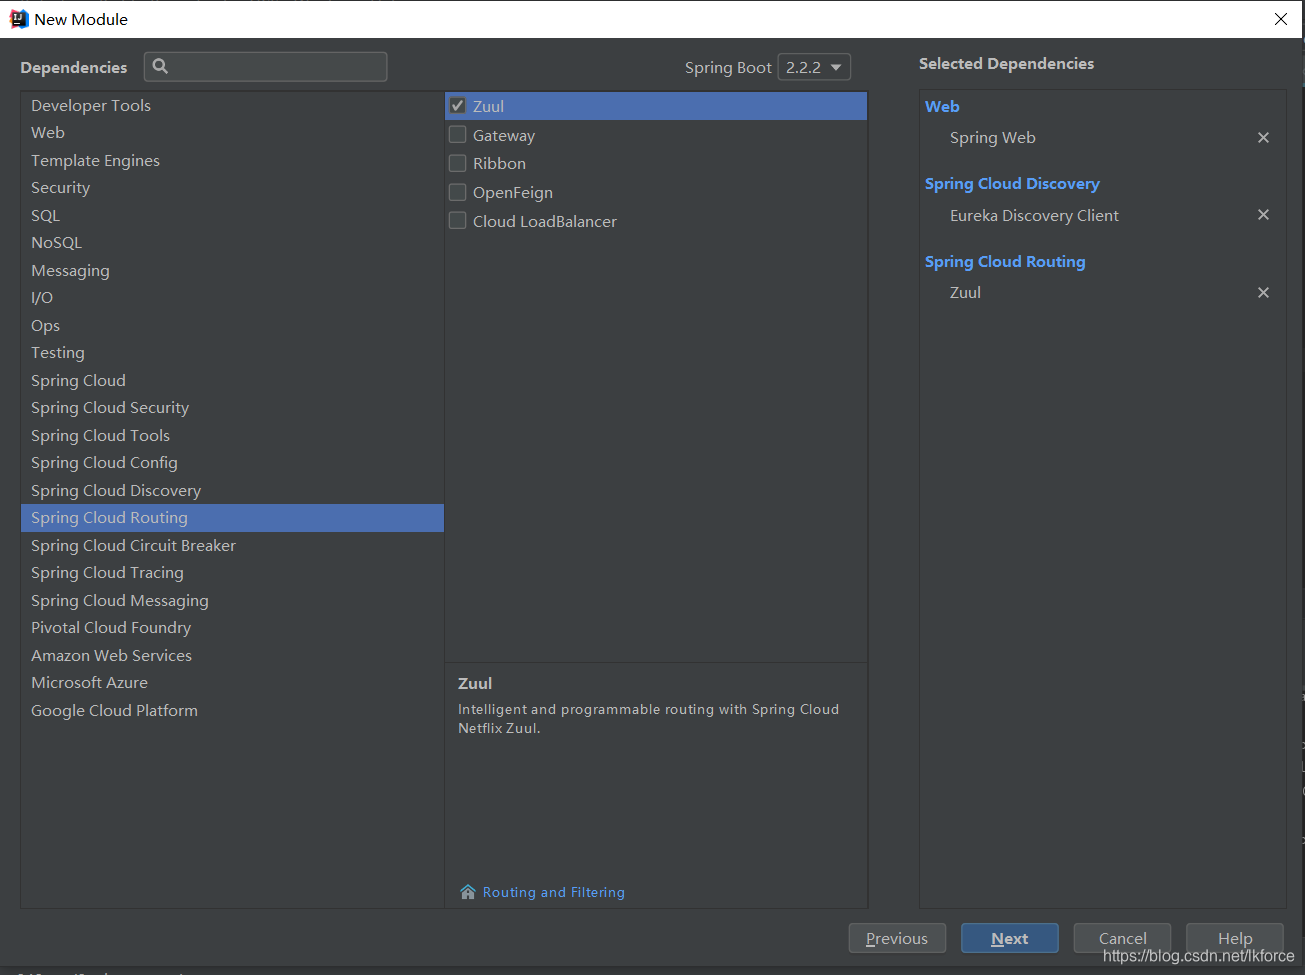
next,除了选择Spring Cloud Discovery->Eureka Discovery Client,还有Web->SpringWeb之外,还需要Spring Cloud Routing下的Zuul:
创建module后,修改application.property:
server.port: 8769

spring.application.name: service-zuul

eureka.client.serviceUrl.defaultZone: http://localhost:8761/eureka/

zuul.routes.api-a.path: /api-a/**
zuul.routes.api-a.service-id: consumer-ribbon
zuul.routes.api-b.path: /api-b/**
zuul.routes.api-b.service-id: consumer-feign
其中zuul.routes就是路由部分
在启动类添加@EnableEurekaClient和@EnableZuulProxy注解
启动服务,在地址栏输入:
http://localhost:8769/api-a/hi?name=test
请求就会转到consumer-ribbon服务的/hi?name=test接口,界面展示:

地址栏输入:
http://localhost:8769/api-b/hi?name=test
请求就会转到consumer-feign服务的/hi?name=test接口,界面展示:

9,在路由网关中创建过滤器
用到的依然是Zuul组件,我们需要定义一个过滤器类,继承ZuulFilter类,比如:
package zuul.server;

import com.netflix.zuul.ZuulFilter;
import com.netflix.zuul.context.RequestContext;
import com.netflix.zuul.exception.ZuulException;
import org.springframework.stereotype.Component;

import javax.servlet.http.HttpServletRequest;
import java.io.IOException;

@Component
public class ThisIsAFilter extends ZuulFilter {

    /**
     * pre 路由之前拦截
     * routing 路由时拦截
     * post 路由后拦截
     * error 发送错误调用
     */
    @Override
    public String filterType() {
        return "pre";
    }

    @Override
    public int filterOrder() {
        return 0;
    }

    /**
     * 是否需要过滤
     *
     * @return true则表示需要过滤
     */
    @Override
    public boolean shouldFilter() {
        RequestContext ctx = RequestContext.getCurrentContext();
        HttpServletRequest request = ctx.getRequest();
        String key = request.getParameter("key");
        if (key != null) {
            return false;
        }
        return true;
    }

    @Override
    public Object run() throws ZuulException {
        RequestContext ctx = RequestContext.getCurrentContext();
        HttpServletRequest request = ctx.getRequest();
        String name = request.getParameter("name");
        if (name.length() > 5) {
            ctx.setSendZuulResponse(false);
            ctx.setResponseStatusCode(401);
            try {
                ctx.getResponse().getWriter().write("error:name.length>5");
            } catch (IOException e) {
                e.printStackTrace();
            }
        }
        return null;
    }
}
以上是一个自定义的过滤器类,继承ZuulFilter类。
继承ZuulFilter类后,需要重写以下方法:
filterType(),返回过滤的节点。返回pre字符串表示在路由之前过滤。
filterOrder(),表示过滤顺序。
shouldFilter(),是否需要过滤,返回true则表示需要过滤。上面的代码中,请求没有key参数则需要过滤。
run(),过滤的方法,具体的过滤逻辑。在上面的代码中,name参数的长度大于5则请求失败,不会分发给服务。
启动服务,在地址栏输入:
http://localhost:8769/api-a/hi?name=test
则页面展示:
hi test ,i am from port:8762
地址栏输入:
http://localhost:8769/api-a/hi?name=testaaa
则页面展示:
error:name.length>5
地址栏输入:
http://localhost:8769/api-a/hi?name=testaaa&key=1
则页面展示:
hi test ,i am from port:8762
10,创建配置中心,config-server
在创建配置中心的server之前,我们需要有一个可访问的配置文件仓库,可以放在git,svn,或者本地。我在git上创建了一个工程,里面有两个文件:
项目路径:
https://github.com/liankgun/spring-cloud-config-repository
文件:
spring-cloud-config-repository/config-dev.properties
内容:
hello:this is config-dev.properties
文件:
spring-cloud-config-repository/config-test.properties
内容:
hello:this is config-test.properties
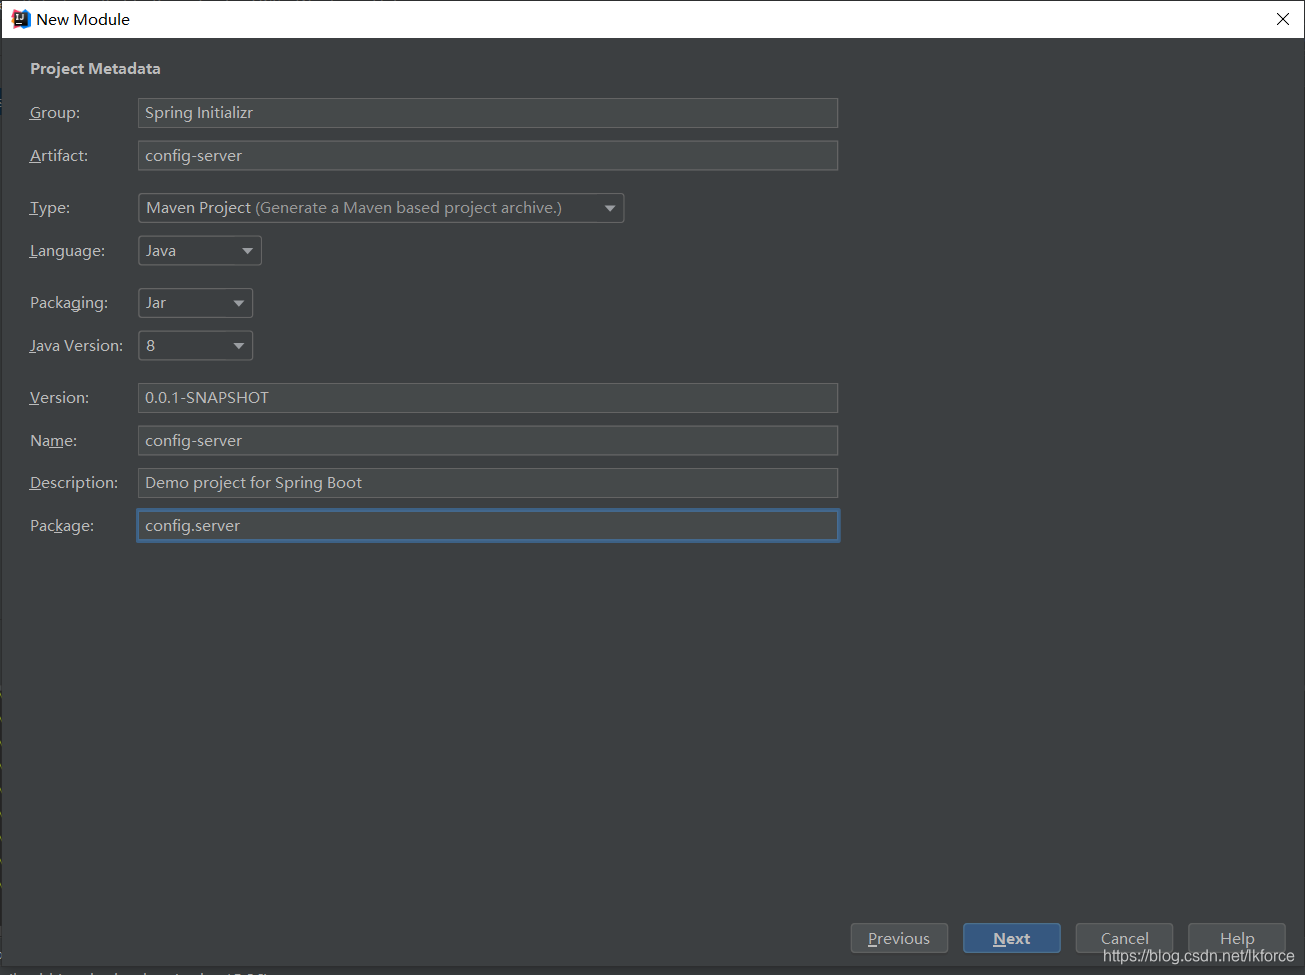
下面创建module,还是选择Spring Initializr,Group和前面的eureka-server写成一样的com.lkforce.cloud,Artifact和Name就叫config-server:
next,选择Spring Cloud Config->Config Server:
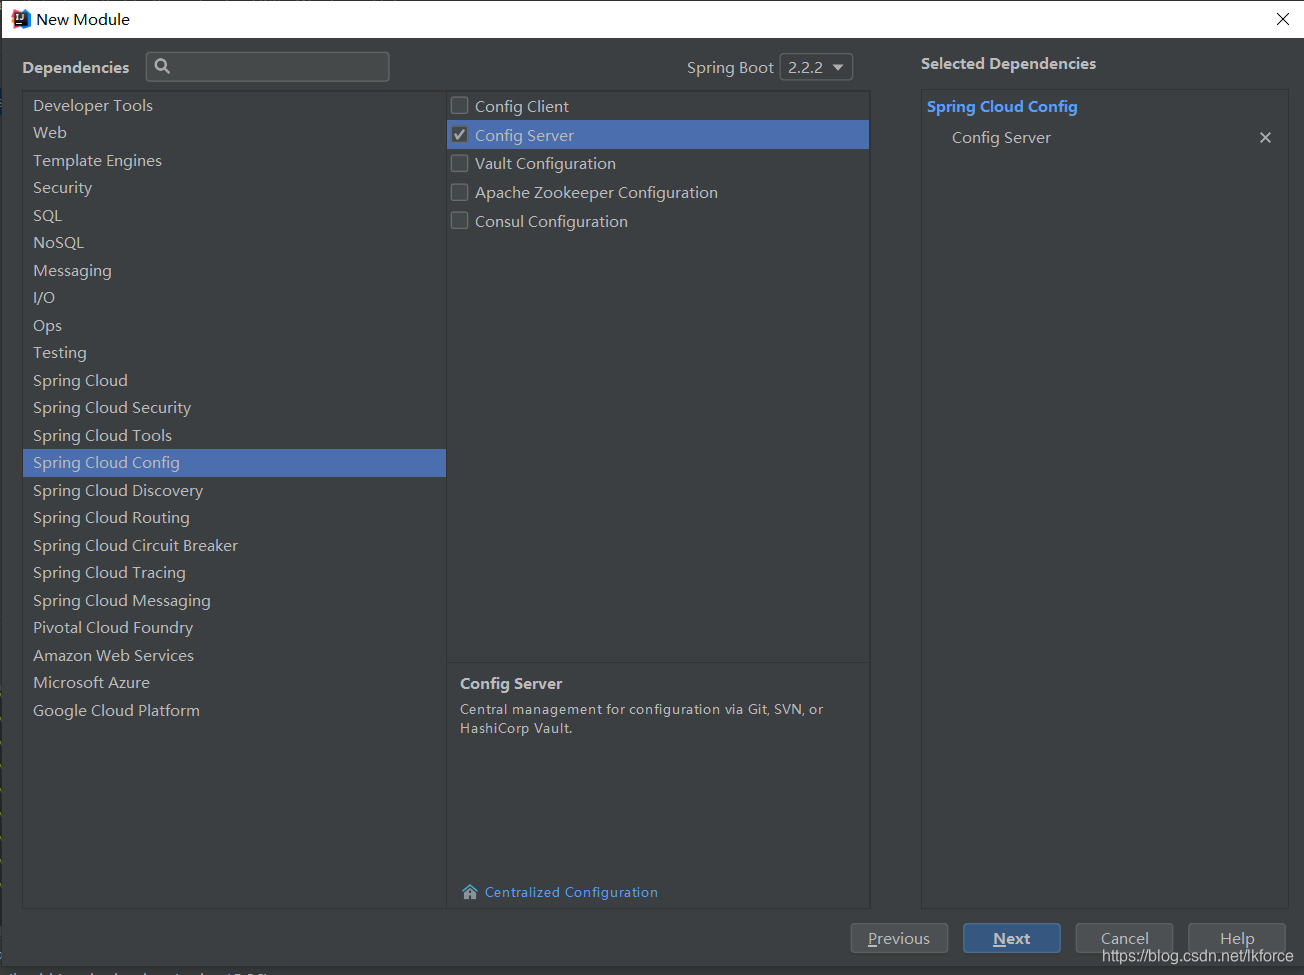
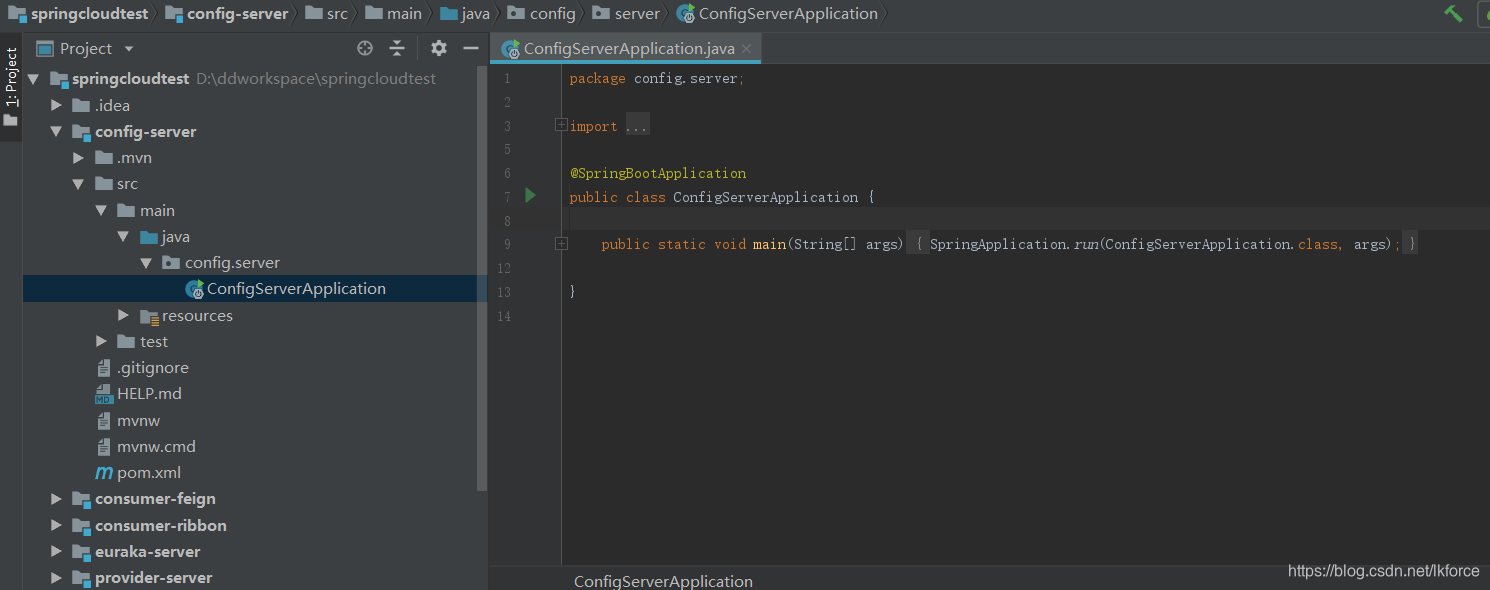
然后我们得到了这样的module:
修改配置文件:
server.port: 8770

spring.application.name: config-server
spring.cloud.config.server.git.uri: https://github.com/liankgun/spring-cloud-config-repository
给启动类添加注解:@EnableConfigServer
启动服务,在浏览器地址栏输入:
http://localhost:8770/config-dev.properties
返回结果:

也就是在github中添加的config-dev.properties文件的内容。
地址栏输入:
http://localhost:8770/config-test.properties
返回结果:

也就是在github中添加的config-test.properties文件的内容。
地址栏输入:
http://localhost:8770/config-client/dev.properties
返回结果:
图32

也就是在github中添加的config-dev.properties文件的文件信息。
说明config-server可用
11,创建配置中心,config-client
配置中心可以统一管理服务的外部参数,方便的进行统一配置和统一修改。
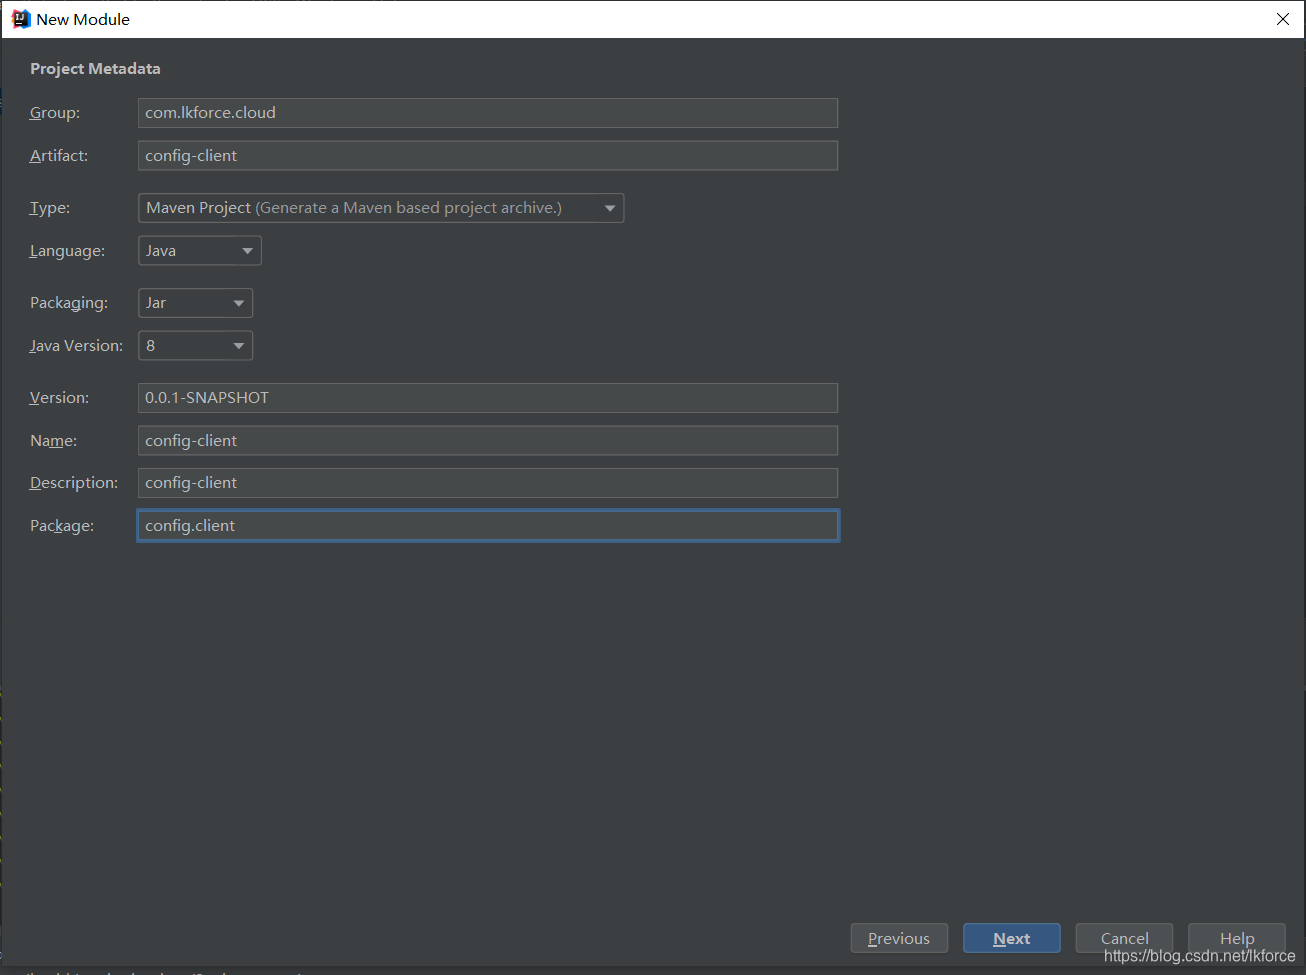
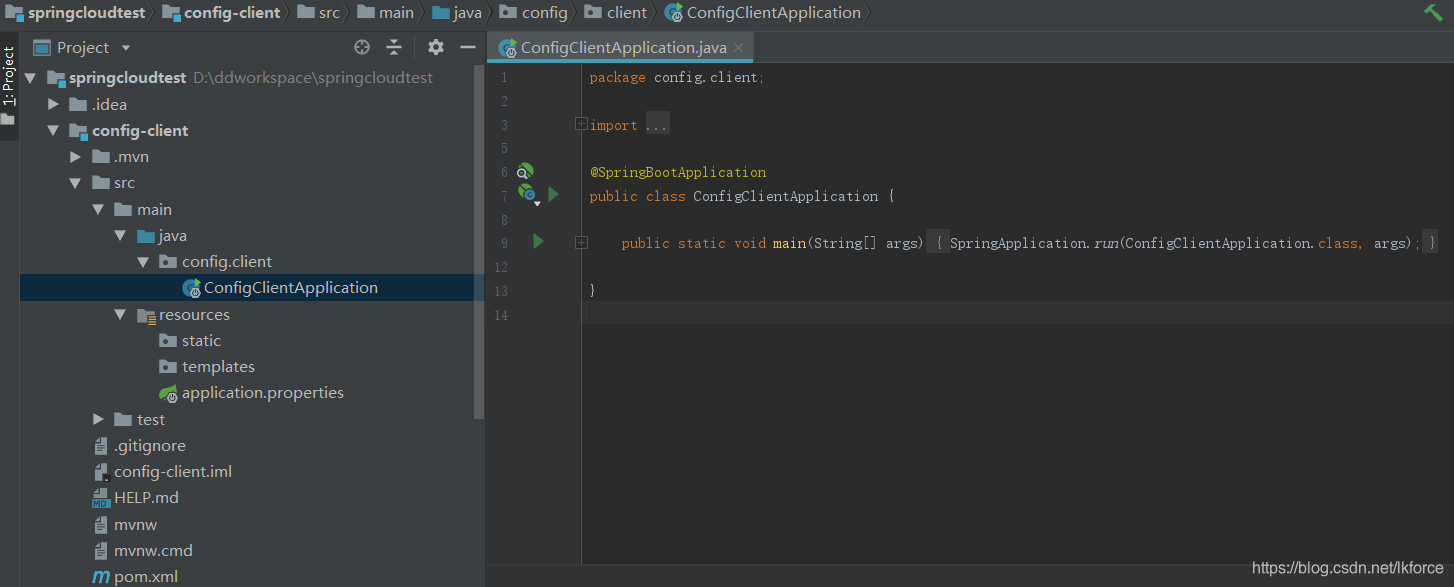
新建module,还是选择Spring Initializr,Group和前面的eureka-server写成一样的com.lkforce.cloud,Artifact和Name就叫config-client:
next,选择Spring Cloud Config->Config Client和Web->SpringWeb:
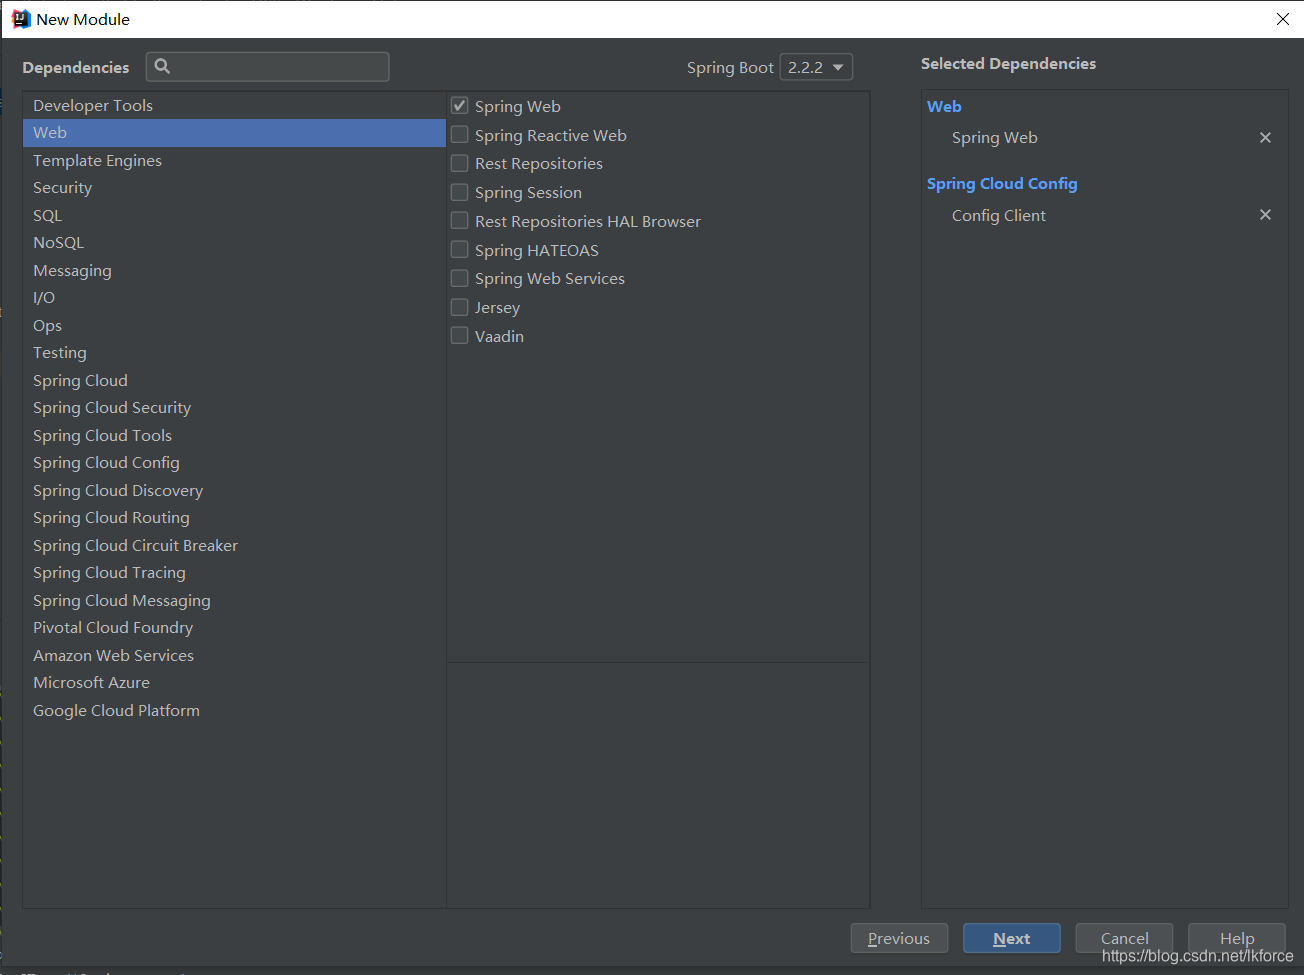
然后我们得到了这样的module:
修改配置文件名,默认的配置文件名是application.properties,需要修改为bootstrap.properties,或者bootstrap.yml,据说config-server端口是8888时不用改名。
另外修改配置文件内容:
server.port: 8771

spring.application.name: config-client

spring.cloud.config.name: config-client
spring.cloud.config.label: master
spring.cloud.config.uri: http://localhost:8770/
spring.profiles.active: dev
要注意,spring.cloud.config.name这一项的名字得和github上的配置文件名字对应,比如上面的配置:
spring.cloud.config.name: config-client
那么在github上的配置文件的名字就得是config-client开头,后面加下划线再加环境名,比如:
- config-client-dev.properties
- config-client-test.properties
- config-client.properties
- config-client-dev.yml
- config-client-test.yml
- config-client.yml
没有环境名的就代表默认配置。
这次启动类不用加什么注解。
创建一个controller,提供对外接口:
package config.client;

import org.springframework.beans.factory.annotation.Value;
import org.springframework.web.bind.annotation.GetMapping;
import org.springframework.web.bind.annotation.RequestMapping;
import org.springframework.web.bind.annotation.RestController;

@RestController
@RequestMapping("/config")
public class ConfigClientController {
    @Value("${hello}")
    private String hello;

    @GetMapping("/getConfigHello")
    public String getConfigHello() {
        return hello;
    }
}
启动服务,在地址栏输入:
http://localhost:8771/config/getConfigHello
返回结果:

也就是github上config-client-dev.properties这个配置文件中,hello参数的值。
之所以可以获得hello参数,是因为这个配置:
spring.cloud.config.uri: http://localhost:8770/
再加上:
spring.cloud.config.name: config-client
再加上:
spring.profiles.active: dev
所以config-client服务一启动的时候,就加载了
这个配置文件的内容。
另外,以上的配置是没有自动刷新功能的,也就是说,如果github上配置文件的内容变了,server端和client端不能立即响应,关于自动刷新的策略网上有很多。
完


 1116
1116

 被折叠的 条评论
为什么被折叠?
被折叠的 条评论
为什么被折叠?
 到【灌水乐园】发言


