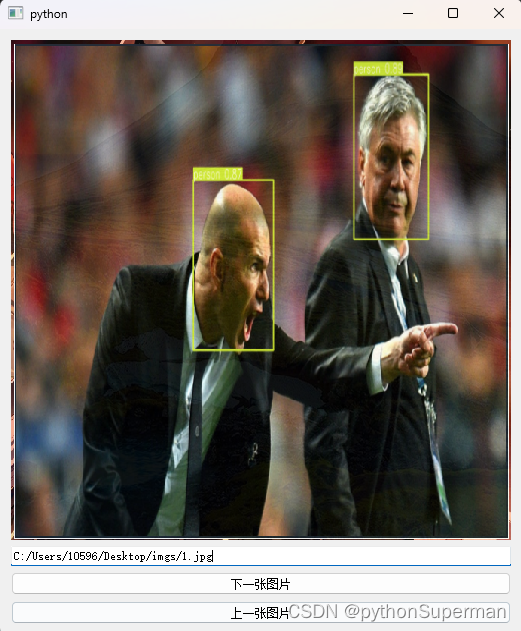
在PyQt中实现一次性选择多张图片,并通过按钮切换到下一张图片的功能

 效果:

代码 

from PyQt5 import QtWidgets, QtGui

class ImageViewer(QtWidgets.QWidget):
    def __init__(self):
        super().__init__()
        self.selected_imgsPath = []
        self.current_image_index = 0
        
        self.label_3 = QtWidgets.QLabel(self)
        self.label_3.setFixedSize(500, 500)  # 设置标签大小为500x500
        self.lineEdit_3 = QtWidgets.QLineEdit(self)
        self.next_image_button = QtWidgets.QPushButton("下一张图片", self)
        self.next_image_button.clicked.connect(self.showNextImage)
        self.prev_image_button = QtWidgets.QPushButton("上一张图片", self)
        self.prev_image_button.clicked.connect(self.showPrevImage)
        
        self.layout = QtWidgets.QVBoxLayout(self)
        self.layout.addWidget(self.label_3)
        self.layout.addWidget(self.lineEdit_3)
        self.layout.addWidget(self.next_image_button)
        self.layout.addWidget(self.prev_image_button)
        
        self.openImage()  # 调用 openImage 函数显示第一张图片
        
    def openImage(self):
        self.selected_imgsPath, _ = QtWidgets.QFileDialog.getOpenFileNames(
            self, "打开图片", "./pending_images", "*.jpg;;*.png;;All Files(*)")
        if len(self.selected_imgsPath) == 0:
            self.empty_information()
            print('empty!')
            return

        img = QtGui.QPixmap(self.selected_imgsPath[0]).scaled(500, 500)  # 调整图片大小为500x500
        self.label_3.setPixmap(img)
        self.lineEdit_3.setText(self.selected_imgsPath[0])
        
        self.current_image_index = 0
        
    def showNextImage(self):
        if len(self.selected_imgsPath) == 0:
            return

        self.current_image_index += 1
        if self.current_image_index >= len(self.selected_imgsPath):
            self.current_image_index = 0

        img_path = self.selected_imgsPath[self.current_image_index]
        img = QtGui.QPixmap(img_path).scaled(500, 500)  # 调整图片大小为500x500
        self.label_3.setPixmap(img)
        self.lineEdit_3.setText(img_path)
        
    def showPrevImage(self):
        if len(self.selected_imgsPath) == 0:
            return

        self.current_image_index -= 1
        if self.current_image_index < 0:
            self.current_image_index = len(self.selected_imgsPath) - 1

        img_path = self.selected_imgsPath[self.current_image_index]
        img = QtGui.QPixmap(img_path).scaled(500, 500)  # 调整图片大小为500x500
        self.label_3.setPixmap(img)
        self.lineEdit_3.setText(img_path)

if __name__ == "__main__":
    import sys
    app = QtWidgets.QApplication(sys.argv)
    viewer = ImageViewer()
    viewer.show()
    sys.exit(app.exec_())
  • 2
    点赞
  • 3
    收藏
    觉得还不错? 一键收藏
  • 0
    评论
可以使用QPixmap和QLabel来实现导入一张图片放大缩小功能,具体步骤如下: 1. 创建一个QWidget窗口,用来放置QLabel。 2. 创建一个QLabel,用来显示图片。 3. 创建一个QPushButton,用来触发放大操作。 4. 创建一个QPushButton,用来触发缩小操作。 5. 创建一个QPixmap,用来加载图片。 6. 将QPixmap设置为QLabel的背景。 7. 实现放大缩小操作,并更新QLabel的大小。 具体代码实现如下: ```python import sys from PyQt5.QtGui import QPixmap from PyQt5.QtWidgets import QApplication, QWidget, QLabel, QPushButton class ImageViewer(QWidget): def __init__(self): super().__init__() # 创建QLabel用于显示图片 self.label = QLabel(self) self.label.setFixedSize(400, 400) # 加载图片 self.pixmap = QPixmap('image.jpg') self.label.setPixmap(self.pixmap) # 创建QPushButton用于放大和缩小图片 self.zoomInButton = QPushButton('放大', self) self.zoomInButton.clicked.connect(self.zoomIn) self.zoomOutButton = QPushButton('缩小', self) self.zoomOutButton.clicked.connect(self.zoomOut) # 设置布局 layout = QVBoxLayout(self) layout.addWidget(self.label) layout.addWidget(self.zoomInButton) layout.addWidget(self.zoomOutButton) self.setLayout(layout) def zoomIn(self): # 放大图片 self.label.setPixmap(self.pixmap.scaled(self.label.width() + 50, self.label.height() + 50)) def zoomOut(self): # 缩小图片 self.label.setPixmap(self.pixmap.scaled(self.label.width() - 50, self.label.height() - 50)) if __name__ == '__main__': app = QApplication(sys.argv) viewer = ImageViewer() viewer.show() sys.exit(app.exec_()) ``` 在代码,我们创建了一个ImageViewer类,继承自QWidget,用于放置QLabel和QPushButton。在构造函数,我们首先创建了一个QLabel,并加载了一张图片。然后,我们创建了两个QPushButton,一个用于放大操作,一个用于缩小操作。在放大和缩小操作,我们使用了QPixmap的scaled函数来调整图片大小,并更新了QLabel的背景。最后,我们使用了QVBoxLayout来设置布局,并将其设置为QWidget的布局。

“相关推荐”对你有帮助么?

  • 非常没帮助
  • 没帮助
  • 一般
  • 有帮助
  • 非常有帮助
提交
评论
添加红包

请填写红包祝福语或标题

红包个数最小为10个

红包金额最低5元

当前余额3.43前往充值 >
需支付:10.00
成就一亿技术人!
领取后你会自动成为博主和红包主的粉丝 规则
hope_wisdom
发出的红包
实付
使用余额支付
点击重新获取
扫码支付
钱包余额 0

抵扣说明:

1.余额是钱包充值的虚拟货币,按照1:1的比例进行支付金额的抵扣。
2.余额无法直接购买下载,可以购买VIP、付费专栏及课程。

余额充值