


 本文围绕Python操作Word文档展开,介绍了相关库的安装与基本概念,涵盖使用文本、字体格式、段落属性等内容,还涉及表格、图表插入,样式修改,文档合并等操作,同时指出了Office和WPS格式差异等问题。
| 有定制化需求可私信联系 |
文章目录
简介
生成合同、报告等信息需要用到Word,
python-docx是一款用于创建和更新 Microsoft Word (.docx) 文件的库
python-docx-template 是一款结合 python-docx 和 jinja2 的库,将 Word 模板文件和 jinja 标记结合使用,便于生成更多文档
| 使用场景 | 库 |
|---|---|
| 创建文档 | python-docx |
| 修改文档 | python-docx-template |
安装
pip install python-docx
本文版本
python-docx==0.8.10
python-pptx==0.6.18
初试
test.jpg

from docx import Document
from docx.shared import Inches
document = Document()
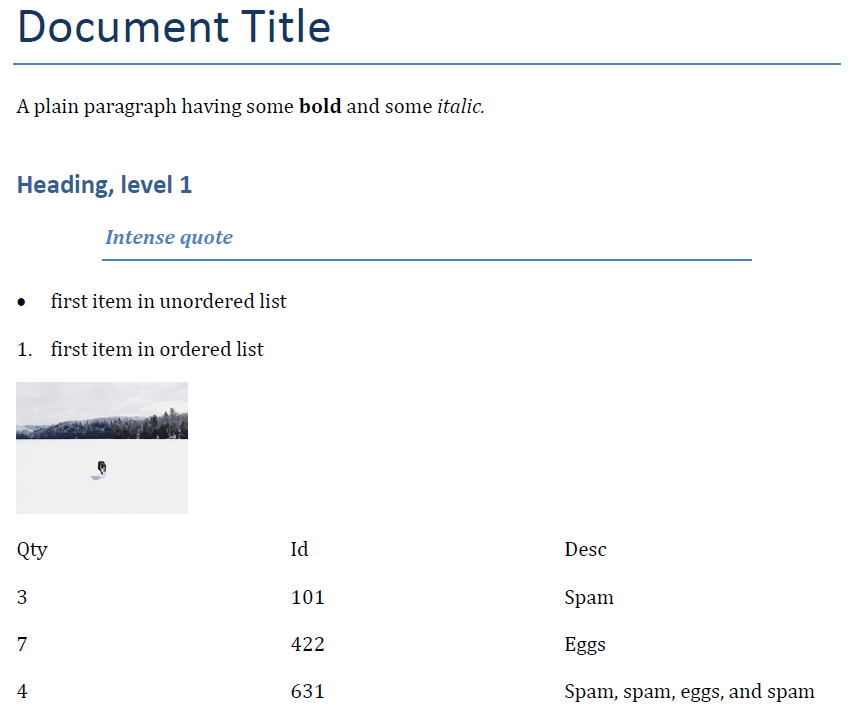
document.add_heading('Document Title', level=0) # 插入标题
paragraph = document.add_paragraph('A plain paragraph having some ') # 插入段落
paragraph.add_run('bold').bold = True # 正文
paragraph.add_run(' and some ')
paragraph.add_run('italic.').italic = True
document.add_heading('Heading, level 1', level=1) # 插入标题 1
document.add_paragraph('Intense quote', style='Intense Quote') # 插入段落,明显引用
document.add_paragraph('first item in unordered list', style='List Bullet') # 插入段落,无序列表
document.add_paragraph('first item in ordered list', style='List Number') # 插入段落,有序列表
document.add_picture('test.jpg', width=Inches(1.25)) # 插入图片
records = (
(3, '101', 'Spam'),
(7, '422', 'Eggs'),
(4, '631', 'Spam, spam, eggs, and spam')
)
table = document.add_table(rows=1, cols=3) # 插入表格
hdr_cells = table.rows[0].cells
hdr_cells[0].text = 'Qty'
hdr_cells[1].text = 'Id'
hdr_cells[2].text = 'Desc'
for qty, id, desc in records:
row_cells = table.add_row().cells
row_cells[0].text = str(qty)
row_cells[1].text = id
row_cells[2].text = desc
document.add_page_break() # 插入分页
document.save('test.docx') # 保存
效果
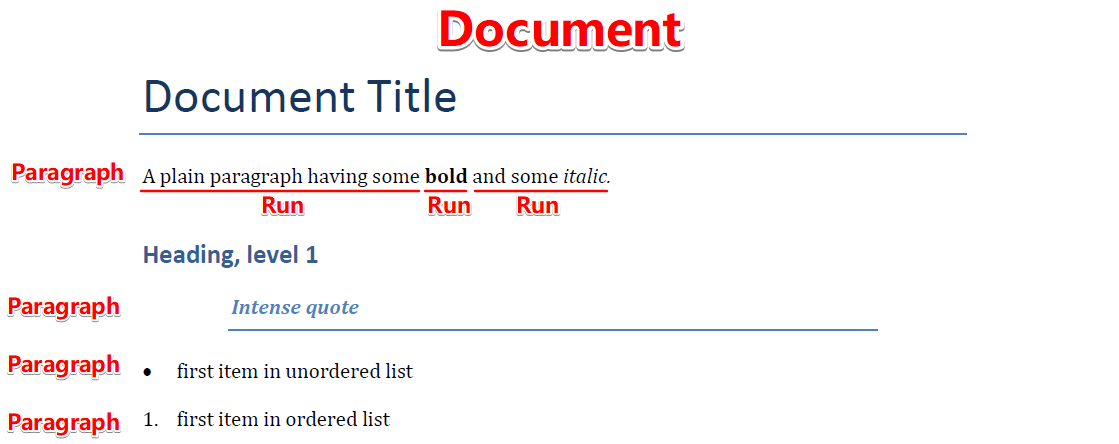
基本概念
主要对象
Document:Word文档对象Paragraph:段落,一个回车一个段落Run:节段,一个段落多个节段
快速上手
from docx import Document
from docx.shared import Cm

'''新建文档'''
document = Document()

'''插入段落'''
paragraph = document.add_paragraph('段落1')
prior_paragraph = paragraph.insert_paragraph_before('段落0')  # 前插

'''插入标题'''
document.add_heading('The REAL meaning of the universe')  # 默认为标题 1
document.add_heading('The role of dolphins', level=2)

'''插入分页符'''
document.add_page_break()

'''插入表格'''
table = document.add_table(rows=2, cols=2)  # 2行2列的表格
cell = table.cell(0, 0)  # 第1行第1列的单元格
cell.text = '姓名'
cell = table.cell(0, 1)  # 第1行第2列的单元格
cell.text = '学号'
row = table.rows[1]  # 第2行
row.cells[0].text = '甲'
row.cells[1].text = '2015012755'
row = table.add_row()  # 插入一行
row = table.rows[2]  # 第3行
row.cells[0].text = '乙'
row.cells[1].text = '2015012756'

for row in table.rows:  # 遍历表格
    for cell in row.cells:
        print(cell.text, end=' ')
    print()

table = document.add_table(1, 3, style='Light Shading Accent 1')
heading_cells = table.rows[0].cells
heading_cells[0].text = '姓名'
heading_cells[1].text = '语文'
heading_cells[2].text = '数学'
grades = (
    ('甲', 90, 80),
    ('乙', 80, 90),
    ('丙', 100, 100),
)
for name, chinese, math in grades:
    cells = table.add_row().cells
    cells[0].text = name
    cells[1].text = str(chinese)
    cells[2].text = str(math)

# table.style = 'LightShading-Accent1'

'''插入图片'''
document.add_picture('test.jpg')
document.add_picture('test.jpg', width=Cm(4.0))  # 宽度为4cm

'''段落样式'''
document.add_paragraph('无序列表', style='ListBullet')  # 无序列表
paragraph = document.add_paragraph('无序列表')
paragraph.style = 'List Bullet'

'''加粗斜体'''
paragraph = document.add_paragraph('正文')
run = paragraph.add_run('加粗')  # 分步
run.bold = True
paragraph.add_run('正文')

paragraph = document.add_paragraph('正文')
paragraph.add_run('加粗').bold = True  # 一步到位
paragraph.add_run('斜体').italic = True

'''字符样式'''
paragraph = document.add_paragraph('正文')
run = paragraph.add_run('强调')  # 分步
run.style = 'Emphasis'

paragraph = document.add_paragraph('正文')
paragraph.add_run('强调', style='Emphasis')  # 一步到位

document.save('test.docx')  # 保存
使用文本
块级与内联文本对象
段落Paragraph是Word中的主要块级对象
块级对象在它所包含的文本的左右边界之间流动,每当文本超出右边界时就添加一行
对于段落来说,边界通常是页边距。若页面是列布局,边界是列边界,如果段落在表格单元格内,边界是单元格边界
表格也是块级对象
内联对象是块级对象内容的一部分。例如,出现在黑体的单词或全大写的句子。最常见的内联对象是run。块容器中的所有内容都在内联对象中。通常,一个段落包含一个或多个run,每个run包含段落的一部分文本
块级对象的属性指定位置,比如段落前后的缩进。
内联对象的属性通常指定内容,比如字体、字体大小、粗体和斜体。
段落属性
段落的格式ParagraphFormat通过Paragraph.paragraph_format获取
水平对齐
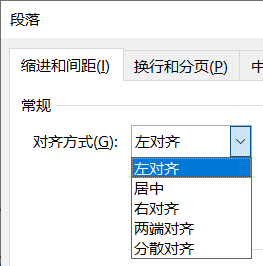
水平对齐枚举 WD_PARAGRAPH_ALIGNMENT
| 水平对齐 | 值 |
|---|---|
| 左对齐 | LEFT |
| 居中 | CENTER |
| 右对齐 | RIGHT |
| 两端对齐 | JUSTIFY |
| 分散对齐 | DISTRIBUTE |
from docx import Document
from docx.enum.text import WD_PARAGRAPH_ALIGNMENT

document = Document()
paragraph = document.add_paragraph('居中')
paragraph_format = paragraph.paragraph_format  # 获取段落的格式属性
print(paragraph_format.alignment)  # None
paragraph_format.alignment = WD_PARAGRAPH_ALIGNMENT.CENTER  # 水平对齐设为居中
print(paragraph_format.alignment)  # CENTER (1)
document.save('test.docx')  # 保存
缩进
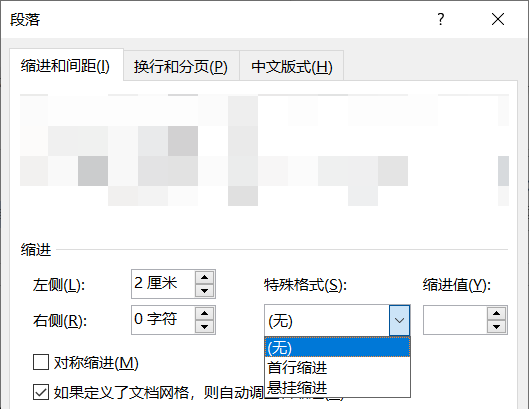
缩进是指段落与容器边缘(通常是页边距)之间的水平空间,段落可以在左右两边分别缩进。
第一行缩进比其他部分缩进要大。第一行缩进较少用悬挂缩进。
缩进可使用负值。若使用None则删除现有缩进,并继承上级缩进
from docx import Document
from docx.shared import Cm

document = Document()
paragraph = document.add_paragraph('缩进')
paragraph_format = paragraph.paragraph_format
print(paragraph_format.left_indent)  # None

paragraph_format.left_indent = Cm(2.0)  # 左缩进设为2厘米
paragraph_format.right_indent = Cm(2.0)  # 右缩进设为2厘米
paragraph_format.first_line_indent = Cm(2.0)  # 首行缩进设为2厘米

print(paragraph_format.left_indent)  # 720090
print(paragraph_format.left_indent.cm)  # 2.00025
document.save('test.docx')  # 保存
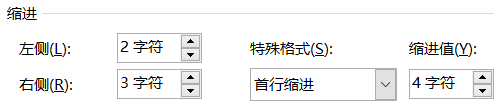
缩进指定字符
from docx import Document
from docx.oxml.shared import OxmlElement, qn


def set_indent(paragraph, left_indent=None, right_indent=None, first_line_indent=None, hanging_indent=None):
    """设置缩进,单位为字符

    :param paragraph: 某段落
    :param left_indent: 左缩进
    :param right_indent: 右缩进
    :param first_line_indent: 首行缩进
    :param hanging_indent: 悬挂缩进
    """
    assert not all([first_line_indent, hanging_indent]), '首行缩进与悬挂缩进不可同时设置'
    pPr = paragraph._element.get_or_add_pPr()
    ind = OxmlElement('w:ind')
    if left_indent:
        ind.set(qn('w:leftChars'), str(left_indent * 100))
    if right_indent:
        ind.set(qn('w:rightChars'), str(right_indent * 100))
    if first_line_indent:
        ind.set(qn('w:firstLineChars'), str(first_line_indent * 100))
    if hanging_indent:
        ind.set(qn('w:hangingChars'), str(hanging_indent * 100))
    pPr.append(ind)


document = Document()
paragraph = document.add_paragraph('缩进')
set_indent(paragraph, left_indent=2, right_indent=3, first_line_indent=4)
document.save('test.docx')
效果
制表符
制表符决定后面的文本开始的位置
段落或样式的制表符TabStops通过ParagraphFormat.tab_stops获取
制表符对齐枚举 WD_TAB_ALIGNMENT,默认为左对齐
制表符前导字符枚举 WD_TAB_LEADER,默认为空格
已有的制表符可通过下标访问
from docx import Document
from docx.shared import Cm
from docx.enum.text import WD_TAB_ALIGNMENT, WD_TAB_LEADER

document = Document()
paragraph = document.add_paragraph('\t制表符')
paragraph_format = paragraph.paragraph_format
tab_stops = paragraph_format.tab_stops
tab_stop = tab_stops.add_tab_stop(Cm(5.0))  # 插入制表符
print(tab_stop.position)  # 1800225
print(tab_stop.position.cm)  # 5.000625
tab_stop = tab_stops.add_tab_stop(Cm(5.0), alignment=WD_TAB_ALIGNMENT.RIGHT, leader=WD_TAB_LEADER.DOTS)  # 右对齐,前导字符为点
document.save('test.docx')  # 保存
详细阅读
段落间距
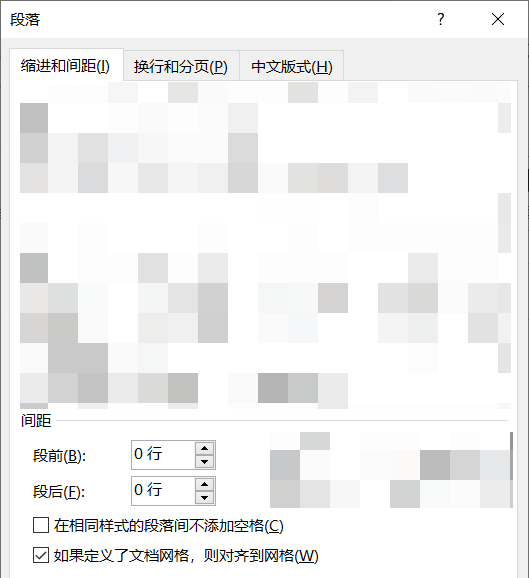
space_before、space_after分别控制段前、段后间距
from docx import Document
from docx.shared import Pt

document = Document()
paragraph = document.add_paragraph('段落间距1')
paragraph = document.add_paragraph('段落间距2')
paragraph_format = paragraph.paragraph_format
print(paragraph_format.space_before)  # None
print(paragraph_format.space_after)  # None

paragraph_format.space_before = Pt(18)
paragraph_format.space_after = Pt(12)
print(paragraph_format.space_before.pt)  # 18.0
print(paragraph_format.space_after.pt)  # 12.0

paragraph = document.add_paragraph('段落间距3')
document.save('test.docx')  # 保存
行距
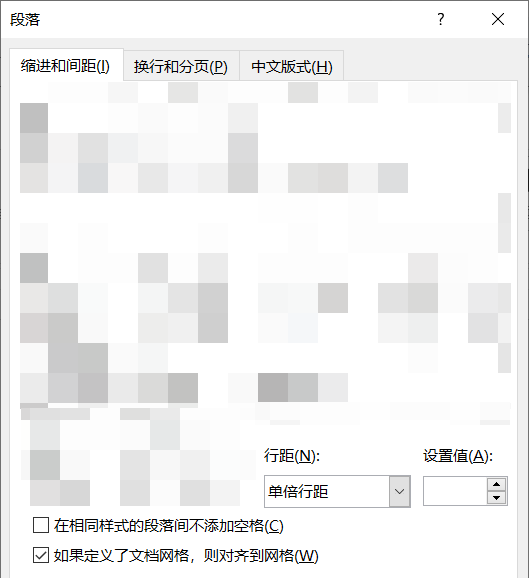
行距由 line_spacing 和 line_spacing_rule 共同控制。
line_spacing 取 Length 或 float 或 None
line_spacing_rule 取枚举 WD_LINE_SPACING 或 None
from docx import Document
from docx.shared import Pt
from docx.enum.text import WD_LINE_SPACING

document = Document()
paragraph = document.add_paragraph('行距1')
paragraph_format = paragraph.paragraph_format
print(paragraph_format.line_spacing)  # None
print(paragraph_format.line_spacing_rule)  # None
paragraph_format.line_spacing = 1.75  # 多倍行距,1.75
print(paragraph_format.line_spacing)  # 1.75
print(paragraph_format.line_spacing_rule)  # MULTIPLE (5)

paragraph = document.add_paragraph('行距2')
paragraph_format = paragraph.paragraph_format
paragraph_format.line_spacing = Pt(18)  # 固定值,18磅
print(paragraph_format.line_spacing.pt)  # 18.0
print(paragraph_format.line_spacing_rule)  # EXACTLY (4)

paragraph = document.add_paragraph('行距3')
paragraph_format = paragraph.paragraph_format
paragraph_format.line_spacing = Pt(20)  # 最小值,20磅
paragraph_format.line_spacing_rule = WD_LINE_SPACING.AT_LEAST
print(paragraph_format.line_spacing)  # 254000
print(paragraph_format.line_spacing_rule)  # AT_LEAST (3)

document.save('test.docx')  # 保存
封装
from docx import Document
from docx.shared import Pt
from docx.enum.text import WD_LINE_SPACING


def set_line_spacing(paragraph, multiple=None, exactly=None, at_least=None):
    """设置行距

    :param paragraph: 某段落
    :param multiple: 多倍行距,整数或浮点数
    :param exactly: 固定值,单位为磅(Pt)
    :param at_least: 最小值,单位为磅(Pt)
    """
    assert [bool(i) for i in [multiple, exactly, at_least]].count(True) == 1, '只能设置一种行距'
    if multiple:
        paragraph.paragraph_format.line_spacing = multiple
    if exactly:
        paragraph.paragraph_format.line_spacing = Pt(exactly)
    if at_least:
        paragraph.paragraph_format.line_spacing = Pt(at_least)
        paragraph.paragraph_format.line_spacing_rule = WD_LINE_SPACING.AT_LEAST


document = Document()
paragraph = document.add_paragraph('行距1')
set_line_spacing(paragraph, multiple=1.75)  # 多倍行距,1.75
paragraph = document.add_paragraph('行距2')
set_line_spacing(paragraph, exactly=18)  # 固定值,18磅
paragraph = document.add_paragraph('行距3')
set_line_spacing(paragraph, at_least=20)  # 最小值,20磅
document.save('test.docx')
分页
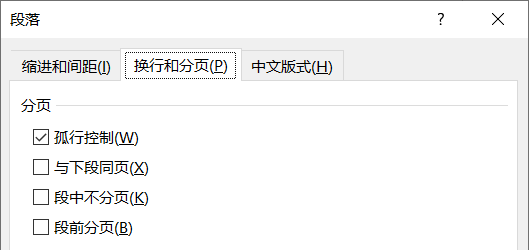
分页属性控制段落在页面边界附近的行为
keep_together:孤行控制。整个段落显示在同一页,如果段落跨两页出现,则在该段之前发出换行符。keep_with_next:与下段同页。将一段与下一段保持在同一页。可以保证节标题与节的第一段在同一页上。page_break_before:段中不分页。段落在新页的顶部。可以保证章节标题从新的页面开始。widow_control:段前分页。将一页分开,以避免将该段的首行或最后一行放在与该段其他部分分开的另一页上。
这四个属性都是三态的,可以取值True、False或None。
from docx import Document

document = Document()
paragraph = document.add_paragraph('分页1' * 400)
paragraph_format = paragraph.paragraph_format
print(paragraph_format.page_break_before)  # None
paragraph_format.keep_together = False  # 孤行控制
paragraph_format.keep_with_next = False  # 与下段同页
paragraph_format.page_break_before = True  # 段中不分页
paragraph_format.widow_control = False  # 段前分页
print(paragraph_format.page_break_before)  # True

paragraph = document.add_paragraph('分页2' * 100)
paragraph_format = paragraph.paragraph_format
paragraph_format.keep_together = False  # 孤行控制
paragraph_format.keep_with_next = False  # 与下段同页
paragraph_format.page_break_before = True  # 段中不分页
paragraph_format.widow_control = False  # 段前分页
document.save('test.docx')  # 保存
字体格式
字体格式应用在Run层面,包括字体款式、大小、粗体、斜体、下划线
Run对象提供了只读属性font来获取对应的Font对象,用于设置具体的字体格式
| 字体 | 属性 |
|---|---|
| all_caps | 全部大写字母 |
| bold | 加粗 |
| color | 颜色,通过RGBColor(r, g, b)赋值 |
| complex_script | 将字符视为脚本 |
| cs_bold | 脚本字符加粗 |
| cs_italic | 脚本字符斜体 |
| double_strike | 双删除线 |
| emboss | 浮雕 |
| hidden | 隐藏 |
| highlight_color | 高亮显示的颜色,通过WD_COLOR_INDEX赋值 |
| imprint | 压印 |
| italic | 斜体 |
| math | Open XML Math来处理WML |
| name | 字体名称 |
| no_proof | 检查拼写和语法时不报错 |
| outline | 轮廓 |
| rtl | 从右到左 |
| shadow | 阴影 |
| size | 大小 |
| small_caps | 小写显示为大写,同时字体大小小两点 |
| snap_to_grid | |
| spec_vanish | |
| strike | 删除线 |
| subscript | 下标 |
| superscript | 上标 |
| underline | 下划线 |
| web_hidden |
from docx import Document
from docx.shared import Pt
from docx.shared import RGBColor
from docx.enum.text import WD_COLOR_INDEX

document = Document()
paragraph = document.add_paragraph()
run = paragraph.add_run('Hello World!')
font = run.font
font.name = 'Calibri'  # 款式
font.size = Pt(12)  # 大小
font.bold = True  # 加粗
font.italic = True  # 倾斜
font.underline = True  # 下划线
font.color.rgb = RGBColor(255, 0, 0)  # 颜色

paragraph = document.add_paragraph()
run = paragraph.add_run('Hello World!')
font = run.font
font.highlight_color = WD_COLOR_INDEX.YELLOW  # 高亮

document.save('test.docx')  # 保存
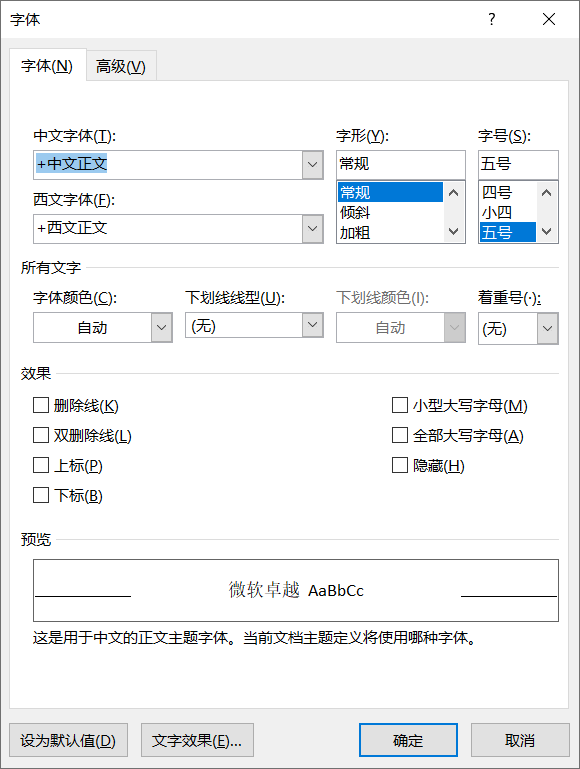
设置中文字体
from docx import Document
from docx.oxml.ns import qn

document = Document()
paragraph = document.add_paragraph()
run = paragraph.add_run('你好')
run.font.name = '宋体'
run.font.element.rPr.rFonts.set(qn('w:eastAsia'), '宋体')
document.save('test.docx')
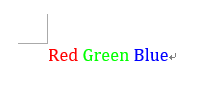
字体颜色 RGBColor
from docx import Document
from docx.shared import RGBColor

document = Document()
paragraph = document.add_paragraph()
run = paragraph.add_run('Red ')
run.font.color.rgb = RGBColor(255, 0, 0)
run = paragraph.add_run('Green ')
run.font.color.rgb = RGBColor(0x00, 0xFF, 0x00)
run = paragraph.add_run('Blue')
run.font.color.rgb = RGBColor.from_string('0000FF')
document.save('test.docx')
长度单位
均继承 docx.shared.Length 类
| 单位 | 类名 | 换算 |
|---|---|---|
| Inches | 英寸 | 2.54cm |
| Cm | 厘米 | 1cm |
| Mm | 毫米 | 0.1cm |
| Pt | 点或磅 | 0.0376cm |
| Twips | 缇 | 1/20pt,1/567cm |
字号对应关系
| 印刷字号 | Word 字号(单位 Pt) |
|---|---|
| 初号 | 42 |
| 小初 | 36 |
| 一号 | 26 |
| 小一 | 24 |
| 二号 | 22 |
| 小二 | 18 |
| 三号 | 16 |
| 小三 | 15 |
| 四号 | 14 |
| 小四 | 12 |
| 五号 | 10.5 |
| 小五 | 9 |
| 六号 | 7.5 |
| 小六 | 6.5 |
| 七号 | 5.5 |
| 八号 | 5 |
使用分区
Word支持Section概念,即具有相同页面布局设置的文档为一个分区。
大多数Word文档只有一个默认的部分,但当需要改变页面布局时,要用到Section
使用页眉和页脚
Working with Headers and Footers
表格

涉及类有:
Table类方法
| 方法 | 功能 |
|---|---|
| add_column(width) | 在右侧插入,返回_Column对象 |
| add_row() | 在下方插入,返回_Row对象 |
| alignment | 对齐方式,取值WD_TABLE_ALIGNMENT或None |
| autofit | 自动调整,默认为True,需要指定宽高时建议设为False |
| cell(row_idx, col_idx) | (0, 0)为左上角单元格,返回_Cell对象 |
| column_cells(column_idx) | 一列单元格 |
| columns | 返回所有_Columns对象 |
| row_cells(row_idx) | 一行单元格 |
| rows | 返回所有_Row对象 |
| style | 表的样式,取值_TableStyle |
| table_direction | 单元格方向,取值WD_TABLE_DIRECTION |
_Cell类方法
| 方法 | 功能 |
|---|---|
| add_paragraph(text=u’', style=None) | 添加段落 |
| add_table(rows, cols) | 添加表格 |
| merge(other_cell) | 合并单元格,other_cell为对角单元格 |
| paragraphs | 单元格中的段落 |
| tables | 单元格中的表格 |
| text | 全部内容的文本字符串 |
| vertical_alignment | 垂直对齐,取值WD_CELL_VERTICAL_ALIGNMENT |
| width | 宽度 |
_Row类方法
| 方法 | 功能 |
|---|---|
| cells | 该行的单元格 |
| height | 高度 |
| height_rule | 高度规则,取值WD_ROW_HEIGHT_RULE |
| table | 该行的表 |
_Column类方法
| 方法 | 功能 |
|---|---|
| cells | 该列的单元格 |
| table | 该列的表 |
| width | 宽度 |
_Rows类方法
| 方法 | 功能 |
|---|---|
| table | 对应的表 |
_Columns类方法
| 方法 | 功能 |
|---|---|
| table | 对应的表 |
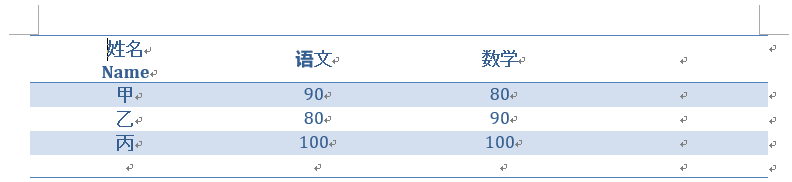
代码
from docx import Document
from docx.shared import Cm
from docx.enum.text import WD_PARAGRAPH_ALIGNMENT
from docx.enum.table import WD_TABLE_ALIGNMENT, WD_CELL_VERTICAL_ALIGNMENT
document = Document()
'''原始数据'''
table = document.add_table(1, 3, style='Light Shading Accent 1')
heading_cells = table.rows[0].cells
heading_cells[0].text = '姓名'
heading_cells[1].text = '语文'
heading_cells[2].text = '数学'
grades = (
('甲', 90, 80),
('乙', 80, 90),
('丙', 100, 100),
)
for name, chinese, math in grades:
cells = table.add_row().cells
cells[0].text = name
cells[1].text = str(chinese)
cells[2].text = str(math)
'''主要方法'''
column = table.add_column(Cm(5.0)) # 在右侧插入
row = table.add_row() # 在下方插入
print(column, row)
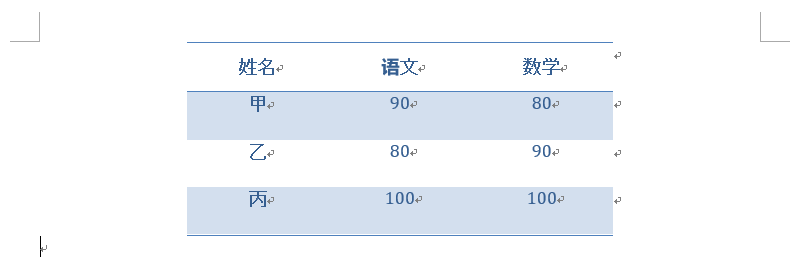
print(table.column_cells(0)) # 第一列单元格
print(table.row_cells(0)) # 第一行单元格
table.alignment = WD_TABLE_ALIGNMENT.CENTER # 居中对齐
cell = table.cell(0, 0) # 左上角单元格
cell.add_paragraph('Name') # 添加段落
print(cell.text) # 全部内容
for cell in table.row_cells(0): # 第一行单元格
cell.vertical_alignment = WD_CELL_VERTICAL_ALIGNMENT.CENTER # 垂直对齐,居中
for column in table.columns: # 所有列
for cell in column.cells: # 所有单元格
for paragraph in cell.paragraphs: # 所有段落
paragraph.paragraph_format.alignment = WD_PARAGRAPH_ALIGNMENT.CENTER # 水平对齐,居中
document.save('test.docx')
效果
详细阅读
插入一行数据
实现类似 Worksheet.append() 的功能
from docx import Document
from docx.shared import Cm


def append(table, iterable):
    """向表格插入一行数据"""
    if len(table.rows) == 1 and all([i.text for i in table.rows[0].cells]) == False:  # 只有一行且第一行无任何值
        row = table.rows[0]
    else:
        row = table.add_row()
    width = int(sum([i.width for i in table.columns]) / max(len(table.columns), len(iterable)))  # 平均宽度
    if len(iterable) > 10:
        width = Cm(1.0)
    for _ in range(len(iterable) - len(table.columns)):
        table.add_column(width)
    for i, x in enumerate(iterable):
        row.cells[i].text = str(x)


document = Document()
table = document.add_table(rows=1, cols=1, style='Table Grid')
append(table, ['a', 'b', 'c'])
append(table, ['a', 'b', 'c', 'd', 'e'])
append(table, range(20))
document.save('test.docx')
总列数不要超过 13 ,否则可能显示不全,把 width 改小,如 width = Cm(1.0)
插入图表
此部分需要修改原库代码,本人已打包好,源码收费500,需要请私信,将【替换】文件夹覆盖到docx中即可,具体路径如:C:\Users\Administrator\AppData\Local\Programs\Python\Python36\Lib\site-packages\docx
安装
pip install python-pptx==0.6.18
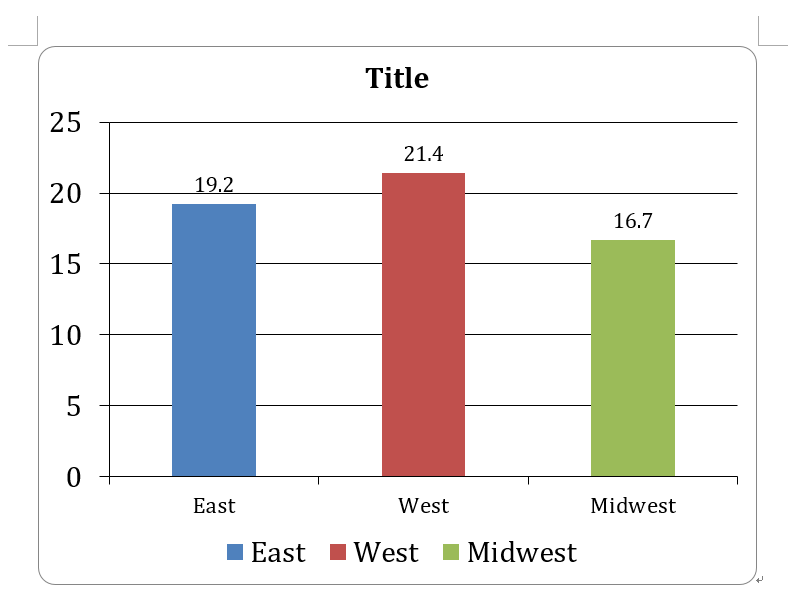
代码
from docx import Document
from pptx.util import Pt, Cm
from pptx.chart.data import CategoryChartData
from pptx.enum.chart import XL_CHART_TYPE, XL_LEGEND_POSITION, XL_DATA_LABEL_POSITION

document = Document()
chart_data = CategoryChartData()
chart_data.categories = ['East', 'West', 'Midwest']
chart_data.add_series('Series 1', (19.2, 21.4, 16.7))
chart = document.add_chart(XL_CHART_TYPE.COLUMN_CLUSTERED, 0, 0, Cm(15.2), Cm(11.4), chart_data)

chart.has_legend = True
chart.legend.position = XL_LEGEND_POSITION.BOTTOM
chart.legend.include_in_layout = False

plot = chart.plots[0]
plot.has_data_labels = True
data_labels = plot.data_labels
data_labels.font.size = Pt(13)
data_labels.position = XL_DATA_LABEL_POSITION.OUTSIDE_END

chart.has_title = True
chart_title = chart.chart_title
text_frame = chart_title.text_frame
text_frame.text = 'Title'
paragraphs = text_frame.paragraphs
paragraph = paragraphs[0]
paragraph.font.size = Pt(18)

category_axis = chart.category_axis
category_axis.tick_labels.font.size = Pt(14)

document.save('test.docx')
效果
去掉边框
from lxml import etree
from pptx.util import Cm
from docx import Document
from pptx.enum.chart import XL_CHART_TYPE
from pptx.chart.data import CategoryChartData


def set_chart_no_border(chart):
    """图表设为无边框"""
    xml = '<c:spPr><a:ln><a:noFill/></a:ln></c:spPr>'
    parser = etree.XMLParser(recover=True)
    element = etree.fromstring(xml, parser)
    chart._chartSpace.append(element)


document = Document()
chart_data = CategoryChartData()
chart_data.categories = ['East', 'West', 'Midwest']
chart_data.add_series('Series 1', (19.2, 21.4, 16.7))
chart = document.add_chart(XL_CHART_TYPE.COLUMN_CLUSTERED, 0, 0, Cm(15.2), Cm(11.4), chart_data)
set_chart_no_border(chart)
document.save('test.docx')

样式
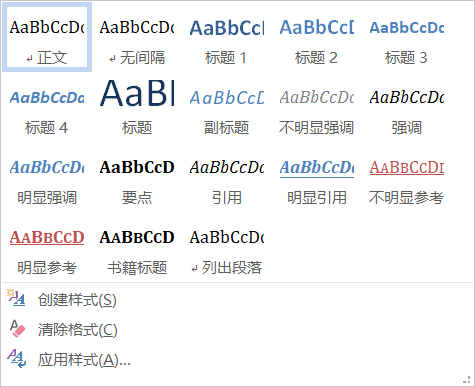
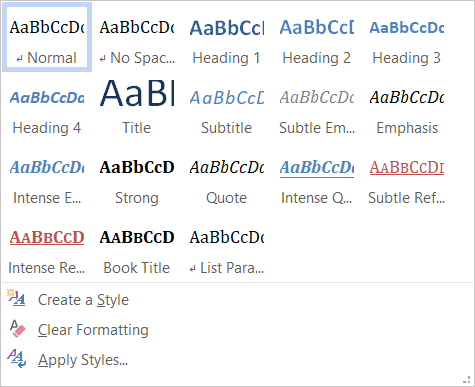
样式名称对应英文的名称,将Word设为英文即可见,设置方法见下文。
标题样式 add_heading('xxx', level=x)
| 标题 | level |
|---|---|
| 标题 | 0 |
| 标题 1 | 1 |
| 标题 2 | 2 |
| 标题 3 | 3 |
| 标题 4 | 4 |
段落样式 add_paragraph('xxx', style='xxx')
| 段落样式 | style |
|---|---|
| 正文 | None |
| 标题 | Title |
| 副标题 | Subtitle |
| 无间隔 | No Spacing |
| 引用 | Quote |
| 明显引用 | Intense Quote |
| 列出段落 | List Paragraph |
| 无序列表 | List Bullet |
| 有序列表 | List Number |
字符样式 add_run('xxx', style='xxx')
| 样式 | style |
|---|---|
| 正文 | None |
| 加粗 | add_run('加粗').bold = True |
| 倾斜 | add_run('倾斜').italic = True |
| 不明显强调 | Subtle Emphasis |
| 强调 | Emphasis |
| 明显强调 | Intense Emphasis |
| 要点 | Strong |
| 不明显参考 | Subtle Reference |
| 明显参考 | Intense Reference |
| 书籍标题 | Book Title |
表格样式
from docx import Document

document = Document()

'''标题样式'''
document.add_heading('标题', level=0)
document.add_heading('标题 1', level=1)
document.add_heading('标题 2', level=2)
document.add_heading('标题 3', level=3)
document.add_heading('标题 4', level=4)
document.add_heading('标题 5', level=5)
document.add_page_break()

'''段落样式'''
document.add_paragraph('正文', style=None)
document.add_paragraph('标题', style='Title')
document.add_paragraph('副标题', style='Subtitle')
document.add_paragraph('无间隔', style='No Spacing')
document.add_paragraph('引用', style='Quote')
document.add_paragraph('明显引用', style='Intense Quote')
document.add_paragraph('列出段落', style='List Paragraph')
document.add_paragraph('无序列表', style='List Bullet')
document.add_paragraph('有序列表', style='List Number')
document.add_page_break()

'''字符样式'''
paragraph = document.add_paragraph()
paragraph.add_run('正文')
paragraph.add_run('加粗').bold = True
paragraph.add_run('倾斜').italic = True
paragraph.add_run('不明显强调', style='Subtle Emphasis')
paragraph.add_run('强调', style='Emphasis')
paragraph.add_run('明显强调', style='Intense Emphasis')
paragraph.add_run('要点', style='Strong')
paragraph.add_run('不明显参考', style='Subtle Reference')
paragraph.add_run('明显参考', style='Intense Reference')
paragraph.add_run('书籍标题', style='Book Title')
document.save('test.docx')
效果

详细阅读
样式细节
- 字符样式:
_CharacterStyle,应用于Run对象 - 段落样式:
_ParagraphStyle - 表格样式:
_TableStyle - 数字样式:
_NumberingStyle
代码
from docx import Document
from docx.shared import Pt
from docx.oxml.ns import qn

document = Document()
paragraph = document.add_paragraph(text='一、摘要')
style = paragraph.style
font = paragraph.style.font
font.name = '宋体'
font._element.rPr.rFonts.set(qn('w:eastAsia'), '宋体')
font.size = Pt(22)
font.bold = True
document.save('test.docx')

修改默认样式
获取所有样式
from docx import Document
from docx.enum.style import WD_STYLE_TYPE

document = Document()
styles = document.styles
for style in styles:
    if style.type == WD_STYLE_TYPE.CHARACTER:
        print('字符样式', style.name)
    elif style.type == WD_STYLE_TYPE.PARAGRAPH:
        print('段落样式', style.name)
    elif style.type == WD_STYLE_TYPE.TABLE:
        print('表格样式', style.name)
    elif style.type == WD_STYLE_TYPE.LIST:
        print('数字样式', style.name)
    else:
        print('未知样式', style.name)
拷贝默认样式
from docx import Document
from docx.enum.style import WD_STYLE_TYPE

_style = Document().styles.get_by_id('TableGrid', WD_STYLE_TYPE.TABLE)
document = Document('1.docx')  # 没有该样式的文档
document.styles.element.append(_style.element)
table = document.add_table(3, 3, style='Table Grid')
document.save('test.docx')
print([i.name for i in document.styles])
段落
from docx import Document
from docx.oxml.ns import qn
from docx.shared import Pt, RGBColor

document = Document()
style = document.styles['Normal']
style.font.name = '宋体'
style.font.element.rPr.rFonts.set(qn('w:eastAsia'), '宋体')
style.font.size = Pt(22)
style.font.color.rgb = RGBColor(0, 0, 0)
document.add_paragraph().add_run('你好')
document.add_paragraph().add_run('早上好')
document.save('test.docx')

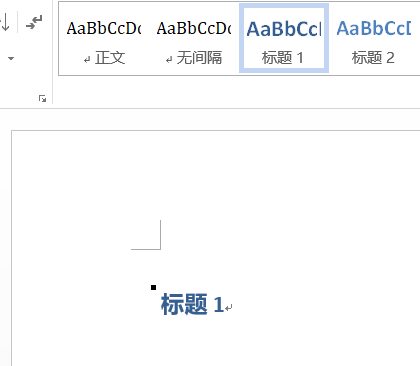
表格
样式
from docx import Document
from docx.oxml.ns import qn
from docx.shared import Pt, RGBColor
document = Document()
heading = document.add_heading('标题 1', level=1)
style = heading.style
# style = document.styles['Heading 1'] # 同上
attrib_delete = {'majorHAnsi', 'majorEastAsia', 'majorBidi'} # 要删除的属性
for key, value in style.element.rPr.rFonts.attrib.items():
if value in attrib_delete:
style.element.rPr.rFonts.attrib.pop(key, None)
style.element.rPr.rFonts.set(qn('w:ascii'), '宋体')
style.element.rPr.rFonts.set(qn('w:eastAsia'), '宋体')
style.element.rPr.rFonts.set(qn('w:hAnsi'), '宋体')
style.element.rPr.rFonts.set(qn('w:cs'), '宋体')
style.font.size = Pt(22)
style.font.color.rgb = RGBColor(0, 0, 0)
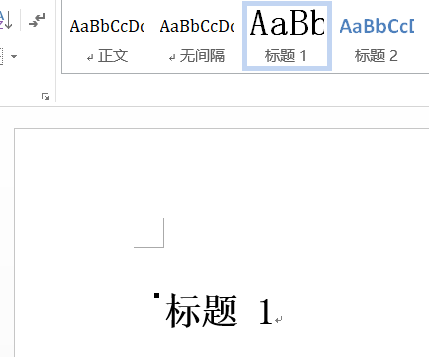
document.save('test.docx')
修改前
修改后
自定义样式
合并文档
安装
pip install docxcompose
代码
from docx import Document
from docxcompose.composer import Composer
# 保存
document1 = Document()
document2 = Document()
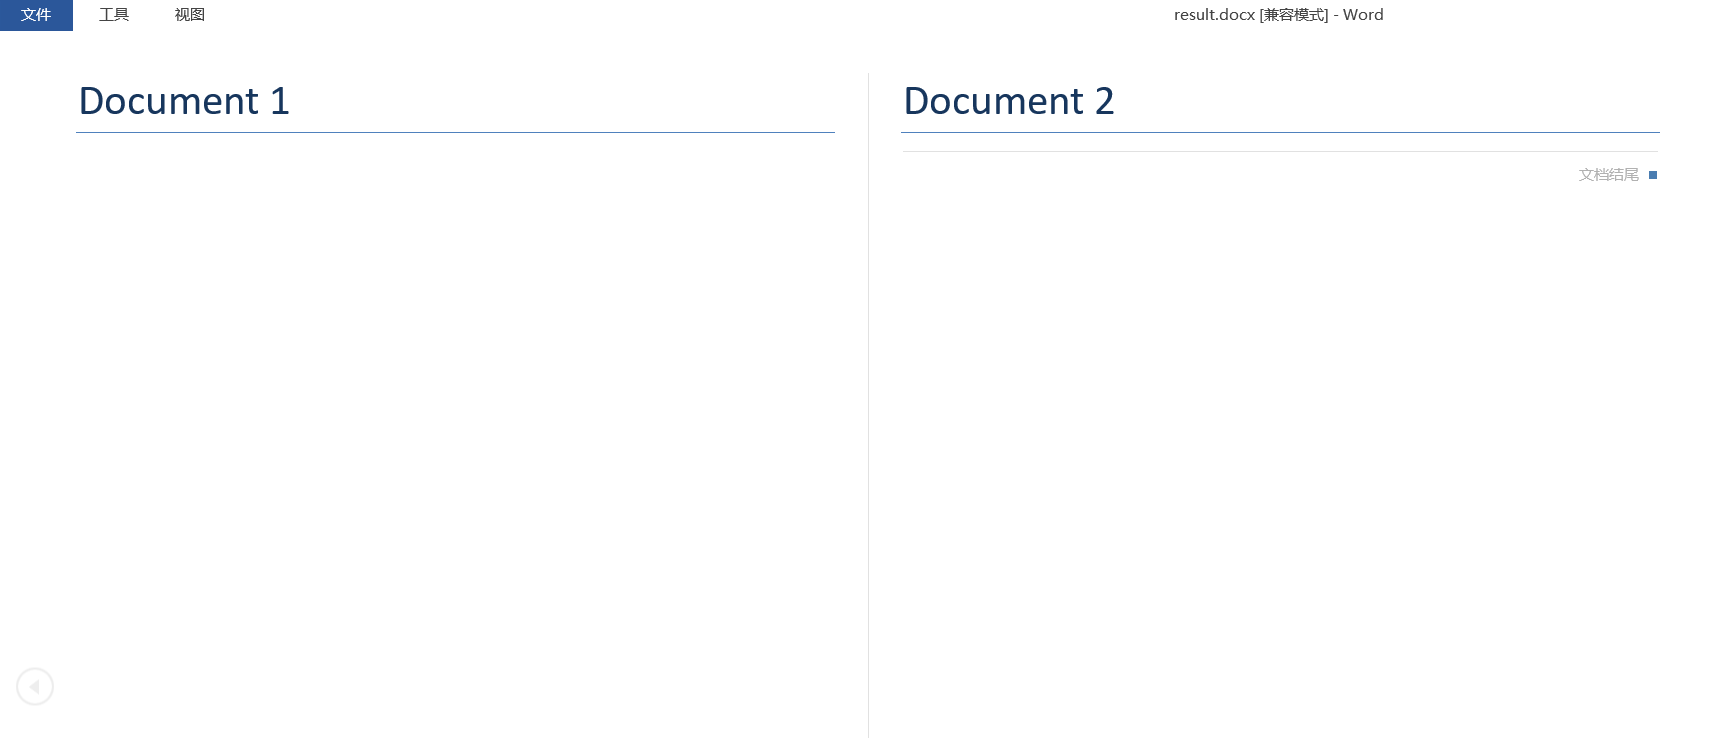
document1.add_heading('Document 1', level=0)
document1.add_page_break() # 分页
document1.save('1.docx')
document2.add_heading('Document 2', level=0)
document2.save('2.docx')
# 打开
document1 = Document('1.docx')
document2 = Document('2.docx')
# 合并
composer = Composer(document1)
composer.append(document2)
composer.save('result.docx')
效果
判断文件为 docx 还是 doc
with open('1.doc', 'rb') as f:
    start_bytes = f.read(2).decode('latin1')
    print(start_bytes)
    if start_bytes == 'PK':
        print('.docx')
    else:
        print('.doc')
说明:
- 应该只支持 .docx
- 合并 WPS 保存的文档可能会报错,可以试试用 Office 保存一次再合并
- 图片的自动换行为【浮于文字上方】可能会报错,可以试试改为【嵌入型】
- 可能会样式丢失
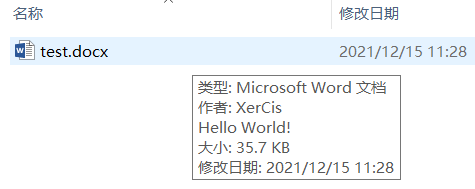
修改作者
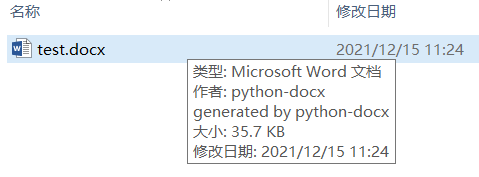
from docx import Document

document = Document()
core_properties = document.core_properties
core_properties.author = 'XerCis'  # 作者
core_properties.comments = 'Hello World!'  # 注释
document.save('test.docx')  # 保存
修改前
修改后
表格内文本水平垂直居中
from docx import Document
from docx.shared import Cm
from docx.enum.text import WD_PARAGRAPH_ALIGNMENT
from docx.enum.table import WD_TABLE_ALIGNMENT, WD_CELL_VERTICAL_ALIGNMENT

document = Document()

'''原始数据'''
table = document.add_table(1, 3, style='Light Shading Accent 1')
heading_cells = table.rows[0].cells
heading_cells[0].text = '姓名'
heading_cells[1].text = '语文'
heading_cells[2].text = '数学'
grades = (
    ('甲', 90, 80),
    ('乙', 80, 90),
    ('丙', 100, 100),
)
for name, chinese, math in grades:
    cells = table.add_row().cells
    cells[0].text = name
    cells[1].text = str(chinese)
    cells[2].text = str(math)

'''主要方法'''
for row in table.rows:  # 统一行高
    row.height = Cm(1.0)

for column in table.columns:  # 统一列宽
    # column.width = Cm(3.0)  # 不起作用
    for cell in column.cells:
        cell.width = Cm(3.0)

table.alignment = WD_TABLE_ALIGNMENT.CENTER  # 表居中

for cell in table.row_cells(0):  # 第一行单元格
    cell.vertical_alignment = WD_CELL_VERTICAL_ALIGNMENT.CENTER  # 垂直对齐,居中

for column in table.columns:  # 所有列
    for cell in column.cells:  # 所有单元格
        for paragraph in cell.paragraphs:  # 所有段落
            paragraph.paragraph_format.alignment = WD_PARAGRAPH_ALIGNMENT.CENTER  # 水平对齐,居中

document.save('test.docx')
图片填充满表格,修改单元格边距
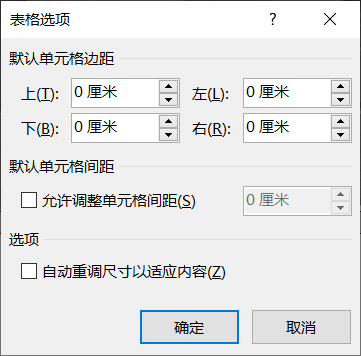
具体操作:
- 无缩进无间距单倍行距
- 单元格上下左右边距为0
- 不允许自动重调尺寸
- 单元格宽度为偶数
- 平均分布列(Maybe)
from docx import Document
from docx.shared import Cm
from docx.oxml.shared import OxmlElement, qn
def set_cell_margins(cell, **kwargs):
"""设置某单元格间距
长度单位为Twips,1Twips = 1/20pt,1Twips = 1/567cm
>>> set_cell_margins(table.cell(1, 0), top=0, start=0, bottom=0, end=0, left=0, right=0)
:param cell: 某单元格
:param top: 上边距
:param start: 左边距
:param bottom: 下边距
:param end: 右边距
:param left: 左边距(WPS)
:param right: 右边距(WPS)
"""
tc = cell._tc
tcPr = tc.get_or_add_tcPr()
tcMar = OxmlElement('w:tcMar')
for m in ['top', 'start', 'bottom', 'end', 'left', 'right']:
if m in kwargs:
node = OxmlElement('w:{}'.format(m))
node.set(qn('w:w'), str(kwargs.get(m)))
node.set(qn('w:type'), 'dxa')
tcMar.append(node)
tcPr.append(tcMar)
document = Document()
table = document.add_table(2, 2, style='Light List')
heading_cells = table.rows[0].cells
cell1, cell2 = heading_cells[0], heading_cells[-1]
cell1.merge(cell2) # 合并单元格
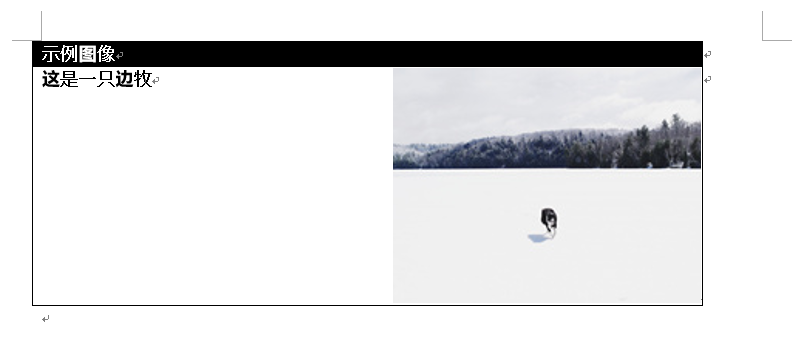
cell1.text = '示例图像'
table.rows[1].height = Cm(5.0) # 第二行行高为5cm
detail_cell = table.cell(1, 0) # 描述图片的单元格
picture_cell = table.cell(1, 1) # 放置图片的单元格
detail_cell.text = '这是一只边牧'
paragraph = picture_cell.paragraphs[0]
run = paragraph.add_run()
picture = run.add_picture('test.jpg', height=Cm(5.0)) # 插入图片
picture_cell.width = Cm(picture.width.cm) # 单元格宽度设为图片的宽度
min_width = min([cell.width.cm for cell in table.column_cells(1)]) # 第二列单元格的最小宽度
for cell in table.column_cells(1): # 第二列单元格
cell.width = Cm(min_width) # 第二列单元格宽度设为最小宽度
set_cell_margins(picture_cell, top=0, start=0, bottom=0, end=0) # 设置单元格间距
document.save('test.docx')
效果
批量替换文本内容
def replace_text(document, old, new):
    """批量替换文本内容

    :param document: 实例化的Document对象
    :param old: 被替换的字符串
    :param new: 新字符串
    """
    for paragraph in document.paragraphs:
        for run in paragraph.runs:
            run.text = run.text.replace(old, new)

    for table in document.tables:
        for row in table.rows:
            for cell in row.cells:
                cell.text = cell.text.replace(old, new)
填充表格
from docx import Document
from docx.oxml.ns import qn, nsdecls
from docx.shared import Pt, Cm, RGBColor, Inches
from docx.oxml import parse_xml, OxmlElement
from docx.enum.text import WD_PARAGRAPH_ALIGNMENT, WD_COLOR_INDEX
from docx.enum.table import WD_TABLE_ALIGNMENT, WD_CELL_VERTICAL_ALIGNMENT
def fill_table(table, x, y, merge_x=-1, merge_y=-1,
content='', font_name='微软雅黑', font_size=10.5,
bold=False, italic=False, underline=False, strike=False,
font_color=None, highlight_color=None,
paragraph_alignment=None, line_spacing=None,
width=2.93, height=0.55, vertical_alignment=WD_CELL_VERTICAL_ALIGNMENT.CENTER,
fill_color=None, topbottommargin=None, startendmargin=None,
picture=None, picture_width=None, picture_height=None):
"""填充表格
:param table: 要操作的表格
:param x: 起始行数,从0开始
:param y: 起始列数,从0开始
:param merge_x: 要合并的单元格的行数,从0开始
:param merge_y: 要合并的单元格的列数,从0开始
:param content: 填充的内容
:param font_name: 字体名称,如宋体
:param font_size: 字体大小,单位为 Pt
:param bold: 字体是否加粗
:param italic: 字体是否倾斜
:param underline: 字体是否下划线
:param strike: 字体是否删除线
:param font_color: 字体颜色,十六进制字符串,如黑色'000000'
:param highlight_color: 字体高亮颜色,如黄色取值WD_COLOR_INDEX.YELLOW
:param paragraph_alignment: 段落水平对齐方式,如居中为WD_PARAGRAPH_ALIGNMENT.CENTER
:param line_spacing: 段落几倍行距
:param height: 单元格高度,单位为 Cm
:param width: 单元格宽度,单位为 Cm
:param vertical_alignment: 单元格垂直对齐方式,默认垂直居中
:param fill_color: 单元格填充颜色,十六进制字符串,如白色'FFFFFF'
:param topbottommargin: 单元格上下边距,单位为 Cm
:param startendmargin: 单元格左右边距,单位为 Cm
:param picture: 插入的图片路径
:param picture_width: 单元格宽度,单位为 Cm
:param picture_height: 单元格高度,单位为 Cm
"""
if merge_x < 0:
cell = table.cell(x, y)
else:
cell = table.cell(x, y).merge(table.cell(merge_x, merge_y)) # 合并单元格
run = cell.paragraphs[0].add_run(str(content)) # 填充内容
run.font.name = font_name # 字体名称
run.font.element.rPr.rFonts.set(qn('w:eastAsia'), font_name)
run.font.size = Pt(font_size) # 字体大小
run.bold = bold # 字体加粗
run.italic = italic # 字体倾斜
run.underline = underline # 字体下划线
run.font.strike = strike # 字体删除线
if font_color:
run.font.color.rgb = RGBColor.from_string(font_color) # 字体颜色
if highlight_color:
run.font.highlight_color = highlight_color # 字体高亮颜色
if paragraph_alignment:
cell.paragraphs[0].paragraph_format.alignment = paragraph_alignment # 段落水平对齐方式
if line_spacing:
cell.paragraphs[0].paragraph_format.line_spacing = line_spacing # 段落几倍行距
cell.width = Cm(width) # 单元格宽度
table.rows[x].height = Cm(height) # 单元格高度,即设置该行的高度
cell.vertical_alignment = vertical_alignment # 单元格垂直对齐方式
if fill_color: # 单元格填充颜色
cell._tc.get_or_add_tcPr().append(parse_xml('<w:shd {} w:fill="{}"/>'.format(nsdecls('w'), fill_color)))
tc = cell._tc
tcPr = tc.get_or_add_tcPr()
tcMar = OxmlElement('w:tcMar')
if topbottommargin is not None: # 单元格上下边距
topbottommargin *= 567
for m in ['top', 'bottom']:
node = OxmlElement('w:{}'.format(m))
node.set(qn('w:w'), str(topbottommargin))
node.set(qn('w:type'), 'dxa')
tcMar.append(node)
tcPr.append(tcMar)
if startendmargin is not None: # 单元格左右边距
startendmargin *= 567 # 1Cm = 567Twips
for m in ['start', 'end', 'left', 'right']: # left和right是WPS的左右边距
node = OxmlElement('w:{}'.format(m))
node.set(qn('w:w'), str(startendmargin))
node.set(qn('w:type'), 'dxa')
tcMar.append(node)
tcPr.append(tcMar)
if picture:
picture_width = Cm(picture_width) if picture_width else None
picture_height = Cm(picture_height) if picture_height else None
run.add_picture(picture, picture_width, picture_height)
return
def set_cells_width(table, width):
"""统一设置列宽,最终表格宽度不能大于15.24厘米
:param table: 要操作的表格
:param width: width: 单元格宽度,单位为 Cm
"""
for row in table.rows:
for cell in row.cells:
cell.width = Cm(width)
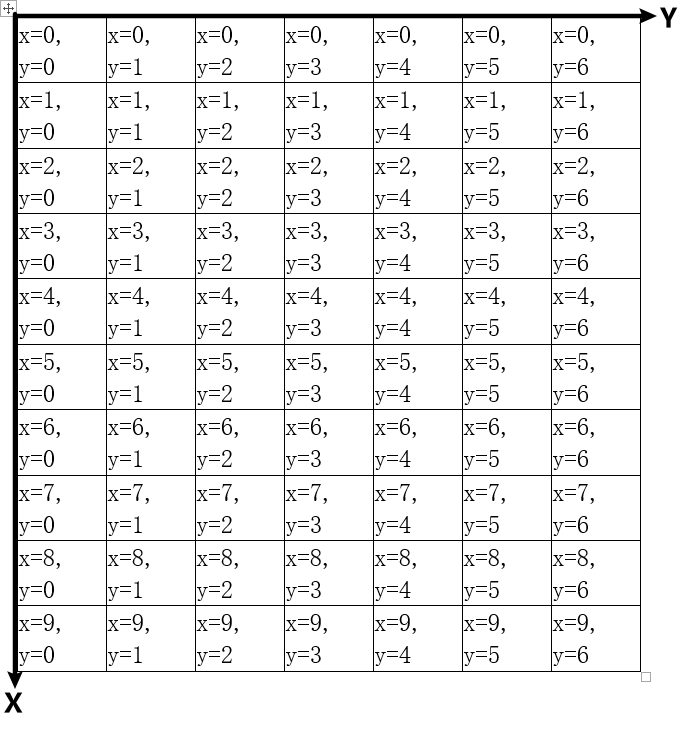
document = Document()
rows = 10
cols = 7
table = document.add_table(rows=rows, cols=cols, style='Table Grid')
table.alignment = WD_TABLE_ALIGNMENT.CENTER # 表格居中
for x in range(rows):
for y in range(cols):
fill_table(table, x=x, y=y, content='x={}, y={}'.format(x, y))
document.add_page_break()
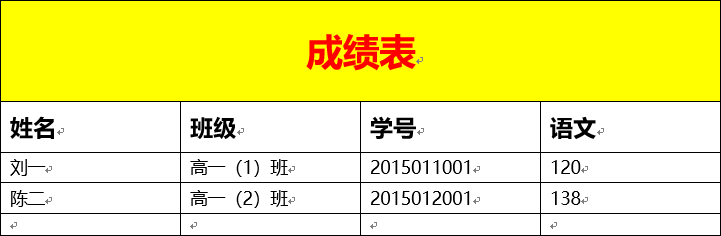
rows = 5
cols = 4
table = document.add_table(rows=rows, cols=cols, style='Table Grid')
table.alignment = WD_TABLE_ALIGNMENT.CENTER # 表格居中
fill_table(table, x=0, y=0, merge_x=0, merge_y=cols - 1, content='成绩表', font_size=22, bold=True, font_color='FF0000',
paragraph_alignment=WD_PARAGRAPH_ALIGNMENT.CENTER, fill_color='FFFF00', topbottommargin=0.4)
for y, content in enumerate(['姓名', '班级', '学号', '语文']):
fill_table(table, x=1, y=y, content=content, font_size=14, bold=True, topbottommargin=0.1)
for y, content in enumerate(['刘一', '高一(1)班', '2015011001', '120']):
fill_table(table, x=2, y=y, content=content)
for y, content in enumerate(['陈二', '高一(2)班', '2015012001', '138']):
fill_table(table, x=3, y=y, content=content)
document.add_page_break()
rows = 2
cols = 2
table = document.add_table(rows=rows, cols=cols, style='Table Grid')
table.alignment = WD_TABLE_ALIGNMENT.CENTER # 表格居中
fill_table(table, x=0, y=0, merge_x=0, merge_y=cols - 1, content='图片', font_size=22, bold=True, font_color='FF0000',
paragraph_alignment=WD_PARAGRAPH_ALIGNMENT.CENTER, fill_color='FFFF00', topbottommargin=0.4)
fill_table(table, x=1, y=0, startendmargin=0, picture='test.jpg', picture_height=5,
paragraph_alignment=WD_PARAGRAPH_ALIGNMENT.CENTER)
fill_table(table, x=1, y=1, startendmargin=0, picture='test.jpg', picture_width=2,
paragraph_alignment=WD_PARAGRAPH_ALIGNMENT.CENTER)
document.save('test.docx')

备注:
1. 某一列的宽度均为一个值时设置才生效,且让最终表格宽度不能大于 15.24 厘米
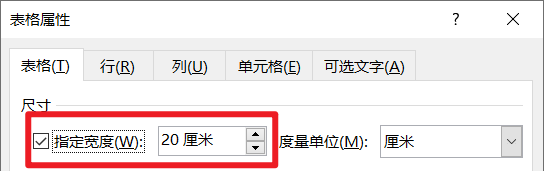
表格指定宽度
默认插入表格宽度为 15.24 厘米,用上述方法调整宽度只能小于这个值,不能大于这个值,于是对表格指定宽度
from docx import Document
from docx.enum.table import WD_TABLE_ALIGNMENT


def set_table_width(table, width):
    """表格指定宽度

    :param table: 要操作的表格
    :param width: 表格宽度,单位为 Cm
    """
    tblW = table._tblPr.xpath('w:tblW')[0]
    for key, value in tblW.attrib.items():
        if value == 'auto':
            tblW.attrib[key] = 'dxa'
        if value == '0':
            tblW.attrib[key] = str(width * 567)


document = Document()
table = document.add_table(rows=5, cols=2, style='Table Grid')
table.alignment = WD_TABLE_ALIGNMENT.CENTER  # 表格居中
set_table_width(table, width=20.0)
document.save('test.docx')
修改前
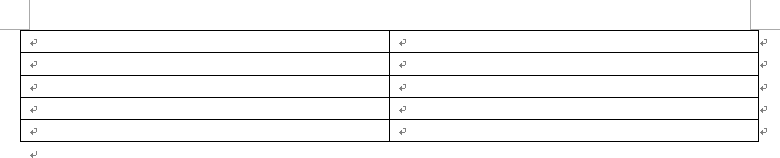
修改后

删除单元格的段落
表格内插入表格,新表格上方会多出一行段落,直接 del 不生效
from docx import Document


def delete_paragraph(paragraph):
    """删除某一段落"""
    p = paragraph._element
    tc = p.getparent()
    tc.remove(p)
    p._p = None
    p._element = None


document = Document()
table = document.add_table(rows=1, cols=1, style='Table Grid')
cell = table.cell(row_idx=0, col_idx=0)

# 表格内的表格
rows = 3
cols = 3
_table = cell.add_table(rows=rows, cols=cols)
for row in range(rows):
    for col in range(cols):
        _cell = _table.cell(row_idx=row, col_idx=col)
        _cell.paragraphs[0].add_run(str(row + col))
delete_paragraph(cell.paragraphs[0])
document.save('test.docx')
修改前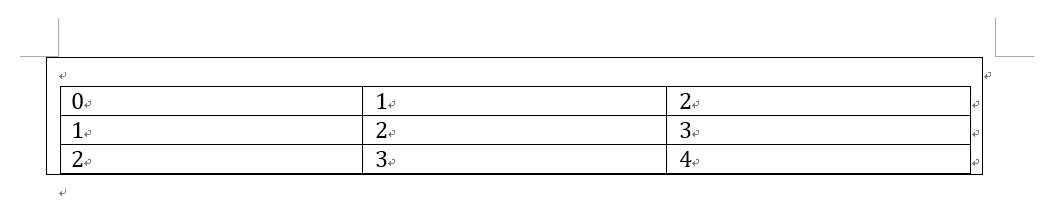
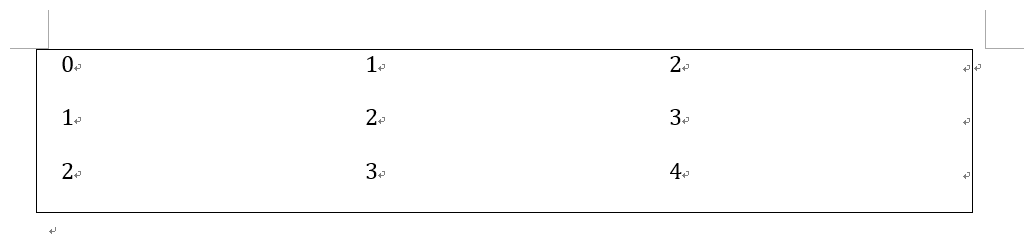
修改后
添加段落
from docx import Document
from docx.shared import Pt, RGBColor
from docx.oxml.shared import OxmlElement, qn
from docx.enum.text import WD_LINE_SPACING, WD_PARAGRAPH_ALIGNMENT, WD_COLOR_INDEX


def set_indent(paragraph, left_indent=None, right_indent=None, first_line_indent=None, hanging_indent=None):
    """设置缩进,单位为字符

    :param paragraph: 某段落
    :param left_indent: 左缩进
    :param right_indent: 右缩进
    :param first_line_indent: 首行缩进
    :param hanging_indent: 悬挂缩进
    """
    assert not all([first_line_indent, hanging_indent]), '首行缩进与悬挂缩进不可同时设置'
    pPr = paragraph._element.get_or_add_pPr()
    ind = OxmlElement('w:ind')
    if left_indent:
        ind.set(qn('w:leftChars'), str(left_indent * 100))
    if right_indent:
        ind.set(qn('w:rightChars'), str(right_indent * 100))
    if first_line_indent:
        ind.set(qn('w:firstLineChars'), str(first_line_indent * 100))
    if hanging_indent:
        ind.set(qn('w:hangingChars'), str(hanging_indent * 100))
    pPr.append(ind)


def set_line_spacing(paragraph, multiple=None, exactly=None, at_least=None):
    """设置行距

    :param paragraph: 某段落
    :param multiple: 多倍行距,整数或浮点数
    :param exactly: 固定值,单位为磅(Pt)
    :param at_least: 最小值,单位为磅(Pt)
    """
    assert [bool(i) for i in [multiple, exactly, at_least]].count(True) == 1, '只能设置一种行距'
    if multiple:
        paragraph.paragraph_format.line_spacing = multiple
    if exactly:
        paragraph.paragraph_format.line_spacing = Pt(exactly)
    if at_least:
        paragraph.paragraph_format.line_spacing = Pt(at_least)
        paragraph.paragraph_format.line_spacing_rule = WD_LINE_SPACING.AT_LEAST


def add_paragraph(document_or_cell,
                  content='', font_name='微软雅黑', font_size=10.5,
                  bold=False, italic=False, underline=False, strike=False,
                  font_color=None, highlight_color=None,
                  paragraph_alignment=None,
                  left_indent=None, right_indent=None, first_line_indent=None, hanging_indent=None,
                  space_before=0, space_after=0, multiple=1.0, exactly=None, at_least=None,
                  keep_together=None, keep_with_next=None, page_break_before=None, widow_control=None):
    """添加段落

    :param table: 要操作的表格
    :param x: 起始行数,从0开始
    :param y: 起始列数,从0开始
    :param merge_x: 要合并的单元格的行数,从0开始
    :param merge_y: 要合并的单元格的列数,从0开始
    :param content: 填充的内容
    :param font_name: 字体名称,如宋体
    :param font_size: 字体大小,单位为磅(Pt)
    :param bold: 字体是否加粗
    :param italic: 字体是否倾斜
    :param underline: 字体是否下划线
    :param strike: 字体是否删除线
    :param font_color: 字体颜色,十六进制字符串,如黑色'000000'
    :param highlight_color: 字体高亮颜色,如黄色取值WD_COLOR_INDEX.YELLOW
    :param paragraph_alignment: 段落对齐方式,如居中为WD_PARAGRAPH_ALIGNMENT.CENTER
    :param left_indent: 左缩进,单位为字符
    :param right_indent: 右缩进,单位为字符
    :param first_line_indent: 首行缩进,单位为字符
    :param hanging_indent: 悬挂缩进,单位为字符
    :param space_before: 段前间距,单位为磅(Pt)
    :param space_after: 段后间距,单位为磅(Pt)
    :param multiple: 段落多倍行距,整数或浮点数
    :param exactly: 段落行距固定值,单位为磅(Pt)
    :param at_least: 段落行距最小值,单位为磅(Pt)
    :param keep_together: 孤行控制,取值True、False
    :param keep_with_next: 与下段同页,取值True、False
    :param page_break_before: 段中不分页,取值True、False
    :param widow_control: 段前分页,取值True、False
    """
    paragraph = document_or_cell.add_paragraph()
    run = paragraph.add_run(str(content))  # 填充内容
    run.font.name = font_name  # 字体名称
    run.font.element.rPr.rFonts.set(qn('w:eastAsia'), font_name)
    run.font.size = Pt(font_size)  # 字体大小
    run.font.bold = bold  # 字体加粗
    run.font.italic = italic  # 字体倾斜
    run.font.underline = underline  # 字体下划线
    run.font.strike = strike  # 字体删除线

    if font_color:
        run.font.color.rgb = RGBColor.from_string(font_color)  # 字体颜色
    if highlight_color:
        run.font.highlight_color = highlight_color  # 字体高亮颜色

    if paragraph_alignment:
        paragraph.paragraph_format.alignment = paragraph_alignment  # 段落对齐方式
    set_indent(paragraph, left_indent, right_indent, first_line_indent, hanging_indent)  # 设置缩进
    paragraph.paragraph_format.space_before = Pt(space_before)  # 段前间距
    paragraph.paragraph_format.space_after = Pt(space_after)  # 段后间距
    if any([exactly, at_least]):
        set_line_spacing(paragraph, None, exactly, at_least)  # 设置行距
    else:
        set_line_spacing(paragraph, multiple)  # 默认单倍行距

    if keep_together is not None:
        paragraph.paragraph_format.keep_together = keep_together
    if keep_with_next is not None:
        paragraph.paragraph_format.keep_with_next = keep_with_next
    if page_break_before is not None:
        paragraph.paragraph_format.page_break_before = page_break_before
    if widow_control is not None:
        paragraph.paragraph_format.widow_control = widow_control
    return paragraph


document = Document()
document_or_cell = document

# table = document.add_table(rows=1, cols=1, style='Table Grid')
# cell = table.cell(0, 0)
# document_or_cell = cell

add_paragraph(document_or_cell, content='字体和大小', font_name='宋体', font_size=12)
add_paragraph(document_or_cell, content='字形和效果', bold=True, italic=True, underline=True, strike=True)
add_paragraph(document_or_cell, content='颜色', font_color='FF0000', highlight_color=WD_COLOR_INDEX.YELLOW)
add_paragraph(document_or_cell, content='居中', paragraph_alignment=WD_PARAGRAPH_ALIGNMENT.CENTER)
add_paragraph(document_or_cell, content='缩进', left_indent=2, right_indent=3, first_line_indent=4)
add_paragraph(document_or_cell, content='间距', space_before=10, space_after=20)
add_paragraph(document_or_cell, content='行距', multiple=1.5)
add_paragraph(document_or_cell, content='换行和分页' + '.' * 10000,
              keep_together=True, keep_with_next=True, page_break_before=True, widow_control=True)
document.save('test.docx')

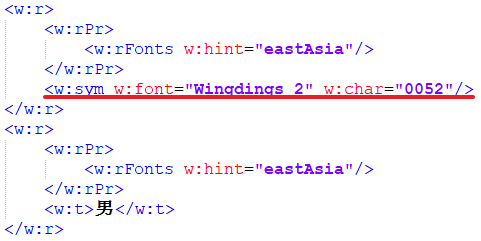
单元格□转☑
已知 WPS 里单击 □ 会变成 ☑,而 Office 的不行,真是有趣
from docx import Document


def get_selected(text, match):
    """返回□转☑的文本

    :param text: 单元格文本
    :param match: □后匹配的内容
    """
    if match in text:
        index = text.index(match)
        if index - 1 >= 0 and text[index - 1] == '□':
            text = text[:index - 1] + '☑' + text[index:]
    return text


def set_selected(table, x, y, content, **kargs):
    """设置□转☑的文本"""
    text = table.cell(x, y).text  # 原文本
    table.cell(x, y).text = ''  # 清空
    content = get_selected(text, content)  # □转☑的文本
    fill_table(table, x, y, content=content, **kargs)


document = Document()
table = document.add_table(rows=2, cols=2, style='Table Grid')
table.cell(0, 0).text = '性别'
table.cell(0, 1).text = '□男\t□女'
table.cell(1, 0).text = '学历'
table.cell(1, 1).text = '□小学\t□初中\t□高中\t□专科\t□本科\t□硕士研究生\t□博士研究生'
set_selected(table, x=0, y=1, content='男', font_size=12)
set_selected(table, x=1, y=1, content='本科', font_size=12)
document.save('test.docx')

这种方法用 WPS 打开的渲染效果并不好,修改底层会更好
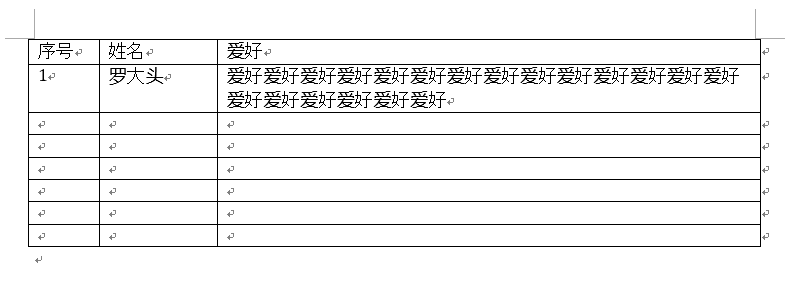
表格分别设置列宽
from docx import Document
from docx.shared import Cm
from docx.enum.table import WD_TABLE_ALIGNMENT


def set_table_different_width(table, widths):
    """表格分别设置列宽,单位为Cm"""
    for x, width in enumerate(widths):
        for cell in table.columns[x].cells:
            cell.width = Cm(width)


document = Document()
rows = 8
cols = 3
table = document.add_table(rows=rows, cols=cols, style='Table Grid')
table.alignment = WD_TABLE_ALIGNMENT.CENTER
table.cell(0, 0).text = '序号'
table.cell(0, 1).text = '姓名'
table.cell(0, 2).text = '爱好'
table.cell(1, 0).text = '1'
table.cell(1, 1).text = '罗大头'
table.cell(1, 2).text = '爱好' * 20
set_table_different_width(table, [1.5, 2.5, 11.5])
document.save('test.docx')
超链接
import docx
from docx.oxml.shared import OxmlElement, qn
from docx.enum.dml import MSO_THEME_COLOR_INDEX
from docx.opc.constants import RELATIONSHIP_TYPE


def add_hyperlink(paragraph, text, url):
    """添加超链接

    :param paragraph: 追加的段落
    :param text: 文本
    :param url: 链接
    """
    r_id = paragraph.part.relate_to(url, RELATIONSHIP_TYPE.HYPERLINK, is_external=True)  # 关联超链接
    hyperlink = OxmlElement('w:hyperlink')
    hyperlink.set(qn('r:id'), r_id)
    run = paragraph.add_run(text)
    run.font.color.theme_color = MSO_THEME_COLOR_INDEX.HYPERLINK
    run.font.underline = True
    hyperlink.append(run._r)
    paragraph._element.append(hyperlink)
    return hyperlink


document = docx.Document()
paragraph = document.add_paragraph('更多技术文章查阅:')
add_hyperlink(paragraph, 'XerCis的博客', 'https://xercis.blog.csdn.net/')
document.save('test.docx')

操作 XML
如 style.element.rPr.rFonts,继承链为 rFonts → CT_Fonts → BaseOxmlElement → _OxmlElementBase → etree.ElementBase → etree._Element
因此具体操作看文档:etree._Element
import pdir
from docx.oxml.text.font import CT_Fonts

print(pdir(CT_Fonts))
查找段落下标
def find_paragraph(document, keyword):
    """查找段落下标"""
    for index, paragraph in enumerate(document.paragraphs):
        text = ''.join(run.text for run in paragraph.runs)
        if keyword in text:
            return index
    return 0
查找表格某参数的所有值
def find_values(document, key):
    """查找表格某参数的所有值"""
    values = []
    for table in document.tables:
        for row in table.rows:
            length = len(row.cells)
            for index, cell in enumerate(row.cells):
                if key == cell.text and index <= length - 2:
                    values.append(row.cells[index + 1].text)
    return values
其他
1. Word切换为英文界面
文件 → 选项 → 语言 →选中【英语】 → 设为默认值 → 重启Word
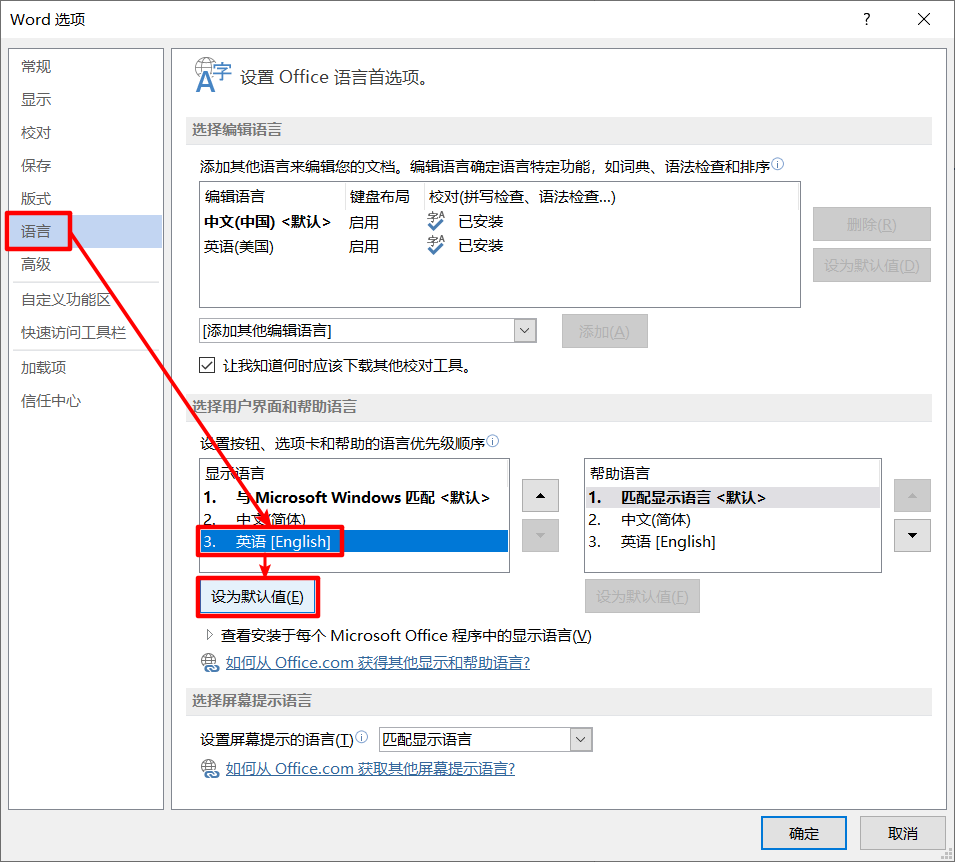
若没有该选项则需要下载 Office 2013 英语语言包
2. 表格设了宽度却与设的不同
将自动调整设为False,table.autofit = False,为True将与一行的长度相同。
3. 自定义Office组件
该库提供不了所有设置,无法做到极致细致的设置,因此需要对底层xml进行操作
from docx.oxml import parse_xml
from docx.oxml import OxmlElement
4. Office和WPS的格式有差异
如表格填充图片,图片宽度大于单元格宽度,有左右单元格边距,Office依然可以填充满图片,WPS则不行。
造成这种现象的原因在于两家软件采用的XML规范有所不同。如Office表格单元格左右边距为start和end,WPS的为left和right。
5. 报错docx.image.exceptions.UnrecognizedImageError
不能插入图片类型为 image/webp,见 New Image Format: WEBP
参考文献
- python-docx Documentation
- Microsoft Word 帮助和学习
- Office Open XML
- Office Open XML——从底层出发,自定义你的Office组件
- How to set cell margins of tables in ms word using python docx
- add add_chart for docx using chart from python-pptx
- [feature]add add_chart for docx using chart from python-pptx
- Jinja Documentation
- Word 神器 python-docx
- Python 操纵 word 有什么好用的类库?
- Office 2013 各国语言版以及语言包汇总下载
- 计算机常用长度单位
- python docx 中文字体设置
- how to remove attribute of a etree Element?
- Removing Paragraph From Cell In Python-Docx
- doc or docx: Is there safeway to identify the type from ‘requests’ in python3
- Can’t set table style
- How to make cell borders of table with python-docx
- Adding an hyperlink in MSWord by using python-docx


 1063
1063

 被折叠的 条评论
为什么被折叠?
被折叠的 条评论
为什么被折叠?
 到【灌水乐园】发言


