


前段时间做了个springMVC+ibatis的框架项目,搭框架的时候查询了很多资料,墨迹墨迹的做出来了,还不是太多 ,现在还属于学习阶段,写在这里以方便以后查找
- 这些是所需要的包,基本上都有了吧,可能还多了点。。。 。。。
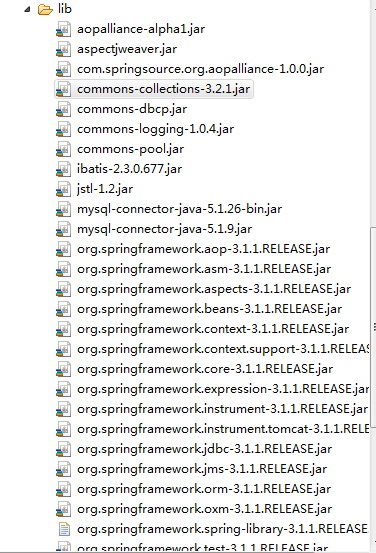
需要注意的是 springMVC依赖于Apache Commons Logging组件,没有它的话,程序无法正常工作
我的做法是先搭好springMVC然后在来整合ibatis,这样写更清楚些,不至于乱。
首先写好web.xml 文件
<?xml version="1.0" encoding="UTF-8"?>
<web-app version="2.5"
    xmlns="http://java.sun.com/xml/ns/javaee"
    xmlns:xsi="http://www.w3.org/2001/XMLSchema-instance"
    xsi:schemaLocation="http://java.sun.com/xml/ns/javaee
    http://java.sun.com/xml/ns/javaee/web-app_2_5.xsd">
  <welcome-file-list>
    <welcome-file>index.jsp</welcome-file>
  </welcome-file-list>

      <filter>
        <filter-name>characterEncodingFilter</filter-name>
        <filter-class>org.springframework.web.filter.CharacterEncodingFilter</filter-class>
        <init-param>
            <param-name>encoding</param-name>
            <param-value>UTF-8</param-value>
        </init-param>
        <init-param>
            <param-name>forceEncoding</param-name>
            <param-value>true</param-value>
        </init-param>
    </filter>
    <filter-mapping>
        <filter-name>characterEncodingFilter</filter-name>
        <url-pattern>/*</url-pattern>
    </filter-mapping>
      <servlet>
        <servlet-name>springMvc</servlet-name>
        <servlet-class>org.springframework.web.servlet.DispatcherServlet</servlet-class>
       <!-- 如不写下面则默认加载的是当前目录下的 servlet.xml配置文件-->
        <init-param>
            <param-name>contextConfigLocation</param-name>
            <param-value>/WEB-INF/classes/springMvc-servlet.xml</param-value>
        </init-param>
        <load-on-startup>1</load-on-startup>
    </servlet>
    <servlet-mapping>
        <servlet-name>springMvc</servlet-name>
        <url-pattern>/</url-pattern>
    </servlet-mapping>

</web-app>
该web.xml配置了编码格式为UTF-8
告诉了sercice/jsp 容器,我们将使用spring mvc 的Dispatcher Servlet
配置springMvc-servlet.xml的路径;
配置springMvc-servlet.xml文件
<?xml version="1.0" encoding="UTF-8"?>
 <beans xmlns="http://www.springframework.org/schema/beans"
 xmlns:xsi="http://www.w3.org/2001/XMLSchema-instance"
  xmlns:mvc="http://www.springframework.org/schema/mvc"
 xmlns:context="http://www.springframework.org/schema/context"
 xsi:schemaLocation="http://www.springframework.org/schema/beans http://www.springframework.org/schema/beans/spring-beans-2.5.xsd
  http://www.springframework.org/schema/mvc
 http://www.springframework.org/schema/mvc/spring-mvc.xsd
 http://www.springframework.org/schema/context
 http://www.springframework.org/schema/context/spring-context-3.0.xsd">

    <mvc:annotation-driven />
  <!-- 视图解析器 -->
<bean id="viewResolver" class="org.springframework.web.servlet.view.InternalResourceViewResolver">
    <!--<property name="viewClass" value="org.springframework.web.servlet.view.JstlView"/>
    --><property name="prefix" value="/WEB-INF/jsp/"/>
    <property name="suffix" value=".jsp"/>
</bean>
上方配置文件设置了返回页面的路径以及返回的页面的后缀,这样在返回java类中就不需要返回全路径。
因为使用的是spring的注解,需要在springMvc-servlet.xml中的beans中添加,上方已经添加了。
http://www.springframework.org/schema/context 然后需要添加(basePackage=文件的路径,)
<context:component-scan base-package="basePackage"/>因为我使用的是三层架构,所以需要添加三个。Controller,Service,Dao为包名称
<context:component-scan base-package="Controller"/>可以指定一个基本的包, 如果指定太广泛的包,会使得springmvc去扫描无关的包;
配置好后就可以在控制器中使用注解;@Controller 代表控制器
@Controller
public class Login {

}
现在需要在控制器中处理请求调用的方法
采用注解@RequestMapping
@RequestMapping(value="/login_denglu")
    public String login_denglu(UserTest userTest,Model model){

        return "login/loginInfo";
    }
使用RequestMapping注解的value属性将URI映射到方法
该注解可以设置该方法处理那些http请求, 通过设置method属性
@RequestMapping(value="/login_denglu",
                method={RequestMethod.POST,RequestMethod.PUT})
    public String login_denglu(UserTest userTest,Model model){

        return "login/loginInfo";
    }
如果不设置则代表任意
方法中UserTest userTest代表页面传入的数据的model
Model model –springmvc会给每个请求都创建一个Model 实例,用于增加需要在页面显示的属性
可以直接访问路径为:
http://localhost:8080/test/login_denglu
也可以设置页面form的action为login_denglu
    <form action="login_denglu" method="post">
    username:<input type="text" name="username">
    <br/>
    password:<input type="text" name="password">
    <br/>
    <input type="submit" value="登录">
</form>
编写逻辑层与数据层
需要在springMvc-servlet.xml中添加
<context:component-scan base-package="Service"/>
<context:component-scan base-package="Dao"/>
进行依赖注入
通过注解进行依赖注入,为了能注入,类必须声明为@Service
@Service
public class userServiceImpl implements userService{
                ...............................
}
调用的时候需要使用@Autowired 注解
    @Autowired
    private userService us;
    @RequestMapping(value="/login_denglu")
    public String login_denglu(UserTest userTest,Model model){
        us.addUser(userTest);
        model.addAttribute("user",userTest);
        return "login/loginInfo";
    }
无需进行set get 可以直接使用
以上就是springMVC的基本功能的实现,现在需要进行整合ibatis
我们需要将ibatis整合进spring中
需要在springMvc-servlet.xml中添加事务管理:
<!-- 配置事务特性 -->
<tx:advice id="txAdvice" transaction-manager="txManager">
<tx:attributes>
<tx:method name="add*" propagation="REQUIRED"/>
<tx:method name="del*" propagation="REQUIRED"/>
<tx:method name="update*" propagation="REQUIRED"/>
<tx:method name="*" read-only="true"/>
</tx:attributes>
</tx:advice>
<!-- 配置哪些类的方法需要进行事务管理 -->
<aop:config>
<aop:pointcut id="allManagerMethod" expression="execution(* com.ibatis.manager.*.*(..))"/>
<aop:advisor advice-ref="txAdvice" pointcut-ref="allManagerMethod"/>
</aop:config>
<!--事务管理DataSourceTransactionManager-->
<bean id="txManager"
class="org.springframework.jdbc.datasource.DataSourceTransactionManager">
<property name="dataSource" ref="dataSource" />
</bean>
<!-- 链接数据源 -->
<bean id="dataSource" class="org.apache.commons.dbcp.BasicDataSource">
<property name="driverClassName" value="com.mysql.jdbc.Driver"></property>
<property name="url" value="jdbc:mysql://localhost:3306/spring_ibatis?useUnicode=true&characterEncoding=utf-8"></property>
<property name="username" value="root"></property>
</bean>需要创建ibatis 的配置文件sqlMapConfig.xml:
<?xml version="1.0" encoding="UTF-8" ?>

<!DOCTYPE sqlMapConfig

    PUBLIC "-//ibatis.apache.org//DTD SQL Map Config 2.0//EN"

    "http://ibatis.apache.org/dtd/sql-map-config-2.dtd">

<sqlMapConfig>

    <settings
       lazyLoadingEnabled="true"
        useStatementNamespaces="true" /><!--useStatementNamespaces等于true的时候,
        、调用的时候需要用该xml的name.方法(例如:queryForObject("sqlMapName.statementName");)  -->
    <!-- 使用spring之后,数据源的配置移植到了spring上,所以iBATIS本身的配置可以取消 -->
  <sqlMap resource="Ibatis_xml/User.xml"/>
</sqlMapConfig>
sqlMapConfig.xml的主要作用就是链接各个表的xml
User.xml应为数据库表格对应的配置文件
<?xml version="1.0" encoding="UTF-8" ?>

<!DOCTYPE sqlMap

    PUBLIC "-//ibatis.apache.org//DTD SQL Map 2.0//EN"
    "http://ibatis.apache.org/dtd/sql-map-2.dtd">
<sqlMap namespace="UserTest">
 <typeAlias alias="User" type="Model.UserTest"/>
 <select id="selectAllUsers" resultClass="User">
    select * from sys_user
 </select>
</sqlMap>
dao中调用:
@Service
public class userDaoImpl extends SqlMapClientDaoSupport implements userDao {

    @Autowired
    public void setSqlMapClientForAutowire(SqlMapClient sqlMapClient) {
        super.setSqlMapClient(sqlMapClient);
    }
    @Override
    public List<UserTest> findAll(UserTest ut) {
        return getSqlMapClientTemplate().queryForList("UserTest.selectAllUsers");
       //  getSqlMapClientTemplate().queryForList("selectAllUsers");
 }
}
这样在逻辑层调用dao就可以实现数据库的访问了。


 268
268


 被折叠的 条评论
为什么被折叠?
被折叠的 条评论
为什么被折叠?
 到【灌水乐园】发言


