


概述
最近入职新公司,因几乎全部项目都使用到jasypt,故而初步学习记录下本文(持续更新)。
官网及GitHub给出的简介:使用简单,性能好,特性features非常丰富;支持
另,有个开源Jasypt-spring-boot组件,GitHub,集成Jasypt,方便Spring Boot开发者使用。
实战
开发中最常见的场景就是对数据库的密码进行加密,将加密后的密码配置在Apollo等配置中心。
Jasypt
使用Jasypt需引入如下依赖:
<dependency>
    <groupId>org.jasypt</groupId>
    <artifactId>jasypt</artifactId>
    <version>1.9.3</version>
</dependency>
而数据库的密码,不要使用=root、1qaz2wsx这种极易被暴力破解的。
推荐使用在线随机密码生成器,可指定密码的位数,当然也支持指定是否包括大、小写字母、数字、特殊符号等。
借助于这个在线工具,生产随机密码FkSs3k31。
直接上代码,Jasypt工具类:
@Slf4j
public class JasyptUtil {
    public static void main(String[] args) {
        String pass = "FkSs3k31";
        String salt = "johnny";
        int n = 3;
        String[] en = new String[n];
        String[] de = new String[n];
        for (int i = 0; i < n; i++) {
            en[i] = encrypt(salt, password);
            de[i] = decrypt(salt, en[i]);
            log.info("加密: " + en[i] + ",解密:" + de[i] + ",相等=" + password.equals(de[i]));
        }
    }

    public static String encrypt(String passWord, String message) {
        BasicTextEncryptor textEncryptor = new BasicTextEncryptor();
        // 加密所需的salt
        textEncryptor.setPassword(passWord);
        return textEncryptor.encrypt(message);
    }

    public static String decrypt(String passWord, String encryptor) {
        BasicTextEncryptor textEncryptor = new BasicTextEncryptor();
        textEncryptor.setPassword(passWord);
        return textEncryptor.decrypt(encryptor);
    }
}
打印输出:
加密: G1XGWDxvGiOcDidkDTFnceNJCDr+SxPE,解密:FkSs3k31,相等=true
加密: lpLDMbDmfspxHXm0n62d1ekJin9KGwkI,解密:FkSs3k31,相等=true
加密: CvUIJ5/HU0Z201j0wDH613Z1y+445Pxu,解密:FkSs3k31,相等=true
可见每次加密得到的密码都不尽相同,但是都能够成功解密。
至于为什么要判断一下原文和解密后的是否相等,参考Java String加解密踩坑
Jasypt-spring-boot
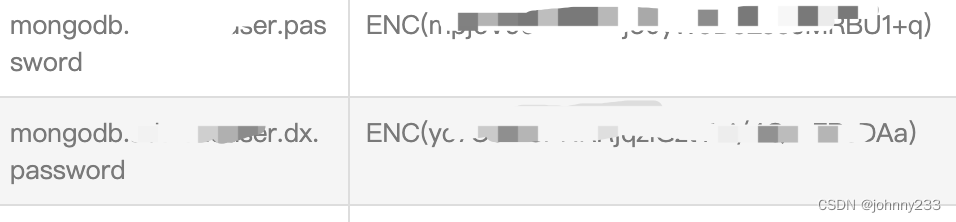
使用Jasypt-spring-boot更是简单方便。通过前面的JasyptUtil,得到一系列数据库不同schema的加密后密码,增加前缀ENC(和后缀),放在配置中心;然后配置中心再新增一个键值对:jasypt.encryptor.password=johnny,
添加依赖即可:
<dependency>
    <groupId>com.github.ulisesbocchio</groupId>
    <artifactId>jasypt-spring-boot-starter</artifactId>
    <version>2.0.0</version>
</dependency>
Spring Boot应用启动时,JasyptSpringBootAutoConfiguration会自动扫描配置类(不管是放在yml本地文件还是配置中心的),检查前缀和后缀,根据配置的加密password去解密。
应用启动打印信息:
分析
引入上述依赖后,EncryptablePropertyResolverConfiguration配置类检查前缀和后缀,
{
  "name": "jasypt.encryptor.property.prefix",
  "type": "java.lang.String",
  "description": "Specify a custom {@link String} to identify as prefix of encrypted properties. Default value is {@code \"ENC(\"}",
  "sourceType": "com.ulisesbocchio.jasyptspringboot.properties.JasyptEncryptorConfigurationProperties$PropertyConfigurationProperties",
  "defaultValue": "ENC("
},
{
  "name": "jasypt.encryptor.property.suffix",
  "type": "java.lang.String",
  "description": "Specify a custom {@link String} to identify as suffix of encrypted properties. Default value is {@code \")\"}",
  "sourceType": "com.ulisesbocchio.jasyptspringboot.properties.JasyptEncryptorConfigurationProperties$PropertyConfigurationProperties",
  "defaultValue": ")"
}
进阶
Jasypt
Jasypt-spring-boot
Jasypt可以为Springboot加密的信息很多,主要有:
System Property 系统变量
Envirnment Property 环境变量
Command Line argument 命令行参数
Application.properties 应用配置文件
Yaml properties 应用配置文件
other custom property sources 其它配置文件
问题
FileNotFoundException
Caused by: java.io.FileNotFoundException: class path resource [com/ulisesbocchio/jasyptspringboot/configuration/EnableEncryptablePropertiesConfiguration.class] cannot be opened because it does not exist
DecryptionException: Unable to decrypt property
应用启动失败,完整的报错信息如下:
| ERROR | org.springframework.boot.SpringApplication | reportFailure | 821 | -
Application run failed
com.ulisesbocchio.jasyptspringboot.exception.DecryptionException: Unable to decrypt property: ENC() resolved to: ENC(). Decryption of Properties failed,  make sure encryption/decryption passwords match
at com.ulisesbocchio.jasyptspringboot.resolver.DefaultPropertyResolver.lambda$resolvePropertyValue$0(DefaultPropertyResolver.java:63)
解密失败?第一反应就是拿着这个报错的密文使用上面的工具类解密,解密成功!
参考stackoverflow,排查下来和jasypt-spring-boot-starter版本有关。
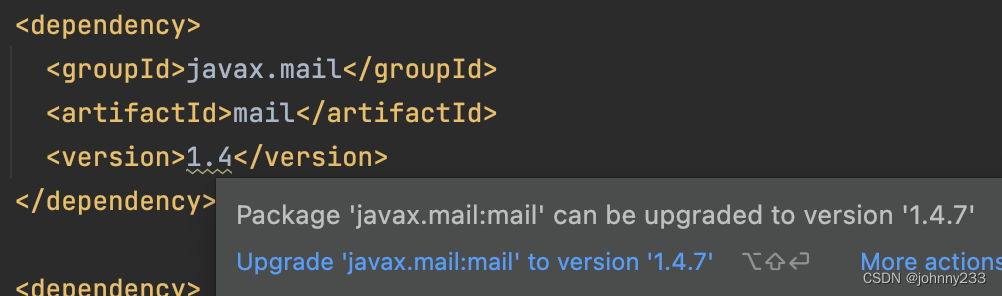
发布前版本为1.18,因应用两年多没有人维护,IDEA也一直在提示我:
故而想着升级pom文件里的诸多依赖,随手顺带把jasypt-spring-boot-starter的依赖升级到最新版3.0.5。
参考maven repository,1.18版本后的几个主要(大)版本:2.0.0,2.1.0,3.0.0。
解决方案:
- 版本回退到
2.1.0:1.18->3.0.5->2.1.0 - 增加配置:
jasypt.encryptor.algorithm=PBEWithMD5AndDES
jasypt.encryptor.iv-generator-classname=org.jasypt.iv.NoIvGenerator
验证下来,两种方案都可行,按需选择一种即可。
Failed to bind properties under ‘’ to java.lang.String
也是一个应用启动(发布)失败的问题,报错日志:
org.springframework.context.ApplicationContextException: Unable to start web server;
nested exception is java.lang.RuntimeException: org.springframework.beans.factory.BeanCreationException: Error creating bean with name 'servletEndpointRegistrar' defined in class path resource [org/springframework/boot/actuate/autoconfigure/endpoint/web/ServletEndpointManagementContextConfiguration$WebMvcServletEndpointManagementContextConfiguration.class]: Bean instantiation via factory method failed;
nested exception is org.springframework.beans.BeanInstantiationException: Failed to instantiate [org.springframework.boot.actuate.endpoint.web.ServletEndpointRegistrar]: Factory method 'servletEndpointRegistrar' threw exception;
nested exception is org.springframework.beans.factory.UnsatisfiedDependencyException: Error creating bean with name 'healthEndpoint' defined in class path resource [org/springframework/boot/actuate/autoconfigure/health/HealthEndpointConfiguration.class]: Unsatisfied dependency expressed through method 'healthEndpoint' parameter 1;
nested exception is org.springframework.beans.factory.BeanCreationException: Error creating bean with name 'healthIndicatorRegistry' defined in class path resource [org/springframework/boot/actuate/autoconfigure/health/HealthIndicatorAutoConfiguration.class]: Bean instantiation via factory method failed;
nested exception is org.springframework.beans.BeanInstantiationException: Failed to instantiate [org.springframework.boot.actuate.health.HealthIndicatorRegistry]: Factory method 'healthIndicatorRegistry' threw exception;
nested exception is org.springframework.beans.factory.UnsatisfiedDependencyException: Error creating bean with name 'org.springframework.boot.actuate.autoconfigure.mongo.MongoHealthIndicatorAutoConfiguration': Unsatisfied dependency expressed through constructor parameter 0;
nested exception is org.springframework.beans.factory.UnsatisfiedDependencyException: Error creating bean with name 'org.springframework.boot.autoconfigure.data.mongo.MongoDataAutoConfiguration': Unsatisfied dependency expressed through constructor parameter 0;
nested exception is org.springframework.boot.context.properties.ConfigurationPropertiesBindException: Error creating bean with name 'spring.data.mongodb-org.springframework.boot.autoconfigure.mongo.MongoProperties': Could not bind properties to 'MongoProperties' : prefix=spring.data.mongodb, ignoreInvalidFields=false, ignoreUnknownFields=true;
nested exception is org.springframework.boot.context.properties.bind.BindException: Failed to bind properties under 'spring.data.mongodb.uri' to java.lang.String
简单来说,应用启动时最底层报错为:Failed to bind properties under 'spring.data.mongodb.uri' to java.lang.String
应用使用的版本为2.1.0,
下降到2.0.0版本解决问题。
配置热更新失败
使用的 jasypt-spring-boot-starter 版本为2.1.0,apollo-client版本为1.5.0。遇到的问题,在Apollo Server端修改配置并发布后,配置不能实现热更新。
参考apollo跟jasypt-spring-boot-2.1.0.jar不兼容。
解决方法:升级jasypt-spring-boot-starter。经过验证,升级到3.0.5可以解决配置热更新问题,新增两个配置即可:
jasypt.encryptor.algorithm=PBEWithMD5AndDES
jasypt.encryptor.iv-generator-classname=org.jasypt.iv.NoIvGenerator


 675
675


 被折叠的 条评论
为什么被折叠?
被折叠的 条评论
为什么被折叠?
 到【灌水乐园】发言


