


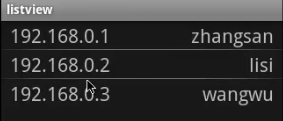
效果如下所示:
个人觉得android手机中的设置列表也是ListView
那么如何创建一个ListView呢?
布局文件:
<LinearLayout xmlns:android="http://schemas.android.com/apk/res/android"
    xmlns:tools="http://schemas.android.com/tools"
    android:layout_width="match_parent"
    android:layout_height="match_parent"
    android:orientation="vertical"
	 >

	<ListView
	    android:id="@id/android:list"
	    android:layout_width="fill_parent"
	    android:layout_height="wrap_content"
	    android:scrollbars="vertical"
	    ></ListView>
</LinearLayout>android:id="@id/android:list":使用android内置的list id
src:
package com.shanl.listview;

import java.util.ArrayList;
import java.util.HashMap;

import android.app.ListActivity;
import android.os.Bundle;
import android.view.Menu;
import android.view.View;
import android.widget.ListView;
import android.widget.SimpleAdapter;

public class MainActivity extends ListActivity {

	@Override
	protected void onCreate(Bundle savedInstanceState) {
		super.onCreate(savedInstanceState);
		setContentView(R.layout.activity_main);
        ArrayList<HashMap<String, String>> list = new ArrayList<HashMap<String,String>>();//生成一个list表
        HashMap<String, String> map1 = new HashMap<String, String>();//生成两个hashmap
        HashMap<String, String> map2 = new HashMap<String, String>();

        map1.put("username", "shanl");//设置hashmap的键值对
        map1.put("phonenum", "123");
        map2.put("username", "qing");
        map2.put("phonenum", "456");

        list.add(map1);//将hashmap加入到list中
        list.add(map2);

        SimpleAdapter listAdapter = new SimpleAdapter(this, list, R.layout.user, new String[] {"username","phonenum"}, new int[] {R.id.username,R.id.phonenum} );//生成一个list适配器,需要另一个布局文件usr
        setListAdapter(listAdapter);
	}
    //list的监听器
    protected void onListItemClick(ListView l, View v, int position, long id) {
        // TODO Auto-generated method stub
        super.onListItemClick(l, v, position, id);
        System.out.println("id----------------" + id);
        System.out.println("position----------" + position);
    }

	@Override
	public boolean onCreateOptionsMenu(Menu menu) {
		// Inflate the menu; this adds items to the action bar if it is present.
		getMenuInflater().inflate(R.menu.main, menu);
		return true;
	}

}<?xml version="1.0" encoding="utf-8"?>
<LinearLayout xmlns:android="http://schemas.android.com/apk/res/android"
android:layout_width="match_parent"
android:layout_height="match_parent"
android:orientation="horizontal" >
<TextView
android:id="@+id/username"
android:layout_width="wrap_content"
android:layout_height="wrap_content"
/>
<TextView
android:id="@+id/phonenum"
android:layout_width="fill_parent"
android:layout_height="wrap_content"
android:gravity="right"/>
</LinearLayout>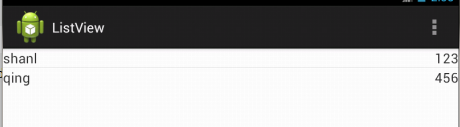
点击一下list,会生成下面的log:


 670
670

 被折叠的 条评论
为什么被折叠?
被折叠的 条评论
为什么被折叠?
 到【灌水乐园】发言


