


我们在界面上经常会用到button按钮,但通常button点击后看不到点击的效果,如果用户连续点击了两次,就会报NAR错误,这样交互性就比较差了。如果我们自定义了button点击效果,比如我们点击了button能让我们看到我们确实点击了button按钮,这样就会有效的避免重复点击了。
自定义点击效果有两种方式,一种是在xml中定义,另一种是在代码中定义。
首先看一下如何在xml中定义:
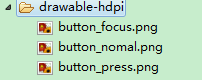
在drawable下新建selector.xml文件:
- <?xml version="1.0" encoding="utf-8"?>
- <selector xmlns:android="http://schemas.android.com/apk/res/android">
- <item android:drawable="@drawable/button_press" android:state_pressed="true"/>
- <item android:drawable="@drawable/button_nomal" android:state_focused="false" android:state_pressed="false"/>
- <item android:drawable="@drawable/button_focus" android:state_focused="true"/>
- <item android:drawable="@drawable/button_nomal" android:state_focused="false"/>
- </selector>
定义了两种状态 一种是按下 一种是获得焦点。 drawable分别引用了这三张图片
然后在main.xml下添加button按钮
- <Button
- android:id="@+id/button1"
- android:layout_width="wrap_content"
- android:layout_height="wrap_content"
- android:text="button效果演示"
- android:background="@drawable/selector" />
在MainActivtiy中得到button
- Button button1=(Button) this.findViewById(R.id.button1);
- button1.setOnClickListener(new View.OnClickListener() {
- @Override
- public void onClick(View v) {
- // TODO Auto-generated method stub
- Toast.makeText(getApplicationContext(), "你点击了button按钮", Toast.LENGTH_SHORT).show();
- }
- });
下面看下点击效果:
点击button前:
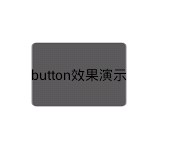
当按下button按钮时:

接下来 看下第二种实现方式,在代码中实现:
首先在main.xml中添加:
- <Button
- android:id="@+id/button2"
- android:layout_width="wrap_content"
- android:layout_height="wrap_content"
- android:text="button效果演示"
- android:background="@drawable/button_nomal"/>
接下面在MainActivity中实现:
- Button button2=(Button) this.findViewById(R.id.button2);
- button2.setOnTouchListener(new OnTouchListener() {
- @Override
- public boolean onTouch(View v, MotionEvent event) {
- // TODO Auto-generated method stub
- if(event.getAction()==MotionEvent.ACTION_DOWN){
- v.setBackgroundResource(R.drawable.button_press);
- }else if(event.getAction()==MotionEvent.ACTION_UP){
- v.setBackgroundResource(R.drawable.button_nomal);
- }
- return false;
- }
- });


 2950
2950

 被折叠的 条评论
为什么被折叠?
被折叠的 条评论
为什么被折叠?
 到【灌水乐园】发言


