


用最简单的方法编写出来流逝布局。
首先,看一下效果图:
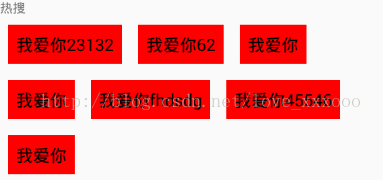
我们从视图层到模型层:
XML中的布局代码:
<TextView
    android:layout_width="match_parent"
    android:layout_height="wrap_content"
    android:text="热搜"/>
<com.example.zym.utils.NewClass
    android:layout_width="match_parent"
    android:layout_height="200dp"
    >
    <TextView
        style="@style/textstyle"
        android:layout_width="wrap_content"
        android:layout_height="wrap_content"
        android:text="我爱你23132"/>
    <TextView
        style="@style/textstyle"
        android:layout_width="wrap_content"
        android:layout_height="wrap_content"
        android:text="我爱你62"/>
    <TextView
        style="@style/textstyle"
        android:layout_width="wrap_content"
        android:layout_height="wrap_content"
        android:text="我爱你"/>
    <TextView
        style="@style/textstyle"
        android:layout_width="wrap_content"
        android:layout_height="wrap_content"
        android:text="我爱你74684"/>
    <TextView
        style="@style/textstyle"
        android:layout_width="wrap_content"
        android:layout_height="wrap_content"
        android:text="我爱你"/>
    <TextView
        style="@style/textstyle"
        android:layout_width="wrap_content"
        android:layout_height="wrap_content"
        android:text="我爱你fhdsdg"/>
    <TextView
        style="@style/textstyle"
        android:layout_width="wrap_content"
        android:layout_height="wrap_content"
        android:text="我爱你45546"/>
    <TextView
        style="@style/textstyle"
        android:layout_width="wrap_content"
        android:layout_height="wrap_content"
        android:text="我爱你"/>
    <TextView
        style="@style/textstyle"
        android:layout_width="wrap_content"
        android:layout_height="wrap_content"
        android:text="我爱你"/>

</com.example.zym.utils.NewClass>
values/styles中的代码:
<style name="textstyle">
    <item name="android:background">#f00</item>
    <item name="android:layout_margin">10dp</item>
    <item name="android:layout_width">150dp</item>
    <item name="android:padding">10dp</item>
    <item name="android:textColor">#000</item>
    <item name="android:textSize">18sp</item>
</style>
MainActivity中的代码:
package com.example.zym.zuoyumeng1511r20180312;

import android.support.v7.app.AppCompatActivity;
import android.os.Bundle;
public class MainActivity extends AppCompatActivity {
    @Override
    protected void onCreate(Bundle savedInstanceState) {
        super.onCreate(savedInstanceState);
        setContentView(R.layout.activity_main);
    }
}
NewClass中的代码(最主要的就是实现这里面的代码):
package com.example.zym.utils;

import android.content.Context;
import android.util.AttributeSet;
import android.util.Log;
import android.view.View;
import android.view.ViewGroup;
import java.util.ArrayList;
import java.util.List;
/**
 * Created by Administrator on 2018/3/12 0012.
 */

public class NewClass extends ViewGroup{

    private final String TAG = getClass().getSimpleName();

    public NewClass(Context context) {
        super(context);
    }

    public NewClass(Context context, AttributeSet attrs) {
        super(context, attrs);
    }

    public NewClass(Context context, AttributeSet attrs, int defStyleAttr) {
        super(context, attrs, defStyleAttr);
    }
    @Override
    public LayoutParams generateLayoutParams(AttributeSet attrs) {
        return new MarginLayoutParams(getContext(), attrs);
    }

    @Override
    protected void onMeasure(int widthMeasureSpec, int heightMeasureSpec) {
        super.onMeasure(widthMeasureSpec, heightMeasureSpec);
        //1、获得此ViewGroup上级容器为其推荐的宽和高,以及计算模式
        int widthMode = MeasureSpec.getMode(widthMeasureSpec);
        int heightMode = MeasureSpec.getMode(heightMeasureSpec);
        int sizeWidth = MeasureSpec.getSize(widthMeasureSpec);
        int sizeHeight = MeasureSpec.getSize(heightMeasureSpec);

        // 2、如果ViewGroup布局是wrap_content时,根据childView的尺寸,计算容器的宽和高
        int width = 0;//ViewGroup的宽度
        int height = 0;//ViewGroup的高度
        int lineWidth = 0;//childView所占据的当前行总宽度
        int lineHeight = 0;//childView所占据的各行总高度
        int cCount = getChildCount();childView的数量
        for(int i=0; i<cCount; i++){//遍历每个childView
            View childView = getChildAt(i);
            measureChild(childView, widthMeasureSpec, heightMeasureSpec);// 测量当前child的宽和高
            MarginLayoutParams mlp = (MarginLayoutParams) childView.getLayoutParams();
            int cWidth = childView.getMeasuredWidth() + mlp.leftMargin + mlp.rightMargin;
            int cHeight = childView.getMeasuredHeight() + mlp.topMargin + mlp.bottomMargin;
            if(lineWidth + cWidth > sizeWidth){//如果加入当前childView后超出最大宽度,width取最大高度,累加lineHeight,然后开启新行
                width = Math.max(lineWidth, cWidth);
                height += lineHeight;
                lineWidth = cWidth;
            }else{//如果加入当前childView后小于最大宽度,则累加lineWidthheight lineHeight取最大高度
                lineWidth += cWidth;
                height = Math.max(lineHeight, cHeight);
            }
            if(i == cCount-1){// 如果是最后一个childView,则将当前记录的最大宽度和当前lineWidth做比较
                width = Math.max(lineWidth, cWidth);
                height += lineHeight;
            }
        }

        //3、如果是wrap_content设置为我们计算的值;否则直接设置为父容器计算的值
        setMeasuredDimension(
                (widthMode == MeasureSpec.EXACTLY) ? sizeWidth : width,
                (heightMode == MeasureSpec.EXACTLY) ? sizeHeight : height
        );
    }

    private List<List<View>> allChildViews = new ArrayList<List<View>>();//存储所有的childView,按行记录
    private List<Integer> maxLineHeight = new ArrayList<Integer>();//存储每行的最大高度值

    @Override
    protected void onLayout(boolean changed, int l, int t, int r, int b) {
        allChildViews.clear();
        maxLineHeight.clear();

        int width = getWidth();//每行的最大宽度
        int lineWidth = 0;//每行的即时宽度
        int lineHeight = 0;//每行的即时高度

        List<View> lineChildViews = new ArrayList<View>();//存储每行所有的childView

        int cCount = getChildCount();
        for(int i=0; i<cCount; i++){//遍历所有childView
            View childView = getChildAt(i);
            MarginLayoutParams mlp = (MarginLayoutParams) childView.getLayoutParams();
            int cWidth = childView.getMeasuredWidth();
            int cHeight = childView.getMeasuredHeight();
            if(lineWidth + cWidth + mlp.leftMargin + mlp.rightMargin > width){//如果需要换行
                maxLineHeight.add(lineHeight);// 存储这一行最大高度
                allChildViews.add(lineChildViews);// 将当前行的childView保存,然后开启新的ArrayList保存下一行的childView
                lineChildViews = new ArrayList<View>();
                lineWidth = 0;// 重置行宽
            }else{//如果不需要换行
                lineWidth += cWidth + mlp.leftMargin + mlp.rightMargin;//即时宽度累加
                lineHeight = Math.max(lineHeight,cHeight + mlp.topMargin + mlp.bottomMargin );//即时高度取最大值
                lineChildViews.add(childView);//把当前childView存入这一行的集合
            }
        }
        // 记录最后一行
        maxLineHeight.add(lineHeight);
        allChildViews.add(lineChildViews);

        int left = 0;//左坐标
        int top = 0;//上坐标
        int lineNums = allChildViews.size();// 得到总行数
        for (int i = 0; i < lineNums; i++) {
            lineChildViews = allChildViews.get(i);// 取得每一行的所有的views
            lineHeight = maxLineHeight.get(i);// 取得当前行的最大高度

            Log.e(TAG, "第" + i + "行 :" + lineChildViews.size() + " , " + lineChildViews);
            Log.e(TAG, "第" + i + "行, :" + lineHeight);

            // 遍历当前行所有的View
            for (int j = 0; j < lineChildViews.size(); j++) {
                View childView = lineChildViews.get(j);//取得childView
                if (childView.getVisibility() == View.GONE) {
                    continue;
                }
                MarginLayoutParams mlp = (MarginLayoutParams) childView.getLayoutParams();
                //计算childView的left,top,right,bottom
                int lc = left + mlp.leftMargin;
                int tc = top + mlp.topMargin;
                int rc = lc + childView.getMeasuredWidth();
                int bc = tc + childView.getMeasuredHeight();

                Log.e(TAG, childView + " , l = " + lc + " , t = " + t + " , r =" + rc + " , b = " + bc);

                childView.layout(lc, tc, rc, bc);//设置这个childView的位置
                left += childView.getMeasuredWidth() + mlp.rightMargin + mlp.leftMargin;//左坐标累加
            }
            left = 0;//开始新的一行,左坐标重置
            top += lineHeight;//开始新的一行,上坐标累加
        }
    }
    }
流式布局的第二种方式,添加依赖:
compile 'com.fynn.fluidlayout:fluidlayout:1.0'
布局文件中:
<?xml version="1.0" encoding="UTF-8"?>
-<LinearLayout tools:context="com.bwei.demo.day04_fuildlayout.MainActivity" android:layout_height="match_parent" android:layout_width="match_parent" xmlns:tools="http://schemas.android.com/tools" xmlns:app="http://schemas.android.com/apk/res-auto" xmlns:android="http://schemas.android.com/apk/res/android">
- <ScrollView
android:layout_height="wrap_content"
android:layout_width="match_parent">
<com.fynn.fluidlayout.FluidLayout
android:layout_height="wrap_content"
android:layout_width="match_parent"
android:padding="5dp"
android:id="@+id/fluid_layout">
</com.fynn.fluidlayout.FluidLayout>
</ScrollView>
</LinearLayout>
mainactivity中:
package com.bwei.demo.day04_fuildlayout;
import android.support.v7.app.AppCompatActivity;
import android.os.Bundle;
import android.view.ViewGroup;
import android.widget.TextView;
import com.fynn.fluidlayout.FluidLayout;
public class MainActivity extends AppCompatActivity {
String [] arrs ={
"倩女幽魂", "单机斗地主", "天堂战记", "妖精的尾巴", "极限挑战", "我们相爱吧", "倚天屠龙记",
"明星大侦探", "丰乳肥臀", "大主宰", "盗墓笔记", "鬼吹灯", "盘龙", "完美世界", "柠檬初上", "WIFI",
"锁屏", "异术超能", "东方不败", "巅峰战舰", "小说", "污", "蒲公英", "网红", "霍建华", "林心如",
"南极", "Java", "Android", "谷歌", "手机", "iPad", "充电宝", "黔驴技穷", "水果", "植物大战僵尸",
"倩女幽魂", "单机斗地主", "天堂战记", "妖精的尾巴", "极限挑战", "我们相爱吧", "倚天屠龙记",
"切水果", "手机", "iPad", "充电宝", "黔驴技穷", "水果", "植物大战僵尸", "切水果", "手机", "iPad",
"充电宝", "黔驴技穷", "水果", "植物大战僵尸", "切水果", "手机", "iPad", "充电宝", "黔驴技穷",
"水果", "植物大战僵尸", "切水果", "手机", "iPad", "充电宝", "黔驴技穷", "水果", "植物大战僵尸",
"切水果", "手机", "iPad", "充电宝", "黔驴技穷", "水果", "植物大战僵尸", "切水果", "手机", "iPad",
"充电宝", "黔驴技穷", "水果", "植物大战僵尸", "切水果", "手机", "iPad", "充电宝", "黔驴技穷",
"水果", "植物大战僵尸", "切水果", "植物大战僵尸", "切水果", "植物大战僵尸", "切水果", "切水果",
"充电宝", "黔驴技穷", "水果", "植物大战僵尸", "切水果", "手机", "iPad", "充电宝", "黔驴技穷",
"倩女幽魂", "单机斗地主", "天堂战记", "妖精的尾巴", "极限挑战", "我们相爱吧", "倚天屠龙记",
"水果", "植物大战僵尸", "切水果", "手机", "iPad", "充电宝", "黔驴技穷", "水果", "植物大战僵尸",
"切水果", "手机", "iPad", "充电宝", "黔驴技穷", "水果", "植物大战僵尸", "切水果", "手机", "iPad",
"充电宝", "黔驴技穷", "水果", "植物大战僵尸", "切水果", "手机", "iPad", "充电宝", "黔驴技穷",
"水果", "植物大战僵尸", "切水果", "植物大战僵尸", "切水果", "植物大战僵尸", "切水果", "切水果"};
private FluidLayout fluidLayout;
/**
* 第一步 :加依赖
* 第二步:引用布局文件
*
* @param savedInstanceState
*/
@Override
protected void onCreate(Bundle savedInstanceState) {
super.onCreate(savedInstanceState);
setContentView(R.layout.activity_main);
fluidLayout = findViewById(R.id.fluid_layout)
genTag();
}
private void genTag() {
for (int x=0;x<arrs.length;x++){
TextView tv = new TextView(MainActivity.this);
tv.setText(arrs[x]);
tv.setTextSize(13);
FluidLayout.LayoutParams params = new FluidLayout.LayoutParams(ViewGroup.LayoutParams.WRAP_CONTENT,
ViewGroup.LayoutParams.WRAP_CONTENT);
params.setMargins(12,12,12,12);
fluidLayout.addView(tv,params);
}
}
}


 7220
7220

 被折叠的 条评论
为什么被折叠?
被折叠的 条评论
为什么被折叠?
 到【灌水乐园】发言


