WPF实现漂亮的自定义时钟(带示例代码)


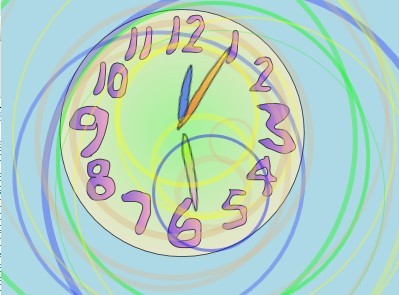
学了几天的WPF了,根据所学的东西东拼西凑做了个时钟控件,先看效果

效果图

下面写一点做这个控件的要点:

1.首先准备4张图,我是用Expression Design自己绘制了时钟的圆盘背景(xaml描述的矢量图形)和三根表针(png格式)

2.创建WPF的UserControl将这些文件加入到项目中,当然创建window不做控件也没关系

3.写控件xaml文件中的代码,下面说一下我的方法

<UserControl x:Class="YJClock.Clock"
    xmlns="http://schemas.microsoft.com/winfx/2006/xaml/presentation"
    xmlns:x="http://schemas.microsoft.com/winfx/2006/xaml"
    x:Name="YJClock"
    Height="244" Width="249" Unloaded="UserControl_Unloaded"

  • 0
    点赞
  • 1
    收藏
    觉得还不错? 一键收藏
  • 4
    评论
以下是一个使用WPF MVVM Light框架和自定义控件的示例工程: 1. 创建一个WPF应用程序项目,并在NuGet包管理器中安装MVVM Light框架。在App.xaml文件中添加以下代码: ```xml <Application x:Class="WpfApp1.App" xmlns="http://schemas.microsoft.com/winfx/2006/xaml/presentation" xmlns:x="http://schemas.microsoft.com/winfx/2006/xaml" xmlns:local="clr-namespace:WpfApp1" StartupUri="MainWindow.xaml"> <Application.Resources> <ResourceDictionary> <ResourceDictionary.MergedDictionaries> <ResourceDictionary Source="/MyCustomControls;component/Themes/Generic.xaml" /> </ResourceDictionary.MergedDictionaries> </ResourceDictionary> </Application.Resources> </Application> ``` 这段代码将MyCustomControls库中的通用样式应用到应用程序中。 2. 创建一个自定义控件库项目,添加自定义控件。例如,我们添加一个名为MyCustomButton的自定义按钮控件。 3. 在MyCustomButton项目中,创建一个名为Generic.xaml的文件,并在其中添加以下代码: ```xml <ResourceDictionary xmlns="http://schemas.microsoft.com/winfx/2006/xaml/presentation" xmlns:x="http://schemas.microsoft.com/winfx/2006/xaml"> <Style TargetType="{x:Type local:MyCustomButton}"> <Setter Property="Template"> <Setter.Value> <ControlTemplate TargetType="{x:Type local:MyCustomButton}"> <Border Background="{TemplateBinding Background}" BorderBrush="{TemplateBinding BorderBrush}" BorderThickness="{TemplateBinding BorderThickness}"> <ContentPresenter HorizontalAlignment="{TemplateBinding HorizontalContentAlignment}" VerticalAlignment="{TemplateBinding VerticalContentAlignment}" /> </Border> </ControlTemplate> </Setter.Value> </Setter> </Style> </ResourceDictionary> ``` 这段代码定义了MyCustomButton控件的样式模板。 4. 在MyCustomButton项目中,在AssemblyInfo.cs文件中添加以下代码,使样式模板可用于外部应用程序: ```csharp [assembly: ThemeInfo(ResourceDictionaryLocation.None, ResourceDictionaryLocation.SourceAssembly)] ``` 5. 在WPF应用程序项目中,添加对MyCustomButton项目的引用,并在MainWindow.xaml中添加以下代码: ```xml <Window x:Class="WpfApp1.MainWindow" xmlns="http://schemas.microsoft.com/winfx/2006/xaml/presentation" xmlns:x="http://schemas.microsoft.com/winfx/2006/xaml" xmlns:d="http://schemas.microsoft.com/expression/blend/2008" xmlns:mc="http://schemas.openxmlformats.org/markup-compatibility/2006" xmlns:local="clr-namespace:WpfApp1" xmlns:controls="clr-namespace:MyCustomControls;assembly=MyCustomControls" mc:Ignorable="d" Title="MainWindow" Height="450" Width="800"> <Grid> <controls:MyCustomButton Content="Click me!" /> </Grid> </Window> ``` 这段代码将MyCustomButton控件添加到窗口中。 6. 创建一个名为MainViewModel的视图模型类,并在其中添加以下代码: ```csharp using GalaSoft.MvvmLight; using GalaSoft.MvvmLight.Command; namespace WpfApp1 { public class MainViewModel : ViewModelBase { public RelayCommand ClickCommand { get; } public MainViewModel() { ClickCommand = new RelayCommand(() => { // Do something when the button is clicked }); } } } ``` 这段代码创建了一个名为ClickCommand的命令,并在构造函数中初始化了该命令。 7. 在MainWindow.xaml中,将窗口的DataContext属性设置为MainViewModel的实例,并将MyCustomButton的Command属性绑定到ClickCommand命令: ```xml <Window x:Class="WpfApp1.MainWindow" xmlns="http://schemas.microsoft.com/winfx/2006/xaml/presentation" xmlns:x="http://schemas.microsoft.com/winfx/2006/xaml" xmlns:d="http://schemas.microsoft.com/expression/blend/2008" xmlns:mc="http://schemas.openxmlformats.org/markup-compatibility/2006" xmlns:local="clr-namespace:WpfApp1" xmlns:controls="clr-namespace:MyCustomControls;assembly=MyCustomControls" mc:Ignorable="d" Title="MainWindow" Height="450" Width="800" DataContext="{Binding Main, Source={StaticResource Locator}}"> <Grid> <controls:MyCustomButton Content="Click me!" Command="{Binding ClickCommand}" /> </Grid> </Window> ``` 这段代码使用MVVM Light框架中的ViewModelLocator将MainViewModel实例绑定到窗口的DataContext属性,并将MyCustomButton的Command属性绑定到ClickCommand命令。 现在,你可以在自定义控件中使用MVVM Light框架来实现你的应用程序逻辑了。

“相关推荐”对你有帮助么?

  • 非常没帮助
  • 没帮助
  • 一般
  • 有帮助
  • 非常有帮助
提交
评论 4
添加红包

请填写红包祝福语或标题

红包个数最小为10个

红包金额最低5元

当前余额3.43前往充值 >
需支付:10.00
成就一亿技术人!
领取后你会自动成为博主和红包主的粉丝 规则
hope_wisdom
发出的红包
实付
使用余额支付
点击重新获取
扫码支付
钱包余额 0

抵扣说明:

1.余额是钱包充值的虚拟货币,按照1:1的比例进行支付金额的抵扣。
2.余额无法直接购买下载,可以购买VIP、付费专栏及课程。

余额充值