


目录
介绍
Magento 打开个主页需要加载1M多的js数量达到惊人的200+,导致用户体验差,就算是开启了Magento的压缩合并js的功能但是js文件的大小还是有1M+。那么有没有办法是可以按需加载js的呢?Magento开发者文档搜索JavaScript发现了Advanced JavaScript bundling,一番倒腾记录一下操作过程。
关闭Magento js优化
bin/magento config:set dev/js/minify_files 0
bin/magento config:set dev/js/enable_js_bundling 0
bin/magento config:set dev/js/merge_files 0
1、安装必备工具
npm install -g requirejscurl -sL https://deb.nodesource.com/setup_15.x | sudo -E bash -
sudo apt-get install -y nodejswget https://bitbucket.org/ariya/phantomjs/downloads/phantomjs-2.1.1-linux-x86_64.tar.bz2 --no-check-certificate
tar -xjvf phantomjs-2.1.1-linux-x86_64.tar.bz2
apt install fontconfig
ln -s /www/wwwroot/phantomjs-2.1.1-linux-x86_64/bin/phantomjs /usr/bin/phantomjs版本检查
node -v ![]()
r.js -v![]()
phantomjs -v![]()
第1部分:获取网站依赖配置
1、获取RequireJs依赖项
A、使用PhantomJS:
在magento根目录创建 deps.js 文件,内容如下:
"use strict";
var page = require('webpage').create(),
    system = require('system'),
    address;

if (system.args.length === 1) {
    console.log('Usage: $phantomjs deps.js url');
    phantom.exit(1);
} else {
    address = system.args[1];
    page.open(address, function (status) {
        if (status !== 'success') {
            console.log('FAIL to load the address');
        } else {
            setTimeout(function () {
                console.log(page.evaluate(function () {
                    return Object.keys(window.require.s.contexts._.defined);
                }));
                phantom.exit();
            }, 5000);
        }
    });
}
创建bundle用来保存文件
mkdir bundlePhantomJS获取 首页,类别,产品,购物车 4种类型的页面依赖,注意根据自己的实际情况修改。
phantomjs deps.js http://m2.loc/ > bundle/homepage.txt
phantomjs deps.js http://m2.loc/women/tops-women/jackets-women.html > bundle/category.txt
phantomjs deps.js http://m2.loc/beaumont-summit-kit.html > bundle/product.txt
......
B、不想使用PhantomJS/需要登录的页面
可以在浏览器调试 控制台输入下面的命令
JSON.stringify(Object.keys(window.require.s.contexts._.defined))
2、格式化并过滤输出
sed -i -e $'s/,/\\\n/g' bundle/category.txt
sed -i -e $'s/,/\\\n/g' bundle/homepage.txt
sed -i -e $'s/,/\\\n/g' bundle/product.txt
....
删除每个文件的所有mixins,因为mixins重复了依赖项。在每个依赖文件上使用以下命令:
sed -i -e 's/mixins\!.*$//g' bundle/homepage.txt
sed -i -e 's/mixins\!.*$//g' bundle/category.txt
sed -i -e 's/mixins\!.*$//g' bundle/product.txt
...
3、创建build.js配置文件
根目录创建build.js,内容如下:
({
    optimize: 'none',
    inlineText: true,

    deps: [],
    shim: {},
    paths: {},
    map: { "*": {} },

    modules: [],
})
注意:这里的optimize:"none",代表不优化js代码,方便调试,完成后记得改成optimize:"uglify",推荐配置如下:
optimize: 'uglify',
uglify: {
    mangle: true, //混淆代码
    output: {
        comments: false, //移除注释
    },
},
optimizeCss: 'standard', //优化css
removeCombined: true, //如果为true,优化器将从输出目录中删除已合并的文件
optimize
JS 代码优化方式,可选的值有:
- uglify:(默认) 用UglifyJS压缩。具体参数配置UglifyJS
- uglify2: 用UglifyJS2( 2.1.2+)压缩。具体参数配置UglifyJS2
- closure: 使用Google's Closure Compiler 简单优化模式压缩文件, 仅在优化工具使用Java有效。
- closure.keepLines:跟closure参数一样, 只不过保留换行符。
- none: 不做压缩。
optimizeCss
CSS 代码优化方式,可选的值有:
- none:不压缩,仅合并
- standard:标准压缩(去换行、空格、注释)
- standard.keepLines:除标准压缩外,保留换行
- standard.keepComments:除标准压缩外,保留注释
- standard.keepComments.keepLines:除标准压缩外,保留换行和注释
官网 build.js 下载地址供参考
浏览器打开开发者工具,找到requirejs-config.js,将配置填到build.js文件。
1)console 命令快速读取配置:
deps
JSON.stringify(require.s.contexts._.config.deps)
shim
JSON.stringify(require.s.contexts._.config.shim)
paths
JSON.stringify(require.s.contexts._.config.paths)
注意:需要把 "text": "mage/requirejs/text" 改成 "text": "requirejs/text"
({
    //...
    paths: {
        //...
        "text": "requirejs/text"
    },
})
map
JSON.stringify(require.s.contexts._.config.map["*"]) ![]()
注意复制"{...}"之间的配置就可以了。
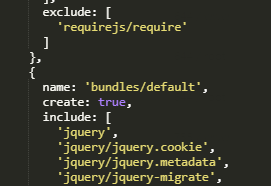
2)modules节点配置
build.js配置文件,modules节点属性说明:
定义要被优化的模块数组。每一项是模块优化的配置,常用的几个参数如下:
- name:模块名;
- create:如果不存在,是否创建。默认 false;
- include:额外引入的模块,和 name 定义的模块一起压缩合并;
- exclude:要排除的模块。有些模块有公共的依赖模块,在合并的时候每个都会压缩进去,例如一些基础库。使用 exclude 就可以把这些模块在压缩在一个更早之前加载的模块中,其它模块不用重复引入。
一些默认配置需要用到简单些先把官网的
requirejs/require
mage/bootstrap
默认配置复制过来:

创建bundles/default节点用来保存所有页面都需要的依赖项
此命令合并并排序在bundle/*.txt文件中找到的依赖项。输出显示包含每个依赖项的文件数:
sort bundle/*.txt |uniq -c |sort -n1 buildTools,
1 jquery/jquery.parsequery,
1 jsbuild,
2 jquery/jquery.metadata,
2 jquery/validate,
2 mage/bootstrap,
3 jquery
3 jquery/ui
3 knockoutjs/knockout
...前面的数字代表了有几种页面有依赖关系,这里只做了3种类型的页面,我们把数字3的多拷贝过来
用下面的命令输出到文件方便查看:
sort bundle/*.txt |uniq -c |sort -n > bundles_default.txt配合excel进行处理一下格式:

name: 'bundles/default',
      create: true,
      include: [
        'jquery',
        'jquery/jquery.cookie',
        'jquery/jquery.metadata',
        'jquery/jquery-migrate',
        .....
        ],
      exclude: [
        'requirejs/require'
      ]
再处理首页
创建 bundles/homepage modules节点
现在要找出哪些页面类型需要哪些依赖项,在Magento根目录中创建一个名为的新文件,deps-map.sh并复制以下代码:
awk 'END {
 for (R in rec) {
   n = split(rec[R], t, "/")
   if (n > 1)
     dup[n] = dup[n] ? dup[n] RS sprintf("\t%-20s -->\t%s", rec[R], R) : \
       sprintf("\t%-20s -->\t%s", rec[R], R)
   }
 for (D in dup) {
   printf "records found in %d files:\n\n", D
   printf "%s\n\n", dup[D]
   }
 }
{
 rec[$0] = rec[$0] ? rec[$0] "/" FILENAME : FILENAME
}' bundle/*.txt
执行命令:
bash deps-map.sh该脚本输出页面依赖关系
bundle/product.txt   -->   buildTools,
bundle/category.txt  -->   jquery/jquery.parsequery,
bundle/product.txt   -->   jsbuild,

bundle/category.txt/bundle/homepage.txt -->    jquery/jquery.metadata,
bundle/category.txt/bundle/homepage.txt -->    jquery/validate,
bundle/category.txt/bundle/homepage.txt -->    mage/bootstrap,

bundle/category.txt/bundle/homepage.txt/bundle/product.txt --> jquery,
bundle/category.txt/bundle/homepage.txt/bundle/product.txt --> jquery/ui,
bundle/category.txt/bundle/homepage.txt/bundle/product.txt --> knockoutjs/knockout,
.......
可以输出到文件方便查看
bash deps-map.sh > deps-map.txt打开文件可以看到records found in * files:这里的 6 files和上面的bundles/default内容是一样的,说明我们只要把有homepage.txt的依赖复制出来就可以了:
先删除records found in 6 files 后面的内容

筛选homepage.txt

得到类似下面的依赖关系,
{
    name: 'bundles/homepage',
        create: true,
    include: [
    'text!Magento_Catalog/template/product/price/max_regular_price.html',
    'text!Magento_Catalog/template/product/addtocompare-button.html',
    'Magento_Tax/js/price/adjustment',
    'text!Magento_Catalog/template/product/name.html',
    ....
],
    exclude: [
        'requirejs/require',
        'bundles/default',
        'bundles/category',
        'bundles/product'
]
}
注意到还有records found in 4 files:是有两个类型的页面有依赖关系,其实还可以拆,我这里就先不倒腾了。
重复上面的步骤完成其他modules节点,注意 exclude['']要排除其他modules节点
3)配置RequireJS使用自定义包
要使RequireJS使用您的包,请在build.js文件modules节点之后添加如下内容:
[
    {
       //...
       exclude: [
           'requirejs/require',
           'bundles/default',
           'bundles/checkout',
           'bundles/cart',
           'bundles/shipping',
           'mage/bootstrap'
       ],
   },
],
bundlesConfigOutFile: `${config.dir}/requirejs-config.js`,
onModuleBundleComplete: function(data) {
    if (this.bundleConfigAppended) {
        return;
    }
    this.bundleConfigAppended = true;

    // bundlesConfigOutFile requires a simple require.config call in order to modify the configuration
    const bundleConfigPlaceholder = `
(function (require) {
require.config({});
})(require);
    `;

    fs.appendFileSync(this.bundlesConfigOutFile, bundleConfigPlaceholder);
}
第2部分:生成静态页面
1、生成静态页面:
bin/magento setup:static-content:deploy -f -a frontend
2、将使用的模板的所有语言静态内容移动到临时目录
mv pub/static/frontend/Magento/{theme}/{locale} pub/static/frontend/Magento/{theme}/{locale}_tmp
如:
mv pub/static/frontend/Magento/luma/en_US pub/static/frontend/Magento/luma/en_US_tmp
mv pub/static/frontend/Magento/luma/zh_Hans_CN pub/static/frontend/Magento/luma/zh_Hans_CN_tmp
3、运行r.js优化器
r.js -o build.js baseUrl=pub/static/frontend/Magento/{theme}/{locale}_tmp dir=pub/static/frontend/Magento/{theme}/{locale}例如:
r.js -o build.js baseUrl=pub/static/frontend/Magento/luma/en_US_tmp dir=pub/static/frontend/Magento/luma/en_US
r.js -o build.js baseUrl=pub/static/frontend/Magento/luma/zh_Hans_CN_tmp dir=pub/static/frontend/Magento/luma/zh_Hans_CN
注意:所有语言包都要优化
错误提示:
Tracing dependencies for: bundles/homepage
Error: Error: ENOENT: no such file or directory, open '...'
at Object.openSync (node:fs:490:3) ![]()
说明缺少paths配置
- 本地文件:用文件名搜索一下配置加进来就可以了
- 远程的js文件:对于远程js文件目前我没有找到好办法,直接下载到本地。
4、验证结果
最终会得到如下js文件:
ll pub/static/frontend/Magento/luma/en_US/bundles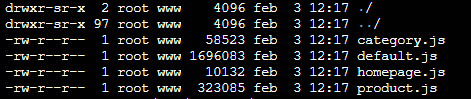
打开网站前台进行确认:

注意:不要在正式网站上操作,这只是一个简单的操作过程,还需要对js进行引用分析去除一些用不上的代码,实际优化过程会有不可预知的问题,祝成功!


 588
588


 被折叠的 条评论
为什么被折叠?
被折叠的 条评论
为什么被折叠?
 到【灌水乐园】发言


