


点击上方 前端Q,关注公众号
回复加群,加入前端Q技术交流群
简介与效果概览
各位大佬给个赞,感谢呢!
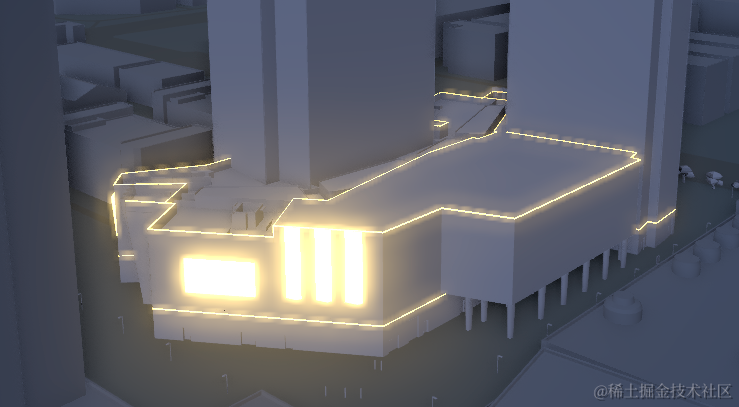
threejs的开发中,实现物体发光效果是一个常见需求,比如实现楼体的等待照明
要想实现这样的效果,我们只需要了解一个效果合成器概念:EffectComposer。
效果合成器能够合成各种花里胡哨的效果,好比是一个做特效的AE,本教程,我们将使用它来实现一个简单的发光效果。
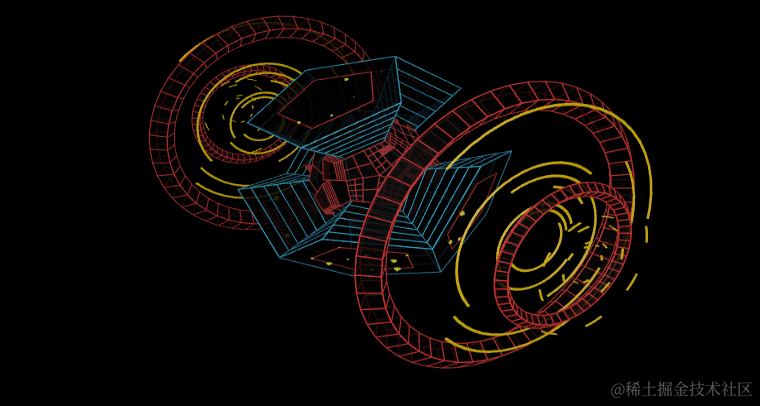
如图,这是我们将导入的一个模型
 .
.
我们要给他赋予灵魂,实现下面的发光效果 
顺带的,我们要实现物体的自动旋转、一个简单的性能监视器、一个发光参数调节的面板
技术方案
原生html框架搭建
借助threejs实现一个物体发光效果非常简单,首先我们使用html搭建一个简单的开发框架
参考官方起步文档:three.js中文网
<!DOCTYPE html>
<html lang="en">

<head>
  <title>three.js物体发光效果</title>
  <meta charset="utf-8" />
  <meta name="viewport" content="width=device-width, user-scalable=no, minimum-scale=1.0, maximum-scale=1.0" />
  <link type="text/css" rel="stylesheet" href="./main.css" />
  <style>
    #info>* {
      max-width: 650px;
      margin-left: auto;
      margin-right: auto;
    }
  </style>
</head>

<body>
  <div id="container"></div>
  <script type="importmap">
      {
        "imports": {
          "three": "https://unpkg.com/three@0.163.0/build/three.module.js",
          "three/addons/": "https://unpkg.com/three@0.163.0/examples/jsm/"
        }
      }
    </script>

  <script type="module">
    import * as THREE from "three";
    import { OrbitControls } from "three/addons/controls/OrbitControls.js";
    import { GLTFLoader } from "three/addons/loaders/GLTFLoader.js";

  </script>
</body>

</html>上述代码中,我们采用type="importmap"的方式引入了threejs开发 的一些核心依赖,"three"是开发的最基本依赖;在Three.js中,"addons" 通常指的是一些附加功能或扩展模块,它们提供了额外的功能,可以用于增强或扩展Three.js的基本功能。
在type="module"中,我们引入了threejs的一些基础依赖,OrbitControls轨道控制器和GLTFLoader模型加载器。
实现模型的加载
我们将下载好的模型放在文件根目录
http://www.yanhuangxueyuan.com/threejs/examples/models/gltf/PrimaryIonDrive.glb基于threejs的基础知识,我们先实现模型的加载与渲染
<script type="module">
import * as THREE from "three";
import { OrbitControls } from "three/addons/controls/OrbitControls.js";
import { GLTFLoader } from "three/addons/loaders/GLTFLoader.js";

init()
function init() {
  const container = document.getElementById("container");

  // WebGL渲染器
  // antialias是否执行抗锯齿。默认为false.
  renderer = new THREE.WebGLRenderer({ antialias: true });
  // 设置设备像素比。通常用于避免HiDPI设备上绘图模糊
  renderer.setPixelRatio(window.devicePixelRatio);
  renderer.setSize(window.innerWidth, window.innerHeight);
  // 设置色调映射  这个属性用于在普通计算机显示器或者移动设备屏幕等低动态范围介质上,模拟、逼近高动态范围(HDR)效果。
  renderer.toneMapping = THREE.ReinhardToneMapping;
  container.appendChild(renderer.domElement);

  // 创建新的场景对象。
  const scene = new THREE.Scene();
  // 创建透视相机
  camera = new THREE.PerspectiveCamera(
    40,
    window.innerWidth / window.innerHeight,
    1,
    100
  );
  camera.position.set(-5, 2.5, -3.5);
  scene.add(camera);
  // 创建轨道控制器
  const controls = new OrbitControls(camera, renderer.domElement);
  controls.maxPolarAngle = Math.PI * 0.5;
  controls.minDistance = 3;
  controls.maxDistance = 8;
  // 添加了一个环境光
  scene.add(new THREE.AmbientLight(0xcccccc));
  // 创建了一个点光源
  const pointLight = new THREE.PointLight(0xffffff, 100);
  camera.add(pointLight);

  // 模型加载
  new GLTFLoader().load("./PrimaryIonDrive.glb", function (gltf) {
    const model = gltf.scene;
    scene.add(model);
    const clip = gltf.animations[0];
    renderer.render(scene, camera);
  });
}
</script>
现在,我们的页面中就有了下面的场景
接下来,我们实现模型的发光效果添加。
模型发光效果添加
实现模型的发光效果,实际是EffectComposer效果合成器实现的。
官方定义:用于在three.js中实现后期处理效果。该类管理了产生最终视觉效果的后期处理过程链。 后期处理过程根据它们添加/插入的顺序来执行,最后一个过程会被自动渲染到屏幕上。
简单来说,EffectComposer效果合成器只是一个工具,它可以将多种效果集成,进行渲染。我们来看一个伪代码:
import { EffectComposer } from "three/addons/postprocessing/EffectComposer.js";

// 创建效果合成器
composer = new EffectComposer(renderer);
composer.addPass(发光效果);
composer.addPass(光晕效果);
composer.addPass(玻璃磨砂效果

// 渲染
composer.render();
它的实现过程大致如上述代码。要实现发光效果,我们需要先熟悉三个Pass。
import { RenderPass } from "three/addons/postprocessing/RenderPass.js";
import { UnrealBloomPass } from "three/addons/postprocessing/UnrealBloomPass.js";
import { OutputPass } from "three/addons/postprocessing/OutputPass.js";
RenderPass: 渲染通道是用于传递渲染结果的对象。RenderPass是EffectComposer中的一个通道,用于将场景渲染到纹理上。(固定代码,相当于混合效果的开始)
UnrealBloomPass: 这是一个用于实现逼真的辉光效果的通道。它模拟了逼真的辉光,使得场景中的亮部分在渲染后产生耀眼的辉光效果。(不同效果有不同的pass)
OutputPass: OutputPass是EffectComposer中的一个通道,用于将最终渲染结果输出到屏幕上。(固定代码,相当于混合效果的结束)
现在,我们完整的实现发光效果
<script type="module">
    import * as THREE from "three";

    import { OrbitControls } from "three/addons/controls/OrbitControls.js";
    import { GLTFLoader } from "three/addons/loaders/GLTFLoader.js";
    import { EffectComposer } from "three/addons/postprocessing/EffectComposer.js";
    import { RenderPass } from "three/addons/postprocessing/RenderPass.js";
    import { UnrealBloomPass } from "three/addons/postprocessing/UnrealBloomPass.js";
    import { OutputPass } from "three/addons/postprocessing/OutputPass.js";

    let camera;
    let composer, renderer;

    const params = {
      threshold: 0,
      strength: 1,
      radius: 0,
      exposure: 1,
    };

    init();

    function init() {
      const container = document.getElementById("container");

      // WebGL渲染器
      // antialias是否执行抗锯齿。默认为false.
      renderer = new THREE.WebGLRenderer({ antialias: true });
      // 设置设备像素比。通常用于避免HiDPI设备上绘图模糊
      renderer.setPixelRatio(window.devicePixelRatio);
      renderer.setSize(window.innerWidth, window.innerHeight);
      // 设置色调映射  这个属性用于在普通计算机显示器或者移动设备屏幕等低动态范围介质上,模拟、逼近高动态范围(HDR)效果。
      renderer.toneMapping = THREE.ReinhardToneMapping;
      container.appendChild(renderer.domElement);

      // 创建新的场景对象。
      const scene = new THREE.Scene();
      // 创建透视相机
      camera = new THREE.PerspectiveCamera(
        40,
        window.innerWidth / window.innerHeight,
        1,
        100
      );
      camera.position.set(-5, 2.5, -3.5);
      scene.add(camera);
      // 创建轨道控制器
      const controls = new OrbitControls(camera, renderer.domElement);
      controls.maxPolarAngle = Math.PI * 0.5;
      controls.minDistance = 3;
      controls.maxDistance = 8;
      // 添加了一个环境光
      scene.add(new THREE.AmbientLight(0xcccccc));
      // 创建了一个点光源
      const pointLight = new THREE.PointLight(0xffffff, 100);
      camera.add(pointLight);

      // 创建了一个RenderPass对象,用于将场景渲染到纹理上。
      const renderScene = new RenderPass(scene, camera);

      // 创建了一个UnrealBloomPass对象,用于实现辉光效果。≈
      const bloomPass = new UnrealBloomPass(
        new THREE.Vector2(window.innerWidth, window.innerHeight),
        1.5,
        0.4,
        0.85
      );
      // 设置发光参数,阈值、强度和半径。
      bloomPass.threshold = params.threshold;
      bloomPass.strength = params.strength;
      bloomPass.radius = params.radius;

      // 创建了一个OutputPass对象,用于将最终渲染结果输出到屏幕上。
      const outputPass = new OutputPass();

      // 创建了一个EffectComposer对象,并将RenderPass、UnrealBloomPass和OutputPass添加到渲染通道中。
      composer = new EffectComposer(renderer);
      composer.addPass(renderScene);
      composer.addPass(bloomPass);
      composer.addPass(outputPass);

      // 模型加载
      new GLTFLoader().load("./PrimaryIonDrive.glb", function (gltf) {
        const model = gltf.scene;
        scene.add(model);
        const clip = gltf.animations[0];
        animate();
      });
    }

    function animate() {
      requestAnimationFrame(animate);
      // 通过调用 render 方法,将场景渲染到屏幕上。
      composer.render();
    }
  </script>
现在,我们就实现发光的基本效果了!
实现物体的自动旋转动画
现在,我们实现一下物体自身的旋转动画
AnimationMixer是three中的动画合成器,使用AnimationMixer可以解析到模型中的动画数据
// 模型加载
new GLTFLoader().load("./PrimaryIonDrive.glb", function (gltf) {
  const model = gltf.scene;
  scene.add(model);
  //创建了THREE.AnimationMixer 对象,用于管理模型的动画。
  mixer = new THREE.AnimationMixer(model);
  //从加载的glTF模型文件中获取动画数据。
  //这里假设模型文件包含动画数据,通过 gltf.animations[0] 获取第一个动画片段。
  const clip = gltf.animations[0];
  // 使用 mixer.clipAction(clip) 创建了一个动画操作(AnimationAction),并立即播放该动画
  mixer.clipAction(clip.optimize()).play();

  animate();
});
实现动画更新
let clock;
clock = new THREE.Clock();

function animate() {
  requestAnimationFrame(animate);
  //使用了 clock 对象的 getDelta() 方法来获取上一次调用后经过的时间,即时间间隔(delta)。
  const delta = clock.getDelta();
  //根据上一次更新以来经过的时间间隔来更新动画。
  //这个方法会自动调整动画的播放速度,使得动画看起来更加平滑,不受帧率的影响
  mixer.update(delta);

  // 通过调用 render 方法,将场景渲染到屏幕上。
  composer.render();
}
完整代码
<script type="module">
import * as THREE from "three";

import { OrbitControls } from "three/addons/controls/OrbitControls.js";
import { GLTFLoader } from "three/addons/loaders/GLTFLoader.js";
import { EffectComposer } from "three/addons/postprocessing/EffectComposer.js";
import { RenderPass } from "three/addons/postprocessing/RenderPass.js";
import { UnrealBloomPass } from "three/addons/postprocessing/UnrealBloomPass.js";
import { OutputPass } from "three/addons/postprocessing/OutputPass.js";

let camera, stats;
let composer, renderer, mixer, clock;

const params = {
  threshold: 0,
  strength: 1,
  radius: 0,
  exposure: 1,
};

init();

function init() {
  const container = document.getElementById("container");

  clock = new THREE.Clock();

  // WebGL渲染器
  // antialias是否执行抗锯齿。默认为false.
  renderer = new THREE.WebGLRenderer({ antialias: true });
  // .....

  // 模型加载
  new GLTFLoader().load("./PrimaryIonDrive.glb", function (gltf) {
    const model = gltf.scene;

    scene.add(model);

    mixer = new THREE.AnimationMixer(model);
    const clip = gltf.animations[0];
    mixer.clipAction(clip.optimize()).play();

    animate();
  });
}

function animate() {
  requestAnimationFrame(animate);
  const delta = clock.getDelta();
  mixer.update(delta);
  // 通过调用 render 方法,将场景渲染到屏幕上。
  composer.render();
}
</script>
优化屏幕缩放逻辑
init{
  // ....

  window.addEventListener("resize", onWindowResize);
}
function onWindowResize() {
  const width = window.innerWidth;
  const height = window.innerHeight;

  camera.aspect = width / height;
  camera.updateProjectionMatrix();

  renderer.setSize(width, height);
  composer.setSize(width, height);
}
添加参数调节面板
在Three.js中,GUI是一个用于创建用户界面(UI)控件的库。具体来说,GUI库允许你在Three.js应用程序中创建交互式的图形用户界面元素,例如滑块、复选框、按钮等,这些元素可以用于控制场景中的对象、相机、光源等参数。
我们借助这个工具实现如下发光效果调试面板

import { GUI } from "three/addons/libs/lil-gui.module.min.js";


init{
  // ....

// 创建一个GUI实例
const gui = new GUI();

// 创建一个名为"bloom"的文件夹,用于容纳调整泛光效果的参数
const bloomFolder = gui.addFolder("bloom");

// 在"bloom"文件夹中添加一个滑块控件,用于调整泛光效果的阈值参数
bloomFolder
  .add(params, "threshold", 0.0, 1.0)
  .onChange(function (value) {
    bloomPass.threshold = Number(value);
  });

// 在"bloom"文件夹中添加另一个滑块控件,用于调整泛光效果的强度参数
bloomFolder
  .add(params, "strength", 0.0, 3.0)
  .onChange(function (value) {
    bloomPass.strength = Number(value);
  });

// 在根容器中添加一个滑块控件,用于调整泛光效果的半径参数
gui
  .add(params, "radius", 0.0, 1.0)
  .step(0.01)
  .onChange(function (value) {
    bloomPass.radius = Number(value);
  });

// 创建一个名为"tone mapping"的文件夹,用于容纳调整色调映射效果的参数
const toneMappingFolder = gui.addFolder("tone mapping");

// 在"tone mapping"文件夹中添加一个滑块控件,用于调整曝光度参数
toneMappingFolder
  .add(params, "exposure", 0.1, 2)
  .onChange(function (value) {
    renderer.toneMappingExposure = Math.pow(value, 4.0);
  });

window.addEventListener("resize", onWindowResize);
}
添加性能监视器

import Stats from "three/addons/libs/stats.module.js";

init{
  stats = new Stats();
  container.appendChild(stats.dom);
  // ...
}

function animate() {
  requestAnimationFrame(animate);
  const delta = clock.getDelta();
  mixer.update(delta);

  stats.update();
  // 通过调用 render 方法,将场景渲染到屏幕上。
  composer.render();
}
在Three.js中,Stats是一个性能监视器,用于跟踪帧速率(FPS)、内存使用量和渲染时间等信息。
完整demo代码
html
<!DOCTYPE html>
<html lang="en">

<head>
  <title>three.js物体发光效果</title>
  <meta charset="utf-8" />
  <meta name="viewport" content="width=device-width, user-scalable=no, minimum-scale=1.0, maximum-scale=1.0" />
  <link type="text/css" rel="stylesheet" href="./main.css" />
  <style>
    #info>* {
      max-width: 650px;
      margin-left: auto;
      margin-right: auto;
    }
  </style>
</head>

<body>
  <div id="container"></div>
  <script type="importmap">
      {
        "imports": {
          "three": "https://unpkg.com/three@0.163.0/build/three.module.js",
          "three/addons/": "https://unpkg.com/three@0.163.0/examples/jsm/"
        }
      }
    </script>

  <script type="module">
    import * as THREE from "three";

    import Stats from "three/addons/libs/stats.module.js";
    import { GUI } from "three/addons/libs/lil-gui.module.min.js";

    import { OrbitControls } from "three/addons/controls/OrbitControls.js";
    import { GLTFLoader } from "three/addons/loaders/GLTFLoader.js";
    import { EffectComposer } from "three/addons/postprocessing/EffectComposer.js";
    import { RenderPass } from "three/addons/postprocessing/RenderPass.js";
    import { UnrealBloomPass } from "three/addons/postprocessing/UnrealBloomPass.js";
    import { OutputPass } from "three/addons/postprocessing/OutputPass.js";

    let camera, stats;
    let composer, renderer, mixer, clock;

    const params = {
      threshold: 0,
      strength: 1,
      radius: 0,
      exposure: 1,
    };

    init();

    function init() {
      const container = document.getElementById("container");

      stats = new Stats();
      container.appendChild(stats.dom);

      clock = new THREE.Clock();

      // WebGL渲染器
      // antialias是否执行抗锯齿。默认为false.
      renderer = new THREE.WebGLRenderer({ antialias: true });
      // 设置设备像素比。通常用于避免HiDPI设备上绘图模糊
      renderer.setPixelRatio(window.devicePixelRatio);
      renderer.setSize(window.innerWidth, window.innerHeight);
      // 设置色调映射  这个属性用于在普通计算机显示器或者移动设备屏幕等低动态范围介质上,模拟、逼近高动态范围(HDR)效果。
      renderer.toneMapping = THREE.ReinhardToneMapping;
      container.appendChild(renderer.domElement);

      // 创建新的场景对象。
      const scene = new THREE.Scene();
      // 创建透视相机
      camera = new THREE.PerspectiveCamera(
        40,
        window.innerWidth / window.innerHeight,
        1,
        100
      );
      camera.position.set(-5, 2.5, -3.5);
      scene.add(camera);
      // 创建轨道控制器
      const controls = new OrbitControls(camera, renderer.domElement);
      controls.maxPolarAngle = Math.PI * 0.5;
      controls.minDistance = 3;
      controls.maxDistance = 8;
      // 添加了一个环境光
      scene.add(new THREE.AmbientLight(0xcccccc));
      // 创建了一个点光源
      const pointLight = new THREE.PointLight(0xffffff, 100);
      camera.add(pointLight);

      // 创建了一个RenderPass对象,用于将场景渲染到纹理上。
      const renderScene = new RenderPass(scene, camera);

      // 创建了一个UnrealBloomPass对象,用于实现辉光效果。≈
      const bloomPass = new UnrealBloomPass(
        new THREE.Vector2(window.innerWidth, window.innerHeight),
        1.5,
        0.4,
        0.85
      );
      // 设置发光参数,阈值、强度和半径。
      bloomPass.threshold = params.threshold;
      bloomPass.strength = params.strength;
      bloomPass.radius = params.radius;

      // 创建了一个OutputPass对象,用于将最终渲染结果输出到屏幕上。
      const outputPass = new OutputPass();

      // 创建了一个EffectComposer对象,并将RenderPass、UnrealBloomPass和OutputPass添加到渲染通道中。
      composer = new EffectComposer(renderer);
      composer.addPass(renderScene);
      composer.addPass(bloomPass);
      composer.addPass(outputPass);

      // 模型加载
      new GLTFLoader().load("./PrimaryIonDrive.glb", function (gltf) {
        const model = gltf.scene;

        scene.add(model);

        mixer = new THREE.AnimationMixer(model);
        const clip = gltf.animations[0];
        mixer.clipAction(clip.optimize()).play();

        animate();
      });

      const gui = new GUI();

      const bloomFolder = gui.addFolder("bloom");

      bloomFolder
        .add(params, "threshold", 0.0, 1.0)
        .onChange(function (value) {
          bloomPass.threshold = Number(value);
        });

      bloomFolder
        .add(params, "strength", 0.0, 3.0)
        .onChange(function (value) {
          bloomPass.strength = Number(value);
        });

      gui
        .add(params, "radius", 0.0, 1.0)
        .step(0.01)
        .onChange(function (value) {
          bloomPass.radius = Number(value);
        });

      const toneMappingFolder = gui.addFolder("tone mapping");

      toneMappingFolder
        .add(params, "exposure", 0.1, 2)
        .onChange(function (value) {
          renderer.toneMappingExposure = Math.pow(value, 4.0);
        });

      window.addEventListener("resize", onWindowResize);
    }

    function onWindowResize() {
      const width = window.innerWidth;
      const height = window.innerHeight;

      camera.aspect = width / height;
      camera.updateProjectionMatrix();

      renderer.setSize(width, height);
      composer.setSize(width, height);
    }

    function animate() {
      requestAnimationFrame(animate);


      const delta = clock.getDelta();

      mixer.update(delta);

      stats.update();
      // 通过调用 render 方法,将场景渲染到屏幕上。
      composer.render();
    }
  </script>
</body>

</html>
main.css
body {
 margin: 0;
 background-color: #000;
 color: #fff;
 font-family: Monospace;
 font-size: 13px;
 line-height: 24px;
 overscroll-behavior: none;
}

a {
 color: #ff0;
 text-decoration: none;
}

a:hover {
 text-decoration: underline;
}

button {
 cursor: pointer;
 text-transform: uppercase;
}

#info {
 position: absolute;
 top: 0px;
 width: 100%;
 padding: 10px;
 box-sizing: border-box;
 text-align: center;
 -moz-user-select: none;
 -webkit-user-select: none;
 -ms-user-select: none;
 user-select: none;
 pointer-events: none;
 z-index: 1; /* TODO Solve this in HTML */
}

a, button, input, select {
 pointer-events: auto;
}

.lil-gui {
 z-index: 2 !important; /* TODO Solve this in HTML */
}

@media all and ( max-width: 640px ) {
 .lil-gui.root {
  right: auto;
  top: auto;
  max-height: 50%;
  max-width: 80%;
  bottom: 0;
  left: 0;
 }
}

#overlay {
 position: absolute;
 font-size: 16px;
 z-index: 2;
 top: 0;
 left: 0;
 width: 100%;
 height: 100%;
 display: flex;
 align-items: center;
 justify-content: center;
 flex-direction: column;
 background: rgba(0,0,0,0.7);
}

 #overlay button {
  background: transparent;
  border: 0;
  border: 1px solid rgb(255, 255, 255);
  border-radius: 4px;
  color: #ffffff;
  padding: 12px 18px;
  text-transform: uppercase;
  cursor: pointer;
 }

#notSupported {
 width: 50%;
 margin: auto;
 background-color: #f00;
 margin-top: 20px;
 padding: 10px;
}
总结
通过本教程,我想现在你对效果合成器一定有了更深入的了解,现在,我们在看看官网的定义:
用于在three.js中实现后期处理效果。该类管理了产生最终视觉效果的后期处理过程链。 后期处理过程根据它们添加/插入的顺序来执行,最后一个过程会被自动渲染到屏幕上
结合代码,我想现在理解其它非常容易
<script type="module">
    import * as THREE from "three";

    import { EffectComposer } from "three/addons/postprocessing/EffectComposer.js";
    import { RenderPass } from "three/addons/postprocessing/RenderPass.js";
    import { UnrealBloomPass } from "three/addons/postprocessing/UnrealBloomPass.js";
    import { OutputPass } from "three/addons/postprocessing/OutputPass.js";

    function init() {
      // 1【渲染开始】创建了一个RenderPass对象,用于将场景渲染到纹理上。
      const renderScene = new RenderPass(scene, camera);

      // 2【需要合成的中间特效】创建了一个UnrealBloomPass对象,用于实现辉光效果。≈
      const bloomPass = new UnrealBloomPass(
        new THREE.Vector2(window.innerWidth, window.innerHeight),
        1.5,
        0.4,
        0.85
      );
      // 【特效设置】设置发光参数,阈值、强度和半径。
      bloomPass.threshold = params.threshold;
      bloomPass.strength = params.strength;
      bloomPass.radius = params.radius;

      // 3【效果输出】创建了一个OutputPass对象,用于将最终渲染结果输出到屏幕上。
      const outputPass = new OutputPass();

      // 4【特效合并】创建了一个EffectComposer对象,并将RenderPass、UnrealBloomPass和OutputPass添加到渲染通道中。
      composer = new EffectComposer(renderer);
      composer.addPass(renderScene);
      composer.addPass(bloomPass);
      composer.addPass(outputPass);
    }

    function animate() {
      requestAnimationFrame(animate);
      // 5【渲染特效】通过调用 render 方法,将场景渲染到屏幕上。
      composer.render();
    }
  </script>
往期推荐
源码视角,Vue3为什么推荐使用ref而不是reactive


最后
欢迎加我微信,拉你进技术群,长期交流学习...
欢迎关注「前端Q」,认真学前端,做个专业的技术人...


点个在看支持我吧


 2万+
2万+

 被折叠的 条评论
为什么被折叠?
被折叠的 条评论
为什么被折叠?
 到【灌水乐园】发言


