


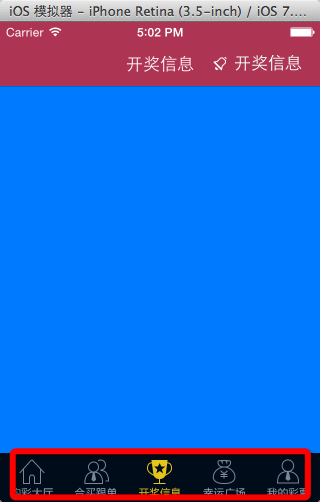
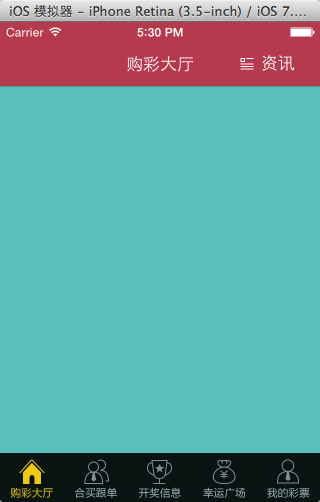
效果:
代码:
NYTabBarController
//
//  NYTabBarController.m
//  彩票lottery
//
//  Created by apple on 15-5-9.
//  Copyright (c) 2015年 znycat. All rights reserved.
//

#import "NYTabBarController.h"
#import "NYTabBar.h"
#import "NYTabBarButton.h"

@interface NYTabBarController () <NYTabBarDelegate>

@end
@implementation NYTabBarController

-(void)viewDidLoad
{
    [super viewDidLoad];
    // 1.创建自定义的TabBar
    NYTabBar * myTabBar = [[NYTabBar alloc]initWithFrame:self.tabBar.frame];
    //设置代理
    myTabBar.delegate = self;

    [self.view addSubview:myTabBar];
    // 1.1根据系统子控制器的个数来创建自定义TabBar上按钮的个数
    for (int i = 0; i<self.viewControllers.count; i++) {
        // 通知自定义TabBar创建按钮
        NSString *norImageName = [NSString stringWithFormat:@"TabBar%d", i + 1];
        NSString *disableImageName = [NSString stringWithFormat:@"TabBar%dSel", i + 1];
        // 只要调用自定义TabBar的该方法就会创建一个按钮
        [myTabBar addTabBarButtonWithNormalImageName:norImageName andDisableImageName:disableImageName];
    }


    // 2.删除系统自带的tabBar
    [self.tabBar removeFromSuperview];

    // 3.设置导航条的主题
    // 如果要同时设置很多UINavigationBar的样式, 可以通过设置UINavigationBar的主题的方式来设置以便简化代码
    UINavigationBar *navBar = [UINavigationBar appearance];
    // 3.1设置所有导航条的背景图片
    // 判断当前运行的操作系统的版本
    if ([[UIDevice currentDevice].systemVersion doubleValue] >= 7.0) {
        [navBar setBackgroundImage:[UIImage imageNamed:@"NavBar64"] forBarMetrics:UIBarMetricsDefault];
    }else {
        [navBar setBackgroundImage:[UIImage imageNamed:@"NavBar"] forBarMetrics:UIBarMetricsDefault];

    }

    // 3.2设置所有导航条的标题颜色
    NSMutableDictionary *md = [NSMutableDictionary dictionary];
    md[NSFontAttributeName] = [UIFont systemFontOfSize:17];
    md[NSForegroundColorAttributeName] = [UIColor whiteColor];
    [navBar setTitleTextAttributes:md];
}

#pragma mark - NYTabBarDelegate
-(void)tabBarDidSelectBtnFrom:(NSInteger)from to:(NSInteger)to
{
    self.selectedIndex = to;
}

@end
NYTabBar
NYTabBar.h
//
//  NYTabBar.h
//  彩票lottery
//
//  Created by apple on 15-5-9.
//  Copyright (c) 2015年 znycat. All rights reserved.
//

#import <UIKit/UIKit.h>

@protocol NYTabBarDelegate <NSObject>

-(void)tabBarDidSelectBtnFrom:(NSInteger)from to:(NSInteger) to;

@end


@interface NYTabBar : UIView

@property (nonatomic, weak) id<NYTabBarDelegate> delegate;

/**
 *  提供给外界创建按钮
 *
 *  @param norName 默认状态的图片
 *  @param disName 高亮状态的图片
 */
-(void)addTabBarButtonWithNormalImageName:(NSString *)norImageName andDisableImageName:(NSString *)disableImageName;

@end
NYTabBar.m
//
//  NYTabBar.m
//  彩票lottery
//
//  Created by apple on 15-5-9.
//  Copyright (c) 2015年 znycat. All rights reserved.
//

#import "NYTabBar.h"
#import "NYTabBarButton.h"
@interface NYTabBar()
// 定义变量记录当前选中的按钮
@property (nonatomic, weak) UIButton *selectBtn;


@end
@implementation NYTabBar


- (void)layoutSubviews
{
    [super layoutSubviews];

    for (int i = 0; i < self.subviews.count ; i++) {

        UIButton *btn = self.subviews[i];

        // 3.3设置frame
        CGFloat btnY = 0;
        CGFloat btnW = self.frame.size.width / self.subviews.count;
        CGFloat btnH = self.frame.size.height;
        CGFloat btnX = i * btnW;
        btn.frame = CGRectMake(btnX, btnY, btnW, btnH);

        // 3.8设置按钮的Tag作为将来切换子控制器的索引
        btn.tag = i;
    }
}


- (void)addTabBarButtonWithNormalImageName:(NSString *)norName andDisableImageName:(NSString *)disName
{
    // 3.1创建按钮
    NYTabBarButton *btn = [[NYTabBarButton alloc] init];
    // 3.2设置按钮上显示的图片
    // 3.2.1设置默认状态图片
    [btn setBackgroundImage:[UIImage imageNamed:norName] forState:UIControlStateNormal];

    // 3.2.2设置不可用状态图片
    [btn setBackgroundImage:[UIImage imageNamed:disName] forState:UIControlStateDisabled];

    // 3.4添加按钮到自定义TabBar
    [self addSubview:btn];

    // 3.5监听按钮点击事件
    [btn addTarget:self action:@selector(btnOnClick:) forControlEvents:UIControlEventTouchDown];

    // 3.6设置默认选中按钮
    if (1 == self.subviews.count) {
        [self btnOnClick:btn];
    }

    // 3.7设置按钮高亮状态不调整图片
    btn.adjustsImageWhenHighlighted = NO;
}

//按钮点击事件
-(void)btnOnClick:(UIButton *)btn
{
    // 3.切换子控制器
    // 通知TabBarController切换控制器
    if ([self.delegate respondsToSelector:@selector(tabBarDidSelectBtnFrom:to:) ]) {
        [self.delegate tabBarDidSelectBtnFrom:self.selectBtn.tag to:btn.tag];
    }

     // 0.取消上一次选中的按钮
    self.selectBtn.enabled = YES;

    // 1.设置当前被点击按钮为选中状态
    btn.enabled = NO;

    // 2.记录当前选中的按钮
    self.selectBtn = btn;

}


@end
NYTabBarButton
//
//  NYTabBarButton.m
//  彩票lottery
//
//  Created by apple on 15-5-9.
//  Copyright (c) 2015年 znycat. All rights reserved.
//

#import "NYTabBarButton.h"

@implementation NYTabBarButton

- (id)initWithFrame:(CGRect)frame
{
    self = [super initWithFrame:frame];
    if (self) {
        // Initialization code
    }
    return self;
}

/**重写这个方法后,按钮就不会自己调用系统内置的复杂的高亮操作*/
-(void)setHighlighted:(BOOL)highlighted
{

}
@end
实现过程
能看懂代码就不用看这个了,代码中的注释也非常清楚
为啥要弄自定义的TabBar这些不说了,直接说过程。
首先,系统开始了我们加载NYTabBarController的viewDidLoad方法
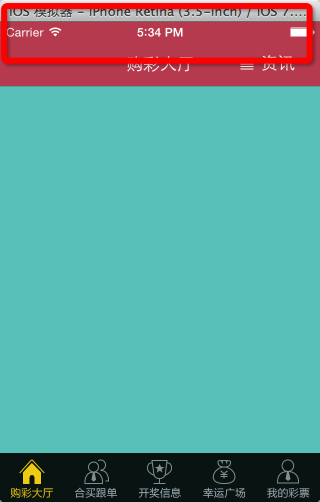
第一步:创建自定义的TabBar,因为系统的TabBar不满足我们的需求,啥是TabBar?看图。
代码:
 // 1.创建自定义的TabBar
    NYTabBar * myTabBar = [[NYTabBar alloc]initWithFrame:self.tabBar.frame];
NYTabBar里面是啥呢?很简单,就是重写了个方法,让他不高亮了。
/**重写这个方法后,按钮就不会自己调用系统内置的复杂的高亮操作*/
-(void)setHighlighted:(BOOL)highlighted
{
}
第二部:根据系统子控制器(ViewController)的个数来创建自定义TabBar上按钮的个数
for (int i = 0; i<self.viewControllers.count; i++) {
        // 通知自定义TabBar创建按钮
        NSString *norImageName = [NSString stringWithFormat:@"TabBar%d", i + 1];
        NSString *disableImageName = [NSString stringWithFormat:@"TabBar%dSel", i + 1];
        // 只要调用自定义TabBar的该方法就会创建一个按钮
        [myTabBar addTabBarButtonWithNormalImageName:norImageName andDisableImageName:disableImageName];
    }
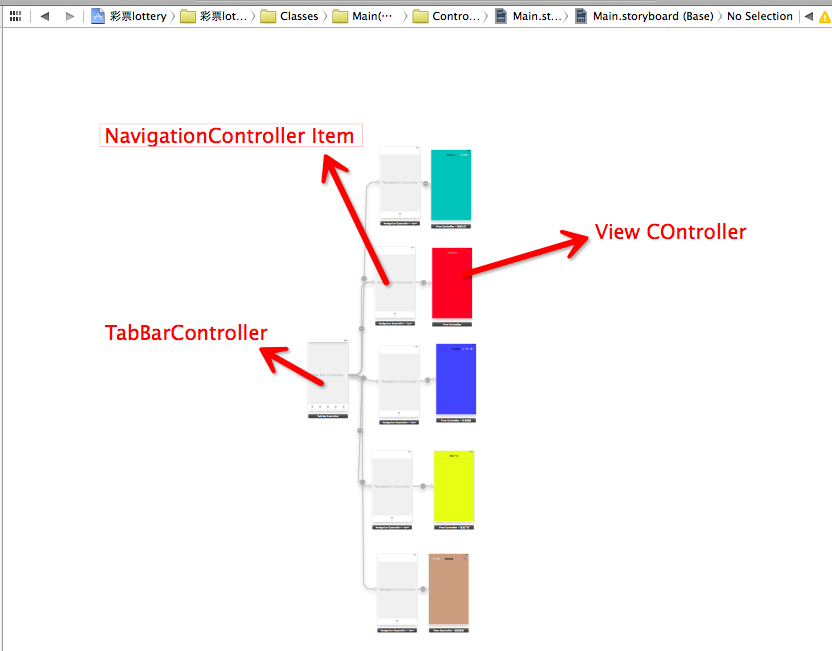
这里需要补充下了,这个彩票主要框架不是纯代码,是用stroyboard拖拽的,很方便也很快,简单一个图。
第三部:就是方法内部了,怎么设置按钮,以及各种各样的需求,比如我们的按钮要点了后直接变色,有要求按钮点击后切换子控制器,等等,代码中描述的很清楚,面向对象的思想,这一步其实不应该算大的里面的,不过他挺重要的,就弄上了。
首先是:-(void)addTabBarButtonWithNormalImageName:(NSString )norImageName andDisableImageName:(NSString )disableImageName;
这个方法。
/**
 *  提供给外界创建按钮
 *
 *  @param norName 默认状态的图片
 *  @param disName 高亮状态的图片
 */
- (void)addTabBarButtonWithNormalImageName:(NSString *)norName andDisableImageName:(NSString *)disName
{
    // 3.1创建按钮
    NYTabBarButton *btn = [[NYTabBarButton alloc] init];
    // 3.2设置按钮上显示的图片
    // 3.2.1设置默认状态图片
    [btn setBackgroundImage:[UIImage imageNamed:norName] forState:UIControlStateNormal];

    // 3.2.2设置不可用状态图片
    [btn setBackgroundImage:[UIImage imageNamed:disName] forState:UIControlStateDisabled];

    // 3.4添加按钮到自定义TabBar
    [self addSubview:btn];

    // 3.5监听按钮点击事件
    [btn addTarget:self action:@selector(btnOnClick:) forControlEvents:UIControlEventTouchDown];

    // 3.6设置默认选中按钮
    if (1 == self.subviews.count) {
        [self btnOnClick:btn];
    }

    // 3.7设置按钮高亮状态不调整图片
    btn.adjustsImageWhenHighlighted = NO;
}
然后上面有
 // 3.1创建按钮
    NYTabBarButton *btn = [[NYTabBarButton alloc] init];
创建按钮这一操作,这时候系统会执行layoutSubviews这一方法,然后我们需要算好他的frame
- (void)layoutSubviews
{
    [super layoutSubviews];

    for (int i = 0; i < self.subviews.count ; i++) {

        UIButton *btn = self.subviews[i];

        // 3.3设置frame
        CGFloat btnY = 0;
        CGFloat btnW = self.frame.size.width / self.subviews.count;
        CGFloat btnH = self.frame.size.height;
        CGFloat btnX = i * btnW;
        btn.frame = CGRectMake(btnX, btnY, btnW, btnH);

        // 3.8设置按钮的Tag作为将来切换子控制器的索引
        btn.tag = i;
    }
}
接下来就是点击事件的实现了,简单的让按钮变成不可按下的状态,然后通过点击把当前按钮的tag传给代理来让代理来实现。
//按钮点击事件
-(void)btnOnClick:(UIButton *)btn
{
    // 3.切换子控制器
    // 通知TabBarController切换控制器
    if ([self.delegate respondsToSelector:@selector(tabBarDidSelectBtnFrom:to:) ]) {
        [self.delegate tabBarDidSelectBtnFrom:self.selectBtn.tag to:btn.tag];
    }

     // 0.取消上一次选中的按钮
    self.selectBtn.enabled = YES;

    // 1.设置当前被点击按钮为选中状态
    btn.enabled = NO;

    // 2.记录当前选中的按钮
    self.selectBtn = btn;

}
这个就是定义协议了,为代理能快速提示准备的。
#import <UIKit/UIKit.h>

@protocol NYTabBarDelegate <NSObject>

-(void)tabBarDidSelectBtnFrom:(NSInteger)from to:(NSInteger) to;

@end


@interface NYTabBar : UIView

@property (nonatomic, weak) id<NYTabBarDelegate> delegate;

/**
 *  提供给外界创建按钮
 *
 *  @param norName 默认状态的图片
 *  @param disName 高亮状态的图片
 */
-(void)addTabBarButtonWithNormalImageName:(NSString *)norImageName andDisableImageName:(NSString *)disableImageName;

@end
第四步: 设置代理,这个为了实现切换自控制器效果,实现点击事件用的,看第三部。还有要把自定义的TabBar添加到view上面(常识。。。)
    //设置代理
    myTabBar.delegate = self;

    [self.view addSubview:myTabBar];
代理得到tag值后怎么完成的呢?很简单。
TabBarController中有个selectedIndex属性,这个就是你选中哪一个了。
#pragma mark - NYTabBarDelegate
-(void)tabBarDidSelectBtnFrom:(NSInteger)from to:(NSInteger)to
{
    self.selectedIndex = to;
}
比如这时候,self.selectedIndex 就是0了。
删除系统自带的tabBar,不解释,自己定义了再放个别人的。苹果性能高也不能这么玩。
// 2.删除系统自带的tabBar
    [self.tabBar removeFromSuperview];
设置导航条的主题(图片,标题),判断当前系统版本来设置背景图片,
 // 3.设置导航条的主题
    // 如果要同时设置很多UINavigationBar的样式, 可以通过设置UINavigationBar的主题的方式来设置以便简化代码
    UINavigationBar *navBar = [UINavigationBar appearance];
    // 3.1设置所有导航条的背景图片
    // 判断当前运行的操作系统的版本
    if ([[UIDevice currentDevice].systemVersion doubleValue] >= 7.0) {
        [navBar setBackgroundImage:[UIImage imageNamed:@"NavBar64"] forBarMetrics:UIBarMetricsDefault];
    }else {
        [navBar setBackgroundImage:[UIImage imageNamed:@"NavBar"] forBarMetrics:UIBarMetricsDefault];

    }

    // 3.2设置所有导航条的标题颜色
    NSMutableDictionary *md = [NSMutableDictionary dictionary];
    md[NSFontAttributeName] = [UIFont systemFontOfSize:17];
    md[NSForegroundColorAttributeName] = [UIColor whiteColor];
    [navBar setTitleTextAttributes:md];
整个过程差不多就这样子了。
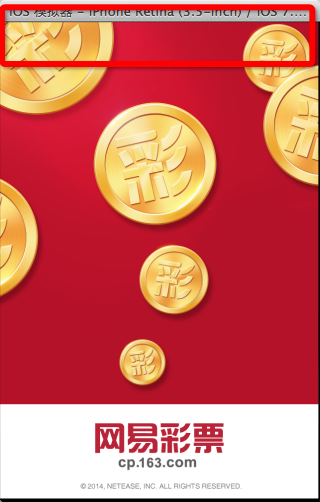
注意点:
开始进入时隐藏状态栏,进入后显示
这样:
然后:
实现方法:
#import "NYAppDelegate.h"

@implementation NYAppDelegate
- (BOOL)application:(UIApplication *)application didFinishLaunchingWithOptions:(NSDictionary *)launchOptions
{
    //隐藏状态栏,ios7之后默认交给控制器管理。要想让application管理,需要添加属性
//    View controller-based status bar appearance   NO   到  info.plist文件中。
    //显示状态栏
    application.statusBarHidden = NO;

    //设置状态栏颜色
    application.statusBarStyle = UIStatusBarStyleLightContent;

    return YES;
}
@end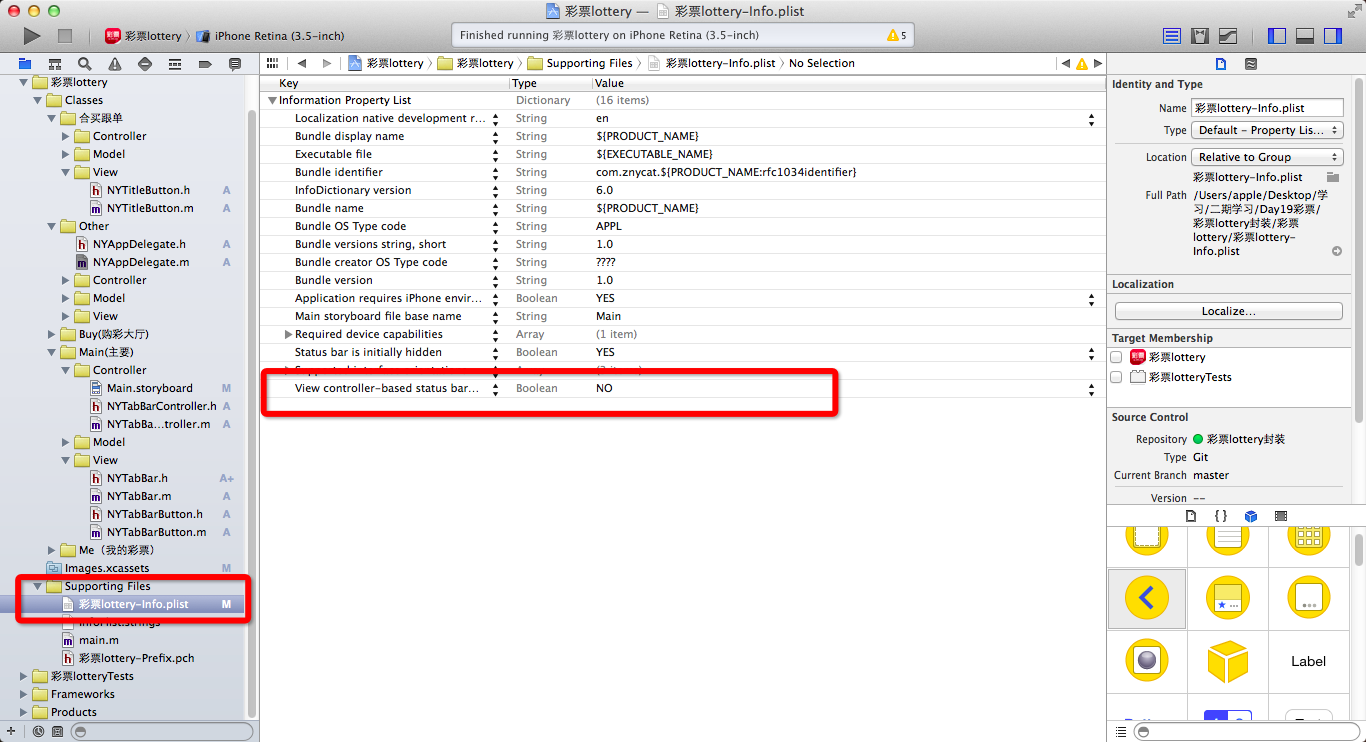
点击按钮去掉高亮
/**重写这个方法后,按钮就不会自己调用系统内置的复杂的高亮操作*/
-(void)setHighlighted:(BOOL)highlighted
{

}
还有这个
    // 3.7设置按钮高亮状态不调整图片
    btn.adjustsImageWhenHighlighted = NO;
设置导航条的主题,以及当前系统版本
/ 3.设置导航条的主题
    // 如果要同时设置很多UINavigationBar的样式, 可以通过设置UINavigationBar的主题的方式来设置以便简化代码
    UINavigationBar *navBar = [UINavigationBar appearance];
    // 3.1设置所有导航条的背景图片
    // 判断当前运行的操作系统的版本
    if ([[UIDevice currentDevice].systemVersion doubleValue] >= 7.0) {
        [navBar setBackgroundImage:[UIImage imageNamed:@"NavBar64"] forBarMetrics:UIBarMetricsDefault];
    }else {
        [navBar setBackgroundImage:[UIImage imageNamed:@"NavBar"] forBarMetrics:UIBarMetricsDefault];

    }

    // 3.2设置所有导航条的标题颜色
    NSMutableDictionary *md = [NSMutableDictionary dictionary];
    md[NSFontAttributeName] = [UIFont systemFontOfSize:17];
    md[NSForegroundColorAttributeName] = [UIColor whiteColor];
    [navBar setTitleTextAttributes:md];


 1490
1490

 被折叠的 条评论
为什么被折叠?
被折叠的 条评论
为什么被折叠?
 到【灌水乐园】发言


