


继续给大家带来低代码平台开发的内容,这次还是组件和物料的开发。
引入 antd
平台使用到的组件不可能全部都是我们自己开发,我们希望能够在我们的设计器当中使用第三方的组件,或者将已经开发过的组件转换成能够在平台上使用的。
关于后者,引擎提供了转换组件的插件
我们暂时不展开,本文简单介绍一下前者,以 antd 组件为例
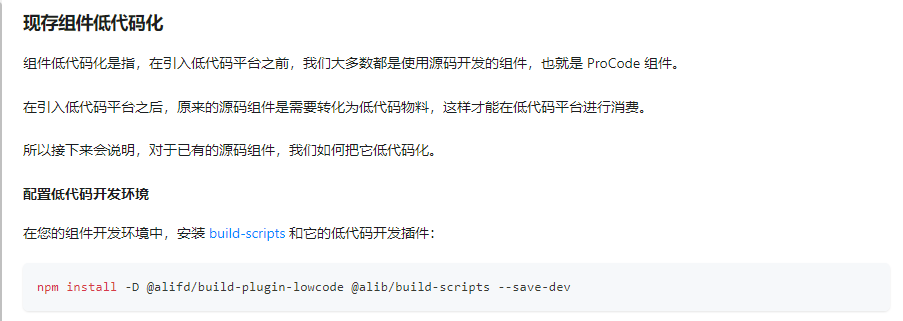
对于有配置物料描述的第三方组件,我们可以在资产配置中直接使用链接进行引入,这里简单介绍在我们自己组件中使用并暴露第三方组件
打开物料库的代码,我们随便创建一个组件,配置好其他内容
import React, { createElement } from 'react';
import {Button} from 'antd';

const AntdButton: React.FC<AntdButtonProps> = ({
  label,
  ...props
}) => {
  return (
    <Button {...props}>{label}</Button>
  )
}

export default AntdButton;
我们还需要使用到 button 的接口声明,这样我们才能在设置器中配置 button
import React, { createElement } from 'react';
import { Button } from 'antd';
import { BaseButtonProps } from 'antd/es/button/button';

export interface AntdButtonProps extends BaseButtonProps {
  /**
   * 按钮文字
   * @initialValue 按钮
   */
  label: string;
}

const AntdButton: React.FC<AntdButtonProps> = ({
  label,
  ...props
}) => {
  return (
    <Button {...props}>{label}</Button>
  )
}

export default AntdButton;
这样就行,我们在物料库执行
npm run lowcode:dev
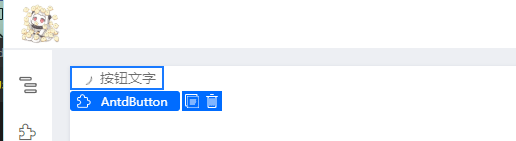
打开 localhost:3333,进入页面查看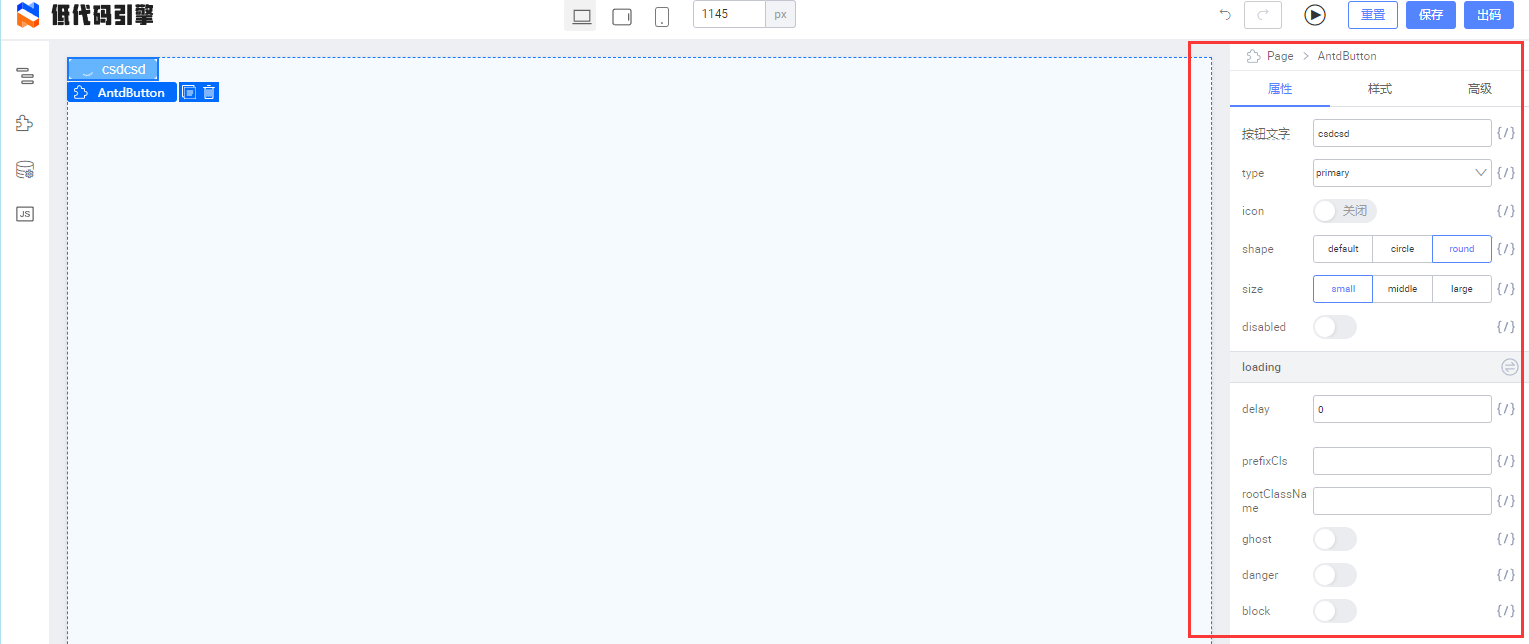
在这个页面可以看到,但是如果我们启动设计器(编辑器)
这里我的设计器引擎版本是 1.2.3 ,组件并不能直接在设计器中使用,是有问题的,我们需要调整一下代码,修改刚刚引入 button 的代码
import { Button } from 'antd';
 =>
import Button from 'antd/es/button';
这样就能使用了,不知道什么时候修复 bug
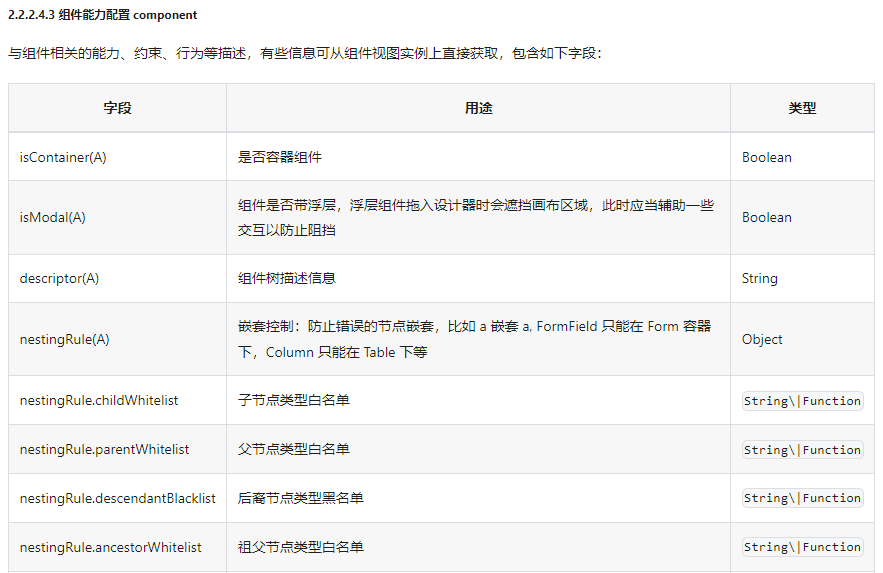
限制子节点/父节点
我们在将节点拖拽进如容器组件当中时希望对子组件类型做限制,类似下面的效果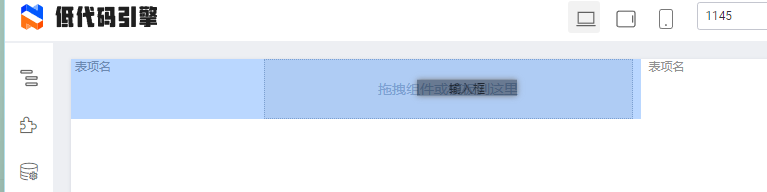
容器允许的组件拖进时,容器会响应变成蓝色,意味着可以拖拽进入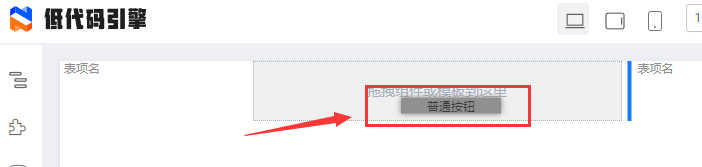

而容器不允许的类型,则无法拖入(按钮被放在了容器旁边,容器没有接收)
要实现这个功能只需简单配置即可
{
    "componentName": "CustomerQuickLayout",
    "title": "快捷布局",
    "docUrl": "",
    "screenshot": "",
    "devMode": "proCode",
    "npm": {
        ···
    },
    "configure": {
        ···
        "component": {
            "isContainer": true,
            "nestingRule": {
                "childWhitelist": [
                    "CustomerInput",
                    "CustomerDiv",
                    "CustomerGrid",
                    "CustomerSelect"
                ],
                "parentWhitelist": [
                    "CustomerRow"
                ]
            }
        }
    },
}
如果是跟着我之前的文章做的话就不需要改 meta 文件,而是要修改 inject.config.json (这个文件是我之前的文章添加的配置文件,请参考我前面的文章)
"customer-quick-layout": {
    ···
    "configure": {
      "component": {
        "isContainer": true,	// 标记是容器
        "nestingRule": {
          "childWhitelist": ["CustomerInput", "CustomerDiv", "CustomerGrid", "CustomerSelect"],	// 子节点白名单
          "parentWhitelist": ["CustomerRow"]	// 父节点白名单
        }
      }
    }
  },
需要注意的是,这里节点名称需要用组件的 componentName
初始化子节点/携带附属节点
我们期望在拖拽一个组件进设计器的时候,这个组件能够自动携带其他组件进入设计器进行初始化。
如图,我拖拽行容器进入时,引擎自动在行容器当中放入了两个快捷布局的组件,快捷布局和行容器是两个完全独立的组件。
要做到这一点,需要修改 advanced 属性
《低代码引擎物料协议规范》 | Low-Code Engine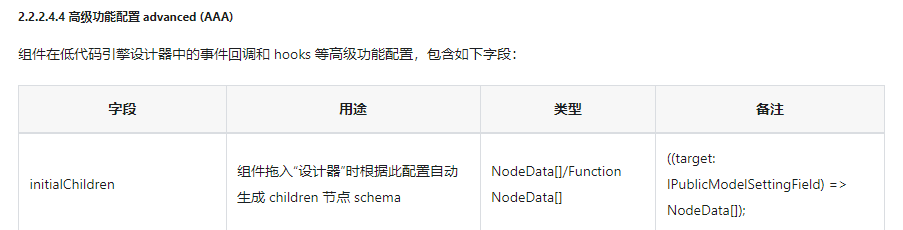
{
    "componentName": "CustomerRow",
    "title": "行容器",
    "docUrl": "",
    "screenshot": "",
    "devMode": "proCode",
    "npm": {
        "package": "editor-components",
        "version": "0.1.0",
        "exportName": "CustomerRow",
        "main": "src\\index.tsx",
        "destructuring": true,
        "subName": ""
    },
    "configure": {
        ···	// 省略部分配置
        "advanced": {
            "initialChildren": [
                {
                    "componentName": "CustomerQuickLayout",
                    "props": {
                        "isRequired": false,
                        "mdProportion": 4
                    }
                },
                {
                    "componentName": "CustomerQuickLayout",
                    "props": {
                        "isRequired": false,
                        "mdProportion": 4
                    }
                }
            ]
        }
    },
}
这个配置自己写比较麻烦,我们有一些快捷的方式,在我们的设计器当中拖拽出我们期望的组件组合,然后查看设计器左下角的 schema
然后找到指定组件的 children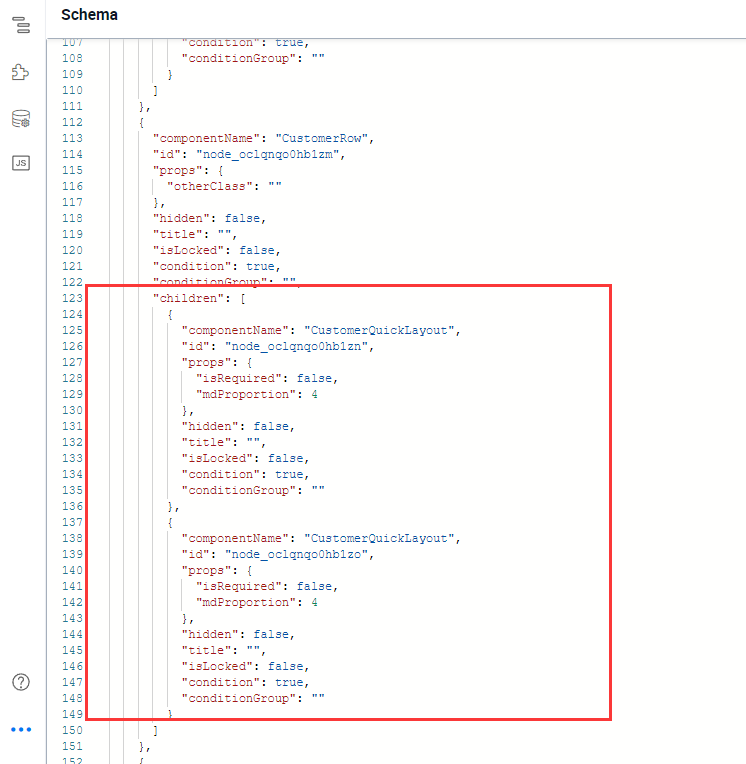
结合我上面贴出的配置对比,可以看到有些配置是不需要写的,大家自行尝试
设置器属性关联互动
如下图
“显示测试属性”和“测试属性”关联,只有在“显示测试属性”打开为 true 时,“测试属性”才会出现并进行修改
如何实现这种效果?
首先需要知道每个 props 属性都可以配置 condition 来设置是否在设置器当中进行显示

condition 接收一个函数,这个函数的返回结果会决定该属性是否展示
问题在于,我们不追加其他配置时,这个函数只会在初始化的时候执行,没办法实现动态更改,比较麻烦
这个效果我没有看到直接的官方例子,自己折腾一会后折腾出来了,用法感觉怪怪的,所以仅供参考
首先,需要配置的属性是 extraProps 的 setValue
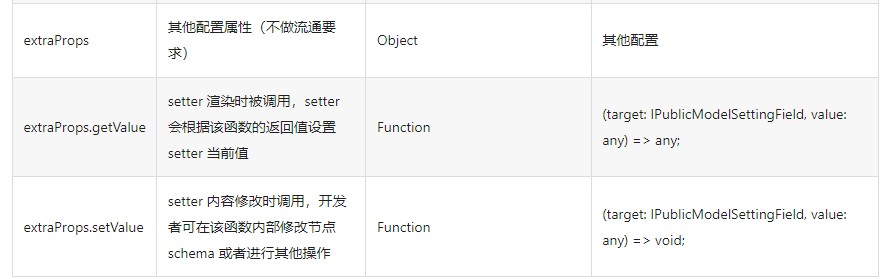
需要借助传入的这个 target 对象,完成目标功能
参考官方的文档,这个对象应该是可以直接设置同级 props 的配置属性的,但是我多次尝试修改 “测试属性”的 condition 都没有效果,没能做到直接修改,所以下面介绍的是间接修改的方法
我们修改 “显示测试属性”的 props
{
    "title": {
        "label": {
            "type": "i18n",
            "en-US": "showTestAttr",
            "zh-CN": "显示测试属性"
        },
        "tip": "showTestAttr | 显示测试属性"
    },
    "name": "showTestAttr",
    "description": "显示测试属性",
    "setter": {
        "componentName": "BoolSetter",
        "isRequired": true,
        "initialValue": false
    },
    "extraProps": {
        "setValue": function (field)  {
          const mob = field.getProps();	// 获取设置属性集
          const targetValue = mob.get('testAttr')?.getValue();	// 获取“测试属性”的value
          mob.get('testAttr')?.setValue(targetValue);	// 赋值“测试属性”
        }
    }
},
可以看到,这个函数做了一个很奇怪的动作,我们拿到了 “测试属性”的值,然后再将这个值赋值给“测试属性”,我们看上去啥都没干。
虽然这个函数本质上啥也没做,但是它会触发 testAttr 配置在 extraProps 中的 condition 函数,让对应的函数重新执行,这样我就可以通过 condition 函数获取 showTestAttr 的值来决定 condition 的返回值,这样就能够控制属性在设置器中的显示
我们增加配置 testAttr 的 condition
{
    "title": {
        "label": {
            "type": "i18n",
            "en-US": "testAttr",
            "zh-CN": "测试属性"
        },
        "tip": "testAttr | 测试属性"
    },
    "name": "testAttr",
    "description": "测试属性",
    "setter": {
        "componentName": "StringSetter",
        "isRequired": true,
        "initialValue": "这是一个测试属性"
    },
    "extraProps": {
        "condition": (field) => {
          const mob = field.getProps();
          const targetValue = mob.get('showTestAttr')?.getValue();
          return targetValue;
        }
    }
}
主要在这个函数,其实函数非常简单,主要要理解需要用 showTestAttr 的 setValue 去触发 testAttr 的condition 函数,让它重新执行,从而控制属性在面板中的显示
如果是正常配置的话到这一步就结束了,但是如果和我一样增加了一个 inject.config.json 配置文件,并使用插件控制 meta 文件的生成,又该怎么做呢?
json 文件中不能写函数,显然,我们的 did-meta 插件需要进行拓展
拓展 did-meta,支持传递函数
上文已经说了,json 文件里面写不了函数,因此我们第一步就是修改配置文件格式,由原来的 json 格式变成 js 格式,方便我们写代码,并且格式改成下面这样
module.exports = {···} // 具体的配置
在 did-meta 中修改导入格式
const metaConfig = require('../inject.config.js');
meta.ts 文件当中,props 的类型是一个数组,但是我们并不是所有的 prop 都需要插入配置,因此我设计在 inject.config.js 中这样配置 props
"configure": {
  "props": {
    2: {
      extraProps: {
        setValue: wrapFunc(function(field)  {
          const mob = field.getProps();
          const targetValue = mob.get('testAttr')?.getValue();
          mob.get('testAttr')?.setValue(targetValue);
        }),
      },
    },
    3: {
      extraProps: {
        condition: wrapFunc((field) => {
          const mob = field.getProps();
          const targetValue = mob.get('showTestAttr')?.getValue();
          return targetValue;
        })
      },
    }
  }
}
这是一个伪数组对象,这样哪个 props 需要传递参数,我们调整对应的数字即可。而这个 wrapFunc 负责将函数转换成字符串
// 将函数转换成字符串
const wrapFunc = (fn) => {
  return fn.toString() + '&fn-used';  // 方便后续处理,加上特定标识符
}
转换成字符串的原因是,我们在最终将配置插入时用到了 JSON.stringify 这个函数,这个转换是没办法转换成函数的,函数会被转换成 undefined
现在 inject.config.js 当中就没有需要改的了,我们还需要在 did-meta 中将函数字符串转换回函数
接下来附上 did-meta 修改之后的完整代码
const fs = require('fs')
const metaConfig = require('../inject.config.js');
const parseTS = require('./parse-props');
const { error } = require('console');
const path = require('path');

const mainEntry = path.join(__dirname.split('plugins')[0], 'src\\index.tsx');
const workDir = __dirname.split('plugins')[0];

const pkgName = 'editor-components';

// 获取 props 的 map
function getPropsMap() {
  const propsParseRes = parseTS.default(mainEntry, {
    pkgName,
    mainFileAbsolutePath: mainEntry,
    mainFilePath: mainEntry,
    npmClient: 'npm',
    workDir,
  });
  const propDescriptionMap = {};
  for (const propMap of propsParseRes) {
    const props = {};
    for (const key of Object.keys(propMap.props)) {
      const descriptions = propMap.props[key]?.description.split('@');
      descriptions.shift();
      props[key] = {};
      descriptions.map(des => {
        const noLineDes = des.replace('\n', '');
        const head = /(.*?) /.exec(noLineDes)[1];
        const value = noLineDes.split(head)[1];
        try {
          if (head === 'props') props[key][head] = JSON.parse(value);
          else if (/^[0-9]*$/.test(value.trim())) props[key][head] = parseInt(value, 10);
          else if (value.trim() === 'true' || value.trim() === 'false') {
            if (value.trim() === 'true') props[key][head] = true;
            else props[key][head] = false;
          } else props[key][head] = value.trim();
        } catch (e) {
          error(`${propMap.displayName} 的 ${key} 属性接口声明存在错误,请检查`);
          throw e;
        }
      })
      if (JSON.stringify(props[key]) === '{}') Reflect.deleteProperty(props, key);
    }
    if (JSON.stringify(props) !== '{}') propDescriptionMap[propMap.displayName] = props;
  }
  return propDescriptionMap;
}

module.exports = async () => {
  const propsMap = getPropsMap();
  const files = await fs.readdirSync('lowcode/');
  for (const file of files) {
    let contextBuffer;
    try {
      contextBuffer = await fs.readFileSync(`lowcode/${file}/meta.ts`);
    } catch {
      await fs.rmdirSync(`lowcode/${file}`);
      continue;
    }
    const context = contextBuffer.toString();
    const after = context.split('IPublicTypeComponentMetadata = ')[1];
    let jsonTarget;
    let metaJson;
    try {
      jsonTarget = after.split(';\n')[0];
      metaJson = JSON.parse(jsonTarget);
    } catch {
      jsonTarget = /(.*?);[\n|\r| ]*const/.exec(after)[1];
      metaJson = JSON.parse(jsonTarget);
    }
    const config = metaConfig[file];

    if (config) {
      // 插入主配置
      for (const key of Object.keys(config)) {
        if (key === 'configure') {
          const propsConfig = config[key].props;
          // 插入 props 的额外配置
          if (propsConfig && JSON.stringify(propsConfig) !== '{}') {
            try {
              for (let index of Object.keys(propsConfig)) {
                for (let chilKey of Object.keys(propsConfig[index])) {
                  // 默认不生成的字段,但是配置中有,转换前赋初始值
                  if (
                    metaJson[key].props[index][chilKey] === undefined ||
                    metaJson[key].props[index][chilKey] === null
                  ) {
                    switch (propsConfig[index][chilKey]) {
                      case 'object':
                        metaJson[key].props[index][chilKey] = {};
                        break;
                      default:
                        metaJson[key].props[index][chilKey] = "";
                        break;
                    }
                  }
                }
                metaJson[key].props[index] = Object.assign(
                  metaJson[key].props[index],
                  propsConfig[index]
                );
              }
            } catch (e) {
              console.log('props 配置需要以数字为键名,是一个伪数组对象,请检查格式');
              throw e;
            }
          }
          // 合并前删除 props 配置
          Reflect.deleteProperty(config[key], 'props');
          metaJson[key] = Object.assign(metaJson[key], config[key]);
        } else if (key !== 'snippets') {
          metaJson[key] = config[key];
        }
      }

      // 给设置器传参
      if (propsMap[metaJson.componentName]) {
        for (let i = 0; i < (metaJson.configure.props || []).length; i++) {
          const prop = metaJson.configure.props[i];
          const paramsConfig = propsMap[metaJson.componentName];
          if (paramsConfig) {
            const params = paramsConfig[prop.name];
            if (metaJson.configure.props[i].setter) {
              metaJson.configure.props[i].setter = Object.assign(
                metaJson.configure.props[i].setter,
                params
              )
            }
          }
        }
      }

      // 插入 snippets 配置
      const snippetsContext = context.split('IPublicTypeSnippet[] = [')[1];
      const snippetsJson = JSON.parse(snippetsContext.split('];')[0]);
      for (const key of Object.keys(config.snippets || [])) {
        snippetsJson[key] = config.snippets[key];
      }

      // 创建主代码
      let targetContext = `${context.split('IPublicTypeComponentMetadata = ')[0]}IPublicTypeComponentMetadata = ${JSON.stringify(metaJson)};

const snippets: IPublicTypeSnippet[] = [
  ${JSON.stringify(snippetsJson)}
];
${snippetsContext.split('];')[1]}`;

      // 将部分字符串化的函数转换回函数
      const reg1 = /:"\([a-zA-Z_0-9]*?\)( )*?\=\>( )*?\{/g; // 箭头函数
      const reg2 = /:"function( )*?\([a-zA-Z_0-9, ]*?\)( )*?\{/g; // 标准函数
      let w;
      while (w = reg1.exec(targetContext)) {
        targetContext = targetContext.replace(w[0], w[0].replace('"', ''))
      }
      while (w = reg2.exec(targetContext)) {
        targetContext = targetContext.replace(w[0], w[0].replace('"', ''))
      }
      // 去除各种标识符
      targetContext = targetContext.replace(/&fn-used"/g, '');
      targetContext = targetContext.replace(/\\r/g, '');
      targetContext = targetContext.replace(/\\n/g, '');
      // 去除多余缩进
      targetContext = targetContext.replace(/            /g, '');
      await fs.writeFileSync(`lowcode/${file}/meta.ts`, targetContext);
    }
  }
}
代码就不展开讲了,聊了这么多期物料库的,下期文章我们讲点设计器(编辑器)的内容


 1165
1165


 被折叠的 条评论
为什么被折叠?
被折叠的 条评论
为什么被折叠?
 到【灌水乐园】发言


