


硬件
服务器 CentOS7 + git(version 1.8.3.1)
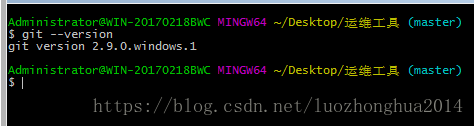
客户端 Win7 + git(version 2.9.0.windows.1)
安装 Git
#yum install -y git
git --version
客户端:
下载 Git for Windows,地址:https://git-for-windows.github.io/
安装完之后,可以使用 Git Bash 作为命令行客户端。
安装完之后,查看 Git 版本
服务器端创建 git 用户,用来管理 Git 服务,并为 git 用户设置密码
[root@k8s-node-1 ~]# useradd git
[root@k8s-node-1 ~]# passwd git
服务器端创建 Git 仓库
设置 /home/data/git/gittest.git 为 Git 仓库
然后把 Git 仓库的 owner 修改为 git
1,cd home
mkdir -p data/git/gittest.git
2, [root@k8s-node-1 home]# git init --bare data/git/gittest.git
3,[root@k8s-node-1 home]# cd data/git/
4,[root@k8s-node-1 git]# chown -R git:git gittest.git/
客户端 clone 远程仓库
D:\lib\xxxx>git clone git@192.168.176.188:/home/data/git/gittest.git
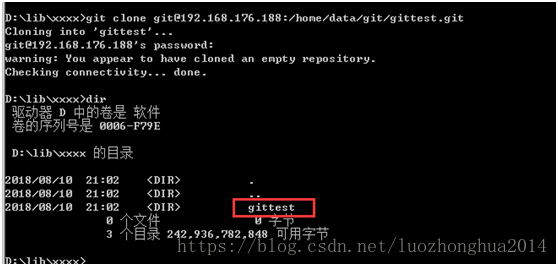
会多出know-hosts文件
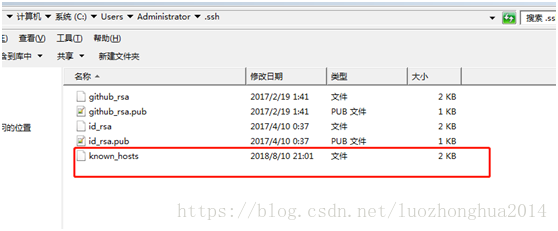
客户端创建 SSH 公钥和私钥
ssh-keygen -t rsa -C "172257861@qq.com"
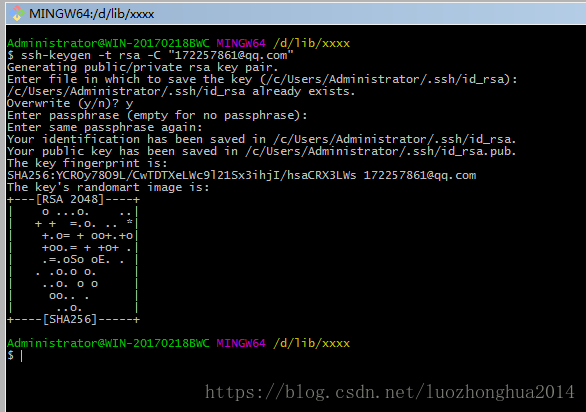
多出2个文件(覆盖我以前文件了)
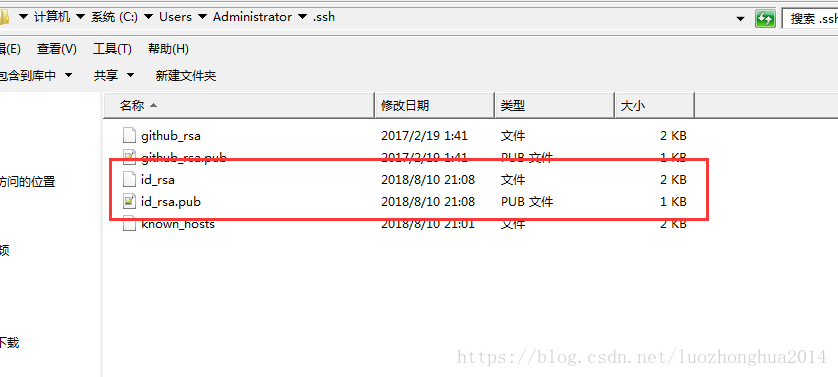
id_rsa 是私钥
id_rsa.pub 是公钥
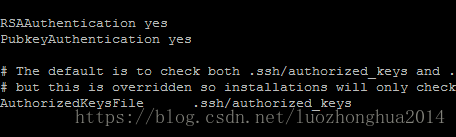
[root@k8s-node-1 ssh]# vi sshd_config
RSAAuthentication yes
PubkeyAuthentication yes
AuthorizedKeysFile .ssh/authorized_keys
保存并重启 sshd 服务
systemctl restart sshd
由 AuthorizedKeysFile 得知公钥的存放路径是 .ssh/authorized_keys,实际上是 $Home/.ssh/authorized_keys,由于管理 Git 服务的用户是 git,所以实际存放公钥的路径是 /home/git/.ssh/authorized_keys
在 /home/git/ 下创建目录 .ssh
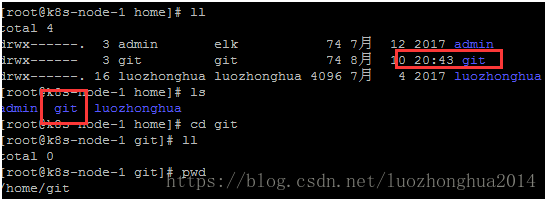
[root@k8s-node-1 home]# ll
total 4
drwx------. 3 admin elk 74 7月 12 2017 admin
drwxr-xr-x 3 root root 16 8月 10 20:51 data
drwx------ 3 git git 74 8月 10 20:43 git
drwx------. 16 luozhonghua luozhonghua 4096 7月 4 2017 luozhonghua
[root@k8s-node-1 home]# cd git
[root@k8s-node-1 git]# ll
total 0
[root@k8s-node-1 git]# pwd
/home/git
[root@k8s-node-1 git]# mkdir .ssh
[root@k8s-node-1 git]# ls
[root@k8s-node-1 git]# ls -a
. .. .bash_logout .bash_profile .bashrc .mozilla .ssh
然后把 .ssh 文件夹的 owner 修改为 git
[root@k8s-node-1 git]# chown -R git:git .ssh
将客户端公钥导入服务器端 /home/git/.ssh/authorized_keys 文件
回到 Git Bash 下,导入文件:
ssh git@192.168.176.188 'cat >> .ssh/authorized_keys' < ~/.ssh/id_rsa.pub

回到服务器端,查看 .ssh 下是否存在 authorized_keys 文件:
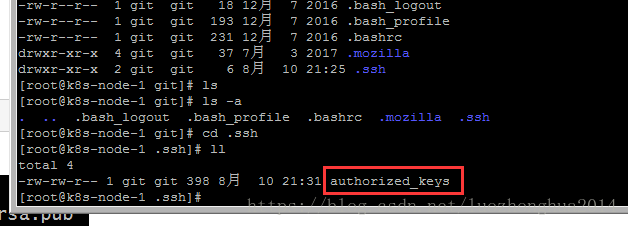
重要:
修改 .ssh 目录的权限为 700
修改 .ssh/authorized_keys 文件的权限为 600
[root@k8s-node-1 git]# chmod 700 .ssh
cd .ssh
chmod 600 authorized_keys
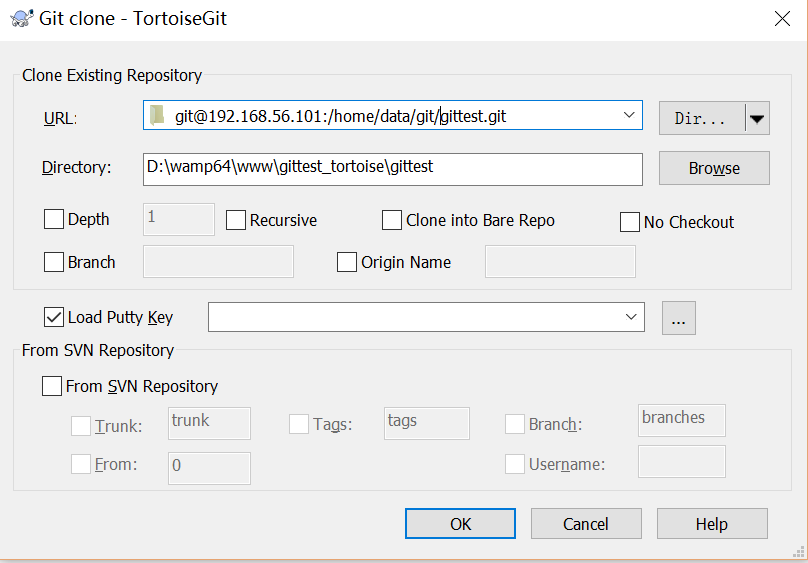
客户端再次 clone 远程仓库
删除原来的
git clone git@192.168.176.188:/home/data/git/gittest.git
也可以使用 tortoiseGit 客户端来管理项目:
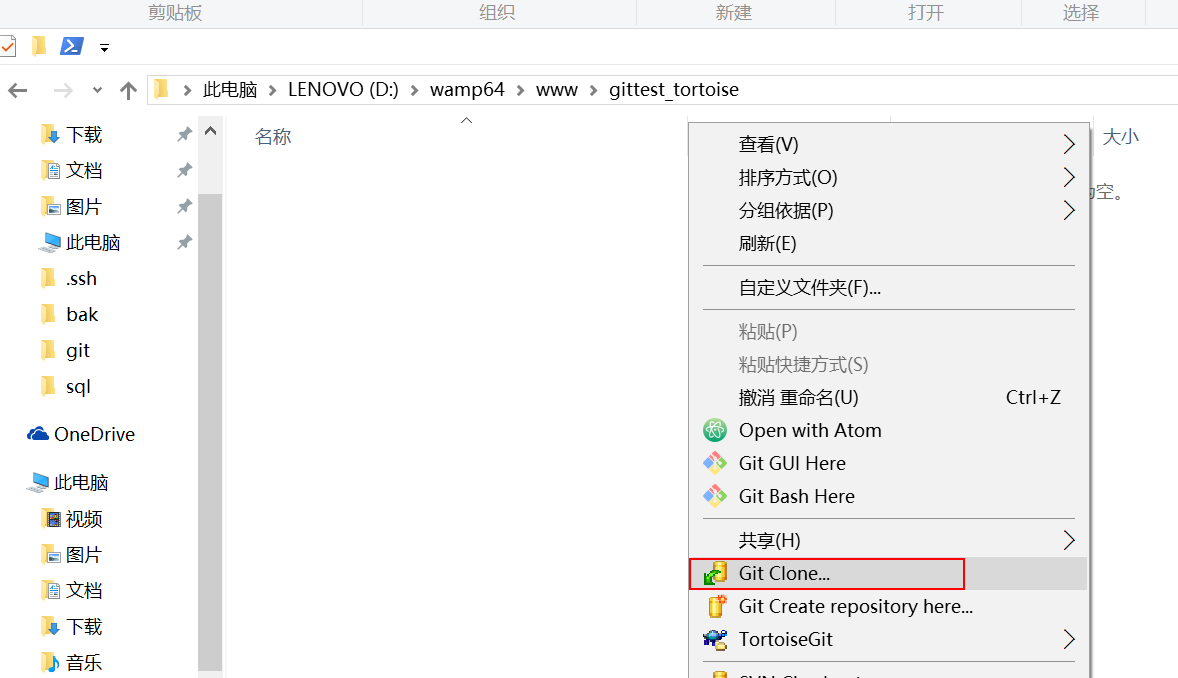
clone
禁止 git 用户 ssh 登录服务器
之前在服务器端创建的 git 用户不允许 ssh 登录服务器
编辑 /etc/passwd
找到:
git:x:502:504::/home/git:/bin/bash
修改为
git:x:502:504::/home/git:/bin/git-shell
此时 git 用户可以正常通过 ssh 使用 git,但无法通过 ssh 登录系统。


 9542
9542


 被折叠的 条评论
为什么被折叠?
被折叠的 条评论
为什么被折叠?
 到【灌水乐园】发言


