


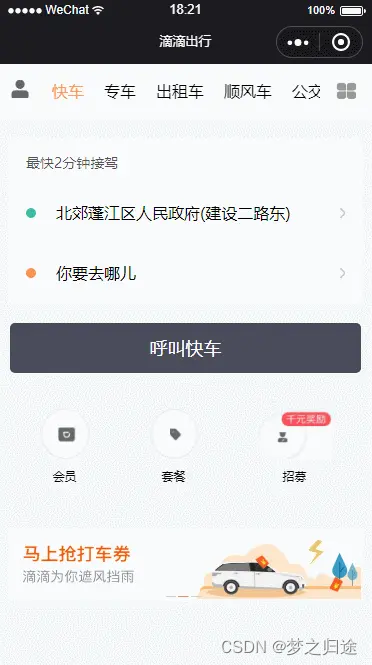
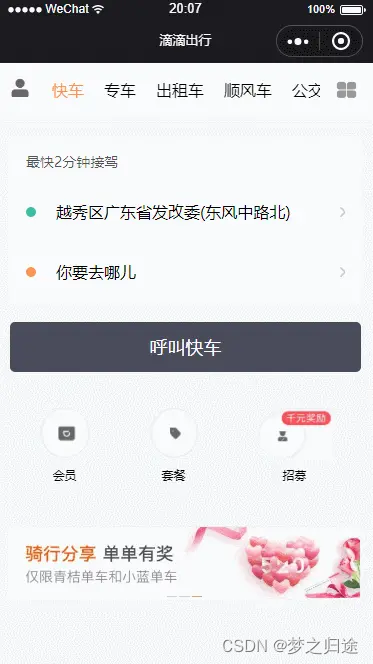
效果图
目录结构
┣━ api # 存放网络请求相关
┣━ common ●
          ┣━ constant               //常量
          ┣━ css                    //weui.css
          ┣━ less                   //通用less样式与变量
          ┗━ lib                     //第三方库 qqmap-wx-jssdk.js
┣━ components  ● 抽取出来的组件
               ┣━ addressList.vue
               ┣━ common-footer.vue
               ┣━ driver-header.vue
               ┣━ loading-sprinner.vue
               ┣━ search-bar.vue
               ┗━ star.vue
┣━ pages ● 页面
         ┣━ cars                    //选择车
         ┣━ cityChoose              //选择城市
         ┣━ destination             //选择目的地
         ┣━ evaluation              //评价
         ┣━ index                   //主页面
         ┣━ login                   //登录
         ┣━ orderCancel             //订单取消
         ┣━ orderClose              //订单关闭
         ┣━ orderService            //订单服务
         ┣━ orderWhy                //询问原因
         ┣━ starting                //选择出发地点
         ┗━ wait                     //等待
┣━ store ● 存放vuex相关
         ┣━ index.js
         ┣━ mutation-types.js
         ┣━ mutations.js
         ┗━ state.js
┣━ utils 工具类
┣━ App.vue
┣━ main.js
┗━ static # 静态资源,存放图片
vuex数据
const state = {
  curNavIndex: 0,   //当前头部导航索引
  phone: '',         //登录号码
  curCity: '',      //当前所在的城市
  startPlace: '出发地', //出发地
  startFormattedPlace: '', //更具人性化的描述的出发地
  startPosition: [],        //包含startLatitude和startLongitude
  destination: '你要去哪儿', //目的地
  endPosition: [],      //包含endLatitude和endLongitude
  driver: {},       //司机信息 包含Cartnumber,cart,id,name,stars
  cost: 0       //花费
}
功能详情
头部导航自动滑动
为了让头部导航点击时能自动滑出,滑动swiper的同时头部导航跟着滑动,在cars页面选中车时回退到index页面时头部导航自动滑动,我在vuex中维护了一个索引值curNavIndex。根据不同的curNavIndex对scroll-view设置不同的scroll-left值。那么如何设置准确的scroll-left值呢?微信小程序无法进行Dom操作,所以无法动态拿到元素宽度。所以我根据头部导航每项的宽度维护了一个数组navOffsetArr
  //两个字宽度+2*margin 也就是 32+10*2 = 52
  const NAV_SMALL_WIDTH = 52;
  //三个字宽度+2*margin 也就是 48+10*2 = 68
  const NAV_BIG_WIDTH = 68;


  this.navOffsetArr = [
        0,
        0,
        NAV_SMALL_WIDTH,
        NAV_SMALL_WIDTH * 2,
        NAV_SMALL_WIDTH * 2 + NAV_BIG_WIDTH,
        NAV_SMALL_WIDTH * 2 + NAV_BIG_WIDTH * 2,
        NAV_SMALL_WIDTH * 3 + NAV_BIG_WIDTH * 2,
        NAV_SMALL_WIDTH * 4 + NAV_BIG_WIDTH * 2
      ]
获取索引值
 computed: {
      ...mapState([
        'curNavIndex'
      ])
    }
watch里监听索引值,当curNavIndex改变时,拿到不同的navScrollLeft值
 watch: {
      curNavIndex(newIndex){
        this.navScrollLeft = this.navOffsetArr[newIndex]
      }
    }
最后将scroll-left与navScrollLeft绑定,从而实现自动滑动
     <scroll-view
        class="nav"
        scroll-x="true"
        scroll-with-animation="true"
        :scroll-left="navScrollLeft">

       ......
       ......

      </scroll-view>
首页自动保存位置信息
在进入index首页的时候,就会自动将当前城市,当前经纬度,当前地址存入state中作为出发点信息。这里接入了腾讯地图api,还是比较方便的。
  wx.getLocation({
          type: 'gcj02',
          success: (res) => {
            reverseGeocoder(qqmapsdk, res).then(res => {
              this.saveStartPlace(res.result.address)
              this.saveFormattedStartPlace(res.result.formatted_addresses.recommend)
              this.saveCurCity(res.result.address_component.city)
            })
            this.saveStartPosition([res.latitude, res.longitude])
          }
        })
mapMutations
methods: {
  ...mapMutations({
        saveCurNavIndex: 'SET_CUR_NAV_INDEX',
        saveStartPlace: 'SET_START_PLACE',
        saveFormattedStartPlace: 'SET_FORMATTED_START_PLACE',
        saveCurCity: 'SET_CUR_CITY',
        saveStartPosition: 'SET_START_POSITION',
        saveCost: 'SET_COST'
      })
}
其中reverseGeocoder()就是一个位置转换为地址的函数,是对qqmapsdk.reverseGeocoder()进行了一次封装
function reverseGeocoder(qqmapsdk, {latitude, longitude}) {
  return new Promise((resolve, reject) => {
    qqmapsdk.reverseGeocoder({
      location: {
        latitude: latitude,
        longitude: longitude,
      },
      success: (res) => resolve(res),
      fail: (res) => reject(res)
    })
  })
}
这样当我们进入index首页的时,就可以在Console中就看到数据成功保存到vuex里

选择出发点
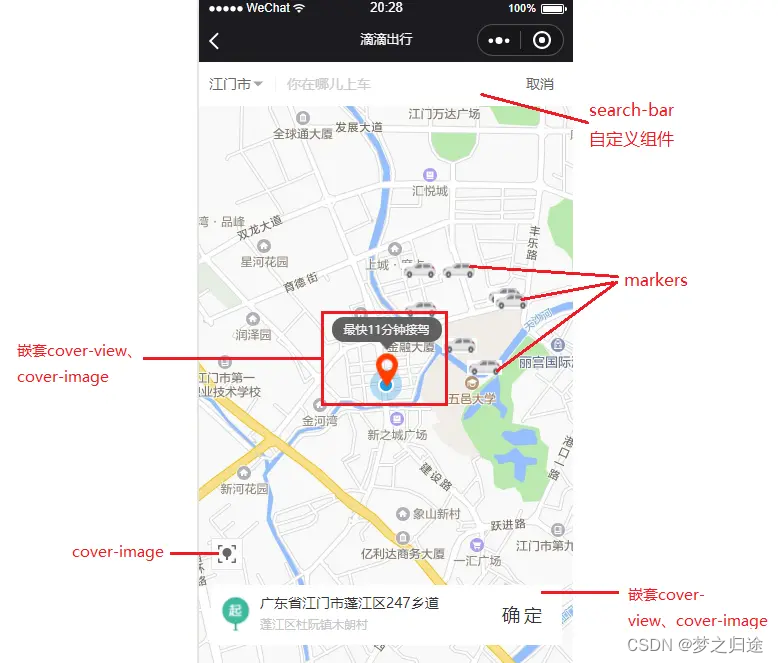
地图map
 <map class="map-didi"
         id="map-didi"
         :latitude="latitude"
         :longitude="longitude"
         :markers="markers"
         @regionchange="regionChange"
         @begin="begin"
         @end="end"
         show-location
    >
    ...
</map>
初始化地图时将地图中心移动至startPosition,如果startPosition不存在,就将地图中心移动至wx.getLocation()获取的当前位置坐标
 initLocation(){
        if (this.startPosition.length) {
          this.latitude = this.startPosition[0]
          this.longitude = this.startPosition[1]
        } else {
          wx.getLocation({
            type: "gcj02",
            success: (res) => {
              this.longitude = res.longitude
              this.latitude = res.latitude
            }
          })
        }
      }
采用随机数据模拟附近的车,然后添加到this.markers中,车的图标根据curNavIndex动态设置,这样就可以在选择不同的服务时展示不同的车图标
   this.markers = []
        const carNum = getRandomNum(3, 8)
        for (let i = 1; i <= carNum; i++) {
          // 定义一个车对象
          let car = {
            id: 0,
            iconPath: "/static/img/car/cart1.png",
            latitude: 0,
            longitude: 0,
            width: 35,
            height: 15
          }

          //随机值
          const lon_dis = (Math.ceil(Math.random() * 99)) * 0.00012;
          const lat_dis = (Math.ceil(Math.random() * 99)) * 0.00012;

          car.id = 2 + i
          car.latitude = this.latitude + lat_dis
          car.longitude = this.longitude + lon_dis
          car.iconPath = `/static/img/car/cart${this.curNavIndex + 1}.png`
          this.markers.push(car)
        }
地图中心的红色定位图标以及接驾时间的文字是用cover-view包裹cover-image实现
   <cover-view class="center-marker">
        <cover-view class="text-center">最快{{minutes}}分钟接驾</cover-view>
        <cover-image class="inverted-triangle" src="/static/img/triangle-down.png"></cover-image>
        <cover-image class="img-center" src="/static/img/marker2.png"></cover-image>
      </cover-view>
其中inverted-triangle是一个倒三角形图片,因为cover-view无法实现复杂css样式,所以底部的倒三角形效果只能用图片实现。
map这里不推荐使用controls,官方也说明 controls即将废弃,请使用 cover-view
选择目的地
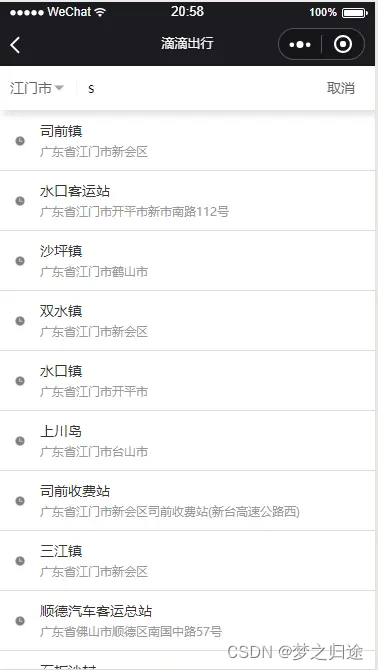
这里首先获取到state中的curCity,利用qqmapsdk.getSuggestion(),并将其参数region设置为curCity, 就可以进行地址模糊检索。选中地址时,利用qqmapsdk.geocoder()进行地址解析,得到目的地的相关数据,再将数据通过mapMutations存入state中
 computed: {
      ...mapState([
        'curCity'
      ])
    }
模糊检索
 qqmapsdk.getSuggestion({
          keyword: value,
          region: this.curCity,
          success: (res) => {
            this.addresses = res.data
          }
        })
点击地址时,解析地址保存数据
choosePlace(item){
        //item.address详细地址
        //item.title简短语义化地址
        console.log(item)
        qqmapsdk.geocoder({
          address: item.address,
          success: (res) => {
            this.saveEndPosition([res.result.location.lat, res.result.location.lng])
            this.saveDestination(item.title)
            this.goBack()
          },
          fail: (err) => {
            console.log(err)
          }
        })
      }
mapMutations
methods: {
 ...mapMutations({
        saveDestination: 'SET_DESTINATION',
        saveEndPosition: 'SET_END_POSITION'
      })
}
选择城市

这里的样式是按照现在的滴滴小程序实现,只要将选中的城市保存在state中的curCity就好了,搜索功能暂未开发。获取城市列表数据用到了腾讯地图的api中的qqmapsdk.getCityList()。这里其实就是数据的过滤与处理,先初始化了一个空对象temp_citys,然后根据城市的拼音的首字母的大写建立key,对应value为一个数组,数组里面包含所有以这个拼音字母开头的城市,最后将temp_citys赋值给this.cityList
 qqmapsdk.getCityList({
        success: (res) => {
          const result = res.result[1]
          let temp_citys = {} //使用temp_citys 避免频繁改动data里面的数据
          for (let i = 0; i < result.length; i++) {
            let key = result[i].pinyin[0].charAt(0).toLocaleUpperCase()
            if (!temp_citys[key]) {
              temp_citys[key] = []
            }
            temp_citys[key].push(result[i].fullname)
          }
          this.cityList = temp_citys
        }
      })
其他的一些页面就不提了,感兴趣的小伙伴可以去看下源码
源码截图:
说明
如果本项目对您有帮助,欢迎 “点赞,关注” 支持一下 谢谢~
源码获取关注公众号「码农园区」,回复 【uniapp源码】


 3810
3810


 被折叠的 条评论
为什么被折叠?
被折叠的 条评论
为什么被折叠?
 到【灌水乐园】发言


