GPIO:(General Purpose Input Output (通用输入/输出)简称为GPIO)
使用方法大致为:
<code class="hljs  has-numbering" style="display: block; padding: 0px; box-sizing: border-box; font-family: 'Source Code Pro', monospace;font-size:undefined; white-space: pre; border-radius: 0px; word-wrap: normal; background-image: initial; background-attachment: initial; background-color: transparent; background-size: initial; background-origin: initial; background-clip: initial; background-position: initial; background-repeat: initial;"><span style="color: inherit;">1、参考芯片手册,设置控制寄存器(将引脚设置为输入、输出或者中断模式)
2、如果是输出引脚,就是往数据寄存器写入高电平或者低电平。如果为输入引脚就是读取数据寄存器的状态(高电平还是低电平)
3、中断,打断</span><span style="color:#ff0000;">cpu</span><span style="color:rgba(0, 0, 0, 0);">的操作,继而去做一部分事情。(快)</span></code><ul class="pre-numbering" style="color: rgb(51, 51, 51); box-sizing: border-box; position: absolute; width: 50px; top: 0px; left: 0px; margin: 0px; padding: 6px 0px 40px; border-right-width: 1px; border-right-style: solid; border-right-color: rgb(221, 221, 221); list-style: none; text-align: right; background-color: rgb(238, 238, 238);"><li style="box-sizing: border-box; padding: 0px 5px;">1</li><li style="box-sizing: border-box; padding: 0px 5px;">2</li><li style="box-sizing: border-box; padding: 0px 5px;">3</li></ul>
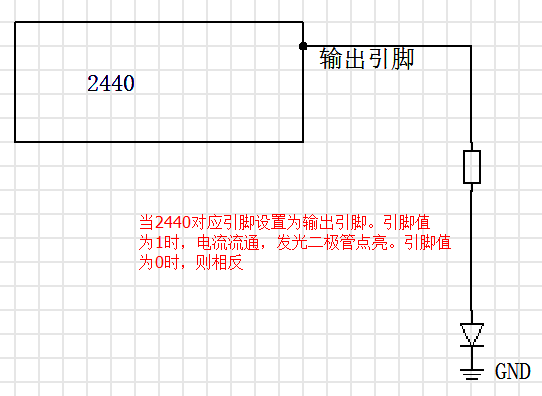
输出引脚:
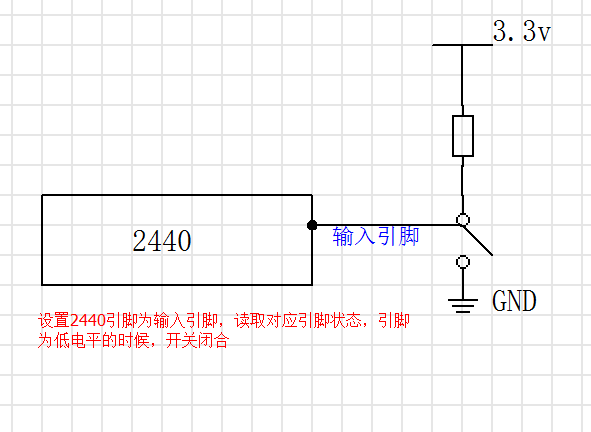
输入引脚:
上拉电阻:

下拉电阻:
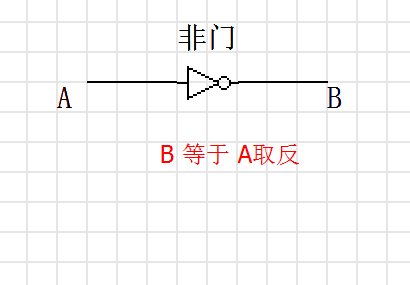
非门:
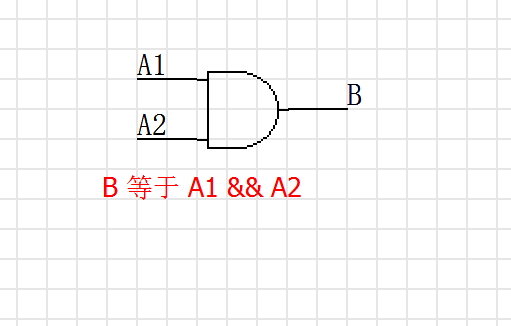
与门:
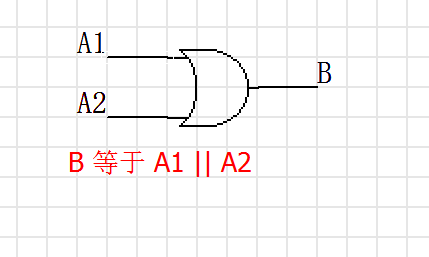
或门:
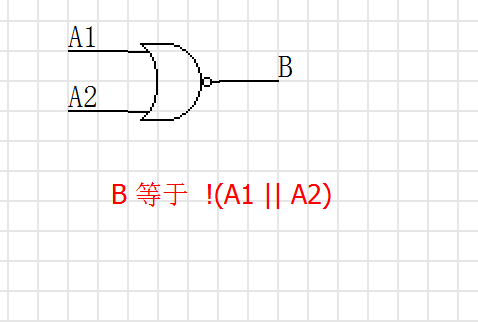
或非门:
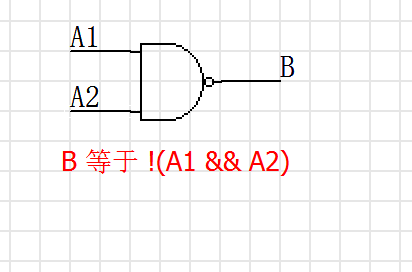
与非门:
中断引脚具备 输入功能,可以读取寄存器状态,确定是高电平还是低电平,可以打断CPU


 264
264

 被折叠的 条评论
为什么被折叠?
被折叠的 条评论
为什么被折叠?
 到【灌水乐园】发言


